|
|
<button> Defines a clickable button. The Inside a Tip: Always specify the |
How to create HTML <button> Tag
A clickable button is marked up as follows:
index.html
Example:
HTML
<button type="button">Click Me!</button>
Output should be:

What Type of Browsers will Support for HTML <button> Tag

Attributes for HTML <button> Tag
| Attribute | Value | Description |
|---|---|---|
| autofocus | autofocus | Specifies that a button should automatically get focus when the page loads |
| disabled | disabled | Specifies that a button should be disabled |
| form | form_id | Specifies which form the button belongs to |
| formaction | URL | Specifies where to send the form-data when a form is submitted. Only for type="submit" |
| formenctype | application/x-www-form-urlencoded multipart/form-data text/plain |
Specifies how form-data should be encoded before sending it to a server. Only for type="submit" |
| formmethod | get post |
Specifies how to send the form-data (which HTTP method to use). Only for type="submit" |
| formnovalidate | formnovalidate | Specifies that the form-data should not be validated on submission. Only for type="submit" |
| formtarget | _blank _self _parent _top framename |
Specifies where to display the response after submitting the form. Only for type="submit" |
| popovertarget | element_id | Specifies a which popover element to invoke |
| popovertargetaction | hide show toggle |
Specifies what happens to the popover element when the button is clicked |
| name | name | Specifies a name for the button |
| type | button reset submit |
Specifies the type of button |
| value | text | Specifies an initial value for the button |
How to Use CSS to style buttons
Follow the Example
index.html
Example:
HTML
 <!DOCTYPE html>
<html>
<head>
<style>
.button {
  border: none;
  color: white;
  padding: 15px 32px;
  text-align: center;
  text-decoration: none;
  display: inline-block;
  font-size: 16px;
  margin: 4px 2px;
  cursor: pointer;
}

.button1 {background-color: #04AA6D;} /* Green */
.button2 {background-color: #008CBA;} /* Blue */
</style>
</head>
<body>

<button class="button button1">Green</button>
<button class="button button2">Blue</button>

</body>
</html>
Output should be:
How to Use CSS to style buttons (with hover effect)
Follow the Example.
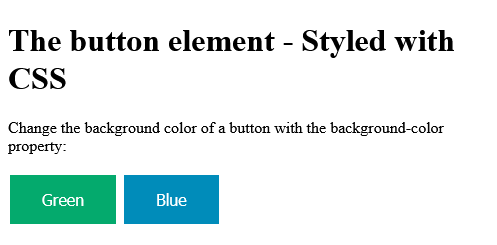
The button element - Styled with CSS
Use the :hover selector to change the style of the button when you move the mouse over it.
Tip: Use the transition-duration property to determine the speed of the "hover" effect:
 <!DOCTYPE html>
<html>
<head>
<style>
.button {
  border: none;
  color: white;
  padding: 16px 32px;
  text-align: center;
  text-decoration: none;
  display: inline-block;
  font-size: 16px;
  margin: 4px 2px;
  transition-duration: 0.4s;
  cursor: pointer;
}

.button1 {
  background-color: white;
  color: black;
  border: 2px solid #04AA6D;
}

.button1:hover {
  background-color: #04AA6D;
  color: white;
}

.button2 {
  background-color: white;
  color: black;
  border: 2px solid #008CBA;
}

.button2:hover {
  background-color: #008CBA;
  color: white;
}

</style>
</head>
<body>

<button class="button button1">Green</button>
<button class="button button2">Blue</button>

</body>
</html>
Output should be:

How to add HTML <button> autofocus Attribute
A button with autofocus.
Definition and Usage
The autofocus attribute is a boolean attribute.
When present, it specifies that a button should automatically get focus when the page loads.
Browser Support
The numbers in the table specify the first browser version that fully supports the attribute.

Syntax
<button type="button" autofocus>
index.html
Example:
HTML
<!DOCTYPE html>
<html>
<body>

<h1>The button autofocus attribute</h1>

<button type="button" autofocus onclick="alert('Hello world!')">Click Me!</button>

</body>
</html>
Output should be:

How to add HTML <button> disabled Attribute
A disabled button.
Definition and Usage
The disabled attribute is a boolean attribute.
When present, it specifies that the button should be disabled.
A disabled button is unusable and un-clickable.
The disabled attribute can be set to keep a user from clicking on the button until some other condition has been met (like selecting a checkbox, etc.). Then, a JavaScript could remove the disabled value, and make the button clickable again.
Browser Support

Syntax
<button disabled>
index.html
Example:
HTML
<button type="button" disabled>Click Me!</button>
Output should be:

How to add HTML <button> hidden Attribute
Hide your HTML Button
index.html
Example:
HTML
<button type="button" hidden>Click Me!</button>
Output should be:

How to add HTML <button> form Attribute
A button located outside a form (but still a part of the form):
Definition and Usage
The form attribute specifies the form the button belongs to.
The value of this attribute must be equal to the id attribute of a <form> element in the same document.
Browser Support
The numbers in the table specify the first browser version that fully supports the attribute.

Syntax
<button form="form_id">
Attribute Values
| Value | Description |
|---|---|
| form_id | Specifies the form element the <button> element belongs to. The value of this attribute must be the id attribute of a <form> element in the same document. |
index.html
Example:
HTML
<!DOCTYPE html>
<html>
<body>

<h1>The button form attribute</h1>

<form action="/action_page.php" method="get" id="nameform">
  <label for="fname">First name:</label>
  <input type="text" id="fname" name="fname"><br><br>
  <label for="lname">Last name:</label>
  <input type="text" id="lname" name="lname">
</form>

<p>The button below is outside the form element, but still part of the form.</p>

<button type="submit" form="nameform" value="Submit">Submit</button>

</body>
</html>
Output should be:

How to add HTML <button> formaction Attribute
A form with two submit buttons. The first submit button submits the form data to "action_page.php", and the second submits to "action_page2.php":
Browser Support
The numbers in the table specify the first browser version that fully supports the attribute.

Syntax
<button type="submit" formaction="URL">
Attribute Values
| Value | Description |
|---|---|
| URL | Specifies where to send the form data.
Possible values:
|
index.html
Example:
HTML
<!DOCTYPE html>
<html>
<body>

<h1>The button formaction attribute</h1>

<form action="/action_page.php" method="get">
  <label for="fname">First name:</label>
  <input type="text" id="fname" name="fname"><br><br>
  <label for="lname">Last name:</label>
  <input type="text" id="lname" name="lname"><br><br>
  <button type="submit">Submit</button>
  <button type="submit" formaction="/action_page2.php">Submit to another page</button>
</form>

</body>
</html>
Output should be:

How to add HTML <button> formenctype Attribute
A form with two submit buttons. The first submit button submits the form data with default character encoding, and the second submits the form data without character encoding.
Browser Support
The numbers in the table specify the first browser version that fully supports the attribute.

Syntax
<button type="submit" formenctype="value">
Attribute Values
| Value | Description |
|---|---|
| application/x-www-form-urlencoded | Default. All characters will be encoded before sent |
| multipart/form-data | This value is necessary if the user will upload a file through the form |
| text/plain | Sends data without any encoding at all. Not recommended |
index.html
Example:
HTML
<!DOCTYPE html>
<html>
<body>

<h1>The button formenctype attribute</h1>

<form action="/action_page_binary.asp" method="post">
  <label for="fname">First name:</label>
  <input type="text" id="fname" name="fname" value="Ståle"><br><br>
  <button type="submit">Submit with character encoding</button>
  <button type="submit" formenctype="text/plain">Submit without character encoding</button>
</form>

</body>
</html>
Output should be:

How to add HTML <button> formenctype application/x-www-form-urlencoded Attribute
| application/x-www-form-urlencoded | Default. All characters will be encoded before sent |
index.html
Example:
HTML
<!DOCTYPE html>
<html>
<body>

<h1>The button formenctype attribute</h1>

<form action="/action_page_binary.asp" method="post">
  <label for="fname">First name:</label>
  <input type="text" id="fname" name="fname" value="Ståle"><br><br>
  <button type="submit">Submit with character encoding</button>
  <button type="submit" formenctype="application/x-www-form-urlencoded">Submit without character encoding</button>
</form>

</body>
</html>
Output should be:

How to add HTML <button> formenctype multipart/form-data Attribute
| multipart/form-data | This value is necessary if the user will upload a file through the form |
index.html
Example:
HTML
<!DOCTYPE html>
<html>
<body>

<h1>The button formenctype attribute</h1>

<form action="/action_page_binary.asp" method="post">
  <label for="fname">First name:</label>
  <input type="text" id="fname" name="fname" value="Ståle"><br><br>
  <button type="submit">Submit with character encoding</button>
  <button type="submit" formenctype="multipart/form-data">Submit without character encoding</button>
</form>

</body>
</html>
Output should be:

How to add HTML <button> formenctype text/plain Attribute
| text/plain | Sends data without any encoding at all. Not recommended |
index.html
Example:
HTML
<!DOCTYPE html>
<html>
<body>

<h1>The button formenctype attribute</h1>

<form action="/action_page_binary.asp" method="post">
  <label for="fname">First name:</label>
  <input type="text" id="fname" name="fname" value="Ståle"><br><br>
  <button type="submit">Submit with character encoding</button>
  <button type="submit" formenctype="text/plain">Submit without character encoding</button>
</form>

</body>
</html>
Output should be:

How to add HTML <button> formmethod Attribute
A form with two submit buttons. The first submit button submits the form data with method="get", and the second submits the form data with method="post":
Definition and Usage
The formmethod attribute specifies which HTTP method to use when sending the form-data. This attribute overrides the form's method attribute.
The formmethod attribute is only used for buttons with type="submit".
The form-data can be sent as URL variables (with method="get") or as HTTP post (with method="post").
Notes on the "get" method:
- it appends the form-data to the URL in name/value pairs
- it is useful for form submissions where a user want to bookmark the result
- There is a limit to how much data you can place in a URL (varies between browsers), therefore, you cannot be sure that all of the form-data will be correctly transferred
- Never use the "get" method to pass sensitive information! (password or other sensitive information will be visible in the browser's address bar)
Notes on the "post" method:
- it sends the form-data as an HTTP post transaction
- Form submissions with the "post" method cannot be bookmarked
- it is more robust and secure than "get"
- it does not have size limitations
Browser Support
The numbers in the table specify the first browser version that fully supports the attribute.

Syntax
<button type="submit" formmethod="get|post">
Attribute Values
| Value | Description |
|---|---|
| get | Appends the form-data to the URL: URL?name=value&name=value |
| post | Sends the form-data as an HTTP post transaction |
index.html
Example:
HTML
<!DOCTYPE html>
<html>
<body>

<h1>The button formmethod attribute</h1>

<form action="/action_page.php" method="get" target="_blank">
  <label for="fname">First name:</label>
  <input type="text" id="fname" name="fname"><br><br>
  <label for="lname">Last name:</label>
  <input type="text" id="lname" name="lname"><br><br>
  <button type="submit">Submit</button>
  <button type="submit" formmethod="post">Submit using POST</button>
</form>

</body>
</html>
Output should be:

How to add HTML <button> formmethod get Attribute
| get | Appends the form-data to the URL: URL?name=value&name=value |
index.html
Example:
HTML
<form action="/action_page.php" method="get" target="_blank">
  <label for="fname">First name:</label>
  <input type="text" id="fname" name="fname"><br><br>
  <label for="lname">Last name:</label>
  <input type="text" id="lname" name="lname"><br><br>
  <button type="submit">Submit</button>
  <button type="submit" formmethod="get">Submit using POST</button>
</form>
Output should be:

How to add HTML <button> formmethod post Attribute
| post | Sends the form-data as an HTTP post transaction |
index.html
Example:
HTML
<!DOCTYPE html>
<html>
<body>

<h1>The button formmethod attribute</h1>

<form action="/action_page.php" method="get" target="_blank">
  <label for="fname">First name:</label>
  <input type="text" id="fname" name="fname"><br><br>
  <label for="lname">Last name:</label>
  <input type="text" id="lname" name="lname"><br><br>
  <button type="submit">Submit</button>
  <button type="submit" formmethod="post">Submit using POST</button>
</form>

</body>
</html>
Output should be:

How to add HTML <button> formnovalidate Attribute
A form with two submit buttons. The first submit button submits the form data with default validation, and the second submits the form data without validation:
Definition and Usage
The formnovalidate attribute is a boolean attribute.
When present, it specifies that the form-data should not be validated on submission. This attribute overrides the form's novalidate attribute.
The formnovalidate attribute is only used for buttons with type="submit".
Browser Support
The numbers in the table specify the first browser version that fully supports the attribute.

Syntax
<button type="submit" formnovalidate>
index.html
Example:
HTML
<!DOCTYPE html>
<html>
<body>

<h1>The button formnovalidate attribute</h1>

<form action="/action_page.php" method="get">
  <label for="email">Enter your email:</label>
  <input type="email" id="email" name="email"><br><br>
  <button type="submit">Submit</button>
  <button type="submit" formnovalidate>Submit without validation</button>
</form>

<p><strong>Note:</strong> The formnovalidate attribute of the button tag is not supported in Safari.</p>

</body>
</html>
Output should be:

How to add HTML <button> formtarget Attribute
A form with two submit buttons. The first submit button submits the form data with default target ("_self"), and the second submits the form data to a new window (target="_blank"):
Definition and Usage
The formtarget attribute specifies where to display the response after submitting the form. This attribute overrides the form's target attribute.
The formtarget attribute is only used for buttons with type="submit".
Browser Support
The numbers in the table specify the first browser version that fully supports the attribute.

Syntax
<button type="submit" formtarget="_blank|_self|_parent|_top|framename">
Attribute Values
| Value | Description |
|---|---|
| _blank | Loads the response in a new window/tab |
| _self | Loads the response in the same frame (this is default) |
| _parent | Loads the response in the parent frame |
| _top | Loads the response in the full body of the window |
| framename | Loads the response in a named iframe |
index.html
Example:
HTML
<!DOCTYPE html>
<html>
<body>

<h1>The button formtarget attribute</h1>

<form action="/action_page.php" method="get">
  <label for="fname">First name:</label>
  <input type="text" id="fname" name="fname"><br><br>
  <label for="lname">Last name:</label>
  <input type="text" id="lname" name="lname"><br><br>
  <button type="submit">Submit</button>
  <button type="submit" formtarget="_blank">Submit to a new window/tab</button>
</form>

</body>
</html>
Output should be:

How to add HTML <button> formtarget _blank Attribute
| _blank | Loads the response in a new window/tab |
index.html
Example:
HTML
<!DOCTYPE html>
<html>
<body>

<h1>The button formtarget attribute</h1>

<form action="/action_page.php" method="get">
  <label for="fname">First name:</label>
  <input type="text" id="fname" name="fname"><br><br>
  <label for="lname">Last name:</label>
  <input type="text" id="lname" name="lname"><br><br>
  <button type="submit">Submit</button>
  <button type="submit" formtarget="_blank">Submit to a new window/tab</button>
</form>

</body>
</html>
Output should be:

How to add HTML <button> formtarget _self Attribute
| _self | Loads the response in the same frame (this is default) |
index.html
Example:
HTML
<!DOCTYPE html>
<html>
<body>

<h1>The button formtarget attribute</h1>

<form action="/action_page.php" method="get">
  <label for="fname">First name:</label>
  <input type="text" id="fname" name="fname"><br><br>
  <label for="lname">Last name:</label>
  <input type="text" id="lname" name="lname"><br><br>
  <button type="submit">Submit</button>
  <button type="submit" formtarget="_self">Submit to a new window/tab</button>
</form>

</body>
</html>
Output should be:

How to add HTML <button> formtarget _parent Attribute
| _parent | Loads the response in the parent frame |
index.html
Example:
HTML
<!DOCTYPE html>
<html>
<body>

<h1>The button formtarget attribute</h1>

<form action="/action_page.php" method="get">
  <label for="fname">First name:</label>
  <input type="text" id="fname" name="fname"><br><br>
  <label for="lname">Last name:</label>
  <input type="text" id="lname" name="lname"><br><br>
  <button type="submit">Submit</button>
  <button type="submit" formtarget="_parent">Submit to a new window/tab</button>
</form>

</body>
</html>
Output should be:

How to add HTML <button> formtarget _blank Attribute
| _top | Loads the response in the full body of the window |
index.html
Example:
HTML
<!DOCTYPE html>
<html>
<body>

<h1>The button formtarget attribute</h1>

<form action="/action_page.php" method="get">
  <label for="fname">First name:</label>
  <input type="text" id="fname" name="fname"><br><br>
  <label for="lname">Last name:</label>
  <input type="text" id="lname" name="lname"><br><br>
  <button type="submit">Submit</button>
  <button type="submit" formtarget="_top">Submit to a new window/tab</button>
</form>

</body>
</html>
Output should be:

How to add HTML <button> formtarget framename Attribute
| framename | Loads the response in a named iframe |
index.html
Example:
HTML
<!DOCTYPE html>
<html>
<body>

<h1>The button formtarget attribute</h1>

<form action="/action_page.php" method="get">
  <label for="fname">First name:</label>
  <input type="text" id="fname" name="fname"><br><br>
  <label for="lname">Last name:</label>
  <input type="text" id="lname" name="lname"><br><br>
  <button type="submit">Submit</button>
  <button type="submit" formtarget="framename">Submit to a new window/tab</button>
</form>

</body>
</html>
Output should be:

How to add HTML <button> popovertarget Attribute
Refer to a popover element with the popovertarget attribute to show/hide the specified popover element.
Definition and Usage
With the popovertarget attribute you can refer to the popover element with the specified id, and toggle between showing and hiding it:
Browser Support

Syntax
<button popovertarget="element_id">
Attribute Values
| Value | Description |
|---|---|
| element_id | The id of the popover element related to this button |
index.html
Example:
HTML
<h1 popover id="myheader">Hello</h1>
<button popovertarget="myheader">Click me!</button>
Output should be:

How to add HTML <button> popovertargetaction Attribute
When the button is clicked, the popover element will show.
Definition and Usage
The popovertargetaction attribute allows you to define what happens when you click the button.
You can choose between the values "show", "hide", and "toggle".
Browser Support

Syntax
<button popovertarget="element_id popovertargetaction="hide|show|toggle"">
Attribute Values
| Value | Description | |
|---|---|---|
| hide | The popover element is hidden when you click the button |
| show | The popover element is showed when you click the button | |
| toggle | Default value. The popover element is toggled between hidding and showing when you click the button |
index.html
Example:
HTML
<!DOCTYPE html>
<html>
<body>

<h1>The button popovertargetaction Attribute</h1>

<h1 popover id="myheader">Hello</h1>

<button popovertarget="myheader" popovertargetaction="show">Show popover</button>

<p>Click the button and it will show the popover element.</p>

</body>
</html>
Output should be:

How to add HTML <button> popovertargetaction hide Attribute
| hide | The popover element is hidden when you click the button |
index.html
Example:
HTML
<!DOCTYPE html>
<html>
<body>

<h1>The button popovertargetaction Attribute</h1>

<h1 popover id="myheader">Hello</h1>

<button popovertarget="myheader" popovertargetaction="hide">Show popover</button>

<p>Click the button and it will show the popover element.</p>

</body>
</html>
Output should be:

How to add HTML <button> popovertargetaction show Attribute
| show | The popover element is showed when you click the button |
index.html
Example:
HTML
<!DOCTYPE html>
<html>
<body>

<h1>The button popovertargetaction Attribute</h1>

<h1 popover id="myheader">Hello</h1>

<button popovertarget="myheader" popovertargetaction="show">Show popover</button>

<p>Click the button and it will show the popover element.</p>

</body>
</html>
Output should be:

How to add HTML <button> popovertargetaction toggle Attribute
| toggle | Default value. The popover element is toggled between hidding and showing when you click the button |
index.html
Example:
HTML
<!DOCTYPE html>
<html>
<body>

<h1>The button popovertargetaction Attribute</h1>

<h1 popover id="myheader">Hello</h1>

<button popovertarget="myheader" popovertargetaction="toggle">Show popover</button>

<p>Click the button and it will show the popover element.</p>

</body>
</html>
Output should be:

How to add HTML <button> name Attribute
Two buttons with equal names, that submit different values when clicked.
Definition and Usage
The name attribute specifies the name for a <button> element.
The name attribute is used to reference form-data after the form has been submitted, or to reference the element in a JavaScript.
Tip: Several <button> elements can share the same name. This allows you to have several buttons with equal names, which can submit different values when used in a form.
Browser Support

Syntax
<button name="name">
Attribute Values
| Value | Description |
|---|---|
| name | The name of the button |
index.html
Example:
HTML
<form action="/action_page.php" method="get">
Choose your favorite subject:
<button name="subject" type="submit" value="HTML">HTML</button>
<button name="subject" type="submit" value="CSS">CSS</button>
</form>
Output should be:

How to add HTML <button> type Attribute
Two button elements that act as one submit button and one reset button (in a form):
Definition and Usage
The type attribute specifies the type of button.
Tip: Always specify the type attribute for the <button> element. Different browsers may use different default types for the <button> element.
Browser Support

Syntax
<button type="button|submit|reset">
Attribute Values
| Value | Description |
|---|---|
| button | The button is a clickable button |
| submit | The button is a submit button (submits form-data) |
| reset | The button is a reset button (resets the form-data to its initial values) |
index.html
Example:
HTML
<form action="/action_page.php" method="get">
  <label for="fname">First name:</label>
  <input type="text" id="fname" name="fname"><br><br>
  <label for="lname">Last name:</label>
  <input type="text" id="lname" name="lname"><br><br>
  <button type="submit" value="Submit">Submit</button>
  <button type="reset" value="Reset">Reset</button>
</form>
Output should be:

How to add HTML <button> type button Attribute
| button | The button is a clickable button |
index.html
Example:
HTML
<!DOCTYPE html>
<html>
<body>

<h1>The button type attribute</h1>

<form action="/action_page.php" method="get">
  <label for="fname">First name:</label>
  <input type="text" id="fname" name="fname"><br><br>
  <label for="lname">Last name:</label>
  <input type="text" id="lname" name="lname"><br><br>
  <button type="submit" value="Submit">Submit</button>
  <button type="button" value="Reset">Reset</button>
</form>

</body>
</html>
Output should be:

How to add HTML <button> type submit Attribute
| submit | The button is a submit button (submits form-data) |
index.html
Example:
HTML
<!DOCTYPE html>
<html>
<body>

<h1>The button type attribute</h1>

<form action="/action_page.php" method="get">
  <label for="fname">First name:</label>
  <input type="text" id="fname" name="fname"><br><br>
  <label for="lname">Last name:</label>
  <input type="text" id="lname" name="lname"><br><br>
  <button type="submit" value="Submit">Submit</button>
  <button type="submit" value="Reset">Reset</button>
</form>

</body>
</html>
Output should be:

How to add HTML <button> type reset Attribute
| reset | The button is a reset button (resets the form-data to its initial values) |
index.html
Example:
HTML
<!DOCTYPE html>
<html>
<body>

<h1>The button type attribute</h1>

<form action="/action_page.php" method="get">
  <label for="fname">First name:</label>
  <input type="text" id="fname" name="fname"><br><br>
  <label for="lname">Last name:</label>
  <input type="text" id="lname" name="lname"><br><br>
  <button type="submit" value="Submit">Submit</button>
  <button type="reset" value="Reset">Reset</button>
</form>

</body>
</html>
Output should be:

How to add HTML <button> value Attribute
Two buttons with equal names, that submit different values when clicked.
Definition and Usage
The value attribute specifies the initial value for a <button> in an HTML form.
Note: In a form, the button and its value is only submitted if the button itself was used to submit the form.
Browser Support

Note: If you use the <button> element in an HTML form, Internet Explorer, prior version 8, will submit the text between the <button> and </button> tags, while the other browsers will submit the content of the value attribute.
Syntax
<button value="value">
Attribute Values
| Value | Description |
|---|---|
| value | The initial value of the button |
index.html
Example:
HTML
<form action="/action_page.php" method="get">
  Choose your favorite subject:
  <button name="subject" type="submit" value="fav_HTML">HTML</button>
  <button name="subject" type="submit" value="fav_CSS">CSS</button>
</form>
Output should be:

Category: | Web Tutorial |
Sub Category: | HTML Tag |
Uploaded by: | Admin |