 <!--This is a comment. Comments are not displayed in the browser-->

<p>This is a paragraph.</p>
Output should be:
Definition and Usage HTML <!--...--> Tag
The comment tag is used to insert comments in the source code. Comments are not displayed in the browsers.
You can use comments to explain your code, which can help you when you edit the source code at a later date. This is especially useful if you have a lot of code.
Browser Support HTML <!--...--> Tag
Output should be:
Tips and Notes HTML <!--...--> Tag
You can use the comment tag to "hide" scripts from browsers without support for scripts (so they don't show them as plain text):
Note: The two forward slashes at the end of comment line (//) is the JavaScript comment symbol. This prevents JavaScript from executing the --> tag.
The <a> tag defines a hyperlink, which is used to link from one page to another.
The most important attribute of the <a> element is the href attribute, which indicates the link's destination.
By default, links will appear as follows in all browsers:
An unvisited link is underlined and blue
A visited link is underlined and purple
An active link is underlined and red
Example of HTML <a> Tag
Create a link to Horje.com:
<a href="https://horje.com">Visit Horje.com!</a>
Output should be:
Tips and Notes for HTML <a> Tag
Tip: If the <a> tag has no href attribute, it is only a placeholder for a hyperlink.
Tip: A linked page is normally displayed in the current browser window, unless you specify another target.
Browser Support for HTML <a> Tag
Output should be:
<a> Tag Attributes
Attribute
Value
Description
download
filename
Specifies that the target will be downloaded when a user clicks on the hyperlink
href
URL
Specifies the URL of the page the link goes to
hreflang
language_code
Specifies the language of the linked document
media
media_query
Specifies what media/device the linked document is optimized for
ping
list_of_URLs
Specifies a space-separated list of URLs to which, when the link is followed, post requests with the body ping will be sent by the browser (in the background). Typically used for tracking.
Download file when clicking on the link (instead of navigating to the file):
Definition and Usage
The download attribute specifies that the target (the file specified in the href attribute) will be downloaded when a user clicks on the hyperlink.
The optional value of the download attribute will be the new name of the file after it is downloaded. There are no restrictions on allowed values, and the browser will automatically detect the correct file extension and add it to the file (.img, .pdf, .txt, .html, etc.).
If the value is omitted, the original filename is used.
Browser Support
The numbers in the table specify the first browser version that fully supports the attribute.
Syntax
<a download="filename">
Attribute Values
Value
Description
filename
Optional. Specifies the new filename for the downloaded file
index.html
Example:HTML
<!DOCTYPE html>
<html>
<body>

<h1>The a download attribute</h1>

<p>Click on the image to download it:<p>
<a href="https://horje.com/avatar.png" download>
  <img src="https://horje.com/avatar.png" alt="Horje" width="104" height="142">
</a>

<p><b>Note:</b> The download attribute is not supported in IE or Edge (prior version 18), or in Safari (prior version 10.1).</p>

</body>
</html>
Output should be:
How to add HTML <a> href Attribute
The href attribute specifies the link's destination:
Definition and Usage
The href attribute specifies the URL of the page the link goes to.
If the href attribute is not present, the <a> tag will not be a hyperlink.
Tip: You can use href="#top" or href="#" to link to the top of the current page!
Browser Support
Syntax
<a href="URL">
Attribute Values
Value
Description
URL
The URL of the link.
Possible values:
An absolute URL - points to another web site (like href="http://www.example.com/default.htm")
A relative URL - points to a file within a web site (like href="default.htm")
Link to an element with a specified id within the page (like href="#section2")
Other protocols (like https://, ftp://, mailto:, file:, etc..)
The hreflang attribute specifies the language of the document in the link:
Definition and Usage
The hreflang attribute specifies the language of the linked document.
This attribute is only used if the href attribute is set.
Note: This attribute is purely advisory.
Browser Support
Syntax
<a hreflang="language_code">
Attribute Values
Value
Description
language_code
A two-letter language code that specifies the language of the linked document.
To view all available language codes, go to our Language code reference.
Teletypes and similar media using a fixed-pitch character grid
tv
Television type devices (low resolution, limited scroll ability)
Values
Value
Description
width
Specifies the width of the targeted display area.
"min-" and "max-" prefixes can be used.
Example: media="screen and (min-width:500px)"
height
Specifies the height of the targeted display area.
"min-" and "max-" prefixes can be used.
Example: media="screen and (max-height:700px)"
device-width
Specifies the width of the target display/paper.
"min-" and "max-" prefixes can be used.
Example: media="screen and (device-width:500px)"
device-height
Specifies the height of the target display/paper.
"min-" and "max-" prefixes can be used.
Example: media="screen and (device-height:500px)"
orientation
Specifies the orientation of the target display/paper.
Possible values: "portrait" or "landscape"
Example: media="all and (orientation: landscape)"
aspect-ratio
Specifies the width/height ratio of the targeted display area.
"min-" and "max-" prefixes can be used.
Example: media="screen and (aspect-ratio:16/9)"
device-aspect-ratio
Specifies the device-width/device-height ratio of the target display/paper.
"min-" and "max-" prefixes can be used.
Example: media="screen and (aspect-ratio:16/9)"
color
Specifies the bits per color of target display.
"min-" and "max-" prefixes can be used.
Example: media="screen and (color:3)"
color-index
Specifies the number of colors the target display can handle.
"min-" and "max-" prefixes can be used.
Example: media="screen and (min-color-index:256)"
monochrome
Specifies the bits per pixel in a monochrome frame buffer.
"min-" and "max-" prefixes can be used.
Example: media="screen and (monochrome:2)"
resolution
Specifies the pixel density (dpi or dpcm) of the target display/paper.
"min-" and "max-" prefixes can be used.
Example: media="print and (resolution:300dpi)"
scan
Specifies scanning method of a tv display.
Possible values are "progressive" and "interlace".
Example: media="tv and (scan:interlace)"
grid
Specifies if the output device is grid or bitmap.
Possible values are "1" for grid, and "0" otherwise.
Example: media="handheld and (grid:1)"
index.html
Example:HTML
<!DOCTYPE html>
<html>
<body>

<h1>The a media attribute</h1>

<p>
<a href="https://horje.com/" media="print and (resolution:300dpi)">Open media attribute page for print</a>
</p>

</body>
</html>
Output should be:
How to add HTML <a> media height Attribute
Specifies the height of the targeted display area.
"min-" and "max-" prefixes can be used.
Example: media="screen and (max-height:700px)"
index.html
Example:HTML
<a href="att_a_media.asp?output=print"
media="screen and (max-height:700px)">
Open media attribute page for print.</a>
Output should be:
How to add HTML <a> media device-width Attribute
Specifies the width of the target display/paper.
"min-" and "max-" prefixes can be used.
Example: media="screen and (device-width:500px)"
index.html
Example:HTML
<a href="att_a_media.asp?output=print"
media="screen and (device-width:500px)">
Open media attribute page for print.</a>
Output should be:
How to add HTML <a> media width Attribute
Specifies the width of the targeted display area.
"min-" and "max-" prefixes can be used.
Example: media="screen and (min-width:500px)"
<a href="att_a_media.asp?output=print"
media="print and (resolution:300dpi)">
Open media attribute page for print.</a>
Output should be:
How to add HTML <a> media device-height Attribute
Specifies the height of the target display/paper.
"min-" and "max-" prefixes can be used.
Example: media="screen and (device-height:500px)"
index.html
Example:HTML
<a href="att_a_media.asp?output=print"
media="screen and (device-height:500px)">
Open media attribute page for print.</a>
Output should be:
How to add HTML <a> media orientation Attribute
Specifies the orientation of the target display/paper.
Possible values: "portrait" or "landscape"
Example: media="all and (orientation: landscape)"
index.html
Example:HTML
<a href="att_a_media.asp?output=print"
media="all and (orientation: landscape)">
Open media attribute page for print.</a>
Output should be:
How to add HTML <a> media aspect-ratio Attribute
Specifies the width/height ratio of the targeted display area.
"min-" and "max-" prefixes can be used.
Example: media="screen and (aspect-ratio:16/9)"
index.html
Example:HTML
<a href="att_a_media.asp?output=print"
media="screen and (aspect-ratio:16/9)">
Open media attribute page for print.</a>
Output should be:
How to add HTML <a> media device-aspect-ratio Attribute
Specifies the device-width/device-height ratio of the target display/paper.
"min-" and "max-" prefixes can be used.
Example: media="screen and (aspect-ratio:16/9)"
index.html
Example:HTML
<a href="att_a_media.asp?output=print"
media="screen and (aspect-ratio:16/9)">
Open media attribute page for print.</a>
Output should be:
How to add HTML <a> media color Attribute
Specifies the bits per color of target display.
"min-" and "max-" prefixes can be used.
Example: media="screen and (color:3)"
index.html
Example:HTML
<a href="att_a_media.asp?output=print"
media="screen and (color:3)">
Open media attribute page for print.</a>
Output should be:
How to add HTML <a> media color-index Attribute
Specifies the number of colors the target display can handle.
"min-" and "max-" prefixes can be used.
Example: media="screen and (min-color-index:256)"
index.html
Example:HTML
<a href="https://horje.com/view/1367/how-to-add-html-a-media-aspect-ratio-attribute"
media="screen and (min-color-index:256)">
Open media attribute page for print.</a>
Output should be:
How to add HTML <a> media monochrome Attribute
Specifies the bits per pixel in a monochrome frame buffer.
"min-" and "max-" prefixes can be used.
Example: media="screen and (monochrome:2)"
index.html
Example:HTML
<a href="https://horje.com/view/1367/how-to-add-html-a-media-aspect-ratio-attribute"
media="screen and (monochrome:2)">
Open media attribute page for print.</a>
Output should be:
How to add HTML <a> media resolution Attribute
Specifies the pixel density (dpi or dpcm) of the target display/paper.
"min-" and "max-" prefixes can be used.
Example: media="print and (resolution:300dpi)"
index.html
Example:HTML
<a href="att_a_media.asp?output=print"
media="print and (resolution:300dpi)">
Open media attribute page for print.</a>
Output should be:
How to add HTML <a> media monochrome Attribute
Specifies scanning method of a tv display.
Possible values are "progressive" and "interlace".
Example: media="tv and (scan:interlace)"
index.html
Example:HTML
<a href="att_a_media.asp?output=print"
media="tv and (scan:interlace)">
Open media attribute page for print.</a>
Output should be:
How to add HTML <a> media grid Attribute
Specifies if the output device is grid or bitmap.
Possible values are "1" for grid, and "0" otherwise.
Example: media="handheld and (grid:1)"
index.html
Example:HTML
<a href="att_a_media.asp?output=print"
media="handheld and (grid:1)">
Open media attribute page for print.</a>
Output should be:
How to add HTML <a> ping Attribute
Notify https://horje.com, when a user clicks on the link.
Definition and Usage
The ping attribute specifies a list of URLs to be notified if the user follows the hyperlink.
When the user clicks on the hyperlink, the ping attribute will send a short HTTP POST request to the specified URL.
This attribute is useful for monitoring/tracking.
Browser Support
The numbers in the table specify the first browser version that fully supports the attribute.
Syntax
<a ping="URL">
Attribute Values
Value
Description
URL
Specifies the URL to be notified if the user follows the hyperlink. Must be a space separated list of one or more valid URLs
Default. Sends the origin, path, and query string if the protocol security level stays the same or is higher (HTTP to HTTP, HTTPS to HTTPS, HTTP to HTTPS is ok). Sends nothing to less secure level (HTTPS to HTTP is not ok)
origin
Sends the origin (scheme, host, and port) of the document
origin-when-cross-origin
Sends the origin of the document for cross-origin request. Sends the origin, path, and query string for same-origin request
same-origin
Sends a referrer for same-origin request. Sends no referrer for cross-origin request
strict-origin-when-cross-origin
Sends the origin if the protocol security level stays the same or is higher (HTTP to HTTP, HTTPS to HTTPS, and HTTP to HTTPS is ok). Sends nothing to less secure level (HTTPS to HTTP)
unsafe-url
Sends the origin, path, and query string (regardless of security). Use this value carefully!
How to add HTML <a> referrerpolicy no-referrer Attribute
no-referrer
No referrer information is sent
index.html
Example:HTML
<a href="https://horje.com/" referrerpolicy="no-referrer">Open A Link</a>
Output should be:
How to add HTML <a> Tag referrerpolicy no-referrer-when-downgrade Attribute
Default. Sends the origin, path, and query string if the protocol security level stays the same or is higher (HTTP to HTTP, HTTPS to HTTPS, HTTP to HTTPS is ok). Sends nothing to less secure level (HTTPS to HTTP is not ok)
index.html
Example:HTML
<a href="https://horje.com/" referrerpolicy="no-referrer-when-downgrade">Open a Link</a>
Output should be:
How to add HTML <a> Tag referrerpolicy origin Attribute
Sends the origin (scheme, host, and port) of the document
index.html
Example:HTML
<a href="https://horje.com/" referrerpolicy="origin">Open a Link</a>
Output should be:
How to add HTML <a> Tag referrerpolicy origin-when-cross-origin Attribute
Sends the origin of the document for cross-origin request. Sends the origin, path, and query string for same-origin request.
index.html
Example:HTML
<a href="https://horje.com/" referrerpolicy="origin-when-cross-origin">Open a Link</a>
Output should be:
How to add HTML <a> Tag referrerpolicy same-origin Attribute
Sends a referrer for same-origin request. Sends no referrer for cross-origin request.
index.html
Example:HTML
<a href="https://horje.com/" referrerpolicy="same-origin">Open a Link</a>
Output should be:
How to add HTML <a> Tag referrerpolicy strict-origin-when-cross-origin Attribute
Sends the origin if the protocol security level stays the same or is higher (HTTP to HTTP, HTTPS to HTTPS, and HTTP to HTTPS is ok). Sends nothing to less secure level (HTTPS to HTTP).
index.html
Example:HTML
<a href="https://horje.com/" referrerpolicy="strict-origin-when-cross-origin">Open a Link</a>
Output should be:
How to add HTML <a> Tag referrerpolicy unsafe-url Attribute
Sends the origin, path, and query string (regardless of security). Use this value carefully!
index.html
Example:HTML
<a href="https://horje.com/" referrerpolicy="unsafe-url">Open a Link</a>
Output should be:
How to add HTML <a> rel Attribute
A link with a rel attribute.
Definition and Usage
The rel attribute specifies the relationship between the current document and the linked document.
Only used if the href attribute is present.
Tip: Search engines can use this attribute to get more information about a link!
Syntax
<a rel="value">
Attribute Values
Value
Description
alternate
Provides a link to an alternate representation of the document (i.e. print page, translated or mirror)
author
Provides a link to the author of the document
bookmark
Permanent URL used for bookmarking
external
Indicates that the referenced document is not part of the same site as the current document
help
Provides a link to a help document
license
Provides a link to licensing information for the document
next
Provides a link to the next document in the series
nofollow
Links to an unendorsed document, like a paid link.
("nofollow" is used by Google, to specify that the Google search spider should not follow that link)
noopener
Requires that any browsing context created by following the hyperlink must not have an opener browsing context
noreferrer
Makes the referrer unknown. No referer header will be included when the user clicks the hyperlink
Links to an unendorsed document, like a paid link.
("nofollow" is used by Google, to specify that the Google search spider should not follow that link)
The target attribute specifies where to open the linked document.
Definition and Usage
The target attribute specifies where to open the linked document.
Browser Support
Syntax
<a target="_blank|_self|_parent|_top|framename">
Attribute Values
Value
Description
_blank
Opens the linked document in a new window or tab
_self
Opens the linked document in the same frame as it was clicked (this is default)
_parent
Opens the linked document in the parent frame
_top
Opens the linked document in the full body of the window
framename
Opens the linked document in the named iframe
index.html
<!DOCTYPE html>
<html>
<body>

<h1>The a target attribute</h1>

<p>Open link in a new window or tab: <a href="https://horje.com" target="_blank">Visit Horje!</a></p>

</body>
</html>
The <abbr> tag defines an abbreviation or an acronym, like "HTML", "CSS", "Mr.", "Dr.", "ASAP", "ATM".
Tip: Use the global titleattribute to show the description for the abbreviation/acronym when you mouse over the element.
An abbreviation is marked up as follows
index.html
Example:HTML
<p>The <abbr title="World Health Organization">WHO</abbr> was founded in 1948.</p>
Output should be:
What types of Browsers will Support <abbr> Tag
Output should be:
<abbr> can also be used with <dfn> to define an abbreviation
Follow the Example
index.html
Example:HTML
<p><dfn><abbr title="Cascading Style Sheets">CSS</abbr>
</dfn> is a language that describes the style of an HTML document.</p>
Output should be:
Default CSS Settings for <abbr> Tag
Most browsers will display the <abbr> element with the following default values:
index.html
Example:HTML
<style>
abbr {
  display: inline;
}
</style>
<p><abbr title="Hyper Text Markup Language">HTML</abbr> describes the structure of Web pages using markup.</p>
<!DOCTYPE html>
<html>
<body>

<h1>The abbr element</h1>

<p>The <abbr title="World Health Organization">WHO</abbr> was founded in 1948.</p>

</body>
</html>
The <address> tag defines the contact information for the author/owner of a document or an article.
The contact information can be an email address, URL, physical address, phone number, social media handle, etc.
The text in the <address> element usually renders in italic, and browsers will always add a line break before and after the <address> element.
HTML Contact information for HTML <address> Tag
Follow the Example
Example:HTML
<address>
Written by <a href="mailto:[email protected]">Jon Doe</a>.<br>
Visit us at:<br>
Example.com<br>
Box 564, Disneyland<br>
USA
</address>
Output should be:
Browser Support for HTML <address> Tag
Output should be:
Default CSS Settings for <address> Tag
Change the default CSS settings to see the effect.
An address element is displayed like this:
index.html
Example:HTML
<style>
address {
  display: block;
  font-style: italic;
}
</style>
<p>An address element is displayed like this:</p>
<address>
Written by <a href="mailto:[email protected]">Jon Doe</a>.<br>
Visit us at:<br>
Example.com<br>
Box 564, Disneyland<br>
USA
</address>
The tag was used in HTML 4 to define an embedded applet (Plug-in).
Plug-ins for HTML <applet> Tag
Plug-ins are a computer programs that extend the standard functionality of the browser.
Plug-ins have been used for many different purposes:
Run Java applets
Run ActiveX controls
Display Flash movies
Display maps
Scan for viruses
Verify a bank id
Most browsers no longer support Java Applets and Plug-ins.
ActiveX controls are no longer supported in any browsers.
The support for Shockwave Flash has also been turned off in modern browsers.
What to Use Instead of HTML <applet> Tag?
You can use following tags instead of HTMLTag.
<video>
<audio>
<embed>
<object>
Use <video> Tag Instead of HTML <applet> Tag
If you want to embed a video, use the <video> tag:
index.html
Example:HTML
 <video width="320" height="240" controls>
  <source src="https://www.w3schools.com/tags/movie.mp4" type="video/mp4">
  <source src="https://www.w3schools.com/tags/movie.mp4" type="video/ogg">
  Your browser does not support the video tag.
</video>
Output should be:
How to Use <audio> Tag Instead of HTML <applet> Tag
If you want to embed audio, use the <audio> tag:
index.html
Example:HTML
<audio controls>
  <source src="https://www.w3schools.com/tags/horse.ogg" type="audio/ogg">
  <source src="https://www.w3schools.com/tags/horse.ogg" type="audio/mpeg">
  Your browser does not support the audio element.
</audio>
Output should be:
How to Use <embed> Tag Instead of HTML <applet> Tag
To embed objects, you can use both the <embed> tag and the <object> tags:
Embed a document with the <embed> element:
index.html
Example:HTML
<embed src="https://horje.com/avatar.png">
How to Use <object> Tag Instead of HTML <applet> Tag
How to set Default CSS Settings for HTML <area> Tag
Most browsers will display the <area> element with the following default values:
Click on the sun or on one of the planets to watch it closer:
index.html
Example:HTML
<style>
area {
display: none;
}
</style>
Output should be:
How to add HTML <area> alt Attribute
Use the alt attribute to specify an alternate text for each area in the image map.
Definition and Usage
The alt attribute specifies an alternate text for an area, if the image cannot be displayed.
The alt attribute provides alternative information for an image if a user for some reason cannot view it (because of slow connection, an error in the src attribute, or if the user uses a screen reader).
The alt attribute is required if the href attribute is present.
Browser Support
Syntax
<area alt="text">
Attribute Values
Value
Description
text
Specifies the alternate text for the area, if the image cannot be displayed
index.html
Example:HTML
<!DOCTYPE html>
<html>
<body>
<h1>The area alt attribute</h1>
<p>Click on the sun or on one of the planets to watch it closer:</p>
<img src="https://horje.com/avatar.png" width="145" height="126" alt="Planets" usemap="#planetmap">
<map name="planetmap">
<area shape="rect" coords="0,0,82,126" alt="Sun" href="https://horje.com/learn/630/what-is-html-area-tag">
<area shape="circle" coords="90,58,3" alt="Mercury" href="https://horje.com/learn/630/what-is-html-area-tag">
<area shape="circle" coords="124,58,8" alt="Venus" href="https://horje.com/learn/630/what-is-html-area-tag">
</map>
</body>
</html>
Output should be:
How to add HTML <area> coords Attribute
Use the coords attribute to specify the coordinates of each area in the image map.
Definition and Usage
The coords attribute specifies the coordinates of an area in an image map.
The coords attribute is used together with the shape attribute to specify the size, shape, and placement of an area.
Tip: The coordinates of the top-left corner of an area are 0,0.
Browser Support
index.html
Example:HTML
<!DOCTYPE html>
<html>
<body>
<h1>The area coords attribute</h1>
<p>Click on the sun or on one of the planets to watch it closer:</p>
<img src="https://horje.com/avatar.png" width="145" height="126" alt="Planets" usemap="#planetmap">
<map id="planetmap" name="planetmap">
<area shape="rect" coords="0,0,82,126" alt="Sun" href="https://horje.com">
<area shape="circle" coords="90,58,3" alt="Mercury" href="https://horje.com/avatar.png">
<area shape="circle" coords="124,58,8" alt="Venus" href="https://horje.com">
</map>
</body>
</html>
Output should be:
How to add HTML <area> coords x1,y1,x2,y2 Attribute
Specifies the coordinates of the top-left and bottom-right corner of the rectangle (shape="rect").
index.html
Example:HTML
<!DOCTYPE html>
<html>
<body>
<h1>The area coords attribute</h1>
<p>Click on the sun or on one of the planets to watch it closer:</p>
<img src="https://horje.com/avatar.png" width="145" height="126" alt="Planets" usemap="#planetmap">
<map id="planetmap" name="planetmap">
<area shape="rect" coords="x1,y1,x2,y2" alt="Sun" href="https://horje.com">
</map>
</body>
</html>
Output should be:
How to add HTML <area> coords x,y,radius Attribute
Specifies the coordinates of the circle center and the radius (shape="circle").
index.html
Example:HTML
<!DOCTYPE html>
<html>
<body>
<h1>The area coords attribute</h1>
<p>Click on the sun or on one of the planets to watch it closer:</p>
<img src="https://horje.com/avatar.png" width="145" height="126" alt="Planets" usemap="#planetmap">
<map id="planetmap" name="planetmap">
<area shape="rect" coords="x,y,radius" alt="Sun" href="https://horje.com">
</map>
</body>
</html>
Output should be:
How to add HTML <area> download Attribute
Use the download attribute to specify that the target will be downloaded when a user clicks on the hyperlink:
Definition and Usage
The download attribute specifies that the target (the file specified in the href attribute) will be downloaded when a user clicks on the hyperlink.
The optional value of the download attribute will be the new name of the file after it is downloaded. There are no restrictions on allowed values, and the browser will automatically detect the correct file extension and add it to the file (.img, .pdf, .txt, .html, etc.).
If the value is omitted, the original filename is used.
Browser Support
The numbers in the table specify the first browser version that fully supports the attribute.
* Chrome 65+ and Firefox only support same-origin download links.
Syntax
<area download="filename">
Attribute Values
Value
Description
filename
Optional. Specifies the new filename for the downloaded file
index.html
Example:HTML
<!DOCTYPE html>
<html>
<body>
<h1>The area download attribute</h1>
<p>Click on the sun or on one of the planets to download its content.</p>
<img src="https://horje.com/avatar.png" width="145" height="126" alt="Planets" usemap="#planetmap">
<map name="planetmap">
<area shape="rect" coords="0,0,82,126" alt="Sun" href="https://horje.com/avatar.png" download>
<area shape="circle" coords="90,58,3" alt="Mercury" href="https://horje.com/avatar.png" download>
<area shape="circle" coords="124,58,8" alt="Venus" href="https://horje.com/avatar.png" download>
</map>
<p><b>Note:</b> The download attribute is not supported in IE, Safari or Opera version 12 (and earlier).</p>
</body>
</html>
Output should be:
How to Specify a value for the download attribute HTML <area> download Attribute
Specify a value for the download attribute, which will be the new filename of the downloaded file (sun.htm instead of information_about_the_sun.htm and so on):
index.html
Example:HTML
<!DOCTYPE html>
<html>
<body>
<h1>The area download attribute</h1>
<p>Click on the sun or on one of the planets to download its content.</p>
<img src="https://horje.com/avatar.png" width="145" height="126" alt="Planets" usemap="#planetmap">
<map name="planetmap">
<area shape="rect" coords="0,0,82,126" alt="Sun" href="https://horje.com" download="sun">
<area shape="circle" coords="90,58,3" alt="Mercury" href="https://horje.com/avatar.png" download="mercury">
<area shape="circle" coords="124,58,8" alt="Venus" href="https://horje.com/avatar.png" download="venus">
</map>
<p>Notice that the filename of the downloaded file will be saved as "sun.htm" instead of "information_about_the_sun.htm" for the sun area, "mercury.gif" instead of "merglobe.gif" for the mercury area and "venus.txt" instead of "information_about_the_planet_venus.txt" for the venus area.</p>
<p><b>Note:</b> The download attribute is not supported in IE, Safari or Opera version 12 (and earlier).</p>
</body>
</html>
Output should be:
How to add HTML <area> href Attribute
Use the href attribute to specify the link target for each area in the image map:
Definition and Usage
The href attribute specifies the hyperlink target for the area.
If the href attribute is not present, the <area> tag is not a hyperlink.
Browser Support
Syntax
<area href="URL">
Attribute Values
Value
Description
URL
Specifies the hyperlink target for the area.
Possible values:
An absolute URL - points to another web site (like href="http://www.example.com/sun.htm")
A relative URL - points to a file within a web site (like href="sun.htm")
Link to an element with a specified id within the page (like href="#top")
Other protocols (like https://, ftp://, mailto:, file:, etc..)
A script (like href="javascript:alert('Hello');")
index.html
Example:HTML
<!DOCTYPE html>
<html>
<body>
<h1>The area href attribute</h1>
<p>Click on the sun or on one of the planets to watch it closer:</p>
<img src="https://horje.com/avatar.png" width="145" height="126" alt="Planets" usemap="#planetmap">
<map id="planetmap" name="planetmap">
<area shape="rect" coords="0,0,82,126" alt="Sun" href="https://horje.com/avatar.png">
<area shape="circle" coords="90,58,3" alt="Mercury" href="https://horje.com/avatar.png">
<area shape="circle" coords="124,58,8" alt="Venus" href="https://horje.com/avatar.png">
</map>
</body>
</html>
Output should be:
How to add HTML <area> hreflang Attribute
Use the hreflang attribute to specify the language of the target URL for each area in the image map:
Definition and Usage
The hreflang attribute specifies the language of the target URL in the area.
This attribute is only used if the href attribute is set.
Note: This attribute is purely advisory.
Browser Support
Syntax
<area hreflang="language_code">
Attribute Values
Value
Description
language_code
A two-letter language code that specifies the language of the linked document.
To view all available language codes, go to our Language code reference.
index.html
Example:HTML
<!DOCTYPE html>
<html>
<body>
<h1>The area hreflang attribute</h1>
<p>Click on the sun to watch it closer:</p>
<img src="https://horje.com/avatar.png" width="145" height="126" alt="Planets" usemap="#planetmap">
<map name="planetmap">
<area shape="rect" coords="0,0,82,126" alt="Sun" href="https://horje.com" hreflang="en">
</map>
</body>
</html>
Output should be:
How to add HTML <area> media Attribute
Use the media attribute to specify what media/device the target URL is optimized for:
Definition and Usage
The media attribute specifies what media/device the target URL is optimized for.
This attribute is used to specify that the URL is designed for special devices (like iPhone), speech or print media.
Teletypes and similar media using a fixed-pitch character grid
tv
Television type devices (low resolution, limited scroll ability)
Values
Value
Description
width
Specifies the width of the targeted display area.
"min-" and "max-" prefixes can be used.
Example: media="screen and (min-width:500px)"
height
Specifies the height of the targeted display area. "min-" and "max-" prefixes can be used.
Example: media="screen and (max-height:700px)"
device-width
Specifies the width of the target display/paper.
"min-" and "max-" prefixes can be used.
Example: media="screen and (device-width:500px)"
device-height
Specifies the height of the target display/paper.
"min-" and "max-" prefixes can be used.
Example: media="screen and (device-height:500px)"
orientation
Specifies the orientation of the target display/paper.
Possible values: "portrait" or "landscape"
Example: media="all and (orientation: landscape)"
aspect-ratio
Specifies the width/height ratio of the targeted display area.
"min-" and "max-" prefixes can be used.
Example: media="screen and (aspect-ratio:16/9)"
device-aspect-ratio
Specifies the device-width/device-height ratio of the target display/paper.
"min-" and "max-" prefixes can be used.
Example: media="screen and (aspect-ratio:16/9)"
color
Specifies the bits per color of target display.
"min-" and "max-" prefixes can be used.
Example: media="screen and (color:3)"
color-index
Specifies the number of colors the target display can handle.
"min-" and "max-" prefixes can be used.
Example: media="screen and (min-color-index:256)"
monochrome
Specifies the bits per pixel in a monochrome frame buffer.
"min-" and "max-" prefixes can be used.
Example: media="screen and (monochrome:2)"
resolution
Specifies the pixel density (dpi or dpcm) of the target display/paper.
"min-" and "max-" prefixes can be used.
Example: media="print and (resolution:300dpi)"
scan
Specifies scanning method of a tv display.
Possible values are "progressive" and "interlace".
Example: media="tv and (scan:interlace)"
grid
Specifies if the output device is grid or bitmap.
Possible values are "1" for grid, and "0" otherwise.
Example: media="handheld and (grid:1)"
index.html
Example:HTML
<!DOCTYPE html>
<html>
<body>
<h1>The area media attribute</h1>
<p>Click on the sun to watch it closer:</p>
<img src="https://horje.com/avatar.png" width="145" height="126" alt="Planets" usemap="#planetmap">
<map name="planetmap">
<area shape="rect" coords="0,0,82,126" alt="Sun" href="https://horje.com" media="screen and (min-color-index:256)">
</map>
</body>
</html>
Output should be:
How to add HTML <area> media width Attribute
width
Specifies the width of the targeted display area.
"min-" and "max-" prefixes can be used.
Example: media="screen and (min-width:500px)"
index.html
Example:HTML
<!DOCTYPE html>
<html>
<body>
<h1>The area media width attribute</h1>
<p>Click on the sun to watch it closer:</p>
<img src="https://horje.com/avatar.png" width="145" height="126" alt="Planets" usemap="#planetmap">
<map name="planetmap">
<area shape="rect" coords="0,0,82,126" alt="Sun" href="https://horje.com/avatar.png" media="screen and (min-width:500px)">
</map>
</body>
</html>
Output should be:
How to add HTML <area> media height Attribute
height
Specifies the height of the targeted display area. "min-" and "max-" prefixes can be used.
Example: media="screen and (max-height:700px)"
index.html
Example:HTML
<!DOCTYPE html>
<html>
<body>
<h1>The area media height attribute</h1>
<p>Click on the sun to watch it closer:</p>
<img src="https://horje.com/avatar.png" width="145" height="126" alt="Planets" usemap="#planetmap">
<map name="planetmap">
<area shape="rect" coords="0,0,82,126" alt="Sun" href="https://horje.com" media="screen and (max-height:700px)">
</map>
</body>
</html>
Output should be:
How to add HTML <area> media device-width Attribute
device-width
Specifies the width of the target display/paper.
"min-" and "max-" prefixes can be used.
Example: media="screen and (device-width:500px)"
index.html
Example:HTML
<!DOCTYPE html>
<html>
<body>
<h1>The area media device-width attribute</h1>
<p>Click on the sun to watch it closer:</p>
<img src="https://horje.com/avatar.png" width="145" height="126" alt="Planets" usemap="#planetmap">
<map name="planetmap">
<area shape="rect" coords="0,0,82,126" alt="Sun" href="https://horje.com" media="screen and (device-width:500px)">
</map>
</body>
</html>
Output should be:
How to add HTML <area> media device-height Attribute
device-height
Specifies the height of the target display/paper.
"min-" and "max-" prefixes can be used.
Example: media="screen and (device-height:500px)"
index.html
Example:HTML
<!DOCTYPE html>
<html>
<body>
<h1>The area media device-height attribute</h1>
<p>Click on the sun to watch it closer:</p>
<img src="https://horje.com/avatar.png" width="145" height="126" alt="Planets" usemap="#planetmap">
<map name="planetmap">
<area shape="rect" coords="0,0,82,126" alt="Sun" href="https://horje.com" media="screen and (device-height:500px)">
</map>
</body>
</html>
Output should be:
How to add HTML <area> media orientation Attribute
orientation
Specifies the orientation of the target display/paper.
Possible values: "portrait" or "landscape"
Example: media="all and (orientation: landscape)"
index.html
Example:HTML
<!DOCTYPE html>
<html>
<body>
<h1>The area media orientation attribute</h1>
<p>Click on the sun to watch it closer:</p>
<img src="https://horje.com/avatar.png" width="145" height="126" alt="Planets" usemap="#planetmap">
<map name="planetmap">
<area shape="rect" coords="0,0,82,126" alt="Sun" href="https://horje.com" media="all and (orientation: landscape)">
</map>
</body>
</html>
Output should be:
How to add HTML <area> media aspect-ratio Attribute
aspect-ratio
Specifies the width/height ratio of the targeted display area.
"min-" and "max-" prefixes can be used.
Example: media="screen and (aspect-ratio:16/9)"
index.html
Example:HTML
<!DOCTYPE html>
<html>
<body>
<h1>The area media aspect-ratio attribute</h1>
<p>Click on the sun to watch it closer:</p>
<img src="https://horje.com/avatar.png" width="145" height="126" alt="Planets" usemap="#planetmap">
<map name="planetmap">
<area shape="rect" coords="0,0,82,126" alt="Sun" href="https://horje.com" media="screen and (aspect-ratio:16/9)">
</map>
</body>
</html>
Output should be:
How to add HTML <area> media device-aspect-ratio Attribute
device-aspect-ratio
Specifies the device-width/device-height ratio of the target display/paper.
"min-" and "max-" prefixes can be used.
Example: media="screen and (aspect-ratio:16/9)"
index.html
Example:HTML
<!DOCTYPE html>
<html>
<body>
<h1>The area media device-aspect-ratio attribute</h1>
<p>Click on the sun to watch it closer:</p>
<img src="https://horje.com/avatar.png" width="145" height="126" alt="Planets" usemap="#planetmap">
<map name="planetmap">
<area shape="rect" coords="0,0,82,126" alt="Sun" href="https://horje.com" media="screen and (aspect-ratio:16/9)">
</map>
</body>
</html>
Output should be:
How to add HTML <area> media color Attribute
color
Specifies the bits per color of target display.
"min-" and "max-" prefixes can be used.
Example: media="screen and (color:3)"
index.html
Example:HTML
<!DOCTYPE html>
<html>
<body>
<h1>The area media color attribute</h1>
<p>Click on the sun to watch it closer:</p>
<img src="https://horje.com/avatar.png" width="145" height="126" alt="Planets" usemap="#planetmap">
<map name="planetmap">
<area shape="rect" coords="0,0,82,126" alt="Sun" href="https://horje.com" media="screen and (color:3)">
</map>
</body>
</html>
Output should be:
How to add HTML <area> media color-index Attribute
color-index
Specifies the number of colors the target display can handle.
"min-" and "max-" prefixes can be used.
Example: media="screen and (min-color-index:256)"
index.html
Example:HTML
<!DOCTYPE html>
<html>
<body>
<h1>The area media color-index attribute</h1>
<p>Click on the sun to watch it closer:</p>
<img src="https://horje.com/avatar.png" width="145" height="126" alt="Planets" usemap="#planetmap">
<map name="planetmap">
<area shape="rect" coords="0,0,82,126" alt="Sun" href="https://horje.com" media="screen and (min-color-index:256)">
</map>
</body>
</html>
Output should be:
How to add HTML <area> media monochrome Attribute
monochrome
Specifies the bits per pixel in a monochrome frame buffer.
"min-" and "max-" prefixes can be used.
Example: media="screen and (monochrome:2)"
index.html
Example:HTML
<!DOCTYPE html>
<html>
<body>
<h1>The area media monochrome attribute</h1>
<p>Click on the sun to watch it closer:</p>
<img src="https://horje.com/avatar.png" width="145" height="126" alt="Planets" usemap="#planetmap">
<map name="planetmap">
<area shape="rect" coords="0,0,82,126" alt="Sun" href="https://horje.com" media="screen and (monochrome:2)">
</map>
</body>
</html>
Output should be:
How to add HTML <area> media resolution Attribute
resolution
Specifies the pixel density (dpi or dpcm) of the target display/paper.
"min-" and "max-" prefixes can be used.
Example: media="print and (resolution:300dpi)"
index.html
Example:HTML
<!DOCTYPE html>
<html>
<body>
<h1>The area media resolution attribute</h1>
<p>Click on the sun to watch it closer:</p>
<img src="https://horje.com/avatar.png" width="145" height="126" alt="Planets" usemap="#planetmap">
<map name="planetmap">
<area shape="rect" coords="0,0,82,126" alt="Sun" href="https://horje.com" media="print and (resolution:300dpi)">
</map>
</body>
</html>
Output should be:
How to add HTML <area> media scan Attribute
scan
Specifies scanning method of a tv display.
Possible values are "progressive" and "interlace".
Example: media="tv and (scan:interlace)"
index.html
Example:HTML
<!DOCTYPE html>
<html>
<body>
<h1>The area media scan attribute</h1>
<p>Click on the sun to watch it closer:</p>
<img src="https://horje.com/avatar.png" width="145" height="126" alt="Planets" usemap="#planetmap">
<map name="planetmap">
<area shape="rect" coords="0,0,82,126" alt="Sun" href="https://horje.com" media="tv and (scan:interlace)">
</map>
</body>
</html>
Output should be:
How to add HTML <area> media grid Attribute
grid
Specifies if the output device is grid or bitmap.
Possible values are "1" for grid, and "0" otherwise.
Example: media="handheld and (grid:1)"
index.html
Example:HTML
<!DOCTYPE html>
<html>
<body>
<h1>The area media grid attribute</h1>
<p>Click on the sun to watch it closer:</p>
<img src="https://horje.com/avatar.png" width="145" height="126" alt="Planets" usemap="#planetmap">
<map name="planetmap">
<area shape="rect" coords="0,0,82,126" alt="Sun" href="https://horje.com" media="handheld and (grid:1)">
</map>
</body>
</html>
Output should be:
How to add HTML <area> referrerpolicy Attribute
Set the referrerpolicy attribute for the area hyperlinks.
Definition and Usage
The referrerpolicy attribute specifies which referrer information to send when the user clicks on the hyperlink.
Browser Support
The numbers in the table specify the first browser version that fully supports the attribute.
Default. Sends the origin, path, and query string if the protocol security level stays the same or is higher (HTTP to HTTP, HTTPS to HTTPS, HTTP to HTTPS is ok). Sends nothing to less secure level (HTTPS to HTTP is not ok)
origin
Sends the origin (scheme, host, and port) of the document
origin-when-cross-origin
Sends the origin of the document for cross-origin request. Sends the origin, path, and query string for same-origin request
same-origin
Sends a referrer for same-origin request. Sends no referrer for cross-origin request
strict-origin-when-cross-origin
Sends the origin if the protocol security level stays the same or is higher (HTTP to HTTP, HTTPS to HTTPS, and HTTP to HTTPS is ok). Sends nothing to less secure level (HTTPS to HTTP)
unsafe-url
Sends the origin, path, and query string (regardless of security). Use this value carefully!
How to add HTML <area> referrerpolicy no-referrer-when-downgrade Attribute
no-referrer-when-downgrade
Default. Sends the origin, path, and query string if the protocol security level stays the same or is higher (HTTP to HTTP, HTTPS to HTTPS, HTTP to HTTPS is ok). Sends nothing to less secure level (HTTPS to HTTP is not ok)
How to add HTML <area> referrerpolicy strict-origin-when-cross-origin Attribute
strict-origin-when-cross-origin
Sends the origin if the protocol security level stays the same or is higher (HTTP to HTTP, HTTPS to HTTPS, and HTTP to HTTPS is ok). Sends nothing to less secure level (HTTPS to HTTP)
Use the rel attribute to specify the relationship between the current document and the linked document:
Definition and Usage
The rel attribute specifies the relationship between the current document and the linked document.
Only used if the href attribute is present.
Browser Support
Syntax
<area rel="value">
Attribute Values
Value
Description
alternate
Links to an alternate version of the document (i.e. print page, translated or mirror)
author
Links to the author of the document
bookmark
Permanent URL used for bookmarking
help
Links to a help document
license
Links to copyright information for the document
next
The next document in a selection
nofollow
Links to an unendorsed document, like a paid link.
("nofollow" is used by Google, to specify that the Google search spider should not follow that link)
noreferrer
Specifies that the browser should not send a HTTP referer header if the user follows the hyperlink
prefetch
Specifies that the target document should be cached
prev
The previous document in a selection
search
Links to a search tool for the document
tag
A tag (keyword) for the current document
index.html
Example:HTML
<!DOCTYPE html>
<html>
<body>
<h1>The area rel attribute</h1>
<p>Click on the sun to watch it closer:</p>
<img src="https://horje.com/avatar.png" width="145" height="126" alt="Planets" usemap="#planetmap">
<map name="planetmap">
<area shape="rect" coords="0,0,82,126" alt="Sun" href="https://horje.com" rel="alternate">
</map>
</body>
</html>
Output should be:
How to add HTML <area> rel alternate Attribute
alternate
Links to an alternate version of the document (i.e. print page, translated or mirror)
index.html
Example:HTML
<!DOCTYPE html>
<html>
<body>
<h1>The area rel attribute</h1>
<p>Click on the sun to watch it closer:</p>
<img src="https://horje.com/avatar.png" width="145" height="126" alt="Planets" usemap="#planetmap">
<map name="planetmap">
<area shape="rect" coords="0,0,82,126" alt="Sun" href="https://horje.com" rel="alternate">
</map>
</body>
</html>
Output should be:
How to add HTML <area> rel author Attribute
author
Links to the author of the document
index.html
Example:HTML
<!DOCTYPE html>
<html>
<body>
<h1>The area rel attribute</h1>
<p>Click on the sun to watch it closer:</p>
<img src="https://horje.com/avatar.png" width="145" height="126" alt="Planets" usemap="#planetmap">
<map name="planetmap">
<area shape="rect" coords="0,0,82,126" alt="Sun" href="https://horje.com" rel="author">
</map>
</body>
</html>
Output should be:
How to add HTML <area> rel bookmark Attribute
bookmark
Permanent URL used for bookmarking
index.html
Example:HTML
<!DOCTYPE html>
<html>
<body>
<h1>The area rel attribute</h1>
<p>Click on the sun to watch it closer:</p>
<img src="https://horje.com/avatar.png" width="145" height="126" alt="Planets" usemap="#planetmap">
<map name="planetmap">
<area shape="rect" coords="0,0,82,126" alt="Sun" href="https://horje.com" rel="bookmark">
</map>
</body>
</html>
Output should be:
How to add HTML <area> rel help Attribute
help
Links to a help document
index.html
Example:HTML
<!DOCTYPE html>
<html>
<body>
<h1>The area rel attribute</h1>
<p>Click on the sun to watch it closer:</p>
<img src="https://horje.com/avatar.png" width="145" height="126" alt="Planets" usemap="#planetmap">
<map name="planetmap">
<area shape="rect" coords="0,0,82,126" alt="Sun" href="https://horje.com" rel="help">
</map>
</body>
</html>
Output should be:
How to add HTML <area> rel license Attribute
license
Links to copyright information for the document
index.html
Example:HTML
<!DOCTYPE html>
<html>
<body>
<h1>The area rel attribute</h1>
<p>Click on the sun to watch it closer:</p>
<img src="https://horje.com/avatar.png" width="145" height="126" alt="Planets" usemap="#planetmap">
<map name="planetmap">
<area shape="rect" coords="0,0,82,126" alt="Sun" href="https://horje.com" rel="license">
</map>
</body>
</html>
Output should be:
How to add HTML <area> rel next Attribute
next
The next document in a selection
index.html
Example:HTML
<!DOCTYPE html>
<html>
<body>
<h1>The area rel attribute</h1>
<p>Click on the sun to watch it closer:</p>
<img src="https://horje.com/avatar.png" width="145" height="126" alt="Planets" usemap="#planetmap">
<map name="planetmap">
<area shape="rect" coords="0,0,82,126" alt="Sun" href="https://horje.com" rel="next">
</map>
</body>
</html>
Output should be:
How to add HTML <area> rel nofollow Attribute
nofollow
Links to an unendorsed document, like a paid link.
("nofollow" is used by Google, to specify that the Google search spider should not follow that link)
index.html
Example:HTML
<!DOCTYPE html>
<html>
<body>
<h1>The area rel attribute</h1>
<p>Click on the sun to watch it closer:</p>
<img src="https://horje.com/avatar.png" width="145" height="126" alt="Planets" usemap="#planetmap">
<map name="planetmap">
<area shape="rect" coords="0,0,82,126" alt="Sun" href="https://horje.com" rel="nofollow">
</map>
</body>
</html>
Output should be:
How to add HTML <area> rel noreferrer Attribute
noreferrer
Specifies that the browser should not send a HTTP referer header if the user follows the hyperlink
index.html
Example:HTML
<!DOCTYPE html>
<html>
<body>
<h1>The area rel attribute</h1>
<p>Click on the sun to watch it closer:</p>
<img src="https://horje.com/avatar.png" width="145" height="126" alt="Planets" usemap="#planetmap">
<map name="planetmap">
<area shape="rect" coords="0,0,82,126" alt="Sun" href="https://horje.com" rel="noreferrer">
</map>
</body>
</html>
Output should be:
How to add HTML <area> rel prefetch Attribute
prefetch
Specifies that the target document should be cached
index.html
Example:HTML
<!DOCTYPE html>
<html>
<body>
<h1>The area rel attribute</h1>
<p>Click on the sun to watch it closer:</p>
<img src="https://horje.com/avatar.png" width="145" height="126" alt="Planets" usemap="#planetmap">
<map name="planetmap">
<area shape="rect" coords="0,0,82,126" alt="Sun" href="https://horje.com" rel="prefetch">
</map>
</body>
</html>
Output should be:
How to add HTML <area> rel prev Attribute
prev
The previous document in a selection
index.html
Example:HTML
<!DOCTYPE html>
<html>
<body>
<h1>The area rel attribute</h1>
<p>Click on the sun to watch it closer:</p>
<img src="https://horje.com/avatar.png" width="145" height="126" alt="Planets" usemap="#planetmap">
<map name="planetmap">
<area shape="rect" coords="0,0,82,126" alt="Sun" href="https://horje.com" rel="prev">
</map>
</body>
</html>
Output should be:
How to add HTML <area> rel search Attribute
search
Links to a search tool for the document
index.html
Example:HTML
<!DOCTYPE html>
<html>
<body>
<h1>The area rel attribute</h1>
<p>Click on the sun to watch it closer:</p>
<img src="https://horje.com/avatar.png" width="145" height="126" alt="Planets" usemap="#planetmap">
<map name="planetmap">
<area shape="rect" coords="0,0,82,126" alt="Sun" href="https://horje.com" rel="search">
</map>
</body>
</html>
Output should be:
How to add HTML <area> rel tag Attribute
tag
A tag (keyword) for the current document
index.html
Example:HTML
<!DOCTYPE html>
<html>
<body>
<h1>The area rel attribute</h1>
<p>Click on the sun to watch it closer:</p>
<img src="https://horje.com/avatar.png" width="145" height="126" alt="Planets" usemap="#planetmap">
<map name="planetmap">
<area shape="rect" coords="0,0,82,126" alt="Sun" href="https://horje.com" rel="tag">
</map>
</body>
</html>
Output should be:
How to add HTML <area> shape Attribute
Use the shape attribute to specify the shape of each area in the image map.
Definition and Usage
The shape attribute specifies the shape of an area.
The shape attribute is used together with the coords attribute to specify the size, shape, and placement of an area.
Browser Support
Syntax
<area shape="default|rect|circle|poly">
Attribute Values
Value
Description
default
Specifies the entire region
rect
Defines a rectangular region
circle
Defines a circular region
poly
Defines a polygonal region
index.html
Example:HTML
<!DOCTYPE html>
<html>
<body>
<h1>The area shape attribute</h1>
<p>Click on the sun or on one of the planets to watch it closer:</p>
<img src="https://horje.com/avatar.png" width="145" height="126" alt="Planets" usemap="#planetmap">
<map id="planetmap" name="planetmap">
<area shape="rect" coords="0,0,82,126" alt="Sun" href="https://horje.com">
<area shape="circle" coords="90,58,3" alt="Mercury" href="https://horje.com/">
<area shape="circle" coords="124,58,8" alt="Venus" href="venus.htm">
</map>
</body>
</html>
Output should be:
How to add HTML <area> shape default Attribute
default
Specifies the entire region
index.html
Example:HTML
<!DOCTYPE html>
<html>
<body>
<h1>The area shape attribute</h1>
<p>Click on the sun or on one of the planets to watch it closer:</p>
<img src="https://horje.com/avatar.png" width="145" height="126" alt="Planets" usemap="#planetmap">
<map id="planetmap" name="planetmap">
<area shape="default" coords="0,0,82,126" alt="Sun" href="https://horje.com">
<area shape="circle" coords="90,58,3" alt="Mercury" href="https://horje.com/">
<area shape="circle" coords="124,58,8" alt="Venus" href="https://horje.com">
</map>
</body>
</html>
Output should be:
How to add HTML <area> shape rect Attribute
rect
Defines a rectangular region
index.html
Example:HTML
<!DOCTYPE html>
<html>
<body>
<h1>The area shape attribute</h1>
<p>Click on the sun or on one of the planets to watch it closer:</p>
<img src="https://horje.com/avatar.png" width="145" height="126" alt="Planets" usemap="#planetmap">
<map id="planetmap" name="planetmap">
<area shape="rect" coords="0,0,82,126" alt="Sun" href="https://horje.com">
<area shape="circle" coords="90,58,3" alt="Mercury" href="https://horje.com/">
<area shape="circle" coords="124,58,8" alt="Venus" href="https://horje.com">
</map>
</body>
</html>
Output should be:
How to add HTML <area> shape circle Attribute
circle
Defines a circular region
index.html
Example:HTML
<!DOCTYPE html>
<html>
<body>
<h1>The area shape attribute</h1>
<p>Click on the sun or on one of the planets to watch it closer:</p>
<img src="https://horje.com/avatar.png" width="145" height="126" alt="Planets" usemap="#planetmap">
<map id="planetmap" name="planetmap">
<area shape="circle" coords="0,0,82,126" alt="Sun" href="https://horje.com">
<area shape="circle" coords="90,58,3" alt="Mercury" href="https://horje.com/">
<area shape="circle" coords="124,58,8" alt="Venus" href="https://horje.com">
</map>
</body>
</html>
Output should be:
How to add HTML <area> shape poly Attribute
poly
Defines a polygonal region
index.html
Example:HTML
<!DOCTYPE html>
<html>
<body>
<h1>The area shape attribute</h1>
<p>Click on the sun or on one of the planets to watch it closer:</p>
<img src="https://horje.com/avatar.png" width="145" height="126" alt="Planets" usemap="#planetmap">
<map id="planetmap" name="planetmap">
<area shape="poly" coords="0,0,82,126" alt="Sun" href="https://horje.com">
<area shape="circle" coords="90,58,3" alt="Mercury" href="https://horje.com/">
<area shape="circle" coords="124,58,8" alt="Venus" href="https://horje.com">
</map>
</body>
</html>
Output should be:
How to add HTML <area> target Attribute
Use the target attribute to specify where to open the linked document in the image map.
Definition and Usage
The target attribute specifies where to open the linked document.
Opens the linked document in the same frame as it was clicked
_parent
Opens the linked document in the parent frame
_top
Opens the linked document in the full body of the window
framename
Opens the linked document in a named iframe
index.html
Example:HTML
<!DOCTYPE html>
<html>
<body>
<h1>The area attribute</h1>
<p>Click on the picture or on one of the planets to watch it closer:</p>
<img src="https://horje.com/avatar.png" width="145" height="126" alt="Planets" usemap="#planetmap">
<map name="planetmap">
<area shape="rect" coords="0,0,82,126" alt="Sun" href="https://horje.com" target="_blank">
<area shape="circle" coords="90,58,3" alt="Mercury" href="https://horje.com">
<area shape="circle" coords="124,58,8" alt="Venus" href="https://horje.com">
</map>
</body>
</html>
Output should be:
How to add HTML <area> target _blank Attribute
_blank
Opens the linked document in a new window or tab
index.html
Example:HTML
<!DOCTYPE html>
<html>
<body>
<h1>The area attribute</h1>
<p>Click on the picture or on one of the planets to watch it closer:</p>
<img src="https://horje.com/avatar.png" width="145" height="126" alt="Planets" usemap="#planetmap">
<map name="planetmap">
<area shape="rect" coords="0,0,82,126" alt="Sun" href="https://horje.com" target="_blank">
<area shape="circle" coords="90,58,3" alt="Mercury" href="https://horje.com">
<area shape="circle" coords="124,58,8" alt="Venus" href="https://horje.com">
</map>
</body>
</html>
Output should be:
How to add HTML <area> target _self Attribute
_self
Opens the linked document in the same frame as it was clicked
index.html
Example:HTML
<!DOCTYPE html>
<html>
<body>
<h1>The area attribute</h1>
<p>Click on the picture or on one of the planets to watch it closer:</p>
<img src="https://horje.com/avatar.png" width="145" height="126" alt="Planets" usemap="#planetmap">
<map name="planetmap">
<area shape="rect" coords="0,0,82,126" alt="Sun" href="https://horje.com" target="_self">
<area shape="circle" coords="90,58,3" alt="Mercury" href="https://horje.com">
<area shape="circle" coords="124,58,8" alt="Venus" href="https://horje.com">
</map>
</body>
</html>
Output should be:
How to add HTML <area> target _parent Attribute
_parent
Opens the linked document in the parent frame
index.html
Example:HTML
<!DOCTYPE html>
<html>
<body>
<h1>The area attribute</h1>
<p>Click on the picture or on one of the planets to watch it closer:</p>
<img src="https://horje.com/avatar.png" width="145" height="126" alt="Planets" usemap="#planetmap">
<map name="planetmap">
<area shape="rect" coords="0,0,82,126" alt="Sun" href="https://horje.com" target="_parent">
<area shape="circle" coords="90,58,3" alt="Mercury" href="https://horje.com">
<area shape="circle" coords="124,58,8" alt="Venus" href="https://horje.com">
</map>
</body>
</html>
Output should be:
How to add HTML <area> target _top Attribute
_top
Opens the linked document in the full body of the window
index.html
Example:HTML
<!DOCTYPE html>
<html>
<body>
<h1>The area attribute</h1>
<p>Click on the picture or on one of the planets to watch it closer:</p>
<img src="https://horje.com/avatar.png" width="145" height="126" alt="Planets" usemap="#planetmap">
<map name="planetmap">
<area shape="rect" coords="0,0,82,126" alt="Sun" href="https://horje.com" target="_top">
<area shape="circle" coords="90,58,3" alt="Mercury" href="https://horje.com">
<area shape="circle" coords="124,58,8" alt="Venus" href="https://horje.com">
</map>
</body>
</html>
Output should be:
How to add HTML <area> target framename Attribute
framename
Opens the linked document in a named iframe
index.html
Example:HTML
<!DOCTYPE html>
<html>
<body>
<h1>The area attribute</h1>
<p>Click on the picture or on one of the planets to watch it closer:</p>
<img src="https://horje.com/avatar.png" width="145" height="126" alt="Planets" usemap="#planetmap">
<map name="planetmap">
<area shape="rect" coords="0,0,82,126" alt="Sun" href="https://horje.com" target="framename">
<area shape="circle" coords="90,58,3" alt="Mercury" href="https://horje.com">
<area shape="circle" coords="124,58,8" alt="Venus" href="https://horje.com">
</map>
</body>
</html>
Output should be:
How to add HTML <area> type Attribute
Use the type attribute to specify the MIME type of the target URL:
Definition and Usage
The type attribute specifies the Internet media type (formerly known as MIME type) of the target URL.
This attribute is only used if the href attribute is set.
Note: This attribute is purely advisory.
Browser Support
Syntax
<area type="media_type">
Attribute Values
Value
Description
media_type
The Internet media type of the linked document.
Look at IANA Media Types for a complete list of standard media types.
index.html
Example:HTML
<!DOCTYPE html>
<html>
<body>
<h1>The area type attribute</h1>
<p>Click on the sun to watch it closer:</p>
<img src="https://horje.com/avatar.png" width="145" height="126" alt="Planets" usemap="#planetmap">
<map name="planetmap">
<area shape="rect" coords="0,0,82,126" alt="Sun" href="https://horje.com/avatar.png" type="image/gif">
</map>
</body>
</html>
Output should be:
How to add HTML <area> type media Attribute
media_type
The Internet media type of the linked document.
Look at IANA Media Types for a complete list of standard media types.
index.html
Example:HTML
<!DOCTYPE html>
<html>
<body>
<h1>The area type attribute</h1>
<p>Click on the sun to watch it closer:</p>
<img src="https://horje.com/avatar.png" width="145" height="126" alt="Planets" usemap="#planetmap">
<map name="planetmap">
<area shape="rect" coords="0,0,82,126" alt="Sun" href="https://horje.com/avatar.png" type="image/gif">
</map>
</body>
</html>
The <article> tag specifies independent, self-contained content.
An article should make sense on its own and it should be possible to distribute it independently from the rest of the site.
Potential sources for the <article> element:
Forum post
Blog post
News story
Note: The <article> element does not render as anything special in a browser. However, you can use CSS to style the <article> element (see example below).
How to create HTML <article> Tag
Three articles with independent, self-contained content:
index.html
Example:HTML
<article>
<h2>Google Chrome</h2>
<p>Google Chrome is a web browser developed by Google, released in 2008. Chrome is the world's most popular web browser today!</p>
</article>
<article>
<h2>Mozilla Firefox</h2>
<p>Mozilla Firefox is an open-source web browser developed by Mozilla. Firefox has been the second most popular web browser since January, 2018.</p>
</article>
<article>
<h2>Microsoft Edge</h2>
<p>Microsoft Edge is a web browser developed by Microsoft, released in 2015. Microsoft Edge replaced Internet Explorer.</p>
</article>
Output should be:
Browser Support for HTML <article> Tag
The numbers in the table specify the first browser version that fully supports the element.
The <aside> tag defines some content aside from the content it is placed in.
The aside content should be indirectly related to the surrounding content.
Tip: The <aside> content is often placed as a sidebar in a document.
Note: The <aside> element does not render as anything special in a browser. However, you can use CSS to style the <aside> element (see example below).
How to create HTML <aside> Tag
Display some content aside from the content it is placed in:
index.html
Example:HTML
<h1>The aside element</h1>
<p>My family and I visited The Epcot center this summer. The weather was nice, and Epcot was amazing! I had a great summer together with my family!</p>
<aside>
<h4>Epcot Center</h4>
<p>Epcot is a theme park at Walt Disney World Resort featuring exciting attractions, international pavilions, award-winning fireworks and seasonal special events.</p>
</aside>
Output should be:
What types of Browsers will Browser Support for HTML <aside> Tag
The numbers in the table specify the first browser version that fully supports the element.
What is HTML <audio> Tag Defines embedded sound content.
The <audio> tag is used to embed sound content in a document, such as music or other audio streams.
The <audio> tag contains one or more <source> tags with different audio sources. The browser will choose the first source it supports.
The text between the <audio> and </audio> tags will only be displayed in browsers that do not support the <audio> element.
There are three supported audio formats in HTML: MP3, WAV, and OGG.
Tips and Notes
Tip: For video files, look at the <video> tag.
How to create HTML <audio> Tag
Play a sound file:
index.html
Example:HTML
<audio controls>
<source src="https://www.w3schools.com/tags/horse.ogg" type="audio/ogg">
<source src="https://www.w3schools.com/tags/horse.ogg" type="audio/mpeg">
Your browser does not support the audio element.
</audio>
Output should be:
What Audio Format and Browser will Support for HTML <audio> Tag
Audio Format and Browser Support
Browser
MP3
WAV
OGG
Edge / IE
YES
YES*
YES*
Chrome
YES
YES
YES
Firefox
YES
YES
YES
Safari
YES
YES
NO
Opera
YES
YES
YES
index.html
What types of Browsers will Browser Support for HTML <audio> Tag
The numbers in the table specify the first browser version that fully supports the element.
Output should be:
Attributes for HTML <audio> Tag
Attribute
Value
Description
autoplay
autoplay
Specifies that the audio will start playing as soon as it is ready
controls
controls
Specifies that audio controls should be displayed (such as a play/pause button etc)
loop
loop
Specifies that the audio will start over again, every time it is finished
muted
muted
Specifies that the audio output should be muted
preload
auto
metadata
none
Specifies if and how the author thinks the audio should be loaded when the page loads
src
URL
Specifies the URL of the audio file
How to add HTML <audio> autoplay Attribute
An audio file that will automatically start playing:
Definition and Usage
The autoplay attribute is a boolean attribute.
When present, the audio will automatically start playing as soon as it can do so without stopping.
Note: Chromium browsers do not allow autoplay in most cases. However, muted autoplay is always allowed.
Add muted after autoplay to let your audio file start playing automatically (but muted).
Browser Support
The numbers in the table specify the first browser version that fully supports the attribute.
Syntax
<audio autoplay>
index.html
Example:HTML
<!DOCTYPE html>
<html>
<body>
<h1>The audio autoplay attribute</h1>
<p>Click on the play button to play a sound:</p>
<audio controls autoplay>
<source src="https://www.w3schools.com/tags/horse.ogg" type="audio/ogg">
<source src="https://www.w3schools.com/tags/horse.ogg" type="audio/mpeg">
Your browser does not support the audio element.
</audio>
</body>
</html>
Output should be:
How to add HTML <audio> controls Attribute
An <audio> element with browser default controls.
Definition and Usage
The controls attribute is a boolean attribute.
When present, it specifies that audio controls should be displayed.
Audio controls should include:
Play
Pause
Seeking
Volume
Browser Support
The numbers in the table specify the first browser version that fully supports the attribute.
Syntax
<audio controls>
index.html
Example:HTML
<!DOCTYPE html>
<html>
<body>
<h1>The audio controls attribute</h1>
<p>Click on the play button to play a sound:</p>
<audio controls>
<source src="https://www.w3schools.com/tags/horse.ogg" type="audio/ogg">
<source src="https://www.w3schools.com/tags/horse.ogg" type="audio/mpeg">
Your browser does not support the audio element.
</audio>
</body>
</html>
Output should be:
How to add HTML <audio> loop Attribute
A song that will start over again, every time it is finished:
Definition and Usage
The loop attribute is a boolean attribute.
When present, it specifies that the audio will start over again, every time it is finished.
Browser Support
The numbers in the table specify the first browser version that fully supports the attribute.
Syntax
<audio loop>
index.html
Example:HTML
<!DOCTYPE html>
<html>
<body>
<h1>The audio loop attribute</h1>
<p>Click on the play button to play a sound:</p>
<audio controls loop>
<source src="https://www.w3schools.com/tags/horse.ogg" type="audio/ogg">
<source src="https://www.w3schools.com/tags/horse.ogg" type="audio/mpeg">
Your browser does not support the audio element.
</audio>
</body>
</html>
Output should be:
How to add HTML <audio> muted Attribute
A muted audio.
Definition and Usage
The muted attribute is a boolean attribute.
When present, it specifies that the audio output should be muted.
Browser Support
The numbers in the table specify the first browser version that fully supports the attribute.
Syntax
<audio muted>
index.html
Example:HTML
<!DOCTYPE html>
<html>
<body>
<h1>The audio muted attribute</h1>
<p>Click on the play button to play a sound:</p>
<audio controls muted>
<source src="https://www.w3schools.com/tags/horse.ogg" type="audio/ogg">
<source src="https://www.w3schools.com/tags/horse.ogg" type="audio/mpeg">
Your browser does not support the audio element.
</audio>
</body>
</html>
Output should be:
How to add HTML <audio> preload Attribute
Author thinks that the sound should NOT be loaded when the page loads.
Definition and Usage
The preload attribute specifies if and how the author thinks that the audio file should be loaded when the page loads.
The preload attribute allows the author to provide a hint to the browser about what he/she thinks will lead to the best user experience. This attribute may be ignored in some instances.
Note: The preload attribute is ignored if autoplay is present.
Browser Support
The numbers in the table specify the first browser version that fully supports the attribute.
Syntax
<audio preload="auto|metadata|none">
Attribute Values
Value
Description
auto
The author thinks that the browser should load the entire audio file when the page loads
metadata
The author thinks that the browser should load only metadata when the page loads
none
The author thinks that the browser should NOT load the audio file when the page loads
index.html
Example:HTML
<!DOCTYPE html>
<html>
<body>
<h1>The audio preload attribute</h1>
<p>Click on the play button to play a sound:</p>
<audio controls preload="none">
<source src="https://www.w3schools.com/tags/horse.ogg" type="audio/ogg">
<source src="https://www.w3schools.com/tags/horse.ogg" type="audio/mpeg">
Your browser does not support the audio element.
</audio>
</body>
</html>
Output should be:
How to add HTML <audio> preload auto Attribute
auto
The author thinks that the browser should load the entire audio file when the page loads
index.html
Example:HTML
<!DOCTYPE html>
<html>
<body>
<h1>The audio preload attribute</h1>
<p>Click on the play button to play a sound:</p>
<audio controls preload="auto">
<source src="https://www.w3schools.com/tags/horse.ogg" type="audio/ogg">
<source src="https://www.w3schools.com/tags/horse.ogg" type="audio/mpeg">
Your browser does not support the audio element.
</audio>
</body>
</html>
Output should be:
How to add HTML <audio> preload metadata Attribute
metadata
The author thinks that the browser should load only metadata when the page loads
index.html
Example:HTML
<!DOCTYPE html>
<html>
<body>
<h1>The audio preload attribute</h1>
<p>Click on the play button to play a sound:</p>
<audio controls preload="metadata">
<source src="https://www.w3schools.com/tags/horse.ogg" type="audio/ogg">
<source src="https://www.w3schools.com/tags/horse.ogg" type="audio/mpeg">
Your browser does not support the audio element.
</audio>
</body>
</html>
Output should be:
How to add HTML <audio> preload none Attribute
none
The author thinks that the browser should NOT load the audio file when the page loads
index.html
Example:HTML
<!DOCTYPE html>
<html>
<body>
<h1>The audio preload attribute</h1>
<p>Click on the play button to play a sound:</p>
<audio controls preload="none">
<source src="https://www.w3schools.com/tags/horse.ogg" type="audio/ogg">
<source src="https://www.w3schools.com/tags/horse.ogg" type="audio/mpeg">
Your browser does not support the audio element.
</audio>
</body>
</html>
Output should be:
How to add HTML <audio> src Attribute
Play a sound.
Definition and Usage
The src attribute specifies the location (URL) of the audio file.
The example above uses an Ogg file, and will work in Firefox, Opera, Chrome, and Edge. However, to play the audio file in IE or Safari, we must use an MP3 file.
To make it work in all browsers - use <source> elements inside the <audio> element. Each <source> element can link to different audio files. The browser will use the first recognized format:
Browser Support
The numbers in the table specify the first browser version that fully supports the attribute.
Note: The src attribute is supported in all of the major browsers, however, the file format may not be supported in all browsers!
Syntax
<audio src="URL">
Attribute Values
Value
Description
URL
The URL of the audio file.
Possible values:
An absolute URL - points to another web site (like src="http://www.example.com/horse.ogg")
A relative URL - points to a file within a web site (like src="horse.ogg")
index.html
Example:HTML
<!DOCTYPE html>
<html>
<body>
<h1>The audio src attribute</h1>
<p>Click on the play button to play a sound:</p>
<audio src="https://www.w3schools.com/tags/horse.ogg" controls>
Your browser does not support the audio element.
</audio>
<p><b>Note:</b> The .ogg fileformat is not supported in IE or Safari.</p>
</body>
</html>
The <b> tag specifies bold text without any extra importance.
How to create HTML <b> Tag
Make some text bold (without marking it as important):
index.html
Example:HTML
<p>This is normal text - <b>and this is bold text</b>.</p>
Output should be:
Tips and Notes for HTML <b> Tag
Note: According to the HTML5 specification, the <b> tag should be used as a LAST resort when no other tag is more appropriate. The specification states that headings should be denoted with the <h1> to <h6> tags, emphasized text should be denoted with the <em> tag, important text should be denoted with the <strong> tag, and marked/highlighted text should be denoted with the <mark> tag.
Tip: You can also use the following CSS to set bold text: "font-weight: bold;".
What Audio Format and Browser will Support for HTML <b> Tag
Output should be:
How to Use CSS to set bold text
Use CSS to Set Bold Text
This is normal text - and this is bold text.
index.html
Example:HTML
<p>This is normal text - <span style="font-weight:bold;">and this is bold text</span>.</p>
Output should be:
How to set Default CSS Settings
Most browsers will display the <b> element with the following default values:
Change the default CSS settings to see the effect.
What Audio Format and Browser will Support for HTML <base> Tag
Output should be:
Attributes for HTML <base> Tag
Attribute
Value
Description
href
URL
Specifies the base URL for all relative URLs in the page
target
_blank
_parent
_self
_top
Specifies the default target for all hyperlinks and
How to add HTML <base> href Attribute
Specify a base URL for all relative URLs on a page.
Definition and Usage
The href attribute specifies the base URL for all relative URLs on a page.
Syntax
<base href="URL">
Attribute Values
Value
Description
URL
An absolute URL that acts as the base URL (like "http://www.example.com/")
index.html
Example:HTML
<!DOCTYPE html>
<html>
<head>
<base href="https://horje.com">
</head>
<body>
<h1>The base href attribute</h1>
<p><img src="https://horje.com/avatar.png" width="24" height="39" alt="Stickman"> - Notice that we have only specified a relative address for the image. Since we have specified a base URL in the head section, the browser will look for the image at "https://horje.com/avatar.png".</p>
</body>
</html>
Output should be:
How to add HTML <base> target Attribute
Specify a default target for all hyperlinks and forms on a page.
Definition and Usage
The target attribute specifies the default target for all hyperlinks and forms in the page.
This attribute can be overridden by using the target attribute for each hyperlink/form.
Browser Support
Syntax
<base target="_blank|_self|_parent|_top">
Attribute Values
Value
Description
_blank
Opens the link in a new window or tab
_self
Default. Opens the link in the same frame as it was clicked
_parent
Opens the link in the parent frame
_top
Opens the link in the full body of the window
index.html
Example:HTML
<!DOCTYPE html>
<html>
<head>
<base target="_blank">
</head>
<body>
<h1>The base target attribute</h1>
<p><a href="https://horje.com">Horje.com</a> - Notice that the link opens in a new window, even if it has no target="_blank" attribute. This is because the target attribute of the base element is set to "_blank".</p>
</body>
</html>
Output should be:
How to add HTML <base> target _blank Attribute
_blank
Opens the link in a new window or tab
index.html
Example:HTML
<!DOCTYPE html>
<html>
<head>
<base target="_blank">
</head>
<body>
<h1>The base target attribute</h1>
<p><a href="https://horje.com">Horje.com</a> - Notice that the link opens in a new window, even if it has no target="_blank" attribute. This is because the target attribute of the base element is set to "_blank".</p>
</body>
</html>
Output should be:
How to add HTML <base> target _self Attribute
_self
Default. Opens the link in the same frame as it was clicked
index.html
Example:HTML
<!DOCTYPE html>
<html>
<head>
<base target="_self">
</head>
<body>
<h1>The base target attribute</h1>
<p><a href="https://horje.com">Horje.com</a> - Notice that the link opens in a new window, even if it has no target="_blank" attribute. This is because the target attribute of the base element is set to "_self".</p>
</body>
</html>
Output should be:
How to add HTML <base> target _parent Attribute
_parent
Opens the link in the parent frame
index.html
Example:HTML
<!DOCTYPE html>
<html>
<head>
<base target="_parent">
</head>
<body>
<h1>The base target attribute</h1>
<p><a href="https://horje.com">Horje.com</a> - Notice that the link opens in a new window, even if it has no target="_blank" attribute. This is because the target attribute of the base element is set to "_parent".</p>
</body>
</html>
Output should be:
How to add HTML <base> target _top Attribute
_top
Opens the link in the full body of the window
index.html
Example:HTML
<!DOCTYPE html>
<html>
<head>
<base target="_top">
</head>
<body>
<h1>The base target attribute</h1>
<p><a href="https://horje.com">Horje.com</a> - Notice that the link opens in a new window, even if it has no target="_blank" attribute. This is because the target attribute of the base element is set to "_top".</p>
</body>
</html>
The <basefont> tag was used in HTML 4 to specify a default text-color, font-size or font-family for all the text in an HTML document.
What to Use Instead of HTML <basefont> Tag?
Specify a default text-color for a page (with CSS):
index.html
Example:HTML
<html>
<head>
<style>
body {
color: red;
}
</style>
</head>
<body>
<h1>This is a heading</h1>
<p>This is a paragraph.</p>
</body>
</html>
Output should be:
Specify a default font-family for a page (with CSS):
index.html
Example:HTML
<html>
<head>
<style>
body {
font-family: courier, serif;
}
</style>
</head>
<body>
<h1>This is a heading</h1>
<p>This is a paragraph.</p>
</body>
</html>
Output should be:
Specify a default font-size for a page (with CSS):
<html>
<head>
<style>
body {
font-size: 50px;
}
</style>
</head>
<body>
<h1>This is a heading</h1>
<p>This is a paragraph.</p>
</body>
</html>
Not supported in HTML5. Use CSS instead.
Defines big text.
What to Use Instead of HTML <big> Tag?
Specify different font-sizes for HTML elements (with CSS):
index.html
Example:HTML
<html>
<head>
<style>
p.ex1 {
font-size: 30px;
}
p.ex2 {
font-size: 50px;
}
</style>
</head>
<body>
<p>This is a normal paragraph.</p>
<p class="ex1">This is a bigger paragraph.</p>
<p class="ex2">This is a much bigger paragraph.</p>
</body>
</html>
The <blockquote> tag specifies a section that is quoted from another source.
Browsers usually indent <blockquote> elements (look at example below to see how to remove the indentation).
<blockquote> Defines a section that is quoted from another source
How to create HTML <blockquote> Tag
A section that is quoted from another source:
index.html
Example:HTML
<blockquote cite="http://www.worldwildlife.org/who/index.html">
For 50 years, WWF has been protecting the future of nature. The world's leading conservation organization, WWF works in 100 countries and is supported by 1.2 million members in the United States and close to 5 million globally.
</blockquote>
Output should be:
Tips and Notes for HTML <blockquote> Tag
Tip: Use <q> for inline (short) quotations.
What Type of Browsers will Support for HTML <blockquote> Tag
Following Browsers will support for HTML <blockquote> Tag
Attributes for HTML <blockquote> Tag
Attribute
Value
Description
cite
URL
Specifies the source of the quotation
How to Use CSS to remove the indentation from the blockquote element:
index.html
Example:HTML
<html>
<head>
<style>
blockquote {
margin-left: 0;
}
</style>
</head>
<body>
<p>Here is a quote from WWF's website:</p>
<blockquote cite="http://www.worldwildlife.org/who/index.html">
For 50 years, WWF has been protecting the future of nature. The world's leading conservation organization, WWF works in 100 countries and is supported by 1.2 million members in the United States and close to 5 million globally.
</blockquote>
</body>
</html>
Output should be:
How to set Default CSS Settings for HTML <blockquote> Tag
Most browsers will display the <blockquote> element with the following default values:
index.html
Example:HTML
<style>
blockquote {
display: block;
margin-top: 1em;
margin-bottom: 1em;
margin-left: 40px;
margin-right: 40px;
}
</style>
<blockquote cite="http://www.worldwildlife.org/who/index.html">
For 50 years, WWF has been protecting the future of nature. The world's leading conservation organization, WWF works in 100 countries and is supported by 1.2 million members in the United States and close to 5 million globally.
</blockquote>
Output should be:
How to add HTML <blockquote> cite Attribute
A section that is quoted from another source.
Definition and Usage
The cite attribute specifies the source of a quotation.
Tip: It's a good habit to always add the source of a quotation, if any.
Browser Support
The cite attribute does not render as anything special in any of the major browsers, but it can be used by search engines to get more information about the quotation.
Syntax
<blockquote cite="URL">
Attribute Values
Value
Description
URL
The source of the quotation.
Possible values:
An absolute URL - points to another web site (like cite="http://www.example.com/page.htm")
A relative URL - points to a file within a web site (like cite="page.htm")
index.html
Example:HTML
<!DOCTYPE html>
<html>
<body>
<h1>The blockquote element</h1>
<p>Here is a quote from WWF's website:</p>
<blockquote cite="http://www.worldwildlife.org/who/index.html">
For 50 years, WWF has been protecting the future of nature. The world's leading conservation organization, WWF works in 100 countries and is supported by 1.2 million members in the United States and close to 5 million globally.
</blockquote>
</body>
</html>
How to set Default CSS Settings for HTML <body> Tag
Follow the Example.
index.html
Example:HTML
<style>
body {
display: block;
margin: 8px;
}
body:focus {
outline: none;
}
</style>
<body>
The content of the document......
<p>Change the default CSS settings to see the effect.</p>
</body>
The <br> tag is useful for writing addresses or poems.
The <br> tag is an empty tag which means that it has no end tag.
How to create HTML <br> Tag
Insert single line breaks in a text:
index.html
Example:HTML
<p>To force<br> line breaks<br> in a text,<br> use the br<br> elemen
Output should be:
Tips and Notes for HTML <br> Tag
Note: Use the <br> tag to enter line breaks, not to add space between paragraphs.
What Type of Browsers will Support for HTML <br> Tag
Following Browsers will support for HTML <br> Tag
Hwo to Use HTML <br> Tag in a poem
Follow the Example.
index.html
Example:HTML
<p>Be not afraid of greatness.<br>
Some are born great,<br>
some achieve greatness,<br>
and others have greatness thrust upon them.</p>
<p><em>-William Shakespeare</em></p>
Inside a <button> element you can put text (and tags like <i>, <b>, <strong>, <br>, <img>, etc.). That is not possible with a button created with the <input> element!
Tip: Always specify the type attribute for a <button> element, to tell browsers what type of button it is.
How to create HTML <button> Tag
A clickable button is marked up as follows:
index.html
Example:HTML
<button type="button">Click Me!</button>
Output should be:
What Type of Browsers will Support for HTML <button> Tag
Following Browsers will support for HTML <button> Tag
Attributes for HTML <button> Tag
Attribute
Value
Description
autofocus
autofocus
Specifies that a button should automatically get focus when the page loads
disabled
disabled
Specifies that a button should be disabled
form
form_id
Specifies which form the button belongs to
formaction
URL
Specifies where to send the form-data when a form is submitted. Only for type="submit"
How to Use CSS to style buttons (with hover effect)
Follow the Example.
The button element - Styled with CSS
Use the :hover selector to change the style of the button when you move the mouse over it.
Tip: Use the transition-duration property to determine the speed of the "hover" effect:
When present, it specifies that the button should be disabled.
A disabled button is unusable and un-clickable.
The disabled attribute can be set to keep a user from clicking on the button until some other condition has been met (like selecting a checkbox, etc.). Then, a JavaScript could remove the disabled value, and make the button clickable again.
Browser Support
Syntax
<button disabled>
index.html
Example:HTML
<button type="button" disabled>Click Me!</button>
Output should be:
How to add HTML <button> hidden Attribute
Hide your HTML Button
index.html
Example:HTML
<button type="button" hidden>Click Me!</button>
Output should be:
How to add HTML <button> form Attribute
A button located outside a form (but still a part of the form):
Definition and Usage
The form attribute specifies the form the button belongs to.
The value of this attribute must be equal to the id attribute of a <form> element in the same document.
Browser Support
The numbers in the table specify the first browser version that fully supports the attribute.
Syntax
<button form="form_id">
Attribute Values
Value
Description
form_id
Specifies the form element the <button> element belongs to. The value of this attribute must be the id attribute of a <form> element in the same document.
index.html
Example:HTML
<!DOCTYPE html>
<html>
<body>
<h1>The button form attribute</h1>
<form action="/action_page.php" method="get" id="nameform">
<label for="fname">First name:</label>
<input type="text" id="fname" name="fname"><br><br>
<label for="lname">Last name:</label>
<input type="text" id="lname" name="lname">
</form>
<p>The button below is outside the form element, but still part of the form.</p>
<button type="submit" form="nameform" value="Submit">Submit</button>
</body>
</html>
Output should be:
How to add HTML <button> formaction Attribute
A form with two submit buttons. The first submit button submits the form data to "action_page.php", and the second submits to "action_page2.php":
Browser Support
The numbers in the table specify the first browser version that fully supports the attribute.
Syntax
<button type="submit" formaction="URL">
Attribute Values
Value
Description
URL
Specifies where to send the form data.
Possible values:
An absolute URL - the full address of a page (like href="http://www.example.com/formresult.asp")
A relative URL - points to a file within the current site (like href="formresult.asp")
A form with two submit buttons. The first submit button submits the form data with default character encoding, and the second submits the form data without character encoding.
Browser Support
The numbers in the table specify the first browser version that fully supports the attribute.
Syntax
<button type="submit" formenctype="value">
Attribute Values
Value
Description
application/x-www-form-urlencoded
Default. All characters will be encoded before sent
multipart/form-data
This value is necessary if the user will upload a file through the form
text/plain
Sends data without any encoding at all. Not recommended
index.html
Example:HTML
<!DOCTYPE html>
<html>
<body>
<h1>The button formenctype attribute</h1>
<form action="/action_page_binary.asp" method="post">
<label for="fname">First name:</label>
<input type="text" id="fname" name="fname" value="Ståle"><br><br>
<button type="submit">Submit with character encoding</button>
<button type="submit" formenctype="text/plain">Submit without character encoding</button>
</form>
</body>
</html>
Output should be:
How to add HTML <button> formenctype application/x-www-form-urlencoded Attribute
application/x-www-form-urlencoded
Default. All characters will be encoded before sent
index.html
Example:HTML
<!DOCTYPE html>
<html>
<body>
<h1>The button formenctype attribute</h1>
<form action="/action_page_binary.asp" method="post">
<label for="fname">First name:</label>
<input type="text" id="fname" name="fname" value="Ståle"><br><br>
<button type="submit">Submit with character encoding</button>
<button type="submit" formenctype="application/x-www-form-urlencoded">Submit without character encoding</button>
</form>
</body>
</html>
Output should be:
How to add HTML <button> formenctype multipart/form-data Attribute
multipart/form-data
This value is necessary if the user will upload a file through the form
index.html
Example:HTML
<!DOCTYPE html>
<html>
<body>
<h1>The button formenctype attribute</h1>
<form action="/action_page_binary.asp" method="post">
<label for="fname">First name:</label>
<input type="text" id="fname" name="fname" value="Ståle"><br><br>
<button type="submit">Submit with character encoding</button>
<button type="submit" formenctype="multipart/form-data">Submit without character encoding</button>
</form>
</body>
</html>
Output should be:
How to add HTML <button> formenctype text/plain Attribute
text/plain
Sends data without any encoding at all. Not recommended
index.html
Example:HTML
<!DOCTYPE html>
<html>
<body>
<h1>The button formenctype attribute</h1>
<form action="/action_page_binary.asp" method="post">
<label for="fname">First name:</label>
<input type="text" id="fname" name="fname" value="Ståle"><br><br>
<button type="submit">Submit with character encoding</button>
<button type="submit" formenctype="text/plain">Submit without character encoding</button>
</form>
</body>
</html>
Output should be:
How to add HTML <button> formmethod Attribute
A form with two submit buttons. The first submit button submits the form data with method="get", and the second submits the form data with method="post":
Definition and Usage
The formmethod attribute specifies which HTTP method to use when sending the form-data. This attribute overrides the form's method attribute.
The formmethod attribute is only used for buttons with type="submit".
The form-data can be sent as URL variables (with method="get") or as HTTP post (with method="post").
Notes on the "get" method:
it appends the form-data to the URL in name/value pairs
it is useful for form submissions where a user want to bookmark the result
There is a limit to how much data you can place in a URL (varies between browsers), therefore, you cannot be sure that all of the form-data will be correctly transferred
Never use the "get" method to pass sensitive information! (password or other sensitive information will be visible in the browser's address bar)
Notes on the "post" method:
it sends the form-data as an HTTP post transaction
Form submissions with the "post" method cannot be bookmarked
it is more robust and secure than "get"
it does not have size limitations
Browser Support
The numbers in the table specify the first browser version that fully supports the attribute.
Syntax
<button type="submit" formmethod="get|post">
Attribute Values
Value
Description
get
Appends the form-data to the URL: URL?name=value&name=value
A form with two submit buttons. The first submit button submits the form data with default validation, and the second submits the form data without validation:
Definition and Usage
The formnovalidate attribute is a boolean attribute.
When present, it specifies that the form-data should not be validated on submission. This attribute overrides the form's novalidate attribute.
The formnovalidate attribute is only used for buttons with type="submit".
Browser Support
The numbers in the table specify the first browser version that fully supports the attribute.
Syntax
<button type="submit" formnovalidate>
index.html
Example:HTML
<!DOCTYPE html>
<html>
<body>
<h1>The button formnovalidate attribute</h1>
<form action="/action_page.php" method="get">
<label for="email">Enter your email:</label>
<input type="email" id="email" name="email"><br><br>
<button type="submit">Submit</button>
<button type="submit" formnovalidate>Submit without validation</button>
</form>
<p><strong>Note:</strong> The formnovalidate attribute of the button tag is not supported in Safari.</p>
</body>
</html>
Output should be:
How to add HTML <button> formtarget Attribute
A form with two submit buttons. The first submit button submits the form data with default target ("_self"), and the second submits the form data to a new window (target="_blank"):
Definition and Usage
The formtarget attribute specifies where to display the response after submitting the form. This attribute overrides the form's target attribute.
The formtarget attribute is only used for buttons with type="submit".
Browser Support
The numbers in the table specify the first browser version that fully supports the attribute.
The popover element is hidden when you click the button
show
The popover element is showed when you click the button
toggle
Default value. The popover element is toggled between hidding and showing when you click the button
index.html
Example:HTML
<!DOCTYPE html>
<html>
<body>
<h1>The button popovertargetaction Attribute</h1>
<h1 popover id="myheader">Hello</h1>
<button popovertarget="myheader" popovertargetaction="show">Show popover</button>
<p>Click the button and it will show the popover element.</p>
</body>
</html>
Output should be:
How to add HTML <button> popovertargetaction hide Attribute
hide
The popover element is hidden when you click the button
index.html
Example:HTML
<!DOCTYPE html>
<html>
<body>
<h1>The button popovertargetaction Attribute</h1>
<h1 popover id="myheader">Hello</h1>
<button popovertarget="myheader" popovertargetaction="hide">Show popover</button>
<p>Click the button and it will show the popover element.</p>
</body>
</html>
Output should be:
How to add HTML <button> popovertargetaction show Attribute
show
The popover element is showed when you click the button
index.html
Example:HTML
<!DOCTYPE html>
<html>
<body>
<h1>The button popovertargetaction Attribute</h1>
<h1 popover id="myheader">Hello</h1>
<button popovertarget="myheader" popovertargetaction="show">Show popover</button>
<p>Click the button and it will show the popover element.</p>
</body>
</html>
Output should be:
How to add HTML <button> popovertargetaction toggle Attribute
toggle
Default value. The popover element is toggled between hidding and showing when you click the button
index.html
Example:HTML
<!DOCTYPE html>
<html>
<body>
<h1>The button popovertargetaction Attribute</h1>
<h1 popover id="myheader">Hello</h1>
<button popovertarget="myheader" popovertargetaction="toggle">Show popover</button>
<p>Click the button and it will show the popover element.</p>
</body>
</html>
Output should be:
How to add HTML <button> name Attribute
Two buttons with equal names, that submit different values when clicked.
Definition and Usage
The name attribute specifies the name for a <button> element.
The name attribute is used to reference form-data after the form has been submitted, or to reference the element in a JavaScript.
Tip: Several <button> elements can share the same name. This allows you to have several buttons with equal names, which can submit different values when used in a form.
Two buttons with equal names, that submit different values when clicked.
Definition and Usage
The value attribute specifies the initial value for a <button> in an HTML form.
Note: In a form, the button and its value is only submitted if the button itself was used to submit the form.
Browser Support
Note: If you use the <button> element in an HTML form, Internet Explorer, prior version 8, will submit the text between the <button> and </button> tags, while the other browsers will submit the content of the value attribute.
The <canvas> tag is used to draw graphics, on the fly, via scripting (usually JavaScript).
The <canvas> tag is transparent, and is only a container for graphics, you must use a script to actually draw the graphics.
Any text inside the <canvas> element will be displayed in browsers with JavaScript disabled and in browsers that do not support <canvas>.
How to create HTML <canvas> Tag
Draw a red rectangle on the fly, and show it inside the <canvas> element:
index.html
Example:HTML
<canvas id="myCanvas">
Your browser does not support the canvas tag.
</canvas>
<script>
let canvas = document.getElementById("myCanvas");
let ctx = canvas.getContext("2d");
ctx.fillStyle = "#FF0000";
ctx.fillRect(0, 0, 80, 80);
</script>
Output should be:
Tips and Notes for HTML <canvas> Tag
Tip: Learn more about the <canvas> element in our HTML Canvas Tutorial.
What Type of Browsers will Support for HTML <canvas> Tag
The numbers in the table specify the first browser version that fully supports the element.
Attributes for HTML <canvas> Tag
Attribute
Value
Description
height
pixels
Specifies the height of the canvas. Default value is 150
width
pixels
Specifies the width of the canvas Default value is 300
Another <canvas> example
Follow the Example
index.html
Example:HTML
<canvas id="myCanvas">
Your browser does not support the canvas tag.
</canvas>
<script>
let c = document.getElementById("myCanvas");
let ctx = c.getContext("2d");
ctx.fillStyle = "red";
ctx.fillRect(20, 20, 75, 50);
//Turn transparency on
ctx.globalAlpha = 0.2;
ctx.fillStyle = "blue";
ctx.fillRect(50, 50, 75, 50);
ctx.fillStyle = "green";
ctx.fillRect(80, 80, 75, 50);
</script>
Output should be:
Default CSS Settings For HTML <canvas> Tag
Most browsers will display the <canvas> element with the following default values:
index.html
Example:HTML
<style>
canvas {
border:1px solid black;
}
</style>
<canvas id="myCanvas">Your browser does not support the HTML5 canvas tag.</canvas>
<script>
let c = document.getElementById("myCanvas");
let ctx = c.getContext("2d");
ctx.fillStyle = "#FF0000";
ctx.fillRect(0, 0, 80, 100);
</script>
Output should be:
How to add HTML <canvas> height Attribute
A <canvas> element with a height and width of 200 pixels.
More "Try it Yourself" examples below.
Definition and Usage
The height attribute specifies the height of the <canvas> element, in pixels.
Tip: Use the width attribute to specify the width of the <canvas> element, in pixels.
Tip: Each time the height or width of a canvas is re-set, the canvas content will be cleared (see example at bottom of page).
Browser Support
The numbers in the table specify the first browser version that fully supports the attribute.
Syntax
<canvas height="pixels">
Attribute Values
Value
Description
pixels
Specifies the height of the canvas, in pixels (e.g. "100"). Default value is 150
The <caption> tag must be inserted immediately after the <table> tag.
Tip: By default, a table caption will be center-aligned above a table. However, the CSS properties text-align and caption-side can be used to align and place the caption.
The <center> tag was used in HTML4 to center-align text.
It Defines centered text.
How to create HTML <center> Tag
Center-align text (with CSS)
index.html
Example:HTML
<center>2024</center>
Output should be:
How to create HTML <center> Tag with CSS
Here is an example with CSS.
index.html
Example:HTML
<!DOCTYPE html>
<html>
<head>
<style>
h1 {text-align: center;}
p {text-align: center;}
div {text-align: center;}
</style>
</head>
<body>
<h1>This is a heading</h1>
<p>This is a paragraph.</p>
<div>This is a div.</div>
</body>
</html>
The <code> tag is used to define a piece of computer code. The content inside is displayed in the browser's default monospace font.
Tip: This tag is not deprecated. However, it is possible to achieve richer effect by using CSS (see example below).
Also look at:
Tag
Description
<samp>
Defines sample output from a computer program
<kbd>
Defines keyboard input
<var>
Defines a variable
<pre>
Defines preformatted text
How to create HTML <code> Tag
Define some text as computer code in a document
index.html
Example:HTML
<p>The HTML <code>button</code> tag defines a clickable button.</p>
<p>The CSS <code>background-color</code> property defines the background color of an element.</p>
Output should be:
What Type of Browsers will Support for HTML <code> Tag
Following Browsers will support for it.
How to Use CSS to style the <code> element
Follow the Example.
index.html
Example:HTML
<style>
code {
font-family: Consolas,"courier new";
color: crimson;
background-color: #f1f1f1;
padding: 2px;
font-size: 105%;
}
</style>
<p>The HTML <code>button</code> tag defines a clickable button.</p>
<p>The CSS <code>background-color</code> property defines the background color of an element.</p>
Output should be:
How to set Default CSS Settings for HTML <code> Tag
Most browsers will display the <code> element with the following default values:
index.html
Example:HTML
<style>
code {
font-family: monospace;
}
</style>
Output should be:
How to add HTML <samp> Tag for Coding view
Define some text as sample output from a computer program in a document:
Definition and Usage
The <samp> tag is used to define sample output from a computer program. The content inside is displayed in the browser's default monospace font.
Tip: This tag is not deprecated. However, it is possible to achieve richer effect by using CSS.
Also look at:
Tag
Description
<code>
Defines a piece of computer code
<kbd>
Defines keyboard input
<var>
Defines a variable
<pre>
Defines preformatted text
Browser Support
index.html
Example:HTML
<p>Message from my computer:</p>
<p><samp>File not found.<br>Press F1 to continue</samp></p>
Output should be:
How to set Default CSS Settings HTML <samp> Tag for Coding view
Most browsers will display the <samp> element with the following default values:
index.html
Example:HTML
<!DOCTYPE html>
<html>
<head>
<style>
samp {
font-family: monospace;
}
</style>
</head>
<body>
<p>A samp element is displayed like this:</p>
<samp>Sample output from a computer program</samp>
<p>Change the default CSS settings to see the effect.</p>
</body>
</html>
Output should be:
How to add HTML <kbd> Tag for Coding view
Define some text as keyboard input in a document.
More "Try it Yourself" examples below.
Definition and Usage
The <kbd> tag is used to define keyboard input. The content inside is displayed in the browser's default monospace font.
Tip: This tag is not deprecated. However, it is possible to achieve richer effect by using CSS (see example below).
Also look at:
Tag
Description
<code>
Defines a piece of computer code
<samp>
Defines sample output from a computer program
<var>
Defines a variable
<pre>
Defines preformatted text
Browser Support
index.html
Example:HTML
<!DOCTYPE html>
<html>
<body>
<h1>The kbd element</h1>
<p>Press <kbd>Ctrl</kbd> + <kbd>C</kbd> to copy text (Windows).</p>
<p>Press <kbd>Cmd</kbd> + <kbd>C</kbd> to copy text (Mac OS).</p>
</body>
</html>
Output should be:
How to add HTML <var> Tag for coding view
Define some text as variables in a document:
Definition and Usage
The <var> tag is used to defines a variable in programming or in a mathematical expression. The content inside is typically displayed in italic.
Tip: This tag is not deprecated. However, it is possible to achieve richer effect by using CSS.
Also look at:
Tag
Description
<code>
Defines a piece of computer code
<samp>
Defines sample output from a computer program
<kbd>
Defines keyboard input
<pre>
Defines preformatted text
Browser Support
index.html
Example:HTML
<!DOCTYPE html>
<html>
<body>
<h1>The var element</h1>
<p>The area of a triangle is: 1/2 x <var>b</var> x <var>h</var>, where <var>b</var> is the base, and <var>h</var> is the vertical height.</p>
</body>
</html>
Output should be:
How to set Default CSS Settings HTML <var> Tag for coding view
Most browsers will display the <var> element with the following default values.
index.html
Example:HTML
<!DOCTYPE html>
<html>
<head>
<style>
var {
font-style: italic;
}
</style>
</head>
<body>
<p>A var element is displayed like this:</p>
<var>Variable</var>
<p>Change the default CSS settings to see the effect.</p>
</body>
</html>
Output should be:
How to add HTML <pre> Tag
Preformatted text.
Definition and Usage
The <pre> tag defines preformatted text.
Text in a <pre> element is displayed in a fixed-width font, and the text preserves both spaces and line breaks. The text will be displayed exactly as written in the HTML source code.
Also look at:
Tag
Description
<code>
Defines a piece of computer code
<samp>
Defines sample output from a computer program
<kbd>
Defines keyboard input
<var>
Defines a variable
Browser Support
index.html
Example:HTML
<!DOCTYPE html>
<html>
<body>
<h1>The pre element</h1>
<pre>
Text in a pre element
is displayed in a fixed-width
font, and it preserves
both spaces and
line breaks
</pre>
</body>
</html>
Output should be:
How to create a pre-formatted text with a fixed width (with CSS)
Follow the Example.
index.html
Example:HTML
<div style="width:200px;overflow:auto">
<pre>This is a pre with a fixed width. It will use as much space as specified.</pre>
</div>
Output should be:
How to add Default CSS Settings HTML <pre> Tag for coing view
Most browsers will display the <pre> element with the following default values.
index.html
Example:HTML
<!DOCTYPE html>
<html>
<head>
<style>
pre {
display: block;
font-family: monospace;
white-space: pre;
margin: 1em 0;
}
</style>
</head>
<body>
<p>A pre element is displayed like this:</p>
<pre>
Text in a pre element
is displayed in a fixed-width
font, and it preserves
both spaces and
line breaks
</pre>
<p>Change the default CSS settings to see the effect.</p>
</body>
</html>
The <colgroup> tag specifies a group of one or more columns in a table for formatting.
The <colgroup> tag is useful for applying styles to entire columns, instead of repeating the styles for each cell, for each row.
Note: The <colgroup> tag must be a child of a <table> element, after any <caption> elements and before any <thead>, <tbody>, <tfoot>, and <tr> elements.
Tip: To define different properties to a column within a <colgroup>, use the <col> tag within the <colgroup> tag.
How to create HTML <colgroup> Tag
Set the background color of the three columns with the <colgroup> and <col> tags
The <datalist> tag specifies a list of pre-defined options for an <input> element.
The <datalist> tag is used to provide an "autocomplete" feature for <input> elements. Users will see a drop-down list of pre-defined options as they input data.
The <datalist> element's id attribute must be equal to the <input> element's list attribute (this binds them together).
How to create HTML <datalist> Tag
A datalist with pre-defined options (connected to an <input> element).
The datalist tag is not supported in Safari 12.0 (or earlier).
index.html
Example:HTML
<label for="browser">Choose your browser from the list:</label>
<input list="browsers" name="browser" id="browser">
<datalist id="browsers">
<option value="Edge">
<option value="Firefox">
<option value="Chrome">
<option value="Opera">
<option value="Safari">
</datalist>
Output should be:
What Type of Browsers will Support for HTML <datalist> Tag
The numbers in the table specify the first browser version that fully supports the element.
How to set Default CSS Settings for HTML <datalist> Tag
Most browsers will display the <datalist> element with the following default values:
The <del> tag defines text that has been deleted from a document. Browsers will usually strike a line through deleted text.
How to create HTML <del> Tag
A text with a deleted part, and a new, inserted part
index.html
Example:HTML
<p>My favorite color is <del>blue</del> <ins>red</ins>!</p>
Output should be:
Tips and Notes for HTML <del> Tag
Tip: Also look at the <ins> tag to markup inserted text.
What Type of Browsers will Support for HTML <del> Tag
Following Browsers will support for HTML <del> Tag
Attributes for HTML <del> Tag
Attribute
Value
Description
cite
URL
Specifies a URL to a document that explains the reason why the text was deleted/changed
datetime
YYYY-MM-DDThh:mm:ssTZD
Specifies the date and time of when the text was deleted/changed
How to Use CSS to style <del> and <ins>
The del and ins elements + CSS
index.html
Example:HTML
<!DOCTYPE html>
<html>
<head>
<style>
del {background-color: tomato;}
ins {background-color: yellow;}
</style>
</head>
<body>
<h1>The del and ins elements + CSS</h1>
<p>My favorite color is <del>blue</del> <ins>red</ins>!</p>
</body>
</html>
Output should be:
How to set Default CSS Settings for HTML <del> Tag
Most browsers will display the <del> element with the following default values
index.html
Example:HTML
<style>
del {
text-decoration: line-through;
}
</style>
Output should be:
How to add HTML <del> cite Attribute
A deleted text, with a URL to a document that explains why the text was deleted:
Definition and Usage
The cite attribute specifies a URL to a document that explains the reason why the text was deleted.
Browser Support
Note: The cite attribute has no visual effect in ordinary web browsers, but can be used by screen readers.
Syntax
<del cite="URL">
Attribute Values
Value
Description
URL
Specifies the address to the document that explains why the text was deleted.
Possible values:
An absolute URL - Points to another web site (like cite="http://www.example.com/page.htm")
A relative URL - Points to a page within a web site (like cite="page.htm")
index.html
Example:HTML
<!DOCTYPE html>
<html>
<body>
<h1>The del cite attribute</h1>
<p><del cite="del_demo_cite.htm">This text has been deleted</del></p>
</body>
</html>
Output should be:
How to add HTML <del> datetime Attribute
A deleted text, with a date and time of when the text was deleted.
Definition and Usage
The datetime attribute specifies the date and time when the text was deleted.
Browser Support
Note: The datetime attribute has no visual effect in ordinary web browsers, but can be used by screen readers.
Syntax
<del datetime="YYYY-MM-DDThh:mm:ssTZD">
Attribute Values
Value
Description
YYYY-MM-DDThh:mm:ssTZD
The date and time of when the text was deleted.
Explanation of components:
YYYY - year (e.g. 2012)
MM - month (e.g. 01 for January)
DD - day of the month (e.g. 08)
T or a space - a separator (required if time is also specified)
hh - hour (e.g. 22 for 10.00pm)
mm - minutes (e.g. 55)
ss - seconds (e.g. 03)
TZD - Time Zone Designator (Z denotes Zulu, also known as Greenwich Mean Time)
index.html
Example:HTML
<p>
<del datetime="2015-11-15T22:55:03Z">This text has been deleted</del>
</p>
The <details> tag specifies additional details that the user can open and close on demand.
The <details> tag is often used to create an interactive widget that the user can open and close. By default, the widget is closed. When open, it expands, and displays the content within.
Any sort of content can be put inside the <details> tag.
Tip: The <summary> tag is used in conjunction with <details> to specify a visible heading for the details.
How to create HTML <details> Tag
Specify details that the user can open and close on demand
index.html
Example:HTML
<details>
<summary>Epcot Center</summary>
<p>Epcot is a theme park at Walt Disney World Resort featuring exciting attractions, international pavilions, award-winning fireworks and seasonal special events.</p>
</details>
Output should be:
What Type of Browsers will Support for HTML <details> Tag
The numbers in the table specify the first browser version that fully supports the element.
Attributes for HTML <details> Tag
Attribute
Value
Description
open
open
Specifies that the details should be visible (open) to the user
How to set Default CSS Settings for HTML <details> Tag
The details and summary elements + CSS.
index.html
Example:HTML
<html>
<style>
details > summary {
padding: 4px;
width: 200px;
background-color: #eeeeee;
border: none;
box-shadow: 1px 1px 2px #bbbbbb;
cursor: pointer;
}
details > p {
background-color: #eeeeee;
padding: 4px;
margin: 0;
box-shadow: 1px 1px 2px #bbbbbb;
}
</style>
<body>
<details>
<summary>Epcot Center</summary>
<p>Epcot is a theme park at Walt Disney World Resort featuring exciting attractions, international pavilions, award-winning fireworks and seasonal special events.</p>
</details>
</body>
</html>
Output should be:
How to set Default CSS Settings for HTML <details> Tag
Most browsers will display the <details> element with the following default values.
index.html
Example:HTML
<style>
details {
display: block;
}
</style>
Output should be:
How to add HTML <details> open Attribute
Definition and Usage
The open attribute is a boolean attribute.
When present, it specifies that the details should be visible (open) to the user.
Browser Support
The numbers in the table specify the first browser version that fully supports the attribute.
Syntax
<details open>
index.html
Example:HTML
<details open>
<summary>Epcot Center</summary>
<p>Epcot is a theme park at Walt Disney World Resort featuring exciting attractions, international pavilions, award-winning fireworks and seasonal special events.</p>
</details>
The <dfn> tag stands for the "definition element", and it specifies a term that is going to be defined within the content.
The nearest parent of the <dfn> tag must also contain the definition/explanation for the term.
The term inside the <dfn> tag can be any of the following.
Method-1: How to create HTML <dfn> Tag
Just as the content of the <dfn> element:
index.html
Example:HTML
<p><dfn>HTML</dfn> is the standard markup language for creating web pages.</p>
Output should be:
Method-2: How to create HTML <dfn> Tag
with the title attribute added
index.html
Example:HTML
<p><dfn title="HyperText Markup Language">HTML</dfn> is the standard markup language for creating web pages.</p>
Output should be:
Method-3: How to create HTML <dfn> Tag
with an tag inside the element
index.html
Example:HTML
<p><dfn><abbr title="HyperText Markup Language">HTML</abbr></dfn> is the standard markup language for creating web pages.</p>
Output should be:
Method-4: How to create HTML <dfn> Tag
with the id attribute added. Then, whenever a term is used, it can refer back to the definition with an <a> tag
index.html
Example:HTML
<p><dfn id="html-def">HTML</dfn> is the standard markup language for creating web pages.</p>
<p>This is some text...</p>
<p>This is some text...</p>
<p>Learn <a href="#html-def">HTML</a> now.</p>
Output should be:
How to set Default CSS Settings for HTML <dfn> Tag
Most browsers will display the <dfn> element with the following default values.
The <dialog> tag defines a dialog box or subwindow.
The <dialog> element makes it easy to create popup dialogs and modals on a web page.
How to create HTML <diolog> Tag
Using the <dialog> element
index.html
Example:HTML
<dialog open>This is an open dialog window</dialog>
Output should be:
What Type of Browsers will Support for HTML <dialog> Tag
The numbers in the table specify the first browser version that fully supports the element.
Attributes for HTML <diolog> Tag
Attribute
Value
Description
open
open
Specifies that the dialog element is active and that the user can interact with it
How to add HTML <dialog> open Attribute
Using the <dialog> element.
Definition and Usage
The open attribute is a boolean attribute.
When present, it specifies that the dialog element is active and that the user can interact with it.
Browser Support
The numbers in the table specify the first browser version that fully supports the attribute.
Syntax
<dialog open>
index.html
Example:HTML
<!DOCTYPE html>
<html>
<body>
<h1>The dialog element</h1>
<p>This is some text.</p>
<p>This is some text.</p>
<dialog open>This is an open dialog window</dialog>
<p>This is some text.</p>
<p>This is some text.</p>
</body>
</html>
A <div> tag is used to maintain CSS Style in the most cases.
The <div> tag defines a division or a section in an HTML document.
The <div> tag is used as a container for HTML elements - which is then styled with CSS or manipulated with JavaScript.
The <div> tag is easily styled by using the class or id attribute.
Any sort of content can be put inside the <div> tag!
Note: By default, browsers always place a line break before and after the <div> element.
How to create HTML <div> Tag
A <div> section in a document that is styled with CSS
index.html
Example:HTML
<html>
<head>
<style>
.myDiv {
border: 5px outset red;
background-color: lightblue;
text-align: center;
}
</style>
</head>
<body>
<div class="myDiv">
<h2>This is a heading in a div element</h2>
<p>This is some text in a div element.</p>
</div>
</body>
</html>
Output should be:
What Type of Browsers will Support for HTML <div> Tag
Following Browsers will support for HTML <div> Tag.
How to set Default CSS Settings for HTML <div> Tag
Most browsers will display the <div> element with the following default values.
When present, it specifies that a group of related form elements (a fieldset) should be disabled.
A disabled fieldset is unusable and un-clickable.
The disabled attribute can be set to keep a user from using the fields until some other condition has been met (like selecting a checkbox, etc.). Then, a JavaScript could remove the disabled value, and make the fieldset usable again.
Browser Support
The numbers in the table specify the first browser version that fully supports the attribute.
A <fieldset> element located outside a form (but still a part of the form).
Definition and Usage
The form attribute specifies the form the fieldset belongs to.
The value of this attribute must be equal to the id attribute of a <form> element in the same document.
Browser Support
Syntax
<fieldset form="form_id">
Attribute Values
Value
Description
form_id
Specifies the form element the <fieldset> element belongs to. The value of this attribute must be the id attribute of a <form> element in the same document.
The <figure> tag specifies self-contained content, like illustrations, diagrams, photos, code listings, etc.
While the content of the <figure> element is related to the main flow, its position is independent of the main flow, and if removed it should not affect the flow of the document.
Tip: The <figcaption> element is used to add a caption for the <figure> element.
How to create HTML <figure> Tag
Use a <figure> element to mark up a photo in a document, and a <figcaption> element to define a caption for the photo
The <font> tag was used in HTML 4 to specify the font face, font size, and color of text.
What should Use Instead of HTML <font> Tag
Set the color of text (with CSS)
index.html
Example:HTML
<!DOCTYPE html>
<html>
<body>
<p style="color:red">This is a paragraph.</p>
<p style="color:blue">This is another paragraph.</p>
</body>
</html>
Output should be:
How to Set the font of text (with CSS)
See the Example.
index.html
Example:HTML
<!DOCTYPE html>
<html>
<body>
<p style="font-family:verdana">This is a paragraph.</p>
<p style="font-family:'Courier New'">This is another paragraph.</p>
</body>
</html>
Output should be:
How to Set the size of text (with CSS)
See the Example
index.html
Example:HTML
<!DOCTYPE html>
<html>
<body>
<p style="font-size:30px">This is a paragraph.</p>
<p style="font-size:11px">This is another paragraph.</p>
</body>
</html>
Specifies how the form-data should be encoded when submitting it to the server (only for method="post")
method
get
post
Specifies the HTTP method to use when sending form-data
name
text
Specifies the name of a form
novalidate
novalidate
Specifies that the form should not be validated when submitted
rel
external
help
license
next
nofollow
noopener
noreferrer
opener
prev
search
Specifies the relationship between a linked resource and the current document
target
_blank
_self
_parent
_top
Specifies where to display the response that is received after submitting the form
How to use An HTML form with checkboxes
See the Example
index.html
Example:HTML
<form action="/action_page.php" method="get">
<input type="checkbox" name="vehicle1" value="Bike">
<label for="vehicle1"> I have a bike</label><br>
<input type="checkbox" name="vehicle2" value="Car">
<label for="vehicle2"> I have a car</label><br>
<input type="checkbox" name="vehicle3" value="Boat" checked>
<label for="vehicle3"> I have a boat</label><br><br>
<input type="submit" value="Submit">
</form>
How to set Default CSS Settings for HTML <form> Tag
Most browsers will display the <form> element with the following default values
index.html
Example:HTML
<style>
form {
display: block;
margin-top: 0em;
}
</style>
Output should be:
How to add HTML <form> accept-charset Attribute
A form with an accept-charset attribute.
Definition and Usage
The accept-charset attribute specifies the character encodings that are to be used for the form submission.
Browser Support
Syntax
<form accept-charset="character_set">
Attribute Values
Value
Description
character_set
A space-separated list of one or more character encodings that are to be used for the form submission.
Common values:
UTF-8 - Character encoding for Unicode
ISO-8859-1 - Character encoding for the Latin alphabet
In theory, any character encoding can be used, but no browser understands all of them. The more widely a character encoding is used, the better the chance that a browser will understand it.
To view all available character encodings, go to our Character sets reference.
Default. Appends the form-data to the URL in name/value pairs: URL?name=value&name=value
index.html
Example:HTML
<!DOCTYPE html>
<html>
<body>
<h1>The form method="get" attribute</h1>
<form action="/action_page.php" method="get" target="_blank">
<label for="fname">First name:</label>
<input type="text" id="fname" name="fname"><br><br>
<label for="lname">Last name:</label>
<input type="text" id="lname" name="lname"><br><br>
<input type="submit" value="Submit">
</form>
<p>Click on the submit button, and the input will be sent to a page on the server called "action_page.php".</p>
</body>
</html>
Output should be:
How to add HTML <form> method post Attribute
post
Sends the form-data as an HTTP post transaction
index.html
Example:HTML
<!DOCTYPE html>
<html>
<body>
<h1>The form method="get" attribute</h1>
<form action="/action_page.php" method="post" target="_blank">
<label for="fname">First name:</label>
<input type="text" id="fname" name="fname"><br><br>
<label for="lname">Last name:</label>
<input type="text" id="lname" name="lname"><br><br>
<input type="submit" value="Submit">
</form>
<p>Click on the submit button, and the input will be sent to a page on the server called "action_page.php".</p>
</body>
</html>
Output should be:
How to add HTML <form> name Attribute
An HTML form with a name attribute.
Definition and Usage
The name attribute specifies the name of a form.
The name attribute is used to reference elements in a JavaScript, or to reference form data after a form is submitted.
The rel attribute specifies the relationship between the current document and the linked document.
Browser Support
Syntax
<form rel="value">
Attribute Values
Value
Description
external
Specifies that the referenced document is not a part of the current site
help
Links to a help document
license
Links to copyright information for the document
next
The next document in a selection
nofollow
Links to an unendorsed document, like a paid link.
("nofollow" is used by Google, to specify that the Google search spider should not follow that link)
noopener
noreferrer
Specifies that the browser should not send a HTTP referrer header if the user follows the hyperlink
opener
prev
The previous document in a selection
search
Links to a search tool for the document
index.html
Example:HTML
<!DOCTYPE html>
<html>
<body>
<h2 style="color: green">Horje</h2>
<h2>HTML form Attribute</h2>
<b>This will avoid information passed to the post page </b>
<!-- It avoids passing the referrer information
to target website by removing the referral
info from the HTTP header.
It is safe to use -->
<form rel="noreferrer" action="mypage.php">
<input type="search" placeholder="search here" />
<input type="button" value="search" />
</form>
</body>
</html>
Output should be:
How to add HTML <form> rel external Attribute
external
Specifies that the referenced document is not a part of the current site
index.html
Example:HTML
<!DOCTYPE html>
<html>
<body>
<h2 style="color: green">Horje</h2>
<h2>HTML form Attribute</h2>
<b>This will avoid information passed to the post page </b>
<!-- It avoids passing the referrer information
to target website by removing the referral
info from the HTTP header.
It is safe to use -->
<form rel="external" action="mypage.php">
<input type="search" placeholder="search here" />
<input type="button" value="search" />
</form>
</body>
</html>
Links to an unendorsed document, like a paid link.
("nofollow" is used by Google, to specify that the Google search spider should not follow that link)
The <h1> to <h6> tags are used to define HTML headings.
<h1> defines the most important heading. <h6> defines the least important heading.
Note: Only use one <h1> per page - this should represent the main heading/subject for the whole page. Also, do not skip heading levels - start with <h1>, then use <h2>, and so on.
How to create HTML <h1> to <h6> Tags
The six different HTML headings
index.html
Example:HTML
<h1>This is heading 1</h1>
<h2>This is heading 2</h2>
<h3>This is heading 3</h3>
<h4>This is heading 4</h4>
<h5>This is heading 5</h5>
<h6>This is heading 6</h6>
Output should be:
Which browser will support for HTML <h1> to <h6> Tags
See the Screen
How to Set the background color and text color of headings (with CSS)
<h1 style="text-align:center">This is heading 1</h1>
<h2 style="text-align:left">This is heading 2</h2>
<h3 style="text-align:right">This is heading 3</h3>
<h4 style="text-align:justify">This is heading 4</h4>
Output should be:
Most browsers will display the <h2> element with the following default values
The <head> element is a container for metadata (data about data) and is placed between the <html> tag and the <body> tag.
Metadata is data about the HTML document. Metadata is not displayed.
Metadata typically define the document title, character set, styles, scripts, and other meta information.
The following elements can go inside the <head> element:
<title> (required in every HTML document)
<style>
<base>
<link>
<meta>
<script>
<noscript>
How to create HTML <head> Tag
A simple HTML document, with a <title> tag inside the head section:
index.html
Example:HTML
<!DOCTYPE html>
<html lang="en">
<head>
<title>Title of the document</title>
</head>
<body>
<h1>This is a heading</h1>
<p>This is a paragraph.</p>
</body>
</html>
Output should be:
Which browser will support for HTML <head> Tag
Browsers will support
How to add The <base> tag inside <head>
(specifies a default URL and target for all links on a page)
See the Example
(adds style information to a page)
See the Example.
index.html
Example:HTML
<!DOCTYPE html>
<html>
<head>
<style>
h1 {color:red;}
p {color:blue;}
</style>
</head>
<body>
<h1>This is a heading</h1>
<p>This is a paragraph.</p>
</body>
</html>
Output should be:
How to add The <link> tag inside <head>
(links to an external style sheet) See the Example
index.html
Example:HTML
<html>
<head>
<link rel="stylesheet" type="text/css" href="styles.css">
</head>
<body>
<h1>I am formatted with a linked style sheet</h1>
<p>Me too!</p>
</body>
</html>
Output should be:
How to set Default CSS Settings for HTML <head> Tag
The <header> Tag element represents a container for introductory content or a set of navigational links.
A <header> Tag element typically contains:
one or more heading elements (<h1> - <h6>)
logo or icon
authorship information
Note: You can have several <header> elements in one HTML document. However, <header> cannot be placed within a <footer>, <address> or another <header> element.
How to create HTML <header> Tag
A header for an <article>
index.html
Example:HTML
<article>
<header>
<h1>A heading here</h1>
<p>Posted by John Doe</p>
<p>Some additional information here</p>
</header>
<p>Lorem Ipsum dolor set amet....</p>
</article>
Output should be:
Which browser will support for HTML <header> Tag
The numbers in the table specify the first browser version that fully supports the element.
How should be HTML <header> Tag Page
A page header
index.html
Example:HTML
<header>
<h1>Main page heading here</h1>
<p>Posted by John Doe</p>
</header>
Output should be:
How to set Default CSS Settings for HTML <header> Tag
Most browsers will display the <header> element with the following default values
The <hr> tag defines a thematic break in an HTML page (e.g. a shift of topic).
The <hr> element is most often displayed as a horizontal rule that is used to separate content (or define a change) in an HTML page.
How to create HTML <hr> Tag
Use the <hr> tag to define thematic changes in the content
index.html
Example:HTML
<h1>The Main Languages of the Web</h1>
<p>HTML is the standard markup language for creating Web pages. HTML describes the structure of a Web page, and consists of a series of elements. HTML elements tell the browser how to display the content.</p>
<hr>
<p>CSS is a language that describes how HTML elements are to be displayed on screen, paper, or in other media. CSS saves a lot of work, because it can control the layout of multiple web pages all at once.</p>
<hr>
<p>JavaScript is the programming language of HTML and the Web. JavaScript can change HTML content and attribute values. JavaScript can change CSS. JavaScript can hide and show HTML elements, and more.</p>
The <html> tag represents the root of an HTML document.
The <html> tag is the container for all other HTML elements (except for the <!DOCTYPE> tag).
Note: You should always include the lang attribute inside the <html> tag, to declare the language of the Web page. This is meant to assist search engines and browsers.
How to create HTML <html> Tag
A simple HTML document
index.html
Example:HTML
<!DOCTYPE html>
<html lang="en">
<head>
<title>Title of the document</title>
</head>
<body>
<h1>This is a heading</h1>
<p>This is a paragraph.</p>
</body>
</html>
Output should be:
Which browser will support for HTML <html> Tag
See which browser will support
Attributes for HTML <html> Tag
Attribute
Value
Description
xmlns
http://www.w3.org/1999/xhtml
Specifies the XML namespace attribute (If you need your content to conform to XHTML)
How to set Default CSS Settings for HTML <html> Tag
Most browsers will display the <html> element with the following default values
The <i> tag defines a part of text in an alternate voice or mood. The content inside is typically displayed in italic.
The <i> tag is often used to indicate a technical term, a phrase from another language, a thought, a ship name, etc.
Use the <i> element only when there is not a more appropriate semantic element, such as:
<em> (emphasized text)
<strong> (important text)
<mark> (marked/highlighted text)
<cite> (the title of a work)
<dfn> (a definition term)
How to create HTML <i> Tag
Mark up text that is set off from the normal prose in a document
index.html
Example:HTML
<p><i>Lorem ipsum</i> is the most popular filler text in history.</p>
<p>The <i>RMS Titanic</i>, a luxury steamship, sank on April 15, 1912 after striking an iceberg.</p>
Output should be:
Which browser will support for HTML <i> Tag
See which browsers will support.
How to set Default CSS Settings for HTML <i> Tag
Most browsers will display the <i> element with the following default values
An inline frame is used to embed another document within the current HTML document.
Tip: Use CSS to style the <iframe> (see example below).
Tip: It is a good practice to always include a title attribute for the <iframe>. This is used by screen readers to read out what the content of the <iframe> is.
How to create HTML <iframe> Tag
An inline frame is marked up as follows
index.html
Example:HTML
<iframe src="https://horje.com/learn/682/what-is-html-i-tag" title="Horje Free Online Web Tutorials">
</iframe>
Output should be:
Which browser will support for HTML <iframe> Tag
See which browser will support for HTML iFrame
Attributes for HTML <iframe> Tag
Attribute
Value
Description
allow
Specifies a feature policy for the <iframe>
allowfullscreen
true
false
Set to true if the <iframe> can activate fullscreen mode by calling the requestFullscreen() method
allowpaymentrequest
true
false
Set to true if a cross-origin <iframe> should be allowed to invoke the Payment Request API
height
pixels
Specifies the height of an <iframe>. Default height is 150 pixels
loading
eager
lazy
Specifies whether a browser should load an iframe immediately or to defer loading of iframes until some conditions are met
The allow attribute specifies a feature policy to define what permissions are available to an <iframe>.
Applicable Elements
The allow Attribute can be used with the following elements:
<iframe>
HTML <iframe>allow Attribute
The <iframe> tag represents a nested browsing context and is used to embed an HTML document in your current HTML document.
The allow attribute can be used with the <iframe> attribute to specify a permissions policy to determine what features are available to it when it is initialized. I.e., permitting the <iframe> to access the computer’s camera or microphone.
How to Add HTML <iframe> allowfullscreen attribute
iframe, short for "inline frame", is the most common way that the allowfullscreen attribute is used. Thanks mostly to video sites like YouTube and Vimeo, videos embedded by third-party websites using an iframe can use the allowfullscreen attribute to enable a "fullscreen" button within the iframe.
Here is sample code for a YouTube video embedded using an iframe along with the allowfullscreen attribute:
How to add HTML <iframe> allowpaymentrequest Attribute
Note: This attribute is Experimental.
The allowpaymentrequest set to true if a cross-origin <iframe> should be allowed to invoke the Payment Request API.
Note: This attribute is considered a legacy attribute and redefined as allow="payment".
Attribute Values
Value
Description
allowpaymentrequest
This is a boolean attribute, the presence of a boolean attribute on an element represents the true value, and the absence of the attribute represents the false value.
index.html
Example:HTML
<iframe src="https://www.paypal.com/" allowpaymentrequest>
Your browser does not support iframe element.
</iframe>
How to add HTML <iframe> height Attribute
An <iframe> with a specified height and width of 200 pixels:
Definition and Usage
The height attribute specifies the height of an <iframe>, in pixels.
The default height is 150 pixels.
Browser Support
Syntax
<iframe height="pixels">
Attribute Values
Value
Description
pixels
The height of the inline frame in pixels (e.g. height="100")
The load event fires when the eagerly-loaded content has all been loaded. At that time, it's entirely possible (or even likely) that there may be lazily-loaded images or iframes within the visual viewport that haven't yet loaded.
The name attribute specifies a name for an iframe.
This name attribute can be used to reference the element in a JavaScript, or as the value of the target attribute of an <a> or <form> element, or the formtarget attribute of an <input> or <button> element.
Browser Support
Syntax
<iframe name="name">
Attribute Values
Value
Description
name
Specifies a name for the <iframe>
index.html
Example:HTML
<iframe src="https://horje.com/learn/683/what-is-html-iframe-tag" name="iframe_a">
<p>Your browser does not support iframes.</p>
</iframe>
Output should be:
How to add HTML <iframe> referrerpolicy Attribute
Specifies that no referrer information will be sent along with the request:
Definition and Usage
The referrerpolicy attribute specifies which referrer information to send when fetching an iframe.
Browser Support
The numbers in the table specify the first browser version that fully supports the attribute.
No referrer information will be sent along with a request
no-referrer-when-downgrade
Default. The referrer header will not be sent to origins without HTTPS
origin
Send only scheme, host, and port to the request client
origin-when-cross-origin
For cross-origin requests: Send only scheme, host, and port. For same-origin requests: Also include the path
same-origin
For same-origin requests: Referrer info will be sent. For cross-origin requests: No referrer info will be sent
strict-origin
Only send referrer info if the security level is the same (e.g. HTTPS to HTTPS). Do not send to a less secure destination (e.g. HTTPS to HTTP)
strict-origin-when-cross-origin
Send full path when performing a same-origin request. Send only origin when the security level stays the same (e.g. HTTPS to HTTPS). Send no header to a less secure destination (HTTPS to HTTP)
unsafe-url
Send origin, path and query string (but not fragment, password, or username). This value is considered unsafe
How to add HTML <iframe> referrerpolicy with strict-origin Attribute
Only send referrer info if the security level is the same (e.g. HTTPS to HTTPS). Do not send to a less secure destination (e.g. HTTPS to HTTP)
index.html
Example:HTML
<!DOCTYPE html>
<html>
<body>
<h1>The iframe referrerpolicy attribute</h1>
<iframe src="https://w3schools.com/" referrerpolicy="strict-origin">
<p>Your browser does not support iframes.</p>
</iframe>
</body>
</html>
Output should be:
How to add HTML <iframe> referrerpolicy with strict-origin-when-cross-origin Attribute
Send full path when performing a same-origin request. Send only origin when the security level stays the same (e.g. HTTPS to HTTPS). Send no header to a less secure destination (HTTPS to HTTP)
index.html
Example:HTML
<!DOCTYPE html>
<html>
<body>
<h1>The iframe referrerpolicy strict-origin-when-cross-origin attribute</h1>
<iframe src="https://horje.com/" referrerpolicy="strict-origin-when-cross-origin">
<p>Your browser does not support iframes.</p>
</iframe>
</body>
</html>
Output should be:
How to add HTML <iframe> referrerpolicy with unsafe-url Attribute
Send origin, path and query string (but not fragment, password, or username). This value is considered unsafe
index.html
Example:HTML
<!DOCTYPE html>
<html>
<body>
<h1>The iframe referrerpolicy unsafe-url attribute</h1>
<iframe src="https://horje.com/" referrerpolicy="unsafe-url">
<p>Your browser does not support iframes.</p>
</iframe>
</body>
</html>
Output should be:
What is HTML <iframe> sandbox Attribute
An <iframe> with extra restrictions.
Definition and Usage
The sandbox attribute enables an extra set of restrictions for the content in the iframe.
When the sandbox attribute is present, and it will:
treat the content as being from a unique origin
block form submission
block script execution
disable APIs
prevent links from targeting other browsing contexts
prevent content from using plugins (through <embed>, <object>, <applet>, or other)
prevent the content to navigate its top-level browsing context
block automatically triggered features (such as automatically playing a video or automatically focusing a form control)
The value of the sandbox attribute can either be empty (then all restrictions are applied), or a space-separated list of pre-defined values that will REMOVE the particular restrictions.
Browser Support
The numbers in the table specify the first browser version that fully supports the attribute.
Syntax
<iframe sandbox="value">
Attribute Values
Value
Description
(no value)
Applies all restrictions
allow-forms
Allows form submission
allow-modals
Allows to open modal windows
allow-orientation-lock
Allows to lock the screen orientation
allow-pointer-lock
Allows to use the Pointer Lock API
allow-popups
Allows popups
allow-popups-to-escape-sandbox
Allows popups to open new windows without inheriting the sandboxing
allow-presentation
Allows to start a presentation session
allow-same-origin
Allows the iframe content to be treated as being from the same origin
allow-scripts
Allows to run scripts
allow-top-navigation
Allows the iframe content to navigate its top-level browsing context
allow-top-navigation-by-user-activation
Allows the iframe content to navigate its top-level browsing context
index.html
Example:HTML
<!DOCTYPE html>
<html>
<body>
<h1>The iframe sandbox attribute</h1>
<iframe src="https://horje.com/" sandbox>
<p>Your browser does not support iframes.</p>
</iframe>
<p>The "Get date and time" button will run a script in the inline frame.</p>
<p>Since the sandbox attribute is set, the content of the inline frame is not allowed to run scripts.</p>
<p>You can add "allow-scripts" to the sandbox attribute, to allow the JavaScript to run.</p>
</body>
</html>
Output should be:
How to add HTML <iframe> sandbox allow-forms Attribute
Allows form submission.
The "Submit" button will submit the form in the inline frame.
Since the sandbox attribute is set to an empty string (""), the submission of the form in the inline frame will be blocked.
Add "allow-forms" to the sandbox attribute, to allow form submission.
index.html
Example:HTML
<!DOCTYPE html>
<html>
<body>
<h1>The iframe sandbox attribute</h1>
<iframe src="https://horje.com" sandbox="allow-forms">
<p>Your browser does not support iframes.</p>
</iframe>
<p>The "Submit" button will submit the form in the inline frame.</p>
<p>Since the sandbox attribute is set to an empty string (""), the submission of the form in the inline frame will be blocked.</p>
<p>Add "allow-forms" to the sandbox attribute, to allow form submission.</p>
</body>
</html>
Output should be:
How to add HTML <iframe> sandbox allow-modals Attribute
Allows to open modal windows
index.html
Example:HTML
<iframe src="https://horje.com" sandbox="allow-modals">
<p>Your browser does not support iframes.</p>
</iframe>
Output should be:
How to add HTML <iframe> sandbox allow-orientation-lock Attribute
How to Add left and right margins to image (with CSS)
See the Example
index.html
Example:HTML
<p><img src="https://horje.com/avatar.png" alt="Smiley face" width="42" height="42"> This is some text. This is some text. This is some text.</p>
<h2>Image with left and right margins</h2>
<p><img src="https://horje.com/avatar.png" alt="Smiley face" width="42" height="42" style="vertical-align:middle;margin:0px 50px">This is some text. This is some text. This is some text.</p>
Output should be:
How to Add top and bottom margins to image (with CSS)
See the Example
index.html
Example:HTML
<p><img src="https://horje.com/avatar.png" alt="Smiley face" width="42" height="42"> This is some text. This is some text. This is some text.</p>
<h2>Image with top and bottom margins</h2>
<p><img src="https://horje.com/avatar.png" alt="Smiley face" width="42" height="42" style="vertical-align:middle;margin:50px 0px">This is some text. This is some text. This is some text.</p>
Output should be:
How to insert images from another folder or from another web site
See the Example
index.html
Example:HTML
<img src="https://horje.com/avatar.png" alt="Stickman" width="24" height="39">
<p>Insert an image from a web site:</p>
<img src="https://horje.com/avatar.png" alt="Lamp" width="32" height="32">
Output should be:
How to add a hyperlink to an image
See The Example
index.html
Example:HTML
<!DOCTYPE html>
<html>
<body>
<h1>Add a hyperlink to an image</h1>
<p><a href="https://horje.com">
<img src="https://horje.com/avatar.png" alt="Horje.com" width="100" height="132">
</a></p>
</body>
</html>
Output should be:
How to create an image map, with clickable regions. Each region is a hyperlink
How to set Default CSS Settings for HTML <img> Tag
See the Example
index.html
Example:HTML
<style>
img {
display: inline-block;
}
</style>
<p>Some text <img src="https://horje.com/avatar.png" alt="Smiley face" width="42" height="42"> some text.</p>
Output should be:
How to add HTML <img> alt Attribute
The required alt attribute specifies an alternate text for an image, if the image cannot be displayed.
The alt attribute provides alternative information for an image if a user for some reason cannot view it (because of slow connection, an error in the src attribute, or if the user uses a screen reader).
Tip: To create a tooltip for an image, use the title attribute!
Browsers Support
Syntax
<img alt="text">
Attribute Values
Value
Description
text
Specifies an alternate text for an image.
Guidelines for the alt text:
The text should describe the image if the image contains information
The text should explain where the link goes if the image is inside an <a> element
Use alt="" if the image is only for decoration
An image with an alternate text specified.
index.html
Example:HTML
<img src="https://horje.com/avatar.png" alt="Girl in a jacket" width="500" height="600">
Output should be:
How to add HTML <img> height Attribute
The height attribute specifies the height of an image, in pixels.
Tip: Always specify both the height and width attributes for images. If height and width are set, the space required for the image is reserved when the page is loaded. However, without these attributes, the browser does not know the size of the image, and cannot reserve the appropriate space to it. The effect will be that the page layout will change during loading (while the images load).
Tip: Downsizing a large image with the height and width attributes forces a user to download the large image (even if it looks small on the page). To avoid this, rescale the image with a program before using it on a page.
Browser Support
Syntax
<img height="pixels">
Attribute Values
Value
Description
pixels
The height in pixels (e.g. height="100")
index.html
Example:HTML
<img src="https://horje.com/avatar.png" alt="Girl in a jacket" width="500" height="600">
Output should be:
How to HTML <img> ismap Attribute
The ismap attribute is a boolean attribute.
When present, it specifies that the image is part of a server-side image map (an image map is an image with clickable areas).
When clicking on a server-side image map, the click coordinates are sent to the server as a URL query string.
Note: The ismap attribute is allowed only if the <img> element is a descendant of an <a> element with a valid href attribute.
he loading attribute specifies whether a browser should load an image immediately or to defer loading of off-screen images until for example the user scrolls near them.
Tip: Add loading="lazy" only to images which are positioned below the fold.
Browser Support
Attribute Values
Value
Description
eager
Default. Loads an image immediately
lazy
Defer loading of images until some conditions are met
The longdesc attribute specifies a hyperlink to a detailed description of an image.
Several examples of how to use the longdesc attribute.
Browser Support
Syntax
<img longdesc="string">
Attribute Values
Value
Description
string
A hyperlink to a detailed description of an image.
Possible values:
An id to another element
An absolute URL - points to another web site (like longdesc="http://www.example.com/description.txt")
A relative URL - points to a file within a web site (like longdesc="description.txt")
index.html
Example:HTML
<!DOCTYPE html>
<html>
<body>
<h1>The img longdesc attribute</h1>
<!-- The description is on the same page as the image -->
<img src="https://horje.com/avatar.png" alt="Horje.com" width="100" height="132" longdesc="#w3htmlExplained">
<!-- The description is in an external page -->
<img src="https://horje.com/avatar.png" alt="Horje.com" width="100" height="132" longdesc="w3html.txt">
<!-- The description is one of several within an external page -->
<img src="https://horje.com/avatar.png" alt="Horje.com" width="100" height="132" longdesc="http://example.com/desc#item3">
<!-- The description is included in a data:URI -->
<img src="https://horje.com/avatar.png" alt="Horje.com" width="100" height="132" longdesc="data:text/html;charset=utf-8;,%3C!DOCTYPE%20html%3E%3Chtml%3E%3Chead%3E%3Ctitle%3EDescription%20of%20the%20Logo%3C/title%3E%3C/head%3E%3Cbody%3E%3Cp%3ESome%20description%20goes%20here%3C/body%3E%3C/html%3E">
<div id="w3htmlExplained">
<h2>Image https://horje.com/avatar.png</h2>
<p>Description of the image...</p>
</div>
</body>
</html>
Output should be:
How to add HTML <img> referrerpolicy Attribute
Set the referrerpolicy for an image:
The referrerpolicy attribute specifies which referrer information to use when fetching an image.
Browser Support
The numbers in the table specify the first browser version that fully supports the attribute.
An image with a height of 600 pixels and a width of 500 pixels:
The width attribute specifies the width of an image, in pixels.
Tip: Always specify both the height and width attributes for images. If height and width are set, the space required for the image is reserved when the page is loaded. However, without these attributes, the browser does not know the size of the image, and cannot reserve the appropriate space to it. The effect will be that the page layout will change during loading (while the images load).
Tip: Downsizing a large image with the height and width attributes forces a user to download the large image (even if it looks small on the page). To avoid this, rescale the image with a program before using it on a page.
Browser Support
Syntax
<img width="pixels">
Attribute Values
Value
Description
pixels
The width in pixels (e.g. width="100")
index.html
Example:HTML
<img src="https://horje.com/avatar.png" alt="Girl in a jacket" width="500" height="600">
Output should be:
How to add HTML <img> crossorigin Attribute
The crossorigin attribute on an <img> tag specifies that CORS is supported when loading an image from a third party server or domain.
CORS is a standard mechanism used to retrieve files from other domains.
The required src attribute specifies the URL of the image.
There are two ways to specify the URL in the src attribute:
1. Absolute URL - Links to an external image that is hosted on another website. Example: src="https://horje.com/avatar.png".
Notes: External images might be under copyright. If you do not get permission to use it, you may be in violation of copyright laws. In addition, you cannot control external images; it can suddenly be removed or changed.
2. Relative URL - Links to an image that is hosted within the website. Here, the URL does not include the domain name. If the URL begins without a slash, it will be relative to the current page. Example: src="img_girl.jpg". If the URL begins with a slash, it will be relative to the domain. Example: src="/images/img_girl.jpg".
Tip: It is almost always best to use relative URLs. They will not break if you change domain.
Note: A broken link icon and the alt text are shown if the browser cannot find the image.
Browser Support
Syntax
<img src="URL">
Attribute Values
Value
Description
URL
The URL of the image.
Possible values:
An absolute URL - points to another web site (like src="http://www.example.com/image.gif")
A relative URL - points to a file within a web site (like src="image.gif")
index.html
Example:HTML
<img src="https://horje.com/avatar.png" alt="Girl in a jacket" width="500" height="600">
Output should be:
How to add HTML <img> srcset Attribute
The srcset attribute on an <img> tag specifies multiple image resources (URLs) for the img element.
Together with the sizes attribute they create responsive images that adjust according to browser conditions.
A srcset attribute on an <img> element.
Resizing the browser will adjust the image file used.
The usemap attribute specifies an image as a client-side image map (an image map is an image with clickable areas).
The usemap attribute is associated with a <map> element's name attribute, and creates a relationship between the <img> and the <map>.
Note: The usemap attribute cannot be used if the <img> element is a descendant of an <a> or <button> element.
index.html
Example:HTML
<!DOCTYPE html>
<html>
<body>
<h1>The map and area elements</h1>
<p>Click on the computer, the phone, or the cup of coffee to go to a new page and read more about the topic:</p>
<img src="https://horje.com/avatar.png" alt="Workplace" usemap="#workmap" width="400" height="379">

<map name="workmap">
  <area shape="rect" coords="34,44,270,350" alt="Computer" href="computer.htm">
  <area shape="rect" coords="290,172,333,250" alt="Phone" href="phone.htm">
  <area shape="circle" coords="337,300,44" alt="Cup of coffee" href="coffee.htm">
</map>
</body>
</html>
Output should be:
How to add HTML <img> width Attribute
An image with a height of 600 pixels and a width of 500 pixels:
The width attribute specifies the width of an image, in pixels.
Tip: Always specify both the height and width attributes for images. If height and width are set, the space required for the image is reserved when the page is loaded. However, without these attributes, the browser does not know the size of the image, and cannot reserve the appropriate space to it. The effect will be that the page layout will change during loading (while the images load).
Tip: Downsizing a large image with the height and width attributes forces a user to download the large image (even if it looks small on the page). To avoid this, rescale the image with a program before using it on a page.
Browser Support
Syntax
<img width="pixels">
Attribute Values
Value
Description
pixels
The width in pixels (e.g. width="100")
index.html
Example:HTML
<img src="https://horje.com/avatar.png" alt="Girl in a jacket" width="200" height="300">
An HTML form with three input fields; two text fields and one submit button.
Definition and Usage
The <input> tag specifies an input field where the user can enter data.
The <input> element is the most important form element.
The <input> element can be displayed in several ways, depending on the type attribute.
The different input types are as follows:
<input type="button">
<input type="checkbox">
<input type="color">
<input type="date">
<input type="datetime-local">
<input type="email">
<input type="file">
<input type="hidden">
<input type="image">
<input type="month">
<input type="number">
<input type="password">
<input type="radio">
<input type="range">
<input type="reset">
<input type="search">
<input type="submit">
<input type="tel">
<input type="text"> (default value)
<input type="time">
<input type="url">
<input type="week">
Look at the type attribute to see examples for each input type!
Tips and Notes
Tip: Always use the <label> tag to define labels for <input type="text">, <input type="checkbox">, <input type="radio">, <input type="file">, and <input type="password">.
Browser Support
Attributes
Attribute
Value
Description
accept
file_extension
audio/*
video/*
image/* media_type
Specifies a filter for what file types the user can pick from the file input dialog box (only for type="file")
alt
text
Specifies an alternate text for images (only for type="image")
autocomplete
on
off
Specifies whether an <input> element should have autocomplete enabled
autofocus
autofocus
Specifies that an <input> element should automatically get focus when the page loads
checked
checked
Specifies that an <input> element should be pre-selected when the page loads (for type="checkbox" or type="radio")
dirname
inputname.dir
Specifies that the text direction will be submitted
disabled
disabled
Specifies that an <input> element should be disabled
form
form_id
Specifies the form the <input> element belongs to
formaction
URL
Specifies the URL of the file that will process the input control when the form is submitted (for type="submit" and type="image")
An HTML form with an image that represents the submit button.
alt
text
Specifies an alternate text for images (only for type="image")
Definition and Usage
The alt attribute provides an alternate text for the user, if he/she for some reason cannot view the image (because of slow connection, an error in the src attribute, or if the user uses a screen reader).
Note: The alt attribute can only be used with <input type="image">.
An HTML form where the username and password does NOT get autocompleted.
Definition and Usage
The autocomplete attribute specifies if browsers should try to predict the value of an input field or not. You can also specify which type of value you expect in the input field.
Browser Support
The numbers in the table specify the first browser version that fully supports the attribute.
Tip: In some browsers you may need to activate an autocomplete function for this to work (Look under "Preferences" in the browser's menu).
Syntax
<input autocomplete="on|off|type-of-value">
Attribute Values
Value
Description
on
Default. Autocomplete is on (enabled)
off
Autocomplete is off (disabled)
address-line1
Expects the first line of the street address
address-line2
Expects the second line of the street address
address-line3
Expects the third line of the street address
address-level1
Expects the first level of the address, e.g. the county
address-level2
Expects the second level of the address, e.g. the city
address-level3
Expects the third level of the address
address-level4
Expects the fourth level of the address
street-address
Expects the full street address
country
Expects the country code
country-name
Expects the country name
postal-code
Expects the post code
name
Expects the full name
additional-name
Expects the middle name
family-name
Expects the last name
give-name
Expects the first name
honoric-prefix
Expects the title, like "Mr", "Ms" etc.
honoric-suffix
Expects the suffix, like "5", "Jr." etc.
nickname
Expects the nickname
organization-title
Expects the job title
username
Expects the username
new-password
Expects a new password
current-password
Expects the current password
bday
Expects the full birthday date
bday-day
Expects the day of the birthday date
bday-month
Expects the month of the birthday date
bday-year
Expects the year of the birthday date
sex
Expects the gender
one-time-code
Expects a one time code for verification etc.
organization
Expects the company name
cc-name
Expects the credit card owner's full name
cc-given-name
Expects the credit card owner's first name
cc-additional-name
Expects the credit card owner's middle name
cc-family-name
Expects the credit card owner's full name
cc-number
Expects the credit card's number
cc-exp
Expects the credit card's expiration date
cc-exp-month
Expects the credit card's expiration month
cc-exp-year
Expects the credit card's expiration year
cc-csc
Expects the CVC code
cc-type
Expects the credit card's type of payment
transaction-currency
Expects the currency
transaction-amount
Expects a number, the amount
language
Expects the preferred language
url
Expects a we address
email
Expects the email address
photo
Expects an image
tel
Expects the full phone number
tel-country-code
Expects the country code of the phone number
tel-national
Expects the phone number with no country code
tel-area-code
Expects the area code of the phone number
tel-local
Expects the phone number with no country code and no area code
tel-local-prefix
Expects the local prefix of the phone number
tel-local-suffix
Expects the local suffix of the phone number
tel-extension
Expects the extension code of the phone number
impp
Expects the url of an instant messaging protocol endpoint
When present, it specifies that an <input> element should be pre-selected (checked) when the page loads.
The checked attribute can be used with <input type="checkbox"> and <input type="radio">.
The checked attribute can also be set after the page load, with a JavaScript.
Browser Support
The numbers in the table specify the first browser version that fully supports the attribute.
Syntax
<input checked>
index.html
Example:HTML
<!DOCTYPE html>
<html>
<body>
<h1>The input checked attribute</h1>
<form action="/action_page.php" method="get">
<input type="checkbox" name="vehicle1" value="Bike">
<label for="vehicle1"> I have a bike</label><br>
<input type="checkbox" name="vehicle2" value="Car">
<label for="vehicle2"> I have a car</label><br>
<input type="checkbox" name="vehicle3" value="Boat" checked>
<label for="vehicle3"> I have a boat</label><br><br>
<input type="submit" value="Submit">
</form>
</body>
</html>
Output should be:
How to add HTML <input> dirname Attribute
An HTML form where the field's text direction will be submitted:
Definition and Usage
The dirname attribute enables the submission of the text direction of the input field
The dirname attribute's value is always the name of the input field, followed by ".dir".
Browser Support
The numbers in the table specify the first browser version that fully supports the attribute.
index.html
Example:HTML
<!DOCTYPE html>
<html>
<body>
<h1>The dirname attribute</h1>
<form action="/action_page.php">
<label for="fname">First name:</label>
<input type="text" id="fname" name="fname" dirname="fname.dir">
<input type="submit" value="Submit">
</form>
<p>When the form is being submitted, the text direction of the input field will also be submitted.</p>
</body>
</html>
Output should be:
How to add HTML <input> disabled Attribute
An HTML form with a disabled input field:
Definition and Usage
The disabled attribute is a boolean attribute.
When present, it specifies that the <input> element should be disabled.
A disabled input element is unusable and un-clickable.
The disabled attribute can be set to keep a user from using the <input> element until some other condition has been met (like selecting a checkbox, etc.). Then, a JavaScript could remove the disabled value, and make the <input> element usable.
Tip: Disabled <input> elements in a form will not be submitted!
Browser Support
The numbers in the table specify the first browser version that fully supports the attribute.
An input field located outside the HTML form (but still a part of the form):
Definition and Usage
The form attribute specifies the form the <input> element belongs to.
Browser Support
The numbers in the table specify the first browser version that fully supports the attribute.
Syntax
<input form="form_id">
Attribute Values
Value
Description
form_id
Specifies the form element the <input> element belongs to. The value of this attribute must be the id attribute of a <form> element in the same document.
index.html
Example:HTML
<!DOCTYPE html>
<html>
<body>
<h1>The form attribute</h1>
<form action="/action_page.php" id="form1">
<label for="fname">First name:</label>
<input type="text" id="fname" name="fname"><br><br>
<input type="submit" value="Submit">
</form>
<p>The "Last name" field below is outside the form element, but still part of the form.</p>
<label for="lname">Last name:</label>
<input type="text" id="lname" name="lname" form="form1">
</body>
</html>
Output should be:
How to add HTML <input> formaction Attribute
An HTML form with two submit buttons, with different actions:
Definition and Usage
The formaction attribute specifies the URL of the file that will process the input control when the form is submitted.
The formaction attribute overrides the action attribute of the <form> element.
Note: The formaction attribute is used with type="submit" and type="image".
Browser Support
The numbers in the table specify the first browser version that fully supports the attribute.
Syntax
<input formaction="URL">
Attribute Values
Value
Description
URL
Specifies the URL of the file that will process the input control when the form is submitted.
Possible values:
An absolute URL - the full address of a page (like href="http://www.example.com/formresult.asp")
A relative URL - points to a file within the current site (like href="formresult.asp")
The second submit button overrides the HTTP method of the form:
Definition and Usage
The formmethod attribute defines the HTTP method for sending form-data to the action URL.
The formmethod attribute overrides the method attribute of the <form> element.
Note: The formmethod attribute can be used with type="submit" and type="image".
The form-data can be sent as URL variables (method="get") or as an HTTP post transaction (method="post").
Notes on the "get" method:
This method appends the form-data to the URL in name/value pairs
This method is useful for form submissions where a user want to bookmark the result
There is a limit to how much data you can place in a URL (varies between browsers), therefore, you cannot be sure that all of the form-data will be correctly transferred
Never use the "get" method to pass sensitive information! (password or other sensitive information will be visible in the browser's address bar)
Notes on the "post" method:
This method sends the form-data as an HTTP post transaction
Form submissions with the "post" method cannot be bookmarked
The "post" method is more robust and secure than "get", and "post" does not have size limitations
Browser Support
The numbers in the table specify the first browser version that fully supports the attribute.
Syntax
<input formmethod="get|post">
Attribute Values
Value
Description
get
Default. Appends the form-data to the URL in name/value pairs: URL?name=value&name=value
The response is displayed in the same frame (this is default)
_parent
The response is displayed in the parent frame
_top
The response is displayed in the full body of the window
framename
The response is displayed in a named iframe
index.html
Example:HTML
<form action="/action_page.php">
<input type="text" id="fname" name="fname"><br><br>
<label for="lname">Last name:</label>
<input type="text" id="lname" name="lname"><br><br>
<input type="submit" value="Submit as normal">
<input type="submit" formtarget="_blank" value="Submit to a new window">
</form>
Output should be:
How to add HTML <input> formtarget _blank Attribute
_blank
The response is displayed in a new window or tab
index.html
Example:HTML
<!DOCTYPE html>
<html>
<body>
<h1>The formtarget attribute</h1>
<form action="/action_page.php">
<label for="fname">First name:</label>
<input type="text" id="fname" name="fname"><br><br>
<label for="lname">Last name:</label>
<input type="text" id="lname" name="lname"><br><br>
<input type="submit" value="Submit as normal">
<input type="submit" formtarget="_blank" value="Submit to a new window/tab">
</form>
</body>
</html>
Output should be:
How to add HTML <input> formtarget _self Attribute
_self
The response is displayed in the same frame (this is default)
index.html
Example:HTML
<!DOCTYPE html>
<html>
<body>
<h1>The formtarget attribute</h1>
<form action="/action_page.php">
<label for="fname">First name:</label>
<input type="text" id="fname" name="fname"><br><br>
<label for="lname">Last name:</label>
<input type="text" id="lname" name="lname"><br><br>
<input type="submit" value="Submit as normal">
<input type="submit" formtarget="_self" value="Submit to a new window/tab">
</form>
</body>
</html>
Output should be:
How to add HTML <input> formtarget _parent Attribute
_parent
The response is displayed in the parent frame
index.html
Example:HTML
<!DOCTYPE html>
<html>
<body>
<h1>The formtarget attribute</h1>
<form action="/action_page.php">
<label for="fname">First name:</label>
<input type="text" id="fname" name="fname"><br><br>
<label for="lname">Last name:</label>
<input type="text" id="lname" name="lname"><br><br>
<input type="submit" value="Submit as normal">
<input type="submit" formtarget="_parent" value="Submit to a new window/tab">
</form>
</body>
</html>
Output should be:
How to add HTML <input> formtarget _top Attribute
_top
The response is displayed in the full body of the window
index.html
Example:HTML
<!DOCTYPE html>
<html>
<body>
<h1>The formtarget attribute</h1>
<form action="/action_page.php">
<label for="fname">First name:</label>
<input type="text" id="fname" name="fname"><br><br>
<label for="lname">Last name:</label>
<input type="text" id="lname" name="lname"><br><br>
<input type="submit" value="Submit as normal">
<input type="submit" formtarget="_top" value="Submit to a new window/tab">
</form>
</body>
</html>
Output should be:
How to add HTML <input> formtarget framename Attribute
framename
The response is displayed in a named iframe
index.html
Example:HTML
<!DOCTYPE html>
<html>
<body>
<h1>The formtarget attribute</h1>
<form action="/action_page.php">
<label for="fname">First name:</label>
<input type="text" id="fname" name="fname"><br><br>
<label for="lname">Last name:</label>
<input type="text" id="lname" name="lname"><br><br>
<input type="submit" value="Submit as normal">
<input type="submit" formtarget="framename" value="Submit to a new window/tab">
</form>
</body>
</html>
Output should be:
How to set HTML <input> height Attribute
Define an image as the submit button, with height and width attributes:
Definition and Usage
The height attribute specifies the height of the <input> element.
Note: The height attribute is used only with <input type="image">.
Tip: Always specify both the height and width attributes for images. If height and width are set, the space required for the image is reserved when the page is loaded. However, without these attributes, the browser does not know the size of the image, and cannot reserve the appropriate space to it. The effect will be that the page layout will change during loading (while the images load).
Browser Support
The numbers in the table specify the first browser version that fully supports the attribute.
An HTML form with an input field that can contain only three letters (no numbers or special characters).
Definition and Usage
The pattern attribute specifies a regular expression that the <input> element's value is checked against on form submission.
Note: The pattern attribute works with the following input types: text, date, search, url, tel, email, and password.
Tip: Use the global title attribute to describe the pattern to help the user.
Tip: Learn more about regular expressions in our JavaScript tutorial.
Browser Support
The numbers in the table specify the first browser version that fully supports the attribute.
Syntax
<input pattern="regexp">
Attribute Values
Value
Description
regexp
Specifies a regular expression that the <input> element's value is checked against
index.html
Example:HTML
<form action="/action_page.php">
<label for="country_code">Country code:</label>
<input type="text" id="country_code" name="country_code"
pattern="[A-Za-z]{3}" title="Three letter country code"><br><br>
<input type="submit">
</form>
Output should be:
How to add HTML <input> pattern Specific characters Attribute
An <input> element with type="password" that must contain 8 or more characters:
index.html
Example:HTML
<form action="/action_page.php">
<label for="pwd">Password:</label>
<input type="password" id="pwd" name="pwd"
pattern=".{8,}" title="Eight or more characters">
<input type="submit">
</form>
Output should be:
How to add HTML <input> pattern uppercase and lowercase letter Attribute
An <input> element with type="password" that must contain 8 or more characters that are of at least one number, and one uppercase and lowercase letter.
index.html
Example:HTML
<form action="/action_page.php">
<label for="pwd">Password:</label>
<input type="password" id="pwd" name="pwd"
pattern="(?=.*\d)(?=.*[a-z])(?=.*[A-Z]).{8,}"
title="Must contain at least one number and one uppercase and lowercase letter, and at least 8 or more characters">
<input type="submit">
</form>
Output should be:
How to add HTML <input> pattern characters @,.;''#$%^&8 Attribute
An <input> element with type="email" that must be in the following order: characters@characters.domain (characters followed by an @ sign, followed by more characters, and then a "."
After the "." sign, add at least 2 letters from a to z
How to add HTML <input> pattern characters http:// or https://
An <input> element with type="url" that must start with http:// or https:// followed by at least one character.
If you enter the characters: jahddd then you will get warning: characters Please Enter a URL.
index.html
Example:HTML
<!DOCTYPE html>
<html>
<body>
<h1>The input pattern attribute</h1>
<p>A form with a URL field that must start with http:// or https:// followed by at least one character:</p>
<form action="/action_page.php">
<label for="website">Homepage:</label>
<input type="url" id="website" name="website" pattern="https?://.+" title="Include http://">
<input type="submit">
</form>
</body>
</html>
Output should be:
How to add HTML <input> placeholder Attribute
A telephone input field with a placeholder text.
Definition and Usage
The placeholder attribute specifies a short hint that describes the expected value of an input field (e.g. a sample value or a short description of the expected format).
The short hint is displayed in the input field before the user enters a value.
Note: The placeholder attribute works with the following input types: text, search, url, tel, email, and password.
Browser Support
The numbers in the table specify the first browser version that fully supports the attribute.
Syntax
<input placeholder="text">
Attribute Values
Value
Description
text
Specifies a short hint that describes the expected value of the input field
The popover element is hidden when you click the button
show
The popover element is showed when you click the button
toggle
Default value. The popover element is toggled between hidding and showing when you click the button
index.html
Example:HTML
<!DOCTYPE html>
<html>
<body>
<h1>The input popovertargetaction Attribute</h1>
<h1 popover id="myheader">Hello</h1>
<input type="button" popovertarget="myheader" popovertargetaction="show" value="Show popover">
<p>Click the button and it will show the popover element.</p>
</body>
</html>
Output should be:
How to add HTML <input> popovertargetaction hide Attribute
hide
The popover element is hidden when you click the button
When present, it specifies that an input field is read-only.
A read-only input field cannot be modified (however, a user can tab to it, highlight it, and copy the text from it).
The readonly attribute can be set to keep a user from changing the value until some other conditions have been met (like selecting a checkbox, etc.). Then, a JavaScript can remove the readonly value, and make the input field editable.
Note: A form will still submit an input field that is readonly, but will not submit an input field that is disabled!
Browser Support
The numbers in the table specify the first browser version that fully supports the attribute.
When present, it specifies that an input field must be filled out before submitting the form.
Note: The required attribute works with the following input types: text, search, url, tel, email, password, date pickers, number, checkbox, radio, and file.
Browser Support
The numbers in the table specify the first browser version that fully supports the attribute.
An HTML form with two input fields; one text field and one submit button.
Definition and Usage
The type attribute specifies the type of <input> element to display.
If the type attribute is not specified, the default type is "text".
Browser Support
Syntax
<input type="value">
Attribute Values
Value
Description
button
Defines a clickable button (mostly used with a JavaScript to activate a script)
checkbox
Defines a checkbox
color
Defines a color picker
date
Defines a date control (year, month, day (no time))
datetime-local
Defines a date and time control (year, month, day, time (no timezone)
email
Defines a field for an e-mail address
file
Defines a file-select field and a "Browse" button (for file uploads)
hidden
Defines a hidden input field
image
Defines an image as the submit button
month
Defines a month and year control (no timezone)
number
Defines a field for entering a number
password
Defines a password field
radio
Defines a radio button
range
Defines a range control (like a slider control)
reset
Defines a reset button
search
Defines a text field for entering a search string
submit
Defines a submit button
tel
Defines a field for entering a telephone number
text
Default. Defines a single-line text field
time
Defines a control for entering a time (no timezone)
url
Defines a field for entering a URL
week
Defines a week and year control (no timezone)
index.html
Example:HTML
<input type="text" id="username" name="username">
Output should be:
How to add HTML <input> type button Attribute
A push button that activates a JavaScript when it is clicked.
index.html
Example:HTML
<!DOCTYPE html>
<html>
<body>
<h1>Show a Push Button</h1>
<p>The button below activates a JavaScript function when it is clicked.</p>
<form>
<input type="button" value="Click me" onclick="msg()">
</form>
<script>
function msg() {
alert("Hello world!");
}
</script>
</body>
</html>
Output should be:
How to add HTML <input> type checkbox Attribute
Input type: checkbox
Checkboxes let a user select one or more options of a limited number of choices.
index.html
Example:HTML
<input type="checkbox" id="vehicle1" name="vehicle1" value="Bike">
<label for="vehicle1"> I have a bike</label><br>
<input type="checkbox" id="vehicle2" name="vehicle2" value="Car">
<label for="vehicle2"> I have a car</label><br>
<input type="checkbox" id="vehicle3" name="vehicle3" value="Boat">
<label for="vehicle3"> I have a boat</label><br>
Output should be:
How to add HTML <input> type color Attribute
Input type: color
Select a color from a color picker.
index.html
Example:HTML
<label for="favcolor">Select your favorite color:</label>
<input type="color" id="favcolor" name="favcolor">
Define a control for entering a number whose exact value is not important (like a slider control). Default range is 0 to 100. However, you can set restrictions on what numbers are accepted with the min, max, and step attributes.
Define a control for entering a time (no time zone).
index.html
Example:HTML
<label for="appt">Select a time:</label>
<input type="time" id="appt" name="appt">
Output should be:
How to add HTML <input> type url Attribute
Input type: url
Define a field for entering a URL.
Tip: Safari on iPhone recognizes the url input type, and changes the on-screen keyboard to match it (adds .com option).
index.html
Example:HTML
<label for="homepage">Add your homepage:</label>
<input type="url" id="homepage" name="homepage">
Output should be:
How to add HTML <input> type week Attribute
Input type: week
Define a week and year control (no time zone).
index.html
Example:HTML
<label for="week">Select a week:</label>
<input type="week" id="week" name="week">
Output should be:
How to add HTML <input type="button">
button
Defines a clickable button (mostly used with a JavaScript to activate a script)
A push button that activates a JavaScript function when it is clicked.
Definition and Usage
The <input type="button"> defines a clickable button (mostly used with a JavaScript to activate a script).
Browser Support
The numbers in the table specify the first browser version that fully supports the element.
Syntax
<input type="button">
index.html
Example:HTML
<input type="button" value="Click me" onclick="msg()">
Output should be:
">
How to add HTML <input type="checkbox">
checkbox
Defines a checkbox
Let the user select one or more options of a limited number of choices.
Definition and Usage
The <input type="checkbox"> defines a checkbox.
The checkbox is shown as a square box that is ticked (checked) when activated.
Checkboxes are used to let a user select one or more options of a limited number of choices.
Tip: Always add the <label> tag for best accessibility practices!
Browser Support
Syntax
<input type="checkbox">
index.html
Example:HTML
<input type="checkbox" id="vehicle1" name="vehicle1" value="Bike">
<label for="vehicle1"> I have a bike</label><br>
<input type="checkbox" id="vehicle2" name="vehicle2" value="Car">
<label for="vehicle2"> I have a car</label><br>
<input type="checkbox" id="vehicle3" name="vehicle3" value="Boat">
<label for="vehicle3"> I have a boat</label><br>
Output should be:
">
How to add HTML <input type="color">
Show a color picker (with a predefined red value).
color
Defines a color picker
Definition and Usage
The <input type="color"> defines a color picker.
The default value is #000000 (black). The value must be in seven-character hexadecimal notation.
Tip: Always add the <label> tag for best accessibility practices!
Browser Support
The numbers in the table specify the first browser version that fully supports the element.
Syntax
<input type="color">
index.html
Example:HTML
<label for="favcolor">Select your favorite color:</label>
<input type="color" id="favcolor" name="favcolor" value="#ff0000">
Output should be:
">
How to add HTML <input type="date">
Show a date control.
Definition and Usage
The <input type="date"> defines a date picker.
The resulting value includes the year, month, and day.
Tip: Always add the <label> tag for best accessibility practices!
Browser Support
The numbers in the table specify the first browser version that fully supports the element.
The <input type="datetime-local"> defines a date picker.
The resulting value includes the year, month, day, and time.
Tip: Always add the <label> tag for best accessibility practices!
Browser Support
The numbers in the table specify the first browser version that fully supports the element.
Syntax
<input type="datetime-local">
index.html
Example:HTML
<label for="birthdaytime">Birthday (date and time):</label>
<input type="datetime-local" id="birthdaytime" name="birthdaytime">
Output should be:
">
How to add HTML <input type="email">
Define a field for an e-mail address (validates automatically when submitted).
email
Defines a field for an e-mail address
Definition and Usage
The <input type="email"> defines a field for an e-mail address.
The input value is automatically validated to ensure it is a properly formatted e-mail address.
To define an e-mail field that allows multiple e-mail addresses, add the "multiple" attribute.
Tip: Always add the <label> tag for best accessibility practices!
Browser Support
The numbers in the table specify the first browser version that fully supports the element.
Syntax
<input type="email">
index.html
Example:HTML
<input type="email" id="email" name="email">
Output should be:
">
How to add HTML <input type="file">
Define a file-select field.
Definition and Usage
The <input type="file"> defines a file-select field and a "Browse" button for file uploads.
To define a file-select field that allows multiple files to be selected, add the multiple attribute.
Tip: Always add the <label> tag for best accessibility practices!
Browser Support
The numbers in the table specify the first browser version that fully supports the element.
Syntax
<input type="file">
index.html
Example:HTML
<input type="file" id="myfile" name="myfile">
Output should be:
">
How to add HTML <input type="hidden">
Define a hidden field.
Definition and Usage
The <input type="hidden"> defines a hidden input field.
A hidden field lets web developers include data that cannot be seen or modified by users when a form is submitted.
A hidden field often stores what database record that needs to be updated when the form is submitted.
Note: While the value is not displayed to the user in the page's content, it is visible (and can be edited) using any browser's developer tools or "View Source" functionality. Do not use hidden inputs as a form of security!
Browser Support
The numbers in the table specify the first browser version that fully supports the element.
How to add Align input image (with CSS) on Submit Button
See the Example.
index.html
Example:HTML
<!DOCTYPE html>
<html>
<body>
<form action="/action_page.php">
<label for="fname">First name:</label>
<input type="text" id="fname" name="fname">
<input type="image" src="https://horje.com/uploads/demo/2024-03-20-15-18-38-img_submit.gif" alt="Submit" style="float:right" width="48" height="48">
</form>
<p>Click on the image, and the input will be sent to a page on the server called "/action_page.php".</p>
</body>
</html>
Output should be:
How to add HTML <input type="month">
Define a month and year control (no time zone).
Definition and Usage
The <input type="month"> defines a month and year control.
The format is "YYYY-MM".
Tip: Always add the <label> tag for best accessibility practices!
Browser Support
The numbers in the table specify the first browser version that fully supports the element.
Syntax
<input type="month">
index.html
Example:HTML
<label for="bdaymonth">Birthday (month and year):</label>
<input type="month" id="bdaymonth" name="bdaymonth">
Output should be:
">
How to add HTML <input type="number">
Define a field for entering a number (You can also set restrictions on what numbers are accepted).
Definition and Usage
The <input type="number"> defines a field for entering a number.
Use the following attributes to specify restrictions:
max - specifies the maximum value allowed
min - specifies the minimum value allowed
step - specifies the legal number intervals
value - Specifies the default value
Tip: Always add the <label> tag for best accessibility practices!
Browser Support
Syntax
<input type="number">
index.html
Example:HTML
<!DOCTYPE html>
<html>
<body>
<h1>Display a Number Field</h1>
<form action="/action_page.php">
<label for="quantity">Quantity (between 1 and 5):</label>
<input type="number" id="quantity" name="quantity" min="1" max="5">
<input type="submit">
</form>
</body>
</html>
Output should be:
">
How to add HTML <input type="password">
Define a password field (characters are masked).
Definition and Usage
The <input type="password"> defines a password field (characters are masked).
Note: Any forms involving sensitive information like passwords should be served over HTTPS.
Tip: Always add the <label> tag for best accessibility practices!
Radio buttons let a user select only one of a limited number of choices.
Definition and Usage
The <input type="radio"> defines a radio button.
Radio buttons are normally presented in radio groups (a collection of radio buttons describing a set of related options). Only one radio button in a group can be selected at the same time.
Note: The radio group must share the same name (the value of the name attribute) to be treated as a group. Once the radio group is created, selecting any radio button in that group automatically deselects any other selected radio button in the same group. You can have as many radio groups on a page as you want, as long as each group has its own name.
Note: The value attribute defines the unique value associated with each radio button. The value is not shown to the user, but is the value that is sent to the server on "submit" to identify which radio button that was selected.
Tip: Always add the <label> tag for best accessibility practices!
Define an image as the submit button, with height and width attributes.
Definition and Usage
The width attribute specifies the width of the <input> element.
Note: The width attribute is used only with <input type="image">.
Tip: Always specify both the height and width attributes for images. If height and width are set, the space required for the image is reserved when the page is loaded. However, without these attributes, the browser does not know the size of the image, and cannot reserve the appropriate space to it. The effect will be that the page layout will change during loading (while the images load).
Browser Support
The numbers in the table specify the first browser version that fully supports the attribute.
index.html
Example:HTML
<!DOCTYPE html>
<html>
<body>
<h1>The input height and width attributes</h1>
<form action="/action_page.php">
<label for="fname">First name:</label>
<input type="text" id="fname" name="fname"><br><br>
<label for="lname">Last name:</label>
<input type="text" id="lname" name="lname"><br><br>
<input type="image" src="https://horje.com/uploads/demo/2024-03-26-04-36-33-img_submit.gif" alt="Submit" width="48" height="48">
</form>
<p><b>Note:</b> The input type="image" sends the X and Y coordinates of the click that activated the image button.</p>
</body>
</html>
A text with a deleted part, and a new, inserted part.
Definition and Usage
The <ins> tag defines a text that has been inserted into a document. Browsers will usually underline inserted text.
Tip: Also look at the <del> tag to markup deleted text.
Browser Support
Attributes
Attribute
Value
Description
cite
URL
Specifies a URL to a document that explains the reason why the text was inserted/changed
datetime
YYYY-MM-DDThh:mm:ssTZD
Specifies the date and time when the text was inserted/changed
Create a HTML ins Tag
Follow the Example.
index.html
Example:HTML
<p>My favorite color is <del>blue</del> <ins>red</ins>!</p>
Output should be:
How to Use CSS to style <del> and <ins>
See the Example.
index.html
Example:HTML
<html>
<head>
<style>
del {background-color: tomato;}
ins {background-color: yellow;}
</style>
</head>
<body>
<p>My favorite color is <del>blue</del> <ins>red</ins>!</p>
</body>
</html>
Output should be:
How to set Default CSS Settings for HTML <ins> Tag
Most browsers will display the <ins> element with the following default values.
index.html
Example:HTML
<!DOCTYPE html>
<html>
<head>
<style>
ins {
text-decoration: underline;
}
</style>
</head>
<body>
<p>An ins element is displayed like this:</p>
<p><ins>Some inserted text.</ins></p>
<p>Change the default CSS settings to see the effect.</p>
</body>
</html>
Output should be:
How to add HTML <ins> cite Attribute
An inserted text, with a URL to a document that explains why the text was inserted.
Definition and Usage
The cite attribute specifies a URL to a document that explains the reason why the text was inserted/changed.
Browser Support
Note: The cite attribute has no visual effect in ordinary web browsers, but can be used by screen readers.
Syntax
<ins cite="URL">
Attribute Values
Value
Description
URL
Specifies the address to the document that explains why the text was inserted/changed.
Possible values:
An absolute URL - Points to another web site (like cite="http://www.example.com")
A relative URL - Points to a page within a web site (like cite="example.html")
index.html
Example:HTML
<p>This is a text.
<ins cite="why_inserted.htm">This is an inserted text.</ins></p>
Output should be:
How to add HTML <ins> datetime Attribute
An inserted text, with a date and time of when the text was inserted.
Definition and Usage
The datetime attribute specifies the date and time of when the text was inserted/changed.
Browser Support
Note: The datetime attribute has no visual effect in ordinary web browsers, but can be used by screen readers.
Syntax
<ins datetime="YYYY-MM-DDThh:mm:ssTZD">
Attribute Values
Value
Description
YYYY-MM-DDThh:mm:ssTZD
Specifies the date and time of when the text was inserted/changed.
Explanation of components:
YYYY - year (e.g. 2009)
MM - month (e.g. 01 for January)
DD - day of the month (e.g. 08)
T or a space - a separator (required if time is also specified)
hh - hour (e.g. 22 for 10.00pm)
mm - minutes (e.g. 55)
ss - seconds (e.g. 03)
TZD - Time Zone Designator (Z denotes Zulu, also known as Greenwich Mean Time)
index.html
Example:HTML
<p>This is a text.
<ins datetime="2015-09-15T22:55:03Z">This is an inserted text.</ins></p>
The <kbd> tag is used to define keyboard input. The content inside is displayed in the browser's default monospace font.
Tip: This tag is not deprecated. However, it is possible to achieve richer effect by using CSS (see example below).
Also look at:
Tag
Description
<code>
Defines a piece of computer code
<samp>
Defines sample output from a computer program
<var>
Defines a variable
<pre>
Defines preformatted text
Browser Support
Create a HTML <kbd> Tag
Define some text as keyboard input in a document.
index.html
Example:HTML
<!DOCTYPE html>
<html>
<body>
<h1>The kbd element</h1>
<p>Press <kbd>Ctrl</kbd> + <kbd>C</kbd> to copy text (Windows).</p>
<p>Press <kbd>Cmd</kbd> + <kbd>C</kbd> to copy text (Mac OS).</p>
</body>
</html>
Output should be:
How to Use CSS to style the <kbd> element
Define some text as computer code in a document.
Definition and Usage
The <code> tag is used to define a piece of computer code. The content inside is displayed in the browser's default monospace font.
Tip: This tag is not deprecated. However, it is possible to achieve richer effect by using CSS (see example below).
Browser Support
index.html
Example:HTML
<!DOCTYPE html>
<html>
<head>
<style>
kbd {
border-radius: 2px;
padding: 2px;
border: 1px solid black;
}
</style>
</head>
<body>
<h1>The kbd element + CSS</h1>
<p>Press <kbd>Ctrl</kbd> + <kbd>C</kbd> to copy text (Windows).</p>
<p>Press <kbd>Cmd</kbd> + <kbd>C</kbd> to copy text (Mac OS).</p>
</body>
</html>
Output should be:
How to set Default CSS Settings for HTML <kbd> Tag
Most browsers will display the <kbd> element with the following default values.
index.html
Example:HTML
<!DOCTYPE html>
<html>
<head>
<style>
kbd {
font-family: monospace;
}
</style>
</head>
<body>
<p>A kbd element is displayed like this:</p>
<kbd>Keyboard input</kbd>
<p>Change the default CSS settings to see the effect.</p>
</body>
</html>
The <label> tag defines a label for several elements:
<input type="checkbox">
<input type="color">
<input type="date">
<input type="datetime-local">
<input type="email">
<input type="file">
<input type="month">
<input type="number">
<input type="password">
<input type="radio">
<input type="range">
<input type="search">
<input type="tel">
<input type="text">
<input type="time">
<input type="url">
<input type="week">
<meter>
<progress>
<select>
<textarea>
Proper use of labels with the elements above will benefit:
Screen reader users (will read out loud the label, when the user is focused on the element)
Users who have difficulty clicking on very small regions (such as checkboxes) - because when a user clicks the text within the <label> element, it toggles the input (this increases the hit area).
Tips and Notes
Tip: The for attribute of <label> must be equal to the id attribute of the related element to bind them together. A label can also be bound to an element by placing the element inside the <label> element.
A <label> element located outside a form (but still a part of the form):
Definition and Usage
The form attribute specifies the form the label belongs to.
The value of this attribute must be equal to the id attribute of a <form> element in the same document.
Browser Support
Syntax
<label form="form_id">
Attribute Values
Value
Description
form_id
Specifies the form element the <label> element belongs to. The value of this attribute must be the id attribute of a <form> element in the same document.
Let the user select one or more options of a limited number of choices:
Definition and Usage
The <input type="checkbox"> defines a checkbox.
The checkbox is shown as a square box that is ticked (checked) when activated.
Checkboxes are used to let a user select one or more options of a limited number of choices.
Tip: Always add the <label> tag for best accessibility practices!
Browser Support
Syntax
<input type="checkbox">
index.html
Example:HTML
<input type="checkbox" id="vehicle1" name="vehicle1" value="Bike">
<label for="vehicle1"> I have a bike</label><br>
<input type="checkbox" id="vehicle2" name="vehicle2" value="Car">
<label for="vehicle2"> I have a car</label><br>
<input type="checkbox" id="vehicle3" name="vehicle3" value="Boat">
<label for="vehicle3"> I have a boat</label><br>
Output should be:
label Tag">
How to add HTML <input type="color"> label Tag
Show a color picker (with a predefined red value):
Definition and Usage
The <input type="color"> defines a color picker.
The default value is #000000 (black). The value must be in seven-character hexadecimal notation.
Tip: Always add the <label> tag for best accessibility practices!
Browser Support
The numbers in the table specify the first browser version that fully supports the element.
Syntax
<input type="color">
index.html
Example:HTML
<label for="favcolor">Select your favorite color:</label>
<input type="color" id="favcolor" name="favcolor" value="#ff0000">
Output should be:
label Tag">
How to add HTML <input type="date"> label Tag
Show a date control:
Definition and Usage
The <input type="date"> defines a date picker.
The resulting value includes the year, month, and day.
Tip: Always add the <label> tag for best accessibility practices!
Browser Support
The numbers in the table specify the first browser version that fully supports the element.
How to add HTML <input> max Date Attribute label Tag
Use of the min and max attributes.
index.html
Example:HTML
<label for="datemax">Enter a date before 1980-01-01:</label>
<input type="date" id="datemax" name="datemax" max="1979-12-31"><br><br>
<label for="datemin">Enter a date after 2000-01-01:</label>
<input type="date" id="datemin" name="datemin" min="2000-01-02"><br><br>
Output should be:
How to add HTML <input> min Attribute on label Tag
Use of the min and max attributes.
Definition and Usage
The min attribute specifies the minimum value for an <input> element.
Tip: Use the min attribute together with the max attribute to create a range of legal values.
Note: The max and min attributes works with the following input types: number, range, date, datetime-local, month, time and week.
Browser Support
The numbers in the table specify the first browser version that fully supports the attribute.
How to add HTML <input> min date Attribute on label Tag
date
Specifies the minimum date allowed
index.html
Example:HTML
<label for="datemax">Enter a date before 1980-01-01:</label>
<input type="date" id="datemax" name="datemax" max="1979-12-31"><br><br>
<label for="datemin">Enter a date after 2000-01-01:</label>
<input type="date" id="datemin" name="datemin" min="2000-01-02"><br><br>
Output should be:
How to add HTML <input> step Attribute label Tag
An HTML form with an input field with a specified legal number intervals.
Definition and Usage
The step attribute specifies the interval between legal numbers in an <input> element.
Example: if step="3", legal numbers could be -3, 0, 3, 6, etc.
Tip: The step attribute can be used together with the max and min attributes to create a range of legal values.
Note: The step attribute works with the following input types: number, range, date, datetime-local, month, time and week.
Browser Support
The numbers in the table specify the first browser version that fully supports the attribute.
Syntax
<input step="number">
Attribute Values
Value
Description
number
Specifies the interval between legal numbers in the input field. Default is 1
Radio buttons let a user select only one of a limited number of choices.
Definition and Usage
The <input type="radio"> defines a radio button.
Radio buttons are normally presented in radio groups (a collection of radio buttons describing a set of related options). Only one radio button in a group can be selected at the same time.
Note: The radio group must share the same name (the value of the name attribute) to be treated as a group. Once the radio group is created, selecting any radio button in that group automatically deselects any other selected radio button in the same group. You can have as many radio groups on a page as you want, as long as each group has its own name.
Note: The value attribute defines the unique value associated with each radio button. The value is not shown to the user, but is the value that is sent to the server on "submit" to identify which radio button that was selected.
The <input type="time"> defines a control for entering a time (no time zone).
Browser Support
The numbers in the table specify the first browser version that fully supports the element.
Syntax
<input type="time">
index.html
Example:HTML
<label for="appt">Select a time:</label>
<input type="time" id="appt" name="appt">
Output should be:
on label Tag">
How to add HTML <input type="url"> on label Tag
Define a field for entering a URL.
Definition and Usage
The <input type="url"> defines a field for entering a URL.
The input value is automatically validated before the form can be submitted.
Browser Support
The numbers in the table specify the first browser version that fully supports the element.
Syntax
<input type="url">
index.html
Example:HTML
<label for="homepage">Add your homepage:</label>
<input type="url" id="homepage" name="homepage">
Output should be:
on label Tag">
How to add HTML <input type="week"> on label Tag
Define a week and year control (no time zone).
Definition and Usage
The <input type="week"> defines a week and year control (no time zone).
Browser Support
The numbers in the table specify the first browser version that fully supports the element.
Syntax
<input type="week">
index.html
Example:HTML
<label for="week">Select a week:</label>
<input type="week" id="week" name="week">
Output should be:
on label Tag">
How to add HTML <meter> with label Tag
Use the meter element to display a scalar value within a given range (a gauge).
Definition and Usage
The <meter> tag defines a scalar measurement within a known range, or a fractional value. This is also known as a gauge.
Examples: Disk usage, the relevance of a query result, etc.
Note: The <meter> tag should not be used to indicate progress (as in a progress bar). For progress bars, use the <progress> tag.
Browser Support
The numbers in the table specify the first browser version that fully supports the element.
Attributes
Attribute
Value
Description
form
form_id
Specifies which form the <meter> element belongs to
high
number
Specifies the range that is considered to be a high value
low
number
Specifies the range that is considered to be a low value
max
number
Specifies the maximum value of the range
min
number
Specifies the minimum value of the range. Default value is 0
optimum
number
Specifies what value is the optimal value for the gauge
value
number
Required. Specifies the current value of the gauge
index.html
Example:HTML
<label for="disk_c">Disk usage C:</label>
<meter id="disk_c" value="2" min="0" max="10">2 out of 10</meter><br>
<label for="disk_d">Disk usage D:</label>
<meter id="disk_d" value="0.6">60%</meter>
Output should be:
How to add HTML <meter> form Attribute with label Tag
A <meter> element located outside a form (but still a part of the form).
Definition and Usage
The form attribute specifies the form the <meter> tag belongs to.
The value of this attribute must be equal to the id attribute of a <meter> element in the same document.
Browser Support
Syntax
<meter form="form_id">
Attribute Values
Value
Description
form_id
Specifies the form element the <meter> element belongs to. The value of this attribute must be the id attribute of a <form> element in the same document.
The <progress> tag represents the completion progress of a task.
Tip: Always add the <label> tag for best accessibility practices!
Tips and Notes
Tip: Use the <progress> tag in conjunction with JavaScript to display the progress of a task.
Note: The <progress> tag is not suitable for representing a gauge (e.g. disk space usage or relevance of a query result). To represent a gauge, use the <meter> tag instead.
Browser Support
The numbers in the table specify the first browser version that fully supports the element.
Attributes
Attribute
Value
Description
max
number
Specifies how much work the task requires in total. Default value is 1
The <select> element is used to create a drop-down list.
The <select> element is most often used in a form, to collect user input.
The name attribute is needed to reference the form data after the form is submitted (if you omit the name attribute, no data from the drop-down list will be submitted).
The id attribute is needed to associate the drop-down list with a label.
The <option> tags inside the <select> element define the available options in the drop-down list.
Tip: Always add the <label> tag for best accessibility practices!
How to add HTML <select> disabled Attribute with label Tag
A disabled drop-down list.
Definition and Usage
The disabled attribute is a boolean attribute.
When present, it specifies that the drop-down list should be disabled.
A disabled drop-down list is unusable and un-clickable.
The disabled attribute can be set to keep a user from using the drop-down list until some other condition has been met (like selecting a checkbox, etc.). Then, a JavaScript can remove the disabled value, and make the drop-down list usable.
How to add HTML <select> form Attribute with label Tag
A drop-down list located outside a form (but still a part of the form).
Definition and Usage
The form attribute specifies the form the drop-down list belongs to.
The value of this attribute must be equal to the id attribute of a <form> element in the same document.
Browser Support
Syntax
<select form="form_id">
Attribute Values
Value
Description
form_id
Specifies the form element the <select> element belongs to. The value of this attribute must be equal to the id attribute of a <form> element in the same document.
How to add HTML <select> multiple Attribute with label Tag
A drop-down list that allows multiple selections.
Definition and Usage
The multiple attribute is a boolean attribute.
When present, it specifies that multiple options can be selected at once.
Selecting multiple options vary in different operating systems and browsers:
For windows: Hold down the control (ctrl) button to select multiple options
For Mac: Hold down the command button to select multiple options
Because of the different ways of doing this, and because you have to inform the user that multiple selection is available, it is more user-friendly to use checkboxes instead.
How to add HTML <select> size Attribute with label Tag
A drop-down list with three visible options.
Definition and Usage
The size attribute specifies the number of visible options in a drop-down list.
If the value of the size attribute is greater than 1, but lower than the total number of options in the list, the browser will add a scroll bar to indicate that there are more options to view.
Browser Support
Note: In Chrome and Safari, this attribute may not work as expected for size="2" and size="3".
Syntax
<select size="number">
Attribute Values
Value
Description
number
The number of visible options in the drop-down list. Default value is 1. If the multiple attribute is present, the default value is 4
How to add HTML <textarea> Attributes with label Tag
A multi-line text input control (text area).
Definition and Usage
The <textarea> tag defines a multi-line text input control.
The <textarea> element is often used in a form, to collect user inputs like comments or reviews.
A text area can hold an unlimited number of characters, and the text renders in a fixed-width font (usually Courier).
The size of a text area is specified by the cols and rows attributes (or with CSS).
The name attribute is needed to reference the form data after the form is submitted (if you omit the name attribute, no data from the text area will be submitted).
The id attribute is needed to associate the text area with a label.
Tip: Always add the <label> tag for best accessibility practices!
Browser Support
Attributes
Attribute
Value
Description
autofocus
autofocus
Specifies that a text area should automatically get focus when the page loads
cols
number
Specifies the visible width of a text area
dirname
textareaname.dir
Specifies that the text direction of the textarea will be submitted
disabled
disabled
Specifies that a text area should be disabled
form
form_id
Specifies which form the text area belongs to
maxlength
number
Specifies the maximum number of characters allowed in the text area
name
text
Specifies a name for a text area
placeholder
text
Specifies a short hint that describes the expected value of a text area
readonly
readonly
Specifies that a text area should be read-only
required
required
Specifies that a text area is required/must be filled out
rows
number
Specifies the visible number of lines in a text area
wrap
hard
soft
Specifies how the text in a text area is to be wrapped when submitted in a form
index.html
Example:HTML
<label for="w3review">Review of Horje:</label>
<textarea id="w3review" name="w3review" rows="4" cols="50">
At horje.com you will learn how to make a website. They offer free tutorials in all web development technologies.
</textarea>
Output should be:
How to add HTML <textarea> autofocus Attribute with label Tag
A text area with autofocus.
Definition and Usage
The autofocus attribute is a boolean attribute.
When present, it specifies that the text area should automatically get focus when the page loads.
Browser Support
The numbers in the table specify the first browser version that fully supports the attribute.
Syntax
<textarea autofocus>
index.html
Example:HTML
<label for="css">Type</label><br>
<textarea autofocus>
At horje.com you will learn how to make a website. We offer free tutorials in all web development technologies.
</textarea>
try
How to add HTML <textarea> cols Attribute with label Tag
A text area with a specified height and width.
Definition and Usage
The cols attribute specifies the visible width of a text area.
Tip: The size of a text area can also be set by the CSS height and width properties.
Browser Support
Syntax
<textarea cols="number">
Attribute Values
Value
Description
number
Specifies the width of the text area (in average character width). Default value is 20
index.html
Example:HTML
<label for="css">Type</label><br>
<textarea rows="4" cols="50">
At horje.com you will learn how to make a website. We offer free tutorials in all web development technologies.
</textarea>
Output should be:
How to add HTML <textarea> dirname Attribute with label Tag
An HTML form where the field's text direction will be submitted.
Definition and Usage
The dirname attribute enables the submission of the text direction of the text area.
The dirname attribute's value is always the name of the text area, followed by ".dir".
Browser Support
The numbers in the table specify the first browser version that fully supports the attribute.
Specifies that the text direction of the textarea will be submitted.
index.html
Example:HTML
<!DOCTYPE html>
<html>
<body>
<h1>The textarea dirname attribute</h1>
<form action="/action_page.php">
<label for="css">Type Text:</label><br>
<textarea name="explanation"dirname="explanation.dir"></textarea></br>
<input type="submit" value="Submit">
</form>
<p>When the form is being submitted, the text direction of the textarea will also be submitted.</p>
</body>
</html>
try
How to add HTML <textarea> disabled Attribute with label Tag
A disabled text area.
Definition and Usage
The disabled attribute is a boolean attribute.
When present, it specifies that the text area should be disabled.
A disabled text area is unusable and the text is not selectable (cannot be copied).
The disabled attribute can be set to keep a user from using the text area until some other condition has been met (like selecting a checkbox, etc.). Then, a JavaScript could remove the disabled value, and make the text area usable.
Browser Support
Syntax
<textarea disabled>
index.html
Example:HTML
<label for="css">Type Text:</label><br>
<textarea disabled>
At Horje.com you will learn how to make a website. We offer free tutorials in all web development technologies.
</textarea>
Output should be:
How to add HTML <textarea> form Attribute with label Tag
A text area located outside a form (but still a part of the form).
Definition and Usage
The form attribute specifies the form the text area belongs to.
The value of this attribute must be equal to the id attribute of a <form> element in the same document.
Browser Support
Syntax
<textarea form="form_id">
Attribute Values
Value
Description
form_id
Specifies the form element the <textarea> element belongs to. The value of this attribute must be the id attribute of a <form> element in the same document.
index.html
Example:HTML
<label for="css">Type Text:</label><br>
<textarea rows="4" cols="50" name="comment" form="usrform">
Enter text here...</textarea>
Output should be:
How to add HTML <textarea> maxlength Attribute with label Tag
Definition and Usage
The maxlength attribute specifies the maximum length (in characters) of a text area.
Browser Support
The numbers in the table specify the first browser version that fully supports the attribute.
Syntax
<textarea maxlength="number">
Attribute Values
Value
Description
number
The maximum number of characters allowed in the text area
index.html
Example:HTML
<!DOCTYPE html>
<html>
<body>
<h1>The textarea maxlength attribute</h1>
<label for="text">Type</label><br>
<textarea rows="4" cols="50" maxlength="50">
Enter text here...</textarea>
</body>
</html>
Output should be:
How to add HTML <textarea> name Attribute with label Tag Part 2
A text area with a name attribute:
Definition and Usage
The name attribute specifies a name for a text area.
The name attribute is used to reference elements in a JavaScript, or to reference form data after a form is submitted.
Browser Support
Syntax
<textarea name="text">
Attribute Values
Value
Description
text
Specifies the name of the text area
index.html
Example:HTML
<form action="/action_page.php">
<label for="text">Type</label><br>
<textarea rows="4" cols="50" name="comment">
Enter text here...</textarea>
<input type="submit">
</form>
Output should be:
How to add HTML <textarea> placeholder Attribute with label Tag
A text area with a placeholder text.
Definition and Usage
The placeholder attribute specifies a short hint that describes the expected value of a text area.
The short hint is displayed in the text area before the user enters a value.
Browser Support
The numbers in the table specify the first browser version that fully supports the attribute.
Syntax
<textarea placeholder="text">
Attribute Values
Value
Description
text
Specifies a short hint that describes the expected value of the text area
index.html
Example:HTML
<label for="text">Who are you?</label><br>
<textarea rows="4" cols="50" placeholder="Describe yourself here..."></textarea>
Output should be:
How to add HTML <textarea> readonly Attribute with label Tag
A read-only text area.
Definition and Usage
The readonly attribute is a boolean attribute.
When present, it specifies that a text area should be read-only.
In a read-only text area, the content cannot be changed, but a user can tab to it, highlight it and copy content from it.
The readonly attribute can be set to keep a user from using a text area until some other condition has been met (like selecting a checkbox, etc.). Then, a JavaScript is required to remove the readonly value, and make the text area editable.
Browser Support
Syntax
<textarea readonly>
index.html
Example:HTML
<label for="text">Type</label><br>
<textarea rows="4" cols="50" readonly>
At horje.com you will learn how to make a website. We offer free tutorials in all web development technologies.
</textarea>
Output should be:
How to add HTML <textarea> required Attribute with label Tag
A form with a required text area.
Definition and Usage
The required attribute is a boolean attribute.
When present, it specifies that a text area is required/must be filled out (in order to submit the form).
Browser Support
The numbers in the table specify the first browser version that fully supports the attribute.
How to add HTML <textarea> rows Attribute with label Tag
A text area with a specified height and width.
Definition and Usage
The rows attribute specifies the visible height of a text area, in lines.
Note: The size of a textarea can also be specified by the CSS height and width properties.
Browser Support
Syntax
<textarea rows="number">
Attribute Values
Value
Description
number
Specifies the height of the text area (in lines). Default value is 2
index.html
Example:HTML
<label for="text">Type</label><br>
<textarea rows="4" cols="50">
At horje.com you will learn how to make a website. We offer free tutorials in all web development technologies.
</textarea>
Output should be:
How to add HTML <textarea> wrap Attribute with label Tag
The text in a text area with wrap="hard" will contain newlines (if any) when submitted in a form.
Definition and Usage
The wrap attribute specifies how the text in a text area is to be wrapped when submitted in a form.
Browser Support
Syntax
<textarea wrap="soft|hard">
Attribute Values
Value
Description
soft
The text in the textarea is not wrapped when submitted in a form. This is default
hard
The text in the textarea is wrapped (contains newlines) when submitted in a form. When "hard" is used, the cols attribute must be specified
Most browsers will display the <li> element with the following default values.
index.html
Example:HTML
<!DOCTYPE html>
<html>
<body>
<style>
li {
display: list-item;
}
</style>
<h1>The ol and ul elements</h1>
<p>The ol element defines an ordered list:</p>
<ol>
<li>Coffee</li>
<li>Tea</li>
<li>Milk</li>
</ol>
<p>The ul element defines an unordered list:</p>
<ul>
<li>Coffee</li>
<li>Tea</li>
<li>Milk</li>
</ul>
</body>
</html>
Here, the hreflang attribute indicates that the linked document is in English.
Definition and Usage
The hreflang attribute specifies the language of the text in the linked document.
This attribute is only used if the href attribute is set.
Note: This attribute is purely advisory.
Browser Support
Note: The hreflang attribute does not render as anything special in any of the major browsers. However, it can be used by search engines, or in scripts.
Syntax
<link hreflang="langauge_code">
Attribute Values
Value
Description
language_code
A two-letter language code that specifies the language of the linked document.
To view all available language codes, go to our Language code reference.
Deprecated. Teletypes and similar media using a fixed-pitch character grid
tv
Deprecated. Television type devices (low resolution, limited scroll ability)
Values
Value
Description
aspect-ratio
Specifies the width/height ratio of the targeted display area.
"min-" and "max-" prefixes can be used.
Example: media="screen and (max-aspect-ratio:16/9)"
color
Specifies the bits per color of target display.
"min-" and "max-" prefixes can be used.
Example: media="screen and (min-color:3)"
color-index
Specifies the number of colors the target display can handle.
"min-" and "max-" prefixes can be used.
Example: media="screen and (min-color-index:256)"
device-aspect-ratio
Deprecated. Specifies the device-width/device-height ratio of the target display/paper.
device-width
Deprecated. Specifies the width of the target display/paper.
device-height
Deprecated. Specifies the height of the target display/paper.
grid
Specifies if the output device is grid or bitmap.
Possible values are "1" for grid, and "0" otherwise.
Example: media="handheld and (grid:1)"
height
Specifies the height of the targeted display area.
"min-" and "max-" prefixes can be used.
Example: media="screen and (max-height:700px)"
monochrome
Specifies the bits per pixel in a monochrome frame buffer.
"min-" and "max-" prefixes can be used.
Example: media="screen and (min-monochrome:2)"
orientation
Specifies the orientation of the target display/paper.
Possible values: "portrait" or "landscape"
Example: media="all and (orientation: landscape)"
resolution
Specifies the pixel density (dpi or dpcm) of the target display/paper.
"min-" and "max-" prefixes can be used.
Example: media="print and (min-resolution:300dpi)"
scan
Specifies scanning method of a tv display.
Possible values are "progressive" and "interlace".
Example: media="tv and (scan:interlace)"
width
Specifies the width of the targeted display area.
"min-" and "max-" prefixes can be used.
Example: media="screen and (min-width:500px)"
index.html
Example:HTML
<!DOCTYPE html>
<html>
<head>
<link rel="stylesheet" type="text/css" href="https://www.w3schools.com/tags/demo_screen.css">
<link rel="stylesheet" type="text/css" href="https://www.w3schools.com/tags/demo_print.css" media="print">
</head>
<body>
<h1>Horje Example</h1>
<p><a href="tryhtml_link_media.htm" target="_blank">Click here</a> to open this page in a new window (without the tryit part).</p>
<p>If you print this page, or open it in print preview, you will see that it is styled with the media="print" stylesheet. The "print" stylesheet contains black text on white background.</p>
</body>
</html>
Output should be:
How to use and value on HTML <link> media Attribute
and
Specifies an AND operator
index.html
Example:HTML
<link rel="stylesheet" type="text/css" href="demo_print.css" media="screen and (max-aspect-ratio:16/9)">
Output should be:
How to use not value on HTML <link> media Attribute
not
Specifies a NOT operator
index.html
Example:HTML
<link rel="stylesheet" type="text/css" href="demo_print.css" media="screen not (max-aspect-ratio:16/9)">
How to use print value on HTML <link> media Attribute
print
Used for Print preview mode/printed pages
index.html
Example:HTML
<!DOCTYPE html>
<html>
<head>
<link rel="stylesheet" type="text/css" href="https://www.w3schools.com/tags/demo_screen.css">
<link rel="stylesheet" type="text/css" href="https://www.w3schools.com/tags/demo_print.css" media="print">
</head>
<body>
<h1>W3Schools Example</h1>
<p><a href="tryhtml_link_media.htm" target="_blank">Click here</a> to open this page in a new window (without the tryit part).</p>
<p>If you print this page, or open it in print preview, you will see that it is styled with the media="print" stylesheet. The "print" stylesheet contains black text on white background.</p>
</body>
</html>
Output should be:
How to use screen value on HTML <link> media Attribute
screen
Used for computer screens, tablets, smart-phones etc.
index.html
Example:HTML
<!DOCTYPE html>
<html>
<head>
<link rel="stylesheet" type="text/css" href="https://www.w3schools.com/tags/demo_screen.css">
<link rel="stylesheet" type="text/css" href="https://www.w3schools.com/tags/demo_print.css" media="screen and (min-color-index:256)">
</head>
<body>
<h1>Horje Example</h1>
<p><a href="tryhtml_link_media.htm" target="_blank">Click here</a> to open this page in a new window (without the tryit part).</p>
<p>If you print this page, or open it in print preview, you will see that it is styled with the media="print" stylesheet. The "print" stylesheet contains black text on white background.</p>
</body>
</html>
Output should be:
How to use speech value on HTML <link> media Attribute
speech
Used for screenreaders that "reads" the page out loud
index.html
Example:HTML
<!DOCTYPE html>
<html>
<head>
<link rel="stylesheet" type="text/css" href="https://www.w3schools.com/tags/demo_screen.css">
<link rel="stylesheet" type="text/css" href="https://www.w3schools.com/tags/demo_print.css" media="speech">
</head>
<body>
<h1>W3Schools Example</h1>
<p><a href="tryhtml_link_media.htm" target="_blank">Click here</a> to open this page in a new window (without the tryit part).</p>
<p>If you print this page, or open it in print preview, you will see that it is styled with the media="print" stylesheet. The "print" stylesheet contains black text on white background.</p>
</body>
</html>
Output should be:
How to use speech value on HTML <link> media Attribute
aural
Deprecated. Speech synthesizers
index.html
Example:HTML
<!DOCTYPE html>
<html>
<head>
<link rel="stylesheet" type="text/css" href="https://www.w3schools.com/tags/demo_screen.css">
<link rel="stylesheet" type="text/css" href="https://www.w3schools.com/tags/demo_print.css" media="aural">
</head>
<body>
<h1>Horje Example</h1>
<p><a href="tryhtml_link_media.htm" target="_blank">Click here</a> to open this page in a new window (without the tryit part).</p>
<p>If you print this page, or open it in print preview, you will see that it is styled with the media="print" stylesheet. The "print" stylesheet contains black text on white background.</p>
</body>
</html>
Output should be:
How to use braille value on HTML <link> media Attribute
braille
Deprecated. Braille feedback devices
index.html
Example:HTML
<!DOCTYPE html>
<html>
<head>
<link rel="stylesheet" type="text/css" href="https://www.w3schools.com/tags/demo_screen.css">
<link rel="stylesheet" type="text/css" href="https://www.w3schools.com/tags/demo_print.css" media="braille">
</head>
<body>
<h1>Horje Example</h1>
<p><a href="tryhtml_link_media.htm" target="_blank">Click here</a> to open this page in a new window (without the tryit part).</p>
<p>If you print this page, or open it in print preview, you will see that it is styled with the media="print" stylesheet. The "print" stylesheet contains black text on white background.</p>
</body>
</html>
Output should be:
How to use handheld value on HTML <link> media Attribute
<!DOCTYPE html>
<html>
<head>
<link rel="stylesheet" type="text/css" href="https://www.w3schools.com/tags/demo_screen.css">
<link rel="stylesheet" type="text/css" href="https://www.w3schools.com/tags/demo_print.css" media="handheld">
</head>
<body>
<h1>Horje Example</h1>
<p><a href="tryhtml_link_media.htm" target="_blank">Click here</a> to open this page in a new window (without the tryit part).</p>
<p>If you print this page, or open it in print preview, you will see that it is styled with the media="print" stylesheet. The "print" stylesheet contains black text on white background.</p>
</body>
</html>
Output should be:
How to use projection value on HTML <link> media Attribute
projection
Projectors
index.html
Example:HTML
<!DOCTYPE html>
<html>
<head>
<link rel="stylesheet" type="text/css" href="https://www.w3schools.com/tags/demo_screen.css">
<link rel="stylesheet" type="text/css" href="https://www.w3schools.com/tags/demo_print.css" media="projection">
</head>
<body>
<h1>Horje Example</h1>
<p><a href="tryhtml_link_media.htm" target="_blank">Click here</a> to open this page in a new window (without the tryit part).</p>
<p>If you print this page, or open it in print preview, you will see that it is styled with the media="print" stylesheet. The "print" stylesheet contains black text on white background.</p>
</body>
</html>
Output should be:
How to use tty value on HTML <link> media Attribute
tty
Deprecated. Teletypes and similar media using a fixed-pitch character grid
index.html
Example:HTML
<!DOCTYPE html>
<html>
<head>
<link rel="stylesheet" type="text/css" href="https://www.w3schools.com/tags/demo_screen.css">
<link rel="stylesheet" type="text/css" href="https://www.w3schools.com/tags/demo_print.css" media="tty">
</head>
<body>
<h1>Horje Example</h1>
<p><a href="tryhtml_link_media.htm" target="_blank">Click here</a> to open this page in a new window (without the tryit part).</p>
<p>If you print this page, or open it in print preview, you will see that it is styled with the media="print" stylesheet. The "print" stylesheet contains black text on white background.</p>
</body>
</html>
Output should be:
How to use tv value on HTML <link> media Attribute
tv
Deprecated. Television type devices (low resolution, limited scroll ability)
index.html
Example:HTML
<!DOCTYPE html>
<html>
<head>
<link rel="stylesheet" type="text/css" href="https://www.w3schools.com/tags/demo_screen.css">
<link rel="stylesheet" type="text/css" href="https://www.w3schools.com/tags/demo_print.css" media="tv and (scan:interlace)">
</head>
<body>
<h1>W3Schools Example</h1>
<p><a href="tryhtml_link_media.htm" target="_blank">Click here</a> to open this page in a new window (without the tryit part).</p>
<p>If you print this page, or open it in print preview, you will see that it is styled with the media="print" stylesheet. The "print" stylesheet contains black text on white background.</p>
</body>
</html>
Output should be:
How to use aspect-ratio value on HTML <link> media Attribute
aspect-ratio
Specifies the width/height ratio of the targeted display area.
"min-" and "max-" prefixes can be used.
Example: media="screen and (max-aspect-ratio:16/9)"
index.html
Example:HTML
<!DOCTYPE html>
<html>
<head>
<link rel="stylesheet" type="text/css" href="https://www.w3schools.com/tags/demo_screen.css">
<link rel="stylesheet" type="text/css" href="https://www.w3schools.com/tags/demo_print.css" media="screen and (max-aspect-ratio:16/9)">
</head>
<body>
<h1>Horje Example</h1>
<p><a href="tryhtml_link_media.htm" target="_blank">Click here</a> to open this page in a new window (without the tryit part).</p>
<p>If you print this page, or open it in print preview, you will see that it is styled with the media="print" stylesheet. The "print" stylesheet contains black text on white background.</p>
</body>
</html>
Output should be:
How to use color value on HTML <link> media Attribute
color
Specifies the bits per color of target display.
"min-" and "max-" prefixes can be used.
Example: media="screen and (min-color:3)"
index.html
Example:HTML
<!DOCTYPE html>
<html>
<head>
<link rel="stylesheet" type="text/css" href="https://www.w3schools.com/tags/demo_screen.css">
<link rel="stylesheet" type="text/css" href="https://www.w3schools.com/tags/demo_print.css" media="screen and (min-color:3)">
</head>
<body>
<h1>Horje Example</h1>
<p><a href="tryhtml_link_media.htm" target="_blank">Click here</a> to open this page in a new window (without the tryit part).</p>
<p>If you print this page, or open it in print preview, you will see that it is styled with the media="print" stylesheet. The "print" stylesheet contains black text on white background.</p>
</body>
</html>
Output should be:
How to use color-index value on HTML <link> media Attribute
color-index
Specifies the number of colors the target display can handle.
"min-" and "max-" prefixes can be used.
Example: media="screen and (min-color-index:256)"
index.html
Example:HTML
<!DOCTYPE html>
<html>
<head>
<link rel="stylesheet" type="text/css" href="https://www.w3schools.com/tags/demo_screen.css">
<link rel="stylesheet" type="text/css" href="https://www.w3schools.com/tags/demo_print.css" media="screen and (min-color-index:256)">
</head>
<body>
<h1>Horje Example</h1>
<p><a href="tryhtml_link_media.htm" target="_blank">Click here</a> to open this page in a new window (without the tryit part).</p>
<p>If you print this page, or open it in print preview, you will see that it is styled with the media="print" stylesheet. The "print" stylesheet contains black text on white background.</p>
</body>
</html>
Output should be:
How to use device-aspect-ratio value on HTML <link> media Attribute
device-aspect-ratio
Deprecated. Specifies the device-width/device-height ratio of the target display/paper.
index.html
Example:HTML
<!DOCTYPE html>
<html>
<head>
<link rel="stylesheet" type="text/css" href="https://www.w3schools.com/tags/demo_screen.css">
<link rel="stylesheet" type="text/css" href="https://www.w3schools.com/tags/demo_print.css" media="screen and (min-device-aspect-ratio: 16/9)">
</head>
<body>
<h1>Horje Example</h1>
<p><a href="tryhtml_link_media.htm" target="_blank">Click here</a> to open this page in a new window (without the tryit part).</p>
<p>If you print this page, or open it in print preview, you will see that it is styled with the media="print" stylesheet. The "print" stylesheet contains black text on white background.</p>
</body>
</html>
Output should be:
How to use device-width value on HTML <link> media Attribute
device-width
Deprecated. Specifies the width of the target display/paper.
index.html
Example:HTML
<!DOCTYPE html>
<html>
<head>
<link rel="stylesheet" type="text/css" href="https://www.w3schools.com/tags/demo_screen.css">
<link rel="stylesheet" type="text/css" href="https://www.w3schools.com/tags/demo_print.css" media="screen and (max-device-width: 799px)">
</head>
<body>
<h1>Horje Example</h1>
<p><a href="tryhtml_link_media.htm" target="_blank">Click here</a> to open this page in a new window (without the tryit part).</p>
<p>If you print this page, or open it in print preview, you will see that it is styled with the media="print" stylesheet. The "print" stylesheet contains black text on white background.</p>
</body>
</html>
Output should be:
How to use device-height value on HTML <link> media Attribute
device-height
Deprecated. Specifies the height of the target display/paper.
index.html
Example:HTML
<link
rel="stylesheet"
media="screen and (max-device-height: 799px)"
href="https://www.w3schools.com/tags/demo_screen.css" />
Output should be:
How to use grid value on HTML <link> media Attribute
grid
Specifies if the output device is grid or bitmap.
Possible values are "1" for grid, and "0" otherwise.
Example: media="handheld and (grid:1)"
index.html
Example:HTML
<!DOCTYPE html>
<html>
<head>
<link rel="stylesheet" type="text/css" href="https://www.w3schools.com/tags/demo_screen.css">
<link rel="stylesheet" type="text/css" href="https://www.w3schools.com/tags/demo_print.css" media="handheld and (grid:1)">
</head>
<body>
<h1>Horje Example</h1>
<p><a href="tryhtml_link_media.htm" target="_blank">Click here</a> to open this page in a new window (without the tryit part).</p>
<p>If you print this page, or open it in print preview, you will see that it is styled with the media="print" stylesheet. The "print" stylesheet contains black text on white background.</p>
</body>
</html>
Output should be:
How to use height value on HTML <link> media Attribute
height
Specifies the height of the targeted display area.
"min-" and "max-" prefixes can be used.
Example: media="screen and (max-height:700px)"
index.html
Example:HTML
<!DOCTYPE html>
<html>
<head>
<link rel="stylesheet" type="text/css" href="https://www.w3schools.com/tags/demo_screen.css">
<link rel="stylesheet" type="text/css" href="https://www.w3schools.com/tags/demo_print.css" media="screen and (max-height:700px)">
</head>
<body>
<h1>Horje Example</h1>
<p><a href="tryhtml_link_media.htm" target="_blank">Click here</a> to open this page in a new window (without the tryit part).</p>
<p>If you print this page, or open it in print preview, you will see that it is styled with the media="print" stylesheet. The "print" stylesheet contains black text on white background.</p>
</body>
</html>
Output should be:
How to use monochrome value on HTML <link> media Attribute
monochrome
Specifies the bits per pixel in a monochrome frame buffer.
"min-" and "max-" prefixes can be used.
Example: media="screen and (min-monochrome:2)"
index.html
Example:HTML
<!DOCTYPE html>
<html>
<head>
<link rel="stylesheet" type="text/css" href="https://www.w3schools.com/tags/demo_screen.css">
<link rel="stylesheet" type="text/css" href="https://www.w3schools.com/tags/demo_print.css" media="screen and (min-monochrome:2)">
</head>
<body>
<h1>Horje Example</h1>
<p><a href="tryhtml_link_media.htm" target="_blank">Click here</a> to open this page in a new window (without the tryit part).</p>
<p>If you print this page, or open it in print preview, you will see that it is styled with the media="print" stylesheet. The "print" stylesheet contains black text on white background.</p>
</body>
</html>
Output should be:
How to use orientation value on HTML <link> media Attribute
orientation
Specifies the orientation of the target display/paper.
Possible values: "portrait" or "landscape"
Example: media="all and (orientation: landscape)"
index.html
Example:HTML
<!DOCTYPE html>
<html>
<head>
<link rel="stylesheet" type="text/css" href="https://www.w3schools.com/tags/demo_screen.css">
<link rel="stylesheet" type="text/css" href="https://www.w3schools.com/tags/demo_print.css" media="all and (orientation: landscape)">
</head>
<body>
<h1>Horje Example</h1>
<p><a href="tryhtml_link_media.htm" target="_blank">Click here</a> to open this page in a new window (without the tryit part).</p>
<p>If you print this page, or open it in print preview, you will see that it is styled with the media="print" stylesheet. The "print" stylesheet contains black text on white background.</p>
</body>
</html>
Output should be:
How to use resolution value on HTML <link> media Attribute
resolution
Specifies the pixel density (dpi or dpcm) of the target display/paper.
"min-" and "max-" prefixes can be used.
Example: media="print and (min-resolution:300dpi)"
index.html
Example:HTML
<!DOCTYPE html>
<html>
<head>
<link rel="stylesheet" type="text/css" href="https://www.w3schools.com/tags/demo_screen.css">
<link rel="stylesheet" type="text/css" href="https://www.w3schools.com/tags/demo_print.css" media="print and (min-resolution:300dpi)">
</head>
<body>
<h1>Horje Example</h1>
<p><a href="tryhtml_link_media.htm" target="_blank">Click here</a> to open this page in a new window (without the tryit part).</p>
<p>If you print this page, or open it in print preview, you will see that it is styled with the media="print" stylesheet. The "print" stylesheet contains black text on white background.</p>
</body>
</html>
Output should be:
How to use scan value on HTML <link> media Attribute
scan
Specifies scanning method of a tv display.
Possible values are "progressive" and "interlace".
Example: media="tv and (scan:interlace)"
index.html
Example:HTML
<!DOCTYPE html>
<html>
<head>
<link rel="stylesheet" type="text/css" href="https://www.w3schools.com/tags/demo_screen.css">
<link rel="stylesheet" type="text/css" href="https://www.w3schools.com/tags/demo_print.css" media="tv and (scan:interlace)">
</head>
<body>
<h1>Horje Example</h1>
<p><a href="tryhtml_link_media.htm" target="_blank">Click here</a> to open this page in a new window (without the tryit part).</p>
<p>If you print this page, or open it in print preview, you will see that it is styled with the media="print" stylesheet. The "print" stylesheet contains black text on white background.</p>
</body>
</html>
Output should be:
How to use width value on HTML <link> media Attribute
width
Specifies the width of the targeted display area.
"min-" and "max-" prefixes can be used.
Example: media="screen and (min-width:500px)"
index.html
Example:HTML
<!DOCTYPE html>
<html>
<head>
<link rel="stylesheet" type="text/css" href="https://www.w3schools.com/tags/demo_screen.css">
<link rel="stylesheet" type="text/css" href="https://www.w3schools.com/tags/demo_print.css" media="screen and (min-width:500px)">
</head>
<body>
<h1>Horje Example</h1>
<p><a href="tryhtml_link_media.htm" target="_blank">Click here</a> to open this page in a new window (without the tryit part).</p>
<p>If you print this page, or open it in print preview, you will see that it is styled with the media="print" stylesheet. The "print" stylesheet contains black text on white background.</p>
</body>
</html>
Output should be:
How to create HTML <iframe> referrerpolicy Attribute on HTML <link> Tag
Definition and Usage
The referrerpolicy attribute specifies which referrer information to send when fetching an iframe.
Browser Support
The numbers in the table specify the first browser version that fully supports the attribute.
No referrer information will be sent along with a request
no-referrer-when-downgrade
Default. The referrer header will not be sent to origins without HTTPS
origin
Send only scheme, host, and port to the request client
origin-when-cross-origin
For cross-origin requests: Send only scheme, host, and port. For same-origin requests: Also include the path
same-origin
For same-origin requests: Referrer info will be sent. For cross-origin requests: No referrer info will be sent
strict-origin
Only send referrer info if the security level is the same (e.g. HTTPS to HTTPS). Do not send to a less secure destination (e.g. HTTPS to HTTP)
strict-origin-when-cross-origin
Send full path when performing a same-origin request. Send only origin when the security level stays the same (e.g. HTTPS to HTTPS). Send no header to a less secure destination (HTTPS to HTTP)
unsafe-url
Send origin, path and query string (but not fragment, password, or username). This value is considered unsafe
index.html
Example:HTML
<!DOCTYPE html>
<html>
<body>
<h1>The iframe referrerpolicy attribute</h1>
<iframe src="https://horje.com/" referrerpolicy="no-referrer">
<p>Your browser does not support iframes.</p>
</iframe>
</body>
</html>
Output should be:
How to create HTML <iframe> no-referrer Attribute on HTML <link> Tag
no-referrer
No referrer information will be sent along with a request
index.html
Example:HTML
<!DOCTYPE html>
<html>
<body>
<h1>The iframe referrerpolicy attribute</h1>
<iframe src="https://w3schools.com/" referrerpolicy="no-referrer">
<p>Your browser does not support iframes.</p>
</iframe>
</body>
</html>
Output should be:
How to create HTML <iframe> no-referrer-when-downgrade Attribute on HTML <link> Tag
no-referrer-when-downgrade
Default. The referrer header will not be sent to origins without HTTPS
index.html
Example:HTML
<!DOCTYPE html>
<html>
<body>
<h1>The iframe referrerpolicy attribute</h1>
<iframe src="https://w3schools.com/" referrerpolicy="no-referrer-when-downgrade">
<p>Your browser does not support iframes.</p>
</iframe>
</body>
</html>
Output should be:
How to create HTML <iframe> origin Attribute on HTML <link> Tag
origin
Send only scheme, host, and port to the request client
index.html
Example:HTML
<!DOCTYPE html>
<html>
<body>
<h1>The iframe referrerpolicy attribute</h1>
<iframe src="https://horje.com/" referrerpolicy="origin">
<p>Your browser does not support iframes.</p>
</iframe>
</body>
</html>
Output should be:
How to create HTML <iframe> origin-when-cross-origin Attribute on HTML <link> Tag
origin-when-cross-origin
For cross-origin requests: Send only scheme, host, and port. For same-origin requests: Also include the path
index.html
Example:HTML
<!DOCTYPE html>
<html>
<body>
<h1>The iframe referrerpolicy attribute</h1>
<iframe src="https://horje.com" referrerpolicy="origin-when-cross-origin">
<p>Your browser does not support iframes.</p>
</iframe>
</body>
</html>
Output should be:
How to create HTML <iframe> same-origin Attribute on HTML <link> Tag
same-origin
For same-origin requests: Referrer info will be sent. For cross-origin requests: No referrer info will be sent
index.html
Example:HTML
<!DOCTYPE html>
<html>
<body>
<h1>The iframe referrerpolicy attribute</h1>
<iframe src="https://horje.com" referrerpolicy="same-origin">
<p>Your browser does not support iframes.</p>
</iframe>
</body>
</html>
Output should be:
How to create HTML <iframe> strict-origin Attribute on HTML <link> Tag
strict-origin
Only send referrer info if the security level is the same (e.g. HTTPS to HTTPS). Do not send to a less secure destination (e.g. HTTPS to HTTP)
index.html
Example:HTML
<!DOCTYPE html>
<html>
<body>
<h1>The iframe referrerpolicy attribute</h1>
<iframe src="https://horje.com" referrerpolicy="strict-origin">
<p>Your browser does not support iframes.</p>
</iframe>
</body>
</html>
Output should be:
How to create HTML <iframe> strict-origin-when-cross-origin Attribute on HTML <link> Tag
strict-origin-when-cross-origin
Send full path when performing a same-origin request. Send only origin when the security level stays the same (e.g. HTTPS to HTTPS). Send no header to a less secure destination (HTTPS to HTTP)
index.html
Example:HTML
<!DOCTYPE html>
<html>
<body>
<h1>The iframe referrerpolicy attribute</h1>
<iframe src="https://horje.com" referrerpolicy="strict-origin-when-cross-origin">
<p>Your browser does not support iframes.</p>
</iframe>
</body>
</html>
Output should be:
How to create HTML <iframe> unsafe-url Attribute on HTML <link> Tag
unsafe-url
Send origin, path and query string (but not fragment, password, or username). This value is considered unsafe
index.html
Example:HTML
<!DOCTYPE html>
<html>
<body>
<h1>The iframe referrerpolicy attribute</h1>
<iframe src="https://horje.com" referrerpolicy="unsafe-url">
<p>Your browser does not support iframes.</p>
</iframe>
</body>
</html>
Output should be:
How to add HTML <link> rel Attribute
Definition and Usage
The required rel attribute specifies the relationship between the current document and the linked document/resource.
Browser Support
Syntax
<link rel="value">
Attribute Values
Value
Description
alternate
Provides a link to an alternate version of the document (i.e. print page, translated or mirror).
Example: <link rel="alternate" type="application/atom+xml" title="W3Schools News" href="/blog/news/atom">
author
Provides a link to the author of the document
dns-prefetch
Specifies that the browser should preemptively perform DNS resolution for the target resource's origin
help
Provides a link to a help document. Example: <link rel="help" href="/help/">
icon
Imports an icon to represent the document.
Example: <link rel="icon" href="favicon.ico" type="image/x-icon">
license
Provides a link to copyright information for the document
next
Provides a link to the next document in the series
pingback
Provides the address of the pingback server that handles pingbacks to the current document
preconnect
Specifies that the browser should preemptively connect to the target resource's origin.
prefetch
Specifies that the browser should preemptively fetch and cache the target resource as it is likely to be required for a follow-up navigation
preload
Specifies that the browser agent must preemptively fetch and cache the target resource for current navigation according to the destination given by the "as" attribute (and the priority associated with that destination).
prerender
Specifies that the browser should pre-render (load) the specified webpage in the background. So, if the user navigates to this page, it speeds up the page load (because the page is already loaded). Warning! This wastes the user's bandwidth! Only use prerender if you are absolutely sure that the webpage is required at some point in the user's journey
prev
Indicates that the document is a part of a series, and that the previous document in the series is the referenced document
search
Provides a link to a resource that can be used to search through the current document and its related pages.
stylesheet
Imports a style sheet
index.html
Example:HTML
<link rel="stylesheet" href="styles.css">
Output should be:
How to add HTML alternate <link> rel Attribute
alternate
Provides a link to an alternate version of the document (i.e. print page, translated or mirror).
Example: <link rel="alternate" type="application/atom+xml" title="W3Schools News" href="/blog/news/atom">
Specifies that the browser should preemptively fetch and cache the target resource as it is likely to be required for a follow-up navigation
rel=prefetch
The prefetch keyword for the rel attribute of the <link> element provides a hint to browsers that the user is likely to need the target resource for future navigations, and therefore the browser can likely improve the user experience by preemptively fetching and caching the resource. <link rel="prefetch"> is used for same-site navigation resources, or for subresources used by same-site pages.
The result is kept in the HTTP cache on disk. Because of this it is useful for prefetching subresources, even if they are not used by the current page. You could also use it to prefetch the next document the user will likely visit on the site. However, as a result you need to be careful with headers — for example certain Cache-Control headers could block prefetching (for example no-cache or no-store).
Note: Because of such limitations, you are advised to use the Speculation Rules API for document prefetches instead, where it is supported.
<link rel="prefetch"> is functionally equivalent to a fetch() call with a priority: "low" option set on it, except that the former will generally have an even lower priority, and it will have a Sec-Purpose: prefetch header set on the request. Note that in general browsers will give prefetch resources a lower priority than preload ones (e.g. requested via <link rel="preload">) — the current page is more important than the next.
The fetch request for a prefetch operation results in an HTTP request that includes the HTTP header Sec-Purpose: prefetch. A server might use this header to change the cache timeouts for the resources, or perform other special handling. The request will also include the Sec-Fetch-Dest header with the value set to empty.
The Accept header in the request will match the value used for normal navigation requests. This allows the browser to find the matching cached resources following navigation.
index.html
Example:HTML
<link rel="prefetch" href="/landing-page" />
Output should be:
How to add HTML preload <link> rel Attribute
preload
Specifies that the browser agent must preemptively fetch and cache the target resource for current navigation according to the destination given by the "as" attribute (and the priority associated with that destination).
The preload value of the <link> element's rel attribute lets you declare fetch requests in the HTML's <head>, specifying resources that your page will need very soon, which you want to start loading early in the page lifecycle, before browsers' main rendering machinery kicks in. This ensures they are available earlier and are less likely to block the page's render, improving performance. Even though the name contains the term load, it doesn't load and execute the script but only schedules it to be downloaded and cached with a higher priority.
Specifies that the browser should pre-render (load) the specified webpage in the background. So, if the user navigates to this page, it speeds up the page load (because the page is already loaded). Warning! This wastes the user's bandwidth! Only use prerender if you are absolutely sure that the webpage is required at some point in the user's journey
index.html
Example:HTML
<link rel="prerender" href="/next-page">
How to add HTML prev <link> rel Attribute
prev
Indicates that the document is a part of a series, and that the previous document in the series is the referenced document
A rel="prev" attribute value on a link specifies that the linked page is the previous page of the current page.
This can be used for articles, galleries, news, and other page in a series of pages.
A rel="prev" on an <a> element.
This link opens the previous page in a list of pages
index.html
Example:HTML
Go back to the <a rel="prev" href="/html/rel/license">previous page</a>
Output should be:
How to add HTML search <link> rel Attribute
A rel="search" on an <a> element.
This link is a Google search query with a filter for the current site.
search
Provides a link to a resource that can be used to search through the current document and its related pages.
index.html
Example:HTML
To discover more:
<a rel="search" href="https://google.com/search?q=site:dofactory.com"
target="_blank">Search here</a>.
Output should be:
How to add HTML stylesheet <link> rel Attribute
The rel='stylesheet' attribute is used to define the relationship between the linked file and the current HTML document.
The rel stands for "relationship", and is probably one of the key features of the <link> element — the value denotes how the item being linked to is related to the containing current document.
The current HTML document needs to tell the browser what you were linking to using the rel tag, otherwise the browser would have no idea what to do with the content you're linking to.
stylesheet
Imports a style sheet
index.html
Example:HTML
<link href='style.css' rel='stylesheet'>
How to add HTML <link> sizes Attribute
Icon with specified size:
Definition and Usage
The sizes attribute specifies the sizes of icons for visual media.
This attribute is only used if rel="icon".
Browser Support
Syntax
<link sizes="HeightxWidth|any">
Attribute Values
Value
Description
HeightxWidth
Specifies one or more sizes for the linked icon.
The height and width values are separated by an "x" or "X".
In the following example, the type attribute indicates that the linked document is an external style sheet:
Definition and Usage
The type attribute specifies the media type of the linked document/resource.
The most common value of type is "text/css". If you omit the type attribute, the browser will look at the rel attribute to guess the correct type. So, if rel="stylesheet", the browser will assume the type is "text/css".
Browser Support
Syntax
<link type="media_type">
Attribute Values
Value
Description
media_type
The media type of the linked document.
Look at IANA Media Types for a complete list of standard media types
The <main> tag specifies the main content of a document.
The content inside the <main> element should be unique to the document. It should not contain any content that is repeated across documents such as sidebars, navigation links, copyright information, site logos, and search forms.
Note: There must not be more than one <main> element in a document. The <main> element must NOT be a descendant of an <article>, <aside>, <footer>, <header>, or <nav> element.
Browser Support
The numbers in the table specify the first browser version that fully supports the element.
Global Attributes
The <main> tag also supports the Global Attributes in HTML.
Event Attributes
The <main> tag also supports the Event Attributes in HTML.
How to create HTML <main> Tag
Specify the main content of the document:
index.html
Example:HTML
<main>
<h1>Most Popular Browsers</h1>
<p>Chrome, Firefox, and Edge are the most used browsers today.</p>
 <article>
<h2>Google Chrome</h2>
<p>Google Chrome is a web browser developed by Google, released in 2008. Chrome is the world's most popular web browser today!</p>
</article>

<article>
<h2>Mozilla Firefox</h2>
<p>Mozilla Firefox is an open-source web browser developed by Mozilla. Firefox has been the second most popular web browser since January, 2018.</p>
</article>

<article>
<h2>Microsoft Edge</h2>
<p>Microsoft Edge is a web browser developed by Microsoft, released in 2015. Microsoft Edge replaced Internet Explorer.</p>
</article>
</main>
Output should be:
How to Use CSS to style the <main> element
Follow the example
index.html
Example:HTML
<!DOCTYPE html>
<html>
<head>
<style>
main {
margin: 0;
padding: 5px;
background-color: lightgray;
}
main > h1, p, .browser {
margin: 10px;
padding: 5px;
}
.browser {
background: white;
}
.browser > h2, p {
margin: 4px;
font-size: 90%;
}
</style>
</head>
<body>
<h1>The main element - Styled with CSS</h1>
<main>
<h1>Most Popular Browsers</h1>
<p>Chrome, Firefox, and Edge are the most used browsers today.</p>
<article class="browser">
<h2>Google Chrome</h2>
<p>Google Chrome is a web browser developed by Google, released in 2008. Chrome is the world's most popular web browser today!</p>
</article>
<article class="browser">
<h2>Mozilla Firefox</h2>
<p>Mozilla Firefox is an open-source web browser developed by Mozilla. Firefox has been the second most popular web browser since January, 2018.</p>
</article>
<article class="browser">
<h2>Microsoft Edge</h2>
<p>Microsoft Edge is a web browser developed by Microsoft, released in 2015. Microsoft Edge replaced Internet Explorer.</p>
</article>
</main>
</body>
</html>
The <map> tag is used to define an image map. An image map is an image with clickable areas.
The required name attribute of the <map> element is associated with the <img>'s usemap attribute and creates a relationship between the image and the map.
The <map> element contains a number of <area> elements, that defines the clickable areas in the image map.
Browser Support
Attributes
Attribute
Value
Description
name
mapname
Required. Specifies the name of the image map
Global Attributes
The <map> tag also supports the Global Attributes in HTML.
Event Attributes
The <map> tag also supports the Event Attributes in HTML.
How to add HTML <map> Tag
An image map, with clickable areas
index.html
Example:HTML
<!DOCTYPE html>
<html>
<body>
<h1>The map and area elements</h1>
<p>Click on the computer, the phone, or the cup of coffee to go to a new page and read more about the topic:</p>
<img src="workplace.jpg" alt="Workplace" usemap="#workmap" width="400" height="379">
<map name="workmap">
<area shape="rect" coords="34,44,270,350" alt="Computer" href="computer.htm">
<area shape="rect" coords="290,172,333,250" alt="Phone" href="phone.htm">
<area shape="circle" coords="337,300,44" alt="Cup of coffee" href="coffee.htm">
</map>
</body>
</html>
Output should be:
How to add Another image map, with clickable areas
Click on the sun or on one of the planets to watch it closer.
index.php
Example:HTML
<style>
map {
display: inline;
}
</style>
<h1>The map and area elements</h1>
<p>Click on the sun or on one of the planets to watch it closer:</p>
<img src="planets.gif" width="145" height="126" alt="Planets" usemap="#planetmap">
<map name="planetmap">
<area shape="rect" coords="0,0,82,126" alt="Sun" href="sun.htm">
<area shape="circle" coords="90,58,3" alt="Mercury" href="mercur.htm">
<area shape="circle" coords="124,58,8" alt="Venus" href="venus.htm">
</map>
The <mark> tag defines text that should be marked or highlighted.
Browser Support
The numbers in the table specify the first browser version that fully supports the element.
Global Attributes
The <mark> tag also supports the Global Attributes in HTML.
Event Attributes
The <mark> tag also supports the Event Attributes in HTML.
How to create HTML <mark> Tag
Highlight parts of a text.
index.html
Example:HTML
<p>Do not forget to buy <mark>milk</mark> today.</p>
Output should be:
How to set Default CSS Settings for MARK
Most browsers will display the <mark> element with the following default values.
index.html
Example:HTML
<!DOCTYPE html>
<html>
<head>
<style>
mark {
background-color: yellow;
color: black;
}
</style>
</head>
<body>
<p>A mark element is displayed like this:</p>
<mark>Highlighted text!!</mark>
<p>Change the default CSS settings to see the effect.</p>
</body>
</html>
The <meta> tag defines metadata about an HTML document. Metadata is data (information) about data.
<meta> tags always go inside the <head> element, and are typically used to specify character set, page description, keywords, author of the document, and viewport settings.
Metadata will not be displayed on the page, but is machine parsable.
Metadata is used by browsers (how to display content or reload page), search engines (keywords), and other web services.
There is a method to let web designers take control over the viewport (the user's visible area of a web page), through the <meta> tag (See "Setting The Viewport" example below).
Browser Support
Attributes
Attribute
Value
Description
charset
character_set
Specifies the character encoding for the HTML document
content
text
Specifies the value associated with the http-equiv or name attribute
Note: The value of the content attribute above must match the value of the title attribute on a link element in the same document, or it must match the value of the title attribute on a style element in the same document.
refresh
Defines a time interval for the document to refresh itself.
Example:
<meta http-equiv="refresh" content="300">
Note: The value "refresh" should be used carefully, as it takes the control of a page away from the user. Using "refresh" will cause a failure in W3C's Web Content Accessibility Guidelines.
Note: The value of the content attribute above must match the value of the title attribute on a link element in the same document, or it must match the value of the title attribute on a style element in the same document.
How to add HTML refresh on <meta> http-equiv Attribute for HTML <meta> Tag
refresh
Defines a time interval for the document to refresh itself.
Example:
<meta http-equiv="refresh" content="300">
Note: The value "refresh" should be used carefully, as it takes the control of a page away from the user. Using "refresh" will cause a failure in W3C's Web Content Accessibility Guidelines.
index.html
Example:HTML
<meta http-equiv="refresh" content="300">
How to add HTML <meta> name Attribute on HTML <meta> Tag
Use the name attribute to define a description, keywords, and the author of an HTML document. Also define the viewport to control the page's dimensions and scaling for different devices.
The name attribute specifies the name for the metadata.
The name attribute specifies a name for the information/value of the content attribute.
Note: If the http-equiv attribute is set, the name attribute should not be set.
HTML5 introduced a method to let web designers take control over the viewport (the user's visible area of a web page), through the <meta> tag (See "Setting The Viewport" example below).
Browser Support
Syntax
<meta name="value">
Attribute Values
Value
Description
application-name
Specifies the name of the Web application that the page represents
author
Specifies the name of the author of the document. Example:
<meta name="author" content="John Doe">
description
Specifies a description of the page. Search engines can pick up this description to show with the results of searches. Example:
<meta name="description" content="Free web tutorials">
generator
Specifies one of the software packages used to generate the document (not used on hand-authored pages). Example:
<meta name="generator" content="FrontPage 4.0">
keywords
Specifies a comma-separated list of keywords - relevant to the page (Informs search engines what the page is about). Example:
<meta name="keywords" content="HTML, meta tag, tag reference">
viewport
Controls the viewport (the user's visible area of a web page).
The viewport varies with the device, and will be smaller on a mobile phone than on a computer screen.
You should include the following <meta> viewport element in all your web pages:
Use custom meta tags to store data that you need in Javascript, instead of hard-coding that data into your Javascript. I store my Google Analytics code in meta tags. Here's some examples:
The <meter> HTML element represents either a scalar value within a known range or a fractional value.
Use the meter element to display a scalar value within a given range (a gauge):
Definition and Usage
The <meter> tag defines a scalar measurement within a known range, or a fractional value. This is also known as a gauge.
Examples: Disk usage, the relevance of a query result, etc.
Note: The <meter> tag should not be used to indicate progress (as in a progress bar). For progress bars, use the <progress> tag.
Tip: Always add the <label> tag for best accessibility practices!
Browser Support
The numbers in the table specify the first browser version that fully supports the element.
Attributes
Attribute
Value
Description
form
form_id
Specifies which form the <meter> element belongs to
high
number
Specifies the range that is considered to be a high value
low
number
Specifies the range that is considered to be a low value
max
number
Specifies the maximum value of the range
min
number
Specifies the minimum value of the range. Default value is 0
optimum
number
Specifies what value is the optimal value for the gauge
value
number
Required. Specifies the current value of the gauge
Global Attributes
The <meter> tag also supports the Global Attributes in HTML.
Event Attributes
The <meter> tag also supports the Event Attributes in HTML.
How to create HTML <meter> Tag
Use the meter element to display a scalar value within a given range (a gauge):
index.html
Example:HTML
<label for="disk_c">Disk usage C:</label>
<meter id="disk_c" value="2" min="0" max="10">2 out of 10</meter><br>
<label for="disk_d">Disk usage D:</label>
<meter id="disk_d" value="0.6">60%</meter>
Output should be:
What is HTML <meter> form Attribute
Definition and Usage
The form attribute specifies the form the <meter> tag belongs to.
The value of this attribute must be equal to the id attribute of a <meter> element in the same document.
Browser Support
Syntax
<meter form="form_id">
Attribute Values
Value
Description
form_id
Specifies the form element the <meter> element belongs to. The value of this attribute must be the id attribute of a <form> element in the same document.
How to create HTML <meter> form Attribute
A <meter> element located outside a form (but still a part of the form):
Notice that NOT all links of a document should be inside a <nav> element. The <nav> element is intended only for major blocks of navigation links.
Browsers, such as screen readers for disabled users, can use this element to determine whether to omit the initial rendering of this content.
Browser Support
The numbers in the table specify the first browser version that fully supports the element.
Global Attributes
The <nav> tag also supports the Global Attributes in HTML.
Event Attributes
The <nav> tag also supports the Event Attributes in HTML
The <nav> HTML element represents a section of a page whose purpose is to provide navigation links, either within the current document or to other documents. Common examples of navigation sections are menus, tables of contents, and indexes.
HTML element provides content to be presented in browsers that don't support (or have disabled support for) the element. Although most commonly-used browsers support frames, there are exceptions, including certain special-use browsers including some mobile browsers, as well as text-mode browsers.
Not Supported in HTML5.
The
tag was used in HTML 4 to act as a fallback tag for browsers that did not support frames.
What to Use Instead of HTML <noframes> Tag?
Use the <iframe> tag to embed another document within the current HTML document:
The HTML element defines a section of HTML to be inserted if a script type on the page is unsupported or if scripting is currently turned off in the browser.
Definition and Usage
The <noscript> tag defines an alternate content to be displayed to users that have disabled scripts in their browser or have a browser that doesn't support script.
The <noscript> element can be used in both <head> and <body>. When used inside <head>, the <noscript> element could only contain <link>, <style>, and <meta> elements.
Browser Support
Global Attributes
The <noscript> tag also supports the Global Attributes in HTML.
Related Pages
HTML tutorial: HTML Scripts
Default CSS Settings
None.
How to create HTML <noscript> Tag
Use of the <noscript> tag:
index.html
Example:HTML
<script>
document.write("Hello World!")
</script>
<noscript>Your browser does not support JavaScript!</noscript>
The HTML element represents an external resource, which can be treated as an image, a nested browsing context, or a resource to be handled by a plugin.
Definition and Usage
The <object> tag defines a container for an external resource.
The external resource can be a web page, a picture, a media player, or a plug-in application.
To embed a picture, it is better to use the <img> tag.
To embed HTML, it is better to use the <iframe> tag.
To embed video or audio, it is better to use the <video> and <audio> tags.
Browser Support
Plug-ins
The <object> tag was originally designed to embed browser Plug-ins.
Plug-ins are computer programs that extend the standard functionality of the browser.
Plug-ins have been used for many different purposes:
Run Java applets
Run ActiveX controls
Display Flash movies
Display maps
Scan for viruses
Verify a bank id
Warning !
Most browsers no longer support Java Applets and Plug-ins.
ActiveX controls are no longer supported in any browser.
The support for Shockwave Flash has also been turned off in modern browsers.
Attributes
Attribute
Value
Description
data
URL
Specifies the URL of the resource to be used by the object
form
form_id
Specifies which form the object belongs to
height
pixels
Specifies the height of the object
name
name
Specifies a name for the object
type
media_type
Specifies the media type of data specified in the data attribute
typemustmatch
true/false
Specifies whether the type attribute and the actual content of the resource must match to be displayed
usemap
#mapname
Specifies the name of a client-side image map to be used with the object
width
pixels
Specifies the width of the object
Global Attributes
The <object> tag also supports the Global Attributes in HTML.
Event Attributes
The <object> tag also supports the Event Attributes in HTML.
HTML is designed with extensibility in mind for data that should be associated with a particular element but need not have any defined meaning. data-* attributes allow us to store extra information on standard, semantic HTML elements without other hacks such as non-standard attributes, or extra properties on DOM.
Definition and Usage
The data attribute specifies the URL of the resource to be used by the object.
Browser Support
Syntax
<object data="URL">
Attribute Values
Value
Description
URL
Specifies the URL of the resource to be used by the object.
Possible values:
An absolute URL - points to data on another web site (like href="http://www.example.com/images/pic_trulli.jpg")
A relative URL - points to data within a web site (like href="pic_trulli.jpg")
How to create HTML <object> data Attribute
How to use the <object> element to embed an image.
The HTML <object> form Attribute is used to specify the one or more forms that the <object> Element.
Definition and Usage
The form attribute specifies the form the object belongs to.
The value of this attribute must be equal to the id attribute of a <form> element in the same document.
Browser Support
Syntax
<object form="form_id">
Attribute Values
Value
Description
form_id
Specifies the <form> element the <object> element belongs to. The value of this attribute must be the id attribute of a <form> element in the same document.
How to create HTML <object> form Attribute
An <object> element located outside a form (but still a part of the form).
index.html
Example:HTML
<!DOCTYPE html>
<html>
<body>
<h1>The object form attribute</h1>
<form action="/action_page.php" id="form1">
First name: <input type="text" name="fname"><br>
<input type="submit" value="Submit">
</form>
<object data="https://horje.com/avatar.png" width="300" height="200"></object>
<p><b>Note:</b> The form attribute is not supported in any of the major browsers.</p>
</body>
</html>
Output should be:
What is HTML <object> height Attribute
The height attribute on an <object> tag sets the height of the object element.
The height is specified in pixels - without the ‘px‘ unit.
Definition and Usage
The height attribute specifies the height of the object, in pixels.
Browser Support
Syntax
<object height="pixels">
Attribute Values
Value
Description
pixels
The height of the object, in pixels (i.e. height="100")
How to add HTML <object> height Attribute
An embedded image with a height of 300 pixels and a width of 200 pixels:
The HTML <object> name Attribute is used to specify the name of the embedded file. This attribute is also used as a reference for an object element in the Javascript.
Definition and Usage
The name attribute specifies the name of an <object> element.
The name attribute is used for referencing an <object> element in JavaScript (an alternative, is to reference it by using its id attribute).
This attribute is used in order to to make it safer for authors to embed untrusted resources where they expect a certain content type. The attribute specifies that the resource specified by the data attribute is only to be used if the value of the type attribute and the Content-Type of the aforementioned resource match.
The typemustmatch attribute must only be used when both the type and data is also being used.
The typemustmatch is a boolean attribute. If the attribute is present, its value must either be the empty string or a value that is an ASCII case-insensitive match for the attribute's canonical name, with no leading or trailing whitespace (i.e. either typemustmatch or typemustmatch="typemustmatch")..
typemustmatch
true/false
Specifies whether the type attribute and the actual content of the resource must match to be displayed
The useMap property on the HTMLImageElement interface reflects the value of the HTML usemap attribute, which is a string providing the name of the client-side image map to apply to the image.
Definition and Usage
The usemap attribute specifies the name of an image map to use with the object.
An image map is an image with clickable areas.
The usemap attribute is associated with a <map> element's name attribute, and creates a relationship between the object and the map.
Browser Support
Syntax
<object usemap="#mapname">
Attribute Values
Value
Description
#mapname
A hash character ("#") plus the name of the map element to use
How to add HTML <object> usemap Attribute
An <object> element using an image map:
index.html
Example:HTML
<!DOCTYPE html>
<html>
<body>
<h1>The object usemap attribute</h1>
<object data="https://horje.com/uploads/demo/2024-09-29-14-25-40-screenshot_2024-09-29_at_20-23-53_w3schools_online_html_editor.png" width="145" height="126" usemap="#planetmap"></object>
<map name="planetmap">
<area shape="rect" coords="0,0,82,126" alt="Sun" href="sun.htm">
<area shape="circle" coords="90,58,3" alt="Mercury" href="mercur.htm">
<area shape="circle" coords="124,58,8" alt="Venus" href="venus.htm">
</map>
<p><b>Note:</b> The usemap attribute of the object element is not supported in Chrome,
Edge, Safari, and Opera.</p>
</body>
</html>
Output should be:
What is HTML <object> width Attribute
The HTML <object> width attribute is used to specify the horizontal dimension of the embedded object, defining the width of the displayed content within the webpage.
Definition and Usage
The width attribute specifies the width of the object, in pixels.
Browser Support
Syntax
<object width="pixels">
Attribute Values
Value
Description
pixels
The width of the object, in pixels (i.e. width="100")
How to add HTML <object> width Attribute
An embedded image with a height of 300 pixels and a width of 200 pixels.
The start attribute specifies the start value of the first list item in an ordered list.
This value is always an integer, even when the numbering type is letters or romans. E.g., to start counting list items from the letter "c" or the roman number "iii", use start="3".
Browser Support
Syntax
<ol start="number">
Attribute Values
Value
Description
number
Specifies the start value of the first list item in the ordered list
The disabled attribute for <optgroup> element in HTML is used to specify that the option-group is disabled. A disabled optgroup is un-clickable and unusable. It is a boolean attribute.
Definition and Usage
The disabled attribute is a boolean attribute.
When present, it specifies that an option-group should be disabled.
A disabled option-group is unusable and un-clickable.
The disabled attribute can be set to keep a user from selecting the option-group until some other condition has been met (like selecting a checkbox, etc.). Then, a JavaScript is required to remove the disabled value, and make the option-group selectable.
Browser Support
The numbers in the table specify the first browser version that fully supports the attribute.
The <option> HTML element is used to define an item contained in a <select>, an <optgroup>, or a <datalist> element. As such, <option> can represent menu items in popups and other lists of items in an HTML document.
Definition and Usage
The <option> tag defines an option in a select list.
<option> elements go inside a <select>, <optgroup>, or <datalist> element.
Note: The <option> tag can be used without any attributes, but you usually need the value attribute, which indicates what is sent to the server on form submission.
Tip: If you have a long list of options, you can group related options within the <optgroup> tag.
Browser Support
Attributes
Attribute
Value
Description
disabled
disabled
Specifies that an option should be disabled
label
text
Specifies a shorter label for an option
selected
selected
Specifies that an option should be pre-selected when the page loads
value
text
Specifies the value to be sent to a server
Global Attributes
The <option> tag also supports the Global Attributes in HTML.
Event Attributes
The <option> tag also supports the Event Attributes in HTML.
When present, it specifies that an option should be disabled.
A disabled option is unusable and un-clickable.
The disabled attribute can be set to keep a user from selecting the option until some other condition has been met (like selecting a checkbox, etc.). Then, a JavaScript is required to remove the disabled value, and make the option selectable.
Browser Support
The numbers in the table specify the first browser version that fully supports the attribute.
The value attribute specifies the value to be sent to a server when a form is submitted.
The content between the opening <option> and closing </option> tags is what the browsers will display in a drop-down list. However, the value of the value attribute is what will be sent to the server when a form is submitted.
Note: If the value attribute is not specified, the content will be passed as a value instead.
How to set Default CSS Settings on HTML <output> Tag
Most browsers will display the <output> element with the following default values.
index.html
Example:HTML
<!DOCTYPE html>
<html>
<style>
output {
display: inline;
}
</style>
<body>
<h1>The output element</h1>
<form oninput="x.value=parseInt(a.value)+parseInt(b.value)">
<input type="range" id="a" value="50">
+<input type="number" id="b" value="25">
=<output name="x" for="a b"></output>
</form>
<p><strong>Note:</strong> The output element is not supported in Edge 12 (or earlier).</p>
</body>
</html>
Output should be:
What is HTML <output> for Attribute
Definition and Usage
The for attribute specifies the relationship between the result of the calculation, and the elements used in the calculation.
Browser Support
The numbers in the table specify the first browser version that fully supports the attribute.
Syntax
<output for="element_id">
Attribute Values
Value
Description
element_id
Specifies a space separated list of ids of one or more elements that specifies the relationship between the result of the calculation, and the elements used in the calculation
How to add HTML <output> for Attribute
It performs a calculation and show the result in an <output> element.
The form attribute specifies the form the <output> tag belongs to.
The value of the form attribute must be equal to the id attribute of a <form> element in the same document.
Browser Support
Syntax
<output form="form_id">
Attribute Values
Value
Description
form_id
Specifies the form element the <output> element belongs to. The value of this attribute must be the id attribute of a <form> element in the same document.
How to add HTML <output> form Attribute
It is An <output> element which is located outside a form (but still a part of the form).
Browsers automatically add a single blank line before and after each <p> element.
Browser Support
Global Attributes
The <p> tag also supports the Global Attributes in HTML.
Event Attributes
The <p> tag also supports the Event Attributes in HTML.
How to craete HTML <p> Tag
A Paragraph is marked up as follows.
index.html
Example:HTML
<p>This is a paragraph.</p>
<p>This is a paragraph.</p>
<p>This is a paragraph.</p>
Output should be:
How to create an Align text in a paragraph with CSS on HTML <p> Tag
This is some text in a paragraph.
index.html
Example:HTML
<p style="text-align:right">This is some text in a paragraph.</p>
Output should be:
How to create Style paragraphs with CSS on HTML <p> Tag
See the Example and Learn More.
index.html
Example:HTML
<!DOCTYPE html>
<html>
<head>
<style>
p {
color: navy;
text-indent: 30px;
text-transform: uppercase;
}
</style>
</head>
<body>
<h1>Style paragraphs with CSS</h1>
<p>World Wrestling Entertainment is an American professional wrestling promotion. It is owned and operated by TKO Group Holdings, a majority-owned subsidiary of Endeavor Group Holdings.</p>
<p>Prior to September 2023, the company's majority owner was its executive chairman, third-generation wrestling promoter Vince McMahon, who retained a 38.6% ownership of the company's outstanding stock and 81.1% of the voting power. The current entity, which was originally named Titan Sports, Inc., was incorporated on February 21, 1980</p>
</body>
</html>
Output should be:
What is More Example on paragraphs on HTML <p> Tag
See The Example and Learn More.
index.html
Example:HTML
<p>
This paragraph
contains a lot of lines
in the source code,
but the browser
ignores it.
</p>
Output should be:
What is the Poem problems in HTML on HTML <p> Tag
Note that the browser simply ignores the line breaks in the source code!
index.html
Example:HTML
<p>
My Bonnie lies over the ocean.
My Bonnie lies over the sea.
My Bonnie lies over the ocean.
Oh, bring back my Bonnie to me.
</p>
Output should be:
How to set Default CSS Settings on HTML <p> Tag
Most browsers will display the <p> element with the following default values.
index.html
Example:HTML
<!DOCTYPE html>
<html>
<head>
<style>
p {
display: block;
margin-top: 1em;
margin-bottom: 1em;
margin-left: 0;
margin-right: 0;
}
</style>
</head>
<body>
<p>A p element is displayed like this:</p>
<p>This is a paragraph.</p>
<p>Change the default CSS settings to see the effect.</p>
</body>
</html>
The <param> tag in HTML is used to define a parameter for plug-ins that are associated with <object> element. It does not contain the end tag. The <param> tag also supports the Global Attributes and Event Attributes in HTML. Ensure the sound plays automatically by setting the “autoplay” parameter to “true”.
Definition and Usage
The <param> tag is used to define parameters for an <object> element.
Browser Support
The <param> tag is supported in all major browsers. However, the file format defined in <object> may not be supported in all browsers.
Attributes
Attribute
Value
Description
name
name
Specifies the name of a parameter
value
value
Specifies the value of the parameter
Global Attributes
The <param> tag also supports the Global Attributes in HTML.
Event Attributes
The <param> tag also supports the Event Attributes in HTML.
How to add HTML <param> Tag
It sets the "autoplay" parameter to "true", so the sound will start playing as soon as the page loads:
The <picture> HTML element contains zero or more <source> elements and one <img> element to offer alternative versions of an image for different display/device scenarios.
The browser will consider each child <source> element and choose the best match among them. If no matches are found—or the browser doesn't support the <picture> element—the URL of the <img> element's src attribute is selected. The selected image is then presented in the space occupied by the <img> element.
Definition and Usage
The <picture> tag gives web developers more flexibility in specifying image resources.
The most common use of the <picture> element will be for art direction in responsive designs. Instead of having one image that is scaled up or down based on the viewport width, multiple images can be designed to more nicely fill the browser viewport.
The <picture> element contains two tags: one or more <source> tags and one <img> tag.
The browser will look for the first <source> element where the media query matches the current viewport width, and then it will display the proper image (specified in the srcset attribute). The <img> element is required as the last child of the <picture> element, as a fallback option if none of the source tags matches.
Tip: The <picture> element works "similar" to <video> and <audio>. You set up different sources, and the first source that fits the preferences is the one being used.
Browser Support
The numbers in the table specify the first browser version that fully supports the element.
Global Attributes
The <picture> tag also supports the Global Attributes in HTML.
Event Attributes
The <picture> tag also supports the Event Attributes in HTML.
How to add HTML <picture> Tag
Resize the browser window to load different images.
See the Example and Learn More.
The <pre> HTML element represents preformatted text which is to be presented exactly as written in the HTML file. The text is typically rendered using a non-proportional, or monospaced, font. Whitespace inside this element is displayed as written.
Definition and Usage
The <pre> tag defines preformatted text.
Text in a <pre> element is displayed in a fixed-width font, and the text preserves both spaces and line breaks. The text will be displayed exactly as written in the HTML source code.
Also look at:
Tag
Description
<code>
Defines a piece of computer code
<samp>
Defines sample output from a computer program
<kbd>
Defines keyboard input
<var>
Defines a variable
Browser Support
Global Attributes
The <pre> tag also supports the Global Attributes in HTML.
Event Attributes
The <pre> tag also supports the Event Attributes in HTML.
How to add HTML <pre> Tag
It is Preformatted a text.
index.html
Example:HTML
<pre>
Text in a pre element
is displayed in a fixed-width
font, and it preserves
both spaces and
line breaks
</pre>
Output should be:
How to create a pre-formatted text with a fixed width (with CSS)
See the Example and Learn More.
index.html
Example:HTML
<h2>Standard pre</h2>
<pre>This is a standard pre. It will use as much space as it needs.</pre>
<h2>Fixed width pre</h2>
<div style="width:200px;overflow:auto">
<pre>This is a pre with a fixed width. It will use as much space as specified.</pre>
</div>
Output should be:
How to set Default CSS Settings on HTML pre Tag
Most browsers will display the <pre> element with the following default values.
index.html
Example:HTML
<style>
pre {
display: block;
font-family: monospace;
white-space: pre;
margin: 1em 0;
}
</style>
<pre>
Text in a pre element
is displayed in a fixed-width
font, and it preserves
both spaces and
line breaks
</pre>
The <progress> HTML element displays an indicator showing the completion progress of a task, typically displayed as a progress bar.
Definition and Usage
The <progress> tag represents the completion progress of a task.
Tip: Always add the <label> tag for best accessibility practices!
Tips and Notes
Tip: Use the <progress> tag in conjunction with JavaScript to display the progress of a task.
Note: The <progress> tag is not suitable for representing a gauge (e.g. disk space usage or relevance of a query result). To represent a gauge, use the <meter> tag instead.
Browser Support
The numbers in the table specify the first browser version that fully supports the element.
Attributes
Attribute
Value
Description
max
number
Specifies how much work the task requires in total. Default value is 1
value
number
Specifies how much of the task has been completed
Global Attributes
The <progress> tag also supports the Global Attributes in HTML.
Event Attributes
The <progress> tag also supports the Event Attributes in HTML.
The <q> HTML element indicates that the enclosed text is a short inline quotation. Most modern browsers implement this by surrounding the text in quotation marks. This element is intended for short quotations that don't require paragraph breaks; for long quotations use the <blockquote> element.
Definition and Usage
The <q> tag defines a short quotation.
Browsers normally insert quotation marks around the quotation.
Tip: Use <blockquote> for long quotations.
Browser Support
Attributes
Attribute
Value
Description
cite
URL
Specifies the source URL of the quote
Global Attributes
The <q> tag also supports the Global Attributes in HTML.
Event Attributes
The <q> tag also supports the Event Attributes in HTML.
How to create HTML <q> Tag
It marks up a short quotation.
index.html
Example:HTML
<p>WWF's goal is to:
<q>Build a future where people live in harmony with nature.</q>
We hope they succeed.</p>
Output should be:
How to Use CSS to style the <q> element
See the Example.
index.html
Example:HTML
<!DOCTYPE html>
<html>
<head>
<style>
q {
color: gray;
font-style: italic;
}
</style>
</head>
<body>
<h1>The q element + CSS</h1>
<p>WWF's goal is to:
<q>Build a future where people live in harmony with nature.</q>
We hope they succeed.</p>
</body>
</html>
Output should be:
How to set Default CSS Settings on HTML <q> Tag
Most browsers will display the <q> element with the following default values.
The <rp> HTML element is used to provide fall-back parentheses for browsers that do not support display of ruby annotations using the <ruby> element. One <rp> element should enclose each of the opening and closing parentheses that wrap the <rt> element that contains the annotation's text.
Definition and Usage
The <rp> tag can be used to provide parentheses around a ruby text, to be shown by browsers that do not support ruby annotations.
Use <rp> together with <ruby> and <rt>: The <ruby> element consists of one or more characters that needs an explanation/pronunciation, and an <rt> element that gives that information, and an optional <rp> element that defines what to show for browsers that not support ruby annotations.
Browser Support
The numbers in the table specify the first browser version that fully supports the element.
Global Attributes
The <rp> tag also supports the Global Attributes in HTML.
Event Attributes
The <rp> tag also supports the Event Attributes in HTML.
How to create HTML <rp> Tag
It is A ruby annotation.
index.html
Example:HTML
<ruby>
漢 <rp>(</rp><rt>ㄏㄢˋ</rt><rp>)</rp>
</ruby>
Output should be:
More Example
Ruby annotations are for showing pronunciation of East Asian characters.
The <rt> HTML element specifies the ruby text component of a ruby annotation, which is used to provide pronunciation, translation, or transliteration information for East Asian typography. The <rt> element must always be contained within a <ruby> element.
Definition and Usage
The <rt> tag defines an explanation or pronunciation of characters (for East Asian typography) in a ruby annotation.
<rt> uses together with <ruby> and <rp>: The <ruby> element consists of one or more characters that needs an explanation/pronunciation, and an <rt> element that gives that information, and an optional <rp> element that defines what to show for browsers that not support ruby annotations.
Browser Support
The numbers in the table specify the first browser version that fully supports the element.
Global Attributes
The <rt> tag also supports the Global Attributes in HTML.
Event Attributes
The <rt> tag also supports the Event Attributes in HTML.
How to create HTML <rt> Tag
It is A ruby annotation.
index.html
Example:HTML
<ruby>
漢 <rt> ㄏㄢˋ </rt>
</ruby>
Output should be:
How to set Default CSS Settings on HTML <rt> Tag
Most browsers will display the <rt> element with the following default values.
The <ruby> HTML element represents small annotations that are rendered above, below, or next to base text, usually used for showing the pronunciation of East Asian characters. It can also be used for annotating other kinds of text, but this usage is less common.
Definition and Usage
The <ruby> tag specifies a ruby annotation.
A ruby annotation is a small extra text, attached to the main text to indicate the pronunciation or meaning of the corresponding characters. This kind of annotation is often used in Japanese publications.
Use <ruby> together with <rt> and <rp>: The <ruby> element consists of one or more characters that needs an explanation/pronunciation, and an <rt> element that gives that information, and an optional <rp> element that defines what to show for browsers that do not support ruby annotations.
Browser Support
The numbers in the table specify the first browser version that fully supports the element.
Global Attributes
The <ruby> tag also supports the Global Attributes in HTML.
Event Attributes
The <ruby> tag also supports the Event Attributes in HTML.
This tag is used to specify that the text content is no longer correct or accurate. This tag is similar but slightly different from the<del> tag. The <s> tag should not be used to define deleted text, rather use the <del> tag for that.
Definition and Usage
The <s> tag specifies text that is no longer correct, accurate or relevant. The text will be displayed with a line through it.
The <s> tag should not be used to define deleted text in a document, use the <del> tag for that.
Browser Support
Global Attributes
The <s> tag also supports the Global Attributes in HTML.
Event Attributes
The <s> tag also supports the Event Attributes in HTML.
Most browsers will display the <s> element with the following default values.
index.html
Example:HTML
<!DOCTYPE html>
<html>
<head>
<style>
s {
text-decoration: line-through;
}
</style>
</head>
<body>
<p>An s element is displayed like this:</p>
<p><s>Some no-longer correct text.</s></p>
<p>Change the default CSS settings to see the effect.</p>
</body>
</html>
The <samp> HTML element is used to enclose inline text which represents sample (or quoted) output from a computer program. Its contents are typically rendered using the browser's default monospaced font (such as Courier or Lucida Console).
Definition and Usage
The <samp> tag is used to define sample output from a computer program. The content inside is displayed in the browser's default monospace font.
Tip: This tag is not deprecated. However, it is possible to achieve richer effect by using CSS.
Also look at:
Tag
Description
<code>
Defines a piece of computer code
<kbd>
Defines keyboard input
<var>
Defines a variable
<pre>
Defines preformatted text
Browser Support
Global Attributes
The <samp> tag also supports the Global Attributes in HTML.
Event Attributes
The <samp> tag also supports the Event Attributes in HTML.
How to create HTML <samp> Tag
It defines some text as sample output from a computer program in a document.
index.html
Example:HTML
<p><samp>File not found.<br>Press F1 to continue</samp></p>
Output should be:
How to set Default CSS Settings on HTML <samp> Tag
Most browsers will display the <samp> element with the following default values.
index.html
Example:HTML
<!DOCTYPE html>
<html>
<head>
<style>
samp {
  font-family: monospace;
}
</style>
</head>
<body>

<p>A samp element is displayed like this:</p>

<samp>Sample output from a computer program</samp>

<p>Change the default CSS settings to see the effect.</p>

</body>
</html>
The <script> HTML element is used to embed executable code or data; this is typically used to embed or refer to JavaScript code. The <script> element can also be used with other languages, such as WebGL's GLSL shader programming language and JSON.
Definition and Usage
The <script> tag is used to embed a client-side script (JavaScript).
The <script> element either contains scripting statements, or it points to an external script file through the src attribute.
Common uses for JavaScript are image manipulation, form validation, and dynamic changes of content.
Tips and Notes
Tip: Also look at the <noscript> element for users that have disabled scripts in their browser, or have a browser that doesn't support client-side scripting.
Tip: If you want to learn more about JavaScript, visit our JavaScript Tutorial.
Browser Support
Attributes
Attribute
Value
Description
async
async
Specifies that the script is downloaded in parallel to parsing the page, and executed as soon as it is available (before parsing completes) (only for external scripts)
crossorigin
anonymous
use-credentials
Sets the mode of the request to an HTTP CORS Request
defer
defer
Specifies that the script is downloaded in parallel to parsing the page, and executed after the page has finished parsing (only for external scripts)
integrity
filehash
Allows a browser to check the fetched script to ensure that the code is never loaded if the source has been manipulated
nomodule
True
False
Specifies that the script should not be executed in browsers supporting ES2015 modules
In XHTML, the content inside scripts is declared as #PCDATA (instead of CDATA), which means that entities will be parsed.
This means that in XHTML, all special characters should be encoded, or all content should be wrapped inside a CDATA section.
index.html
Example:HTML
<script type="text/javascript">
//<![CDATA[
let i = 10;
if (i < 5) {
// some code
}
//]]>
</script>
What is HTML <script> async Attribute
Definition and Usage
The async attribute is a boolean attribute.
If the async attribute is set, the script is downloaded in parallel to parsing the page, and executed as soon as it is available. The parsing of the page is interrupted once the script is downloaded completely, and then the script is executed, before the parsing of the rest of the page continues.
Note: The async attribute is only for external scripts (and should only be used if the src attribute is present).
Note: There are several ways an external script can be executed:
If async is present: The script is downloaded in parallel to parsing the page, and executed as soon as it is available (before parsing completes)
If defer is present (and not async): The script is downloaded in parallel to parsing the page, and executed after the page has finished parsing
If neither async or defer is present: The script is downloaded and executed immediately, blocking parsing until the script is completed
Browser Support
The numbers in the table specify the first browser version that fully supports the attribute.
Syntax
<script async>
How to add HTML <script> async Attribute
It is a script that will be downloaded in parallel to parsing the page, and executed as soon as it is available.
The crossorigin attribute sets the mode of the request to an HTTP CORS Request.
Web pages often make requests to load resources on other servers. Here is where CORS comes in.
A cross-origin request is a request for a resource (e.g. style sheets, iframes, images, fonts, or scripts) from another domain.
CORS is used to manage cross-origin requests.
CORS stands for Cross-Origin Resource Sharing, and is a mechanism that allows resources on a web page to be requested from another domain outside their own domain. It defines a way of how a browser and server can interact to determine whether it is safe to allow the cross-origin request. CORS allows servers to specify who can access the assets on the server, among many other things.
Tip: The opposite of cross-origin requests is same-origin requests. This means that a web page can only interact with other documents that are also on the same server. This policy enforces that documents that interact with each other must have the same origin (domain).
Tip: Also look at the integrity attribute.
Browser Support
The numbers in the table specify the first browser version that fully supports the attribute.
Syntax
<script crossorigin="anonymous|use-credentials">
Attribute Values
Value
Description
anonymous
use-credentials
Specifies the mode of the CORS request:
anonymous - A cross-origin request is performed. No credentials are sent
use-credentials - A cross-origin request is performed. Credentials are sent (e.g. a cookie, a certificate, a HTTP Basic authentication)
How to add HTML <script> crossorigin Attribute
Here is a link to a .js file on another server. Here we use both the integrity and crossorigin attributes.
If the defer attribute is set, it specifies that the script is downloaded in parallel to parsing the page, and executed after the page has finished parsing.
Note: The defer attribute is only for external scripts (should only be used if the src attribute is present).
Note: There are several ways an external script can be executed:
If async is present: The script is downloaded in parallel to parsing the page, and executed as soon as it is available (before parsing completes)
If defer is present (and not async): The script is downloaded in parallel to parsing the page, and executed after the page has finished parsing
If neither async or defer is present: The script is downloaded and executed immediately, blocking parsing until the script is completed
Browser Support
The numbers in the table specify the first browser version that fully supports the attribute.
Syntax
<script defer>
How to add HTML <script> defer Attribute
It is a script that will be downloaded in parallel to parsing the page, and executed after the page has finished parsing.
index.html
Example:HTML
<!DOCTYPE html>
<html>
<body>
<h1>The script defer attribute</h1>
<script src="https://www.w3schools.com/tags/demo_defer.js" defer></script>
<p>The script above requests information from the paragraph below. Normally, this is not possible, because the script is executed before the paragraph exists.</p>
<p id="p1">Hello World!</p>
<p>However, the defer attribute specifies that the script should be executed later. This way the script can request information from the paragraph.</p>
</body>
</html>
Output should be:
What is HTML <script> integrity Attribute
Definition and Usage
The integrity attribute allows a browser to check the fetched script to ensure that the code is never loaded if the source has been manipulated.
Subresource Integrity (SRI) is a W3C specification that allows web developers to ensure that resources hosted on third-party servers have not been altered. Use of SRI is recommended!
When using SRI, the webpage holds the hash and the server holds the file (the .js file in this case). The browser downloads the file, then checks it, to make sure that it is a match with the hash in the integrity attribute. If it matches, the file is used, and if not, the file is blocked.
You can use an online SRI hash generator to generate integrity hashes: SRI Hash Generator
Browser Support
The numbers in the table specify the first browser version that fully supports the attribute.
Syntax
<script integrity="filehash">
Attribute Values
Value
Description
filehash
The file hashing value of the external script file
How to create HTML <script> integrity Attribute
It links to a CDN, using both the integrity and crossorigin atributes.
The noModule property of the HTMLScriptElement interface is a boolean value that indicates whether the script should be executed in browsers that support ES modules. Practically, this can be used to serve fallback scripts to older browsers that do not support JavaScript modules.
It reflects the nomodule attribute of the <script> element.
nomodule
True
False
Specifies that the script should not be executed in browsers supporting ES2015 modules
How to create nomodule on HTML <script> Tag
A boolean, true means that the script should not be executed in browsers that support ES modules, false otherwise.
index.html
Example:HTML
<script id="el" nomodule>
// If the browser supports JavaScript modules, the following script will not be executed.
console.log("The browser does not support JavaScript modules");
</script>
<script>
const el = document.getElementById("el");
console.log(el.noModule); // Output: true
</script>
What is HTML <script> referrerpolicy Attribute
Definition and Usage
The referrerpolicy attribute specifies which referrer information to send when fetching a script.
Browser Support
The numbers in the table specify the first browser version that fully supports the attribute.
Default. Sends the origin, path, and query string if the protocol security level stays the same or is higher (HTTP to HTTP, HTTPS to HTTPS, HTTP to HTTPS is ok). Sends nothing to less secure level (HTTPS to HTTP is not ok)
origin
Sends the origin (scheme, host, and port) of the document
origin-when-cross-origin
Sends the origin of the document for cross-origin request. Sends the origin, path, and query string for same-origin request
same-origin
Sends a referrer for same-origin request. Sends no referrer for cross-origin request
strict-origin-when-cross-origin
Sends the origin if the protocol security level stays the same or is higher (HTTP to HTTP, HTTPS to HTTPS, and HTTP to HTTPS is ok). Sends nothing to less secure level (HTTPS to HTTP)
unsafe-url
Sends the origin, path, and query string (regardless of security). Use this value carefully!
How to create HTML <script> referrerpolicy Attribute
How to add no-referrer-when-downgrade value on HTML <script> referrerpolicy Attribute
The URL is sent as a referrer when the protocol security level stays the same (e.g.HTTP→HTTP, HTTPS→HTTPS), but isn't sent to a less secure destination (e.g. HTTPS→HTTP).
no-referrer-when-downgrade
Default. Sends the origin, path, and query string if the protocol security level stays the same or is higher (HTTP to HTTP, HTTPS to HTTPS, HTTP to HTTPS is ok). Sends nothing to less secure level (HTTPS to HTTP is not ok)
How to add origin value on HTML <script> referrerpolicy Attribute
Only send the origin of the document as the referrer in all cases. The document https://example.com/page.html will send the referrer https://example.com/.
origin
Sends the origin (scheme, host, and port) of the document
How to add strict-origin value on HTML <script> referrerpolicy Attribute
Only send the origin of the document as the referrer when the protocol security level stays the same (e.g. HTTPS→HTTPS), but don't send it to a less secure destination (e.g. HTTPS→HTTP).
How to add strict-origin-when-cross-origin value on HTML <script> referrerpolicy Attribute
This is the user agent's default behavior if no policy is specified. Send a full URL when performing a same-origin request, only send the origin when the protocol security level stays the same (e.g. HTTPS→HTTPS), and send no header to a less secure destination (e.g. HTTPS→HTTP).
strict-origin-when-cross-origin
Sends the origin if the protocol security level stays the same or is higher (HTTP to HTTP, HTTPS to HTTPS, and HTTP to HTTPS is ok). Sends nothing to less secure level (HTTPS to HTTP)
How to add unsafe-url value on HTML <script> referrerpolicy Attribute
Send a full URL when performing a same-origin or cross-origin request. This policy will leak origins and paths from TLS-protected resources to insecure origins. Carefully consider the impact of this setting.
unsafe-url
Sends the origin, path, and query string (regardless of security). Use this value carefully!
The <script> HTML element is used to embed executable code or data; this is typically used to embed or refer to JavaScript code. The <script> element can also be used with other languages, such as WebGL's GLSL shader programming language and JSON.
Definition and Usage
The src attribute specifies the URL of an external script file.
If you want to run the same JavaScript on several pages in a web site, you should create an external JavaScript file, instead of writing the same script over and over again. Save the script file with a .js extension, and then refer to it using the src attribute in the <script> tag.
Note: The external script file cannot contain the <script> tag.
Note: Point to the external script file exactly where you would have written the script.
Browser Support
Syntax
<script src="URL">
Attribute Values
Value
Description
URL
The URL of the external script file.
Possible values:
An absolute URL - points to another web site (like src="http://www.example.com/example.js")
A relative URL - points to a file within a web site (like src="/scripts/example.js")
The <search> HTML element is a container representing the parts of the document or application with form controls or other content related to performing a search or filtering operation. The <search> element semantically identifies the purpose of the element's contents as having search or filtering capabilities. The search or filtering functionality can be for the website or application, the current web page or document, or the entire Internet or subsection thereof.
Definition and Usage
The <search> tag is used to specify that here comes a set of elements that is related to search.
Elements inside a <search> elements can typically be form elements used to perform a search.
Note: The <search> element does not render as anything special in a browser. However, you can use CSS to style the <search> element and its content.
Browser Support
Global Attributes
The <search> tag also supports the Global Attributes in HTML.
Event Attributes
The <search> tag also supports the Event Attributes in HTML.
How to create HTML <search> Tag
It surrounds the search form with a search element:
The <section> HTML element represents a generic standalone section of a document, which doesn't have a more specific semantic element to represent it. Sections should always have a heading, with very few exceptions.
Definition and Usage
The <section> tag defines a section in a document.
Browser Support
The numbers in the table specify the first browser version that fully supports the element.
Global Attributes
The <section> tag also supports the Global Attributes in HTML.
Event Attributes
The <section> tag also supports the Event Attributes in HTML.
How to create HTML <section> Tag
Here are Two sections in a document.
index.html
Example:HTML
<section>
<h2>WWF History</h2>
<p>The World Wide Fund for Nature (WWF) is an international organization working on issues regarding the conservation, research and restoration of the environment, formerly named the World Wildlife Fund. WWF was founded in 1961.</p>
</section>
<section>
<h2>WWF's Symbol</h2>
<p>The Panda has become the symbol of WWF. The well-known panda logo of WWF originated from a panda named Chi Chi that was transferred from the Beijing Zoo to the London Zoo in the same year of the establishment of WWF.</p>
</section>
The <select> HTML element represents a control that provides a menu of options.
Definition and Usage
The <select> element is used to create a drop-down list.
The <select> element is most often used in a form, to collect user input.
The name attribute is needed to reference the form data after the form is submitted (if you omit the name attribute, no data from the drop-down list will be submitted).
The id attribute is needed to associate the drop-down list with a label.
The <option> tags inside the <select> element define the available options in the drop-down list.
Tip: Always add the <label> tag for best accessibility practices!
Browser Support
Attributes
Attribute
Value
Description
autofocus
autofocus
Specifies that the drop-down list should automatically get focus when the page loads
disabled
disabled
Specifies that a drop-down list should be disabled
form
form_id
Defines which form the drop-down list belongs to
multiple
multiple
Specifies that multiple options can be selected at once
name
name
Defines a name for the drop-down list
required
required
Specifies that the user is required to select a value before submitting the form
size
number
Defines the number of visible options in a drop-down list
Global Attributes
The <select> tag also supports the Global Attributes in HTML.
Event Attributes
The <select> tag also supports the Event Attributes in HTML.
The disabled attribute for <select> element in HTML is used to specify that the select element is disabled. A disabled drop-down list is un-clickable and unusable. It is a boolean attribute.
Definition and Usage
The disabled attribute is a boolean attribute.
When present, it specifies that the drop-down list should be disabled.
A disabled drop-down list is unusable and un-clickable.
The disabled attribute can be set to keep a user from using the drop-down list until some other condition has been met (like selecting a checkbox, etc.). Then, a JavaScript can remove the disabled value, and make the drop-down list usable.
The form attribute specifies the form the drop-down list belongs to.
The value of this attribute must be equal to the id attribute of a <form> element in the same document.
Browser Support
Syntax
<select form="form_id">
Attribute Values
Value
Description
form_id
Specifies the form element the <select> element belongs to. The value of this attribute must be equal to the id attribute of a <form> element in the same document.
How to create HTML <select> form Attribute
It is A drop-down list located outside a form (but still a part of the form)
index.html
Output should be:
What is HTML <select> multiple Attribute
Definition and Usage
The multiple attribute is a boolean attribute.
When present, it specifies that multiple options can be selected at once.
Selecting multiple options vary in different operating systems and browsers:
For windows: Hold down the control (ctrl) button to select multiple options
For Mac: Hold down the command button to select multiple options
Because of the different ways of doing this, and because you have to inform the user that multiple selection is available, it is more user-friendly to use checkboxes instead.
Browser Support
Syntax
<select multiple>
How to add HTML <select> multiple Attribute
It is A drop-down list that allows multiple selections.
The size attribute specifies the number of visible options in a drop-down list.
If the value of the size attribute is greater than 1, but lower than the total number of options in the list, the browser will add a scroll bar to indicate that there are more options to view.
Browser Support
Note: In Chrome and Safari, this attribute may not work as expected for size="2" and size="3".
Syntax
<select size="number">
Attribute Values
Value
Description
number
The number of visible options in the drop-down list. Default value is 1. If the multiple attribute is present, the default value is 4
The <small> HTML element represents side-comments and small print, like copyright and legal text, independent of its styled presentation. By default, it renders text within it one font-size smaller, such as from small to x-small.
Definition and Usage
The <small> tag defines smaller text (like copyright and other side-comments).
Tip: This tag is not deprecated, but it is possible to achieve richer (or the same) effect with CSS.
Browser Support
Global Attributes
The <small> tag also supports the Global Attributes in HTML.
Event Attributes
The <small> tag also supports the Event Attributes in HTML.
How to create HTML <small> Tag
It defines a smaller text.
index.html
Example:HTML
<p><small>This is some smaller text.</small></p>
Output should be:
How to Use CSS to define smaller text
See the Example.
index.html
Example:HTML
<!DOCTYPE html>
<html>
<head>
<style>
span.small {
font-size: smaller;
}
</style>
</head>
<body>
<h1>Use CSS to define smaller text</h1>
<p>This is some normal text.</p>
<p><span class="small">This is some smaller text.</span></p>
</body>
</html>
Output should be:
How to set Default CSS Settings on HTML <small> Tag
Most browsers will display the <small> element with the following default values.
index.html
Example:HTML
<!DOCTYPE html>
<html>
<head>
<style>
small {
font-size: smaller;
}
</style>
</head>
<body>
<p>A small element is displayed like this:</p>
<small>Some smaller text</small>
<p>Change the default CSS settings to see the effect.</p>
</body>
</html>
The <source> tag is used to specify multiple media resources for media elements, such as <video>, <audio>, and <picture>.
The <source> tag allows you to specify alternative video/audio/image files which the browser may choose from, based on browser support or viewport width. The browser will choose the first <source> it supports.
Browser Support
The numbers in the table specify the first browser version that fully supports the element.
Attributes
Attribute
Value
Description
media
media_query
Accepts any valid media query that would normally be defined in a CSS
sizes
Specifies image sizes for different page layouts
src
URL
Required when <source> is used in <audio> and <video>. Specifies the URL of the media file
srcset
URL
Required when <source> is used in <picture>. Specifies the URL of the image to use in different situations
type
MIME-type
Specifies the MIME-type of the resource
Global Attributes
The <source> tag also supports the Global Attributes in HTML.
Event Attributes
The <source> tag also supports the Event Attributes in HTML.
How to create HTML <source> Tag
It is An audio player with two source files. The browser will choose the first <source> it supports.
index.html
Example:HTML
<!DOCTYPE html>
<html>
<body>
<h1>The source element</h1>
<p>Click on the play button to play a sound:</p>
<audio controls>
<source src="https://file-examples.com/storage/fe36b23e6a66fc0679c1f86/2017/11/file_example_OOG_1MG.ogg" type="audio/ogg">
<source src="https://file-examples.com/storage/fe36b23e6a66fc0679c1f86/2017/11/file_example_MP3_700KB.mp3" type="audio/mpeg">
Your browser does not support the audio element.
</audio>
</body>
</html>
Output should be:
How to Use <source> within <video> to play a video
See the Example.
index.html
Example:HTML
<!DOCTYPE html>
<html>
<body>
<h1>The video element</h1>
<video width="320" height="240" controls>
<source src="https://www.sample-videos.com/video321/mp4/720/big_buck_bunny_720p_1mb.mp4" type="video/mp4">
<source src="https://www.sample-videos.com/video321/mp4/720/big_buck_bunny_720p_1mb.mp4" type="video/ogg">
Your browser does not support the video tag.
</video>
</body>
</html>
Output should be:
How to Use <source> within <picture> to define different images based on the viewport width
Teletypes and similar media using a fixed-pitch character grid
tv
Television type devices (low resolution, limited scroll ability)
Values
Value
Description
width
Specifies the width of the targeted display area.
"min-" and "max-" prefixes can be used.
Example: media="screen and (min-width:500px)"
height
Specifies the height of the targeted display area.
"min-" and "max-" prefixes can be used.
Example: media="screen and (max-height:700px)"
device-width
Specifies the width of the target display/paper.
"min-" and "max-" prefixes can be used.
Example: media="screen and (device-width:500px)"
device-height
Specifies the height of the target display/paper.
"min-" and "max-" prefixes can be used.
Example: media="screen and (device-height:500px)"
orientation
Specifies the orientation of the target display/paper.
Possible values: "portrait" or "landscape"
Example: media="all and (orientation: landscape)"
aspect-ratio
Specifies the width/height ratio of the targeted display area.
"min-" and "max-" prefixes can be used.
Example: media="screen and (aspect-ratio:16/9)"
device-aspect-ratio
Specifies the device-width/device-height ratio of the target display/paper.
"min-" and "max-" prefixes can be used.
Example: media="screen and (aspect-ratio:16/9)"
color
Specifies the bits per color of target display.
"min-" and "max-" prefixes can be used.
Example: media="screen and (color:3)"
color-index
Specifies the number of colors the target display can handle.
"min-" and "max-" prefixes can be used.
Example: media="screen and (min-color-index:256)"
monochrome
Specifies the bits per pixel in a monochrome frame buffer.
"min-" and "max-" prefixes can be used.
Example: media="screen and (monochrome:2)"
resolution
Specifies the pixel density (dpi or dpcm) of the target display/paper.
"min-" and "max-" prefixes can be used.
Example: media="print and (resolution:300dpi)"
scan
Specifies scanning method of a tv display.
Possible values are "progressive" and "interlace".
Example: media="tv and (scan:interlace)"
grid
Specifies if the output device is grid or bitmap.
Possible values are "1" for grid, and "0" otherwise.
Example: media="handheld and (grid:1)"
<!DOCTYPE html>
<html>
<body>
<h1>The source media attribute</h1>
<picture>
<source media="screen not (min-width:500px)" srcset="https://horje.com/avatar.png">
<source media="handheld and (min-width:500px)" srcset="https://horje.com/avatar.png">
<img src="https://horje.com/avatar.png" alt="Horje Icon" style="width:auto;">
</picture>
</body>
</html>
Output should be:
How to add projection Value in HTML <source> media Attribute
projection
Projectors
index.html
Example:HTML
<!DOCTYPE html>
<html>
<body>
<h1>The source media attribute</h1>
<picture>
<source media="screen not (min-width:500px)" srcset="https://horje.com/avatar.png">
<source media="projection and (min-width:500px)" srcset="https://horje.com/avatar.png">
<img src="https://horje.com/avatar.png" alt="Horje Icon" style="width:auto;">
</picture>
</body>
</html>
Output should be:
How to add print Value in HTML <source> media Attribute
print
Print preview mode/printed pages
index.html
Example:HTML
<!DOCTYPE html>
<html>
<body>
<h1>The source media attribute</h1>
<picture>
<source media="screen not (min-width:500px)" srcset="https://horje.com/avatar.png">
<source media="print and (min-width:500px)" srcset="https://horje.com/avatar.png">
<img src="https://horje.com/avatar.png" alt="Horje Icon" style="width:auto;">
</picture>
</body>
</html>
Output should be:
How to add screen Value in HTML <source> media Attribute
screen
Computer screens
index.html
Example:HTML
<!DOCTYPE html>
<html>
<body>
<h1>The source media attribute</h1>
<picture>
<source media="screen not (min-width:500px)" srcset="https://horje.com/avatar.png">
<source media="print and (min-width:500px)" srcset="https://horje.com/avatar.png">
<img src="https://horje.com/avatar.png" alt="Horje Icon" style="width:auto;">
</picture>
</body>
</html>
Output should be:
How to add tty Value in HTML <source> media Attribute
tty
Teletypes and similar media using a fixed-pitch character grid
index.html
Example:HTML
<!DOCTYPE html>
<html>
<body>
<h1>The source media attribute</h1>
<picture>
<source media="screen not (min-width:500px)" srcset="https://horje.com/avatar.png">
<source media="tty and (min-width:500px)" srcset="https://horje.com/avatar.png">
<img src="https://horje.com/avatar.png" alt="Horje Icon" style="width:auto;">
</picture>
</body>
</html>
Output should be:
How to add tv Value in HTML <source> media Attribute
tv
Television type devices (low resolution, limited scroll ability)
index.html
Example:HTML
<!DOCTYPE html>
<html>
<body>
<h1>The source media attribute</h1>
<picture>
<source media="screen not (min-width:500px)" srcset="https://horje.com/avatar.png">
<source media="tv and (min-width:500px)" srcset="https://horje.com/avatar.png">
<img src="https://horje.com/avatar.png" alt="Horje Icon" style="width:auto;">
</picture>
</body>
</html>
Output should be:
How to add width Value in HTML <source> media Attribute
width
Specifies the width of the targeted display area.
"min-" and "max-" prefixes can be used.
Example: media="screen and (min-width:500px)"
index.html
Example:HTML
<!DOCTYPE html>
<html>
<body>
<h1>The source media attribute</h1>
<picture>
<source media="screen not (min-width:500px)" srcset="https://horje.com/avatar.png">
<source media="screen and (min-width:500px)" srcset="https://horje.com/avatar.png">
<img src="https://horje.com/avatar.png" alt="Horje Icon" style="width:auto;">
</picture>
</body>
</html>
Output should be:
How to add height Value in HTML <source> media Attribute
height
Specifies the height of the targeted display area.
"min-" and "max-" prefixes can be used.
Example: media="screen and (max-height:700px)"
index.html
Example:HTML
<source media="screen and (max-height:700px)" srcset="https://horje.com/avatar.png">
Output should be:
How to add device-width Value in HTML <source> media Attribute
device-width
Specifies the width of the target display/paper.
"min-" and "max-" prefixes can be used.
Example: media="screen and (device-width:500px)"
index.html
Example:HTML
<source media="screen and (device-width:500px)" srcset="https://horje.com/avatar.png">
Output should be:
How to add device-height Value in HTML <source> media Attribute
device-height
Specifies the height of the target display/paper.
"min-" and "max-" prefixes can be used.
Example: media="screen and (device-height:500px)"
index.html
Example:PHP
<source media="screen and (device-height:500px)" srcset="https://horje.com/avatar.png">
Output should be:
How to add orientation Value in HTML <source> media Attribute
orientation
Specifies the orientation of the target display/paper.
Possible values: "portrait" or "landscape"
Example: media="all and (orientation: landscape)"
index.html
Example:HTML
<source media="all and (orientation: landscape)" srcset="https://horje.com/avatar.png">
Output should be:
How to add aspect-ratio Value in HTML <source> media Attribute
aspect-ratio
Specifies the width/height ratio of the targeted display area.
"min-" and "max-" prefixes can be used.
Example: media="screen and (aspect-ratio:16/9)"
index.html
Example:HTML
<source media="screen and (aspect-ratio:16/9)" srcset="https://horje.com/avatar.png">
Output should be:
How to add device-aspect-ratio Value in HTML <source> media Attribute
device-aspect-ratio
Specifies the device-width/device-height ratio of the target display/paper.
"min-" and "max-" prefixes can be used.
Example: media="screen and (aspect-ratio:16/9)"
index.html
Example:HTML
<source media="screen and (aspect-ratio:16/9)" srcset="https://horje.com/avatar.png">
Output should be:
How to add color Value in HTML <source> media Attribute
color
Specifies the bits per color of target display.
"min-" and "max-" prefixes can be used.
Example: media="screen and (color:3)"
index.html
Example:HTML
<source media="screen and (color:3)" srcset="https://horje.com/avatar.png">
try
How to add color-index Value in HTML <source> media Attribute
color-index
Specifies the number of colors the target display can handle.
"min-" and "max-" prefixes can be used.
Example: media="screen and (min-color-index:256)"
index.html
Example:HTML
<source media="screen and (min-color-index:256)" srcset="https://horje.com/avatar.png">
Output should be:
How to add monochrome Value in HTML <source> media Attribute
monochrome
Specifies the bits per pixel in a monochrome frame buffer.
"min-" and "max-" prefixes can be used.
Example: media="screen and (monochrome:2)"
index.html
Example:HTML
<source media="screen and (min-color-index:256)" srcset="https://horje.com/avatar.png">
Output should be:
How to add resolution Value in HTML <source> media Attribute
resolution
Specifies the pixel density (dpi or dpcm) of the target display/paper.
"min-" and "max-" prefixes can be used.
Example: media="print and (resolution:300dpi)"
index.html
Example:HTML
<source media="print and (resolution:300dpi)" srcset="https://horje.com/avatar.png">
Output should be:
How to add scan Value in HTML <source> media Attribute
scan
Specifies scanning method of a tv display.
Possible values are "progressive" and "interlace".
Example: media="tv and (scan:interlace)"
<source media="tv and (scan:interlace)" srcset="https://horje.com/avatar.png">
Output should be:
How to add grid Value in HTML <source> media Attribute
grid
Specifies if the output device is grid or bitmap.
Possible values are "1" for grid, and "0" otherwise.
Example: media="handheld and (grid:1)"
index.html
Example:HTML
<source media="handheld and (grid:1)" srcset="https://horje.com/avatar.png">
The src attribute specifies the URL of the media file to play.
This attribute is required when <source> is used in <audio> and <video>.
Browser Support
The numbers in the table specify the first browser version that fully supports the attribute.
Syntax
<source src="URL">
Attribute Values
Value
Description
URL
Specifies the URL of the media file.
Possible values:
An absolute URL - points to another web site (like href="http://www.example.com/horse.ogg")
A relative URL - points to a file within a web site (like href="horse.ogg")
index.html
Example:HTML
<audio controls>
<source src="https://file-examples.com/storage/fe36b23e6a66fc0679c1f86/2017/11/file_example_OOG_1MG.ogg" type="audio/ogg">
<source src="https://file-examples.com/storage/fe36b23e6a66fc0679c1f86/2017/11/file_example_MP3_700KB.mp3" type="audio/mpeg">
Your browser does not support the audio element.
</audio>
Output should be:
How to add HTML <source> srcset Attribute
Definition and Usage
The srcset attribute specifies the URL of the image to use in different situations.
This attribute is required when <source> is used in <picture>.
Browser Support
The numbers in the table specify the first browser version that fully supports the attribute.
Syntax
<source srcset="URL">
Attribute Values
Value
Description
URL
Specifies the URL of the image.
Possible values:
An absolute URL - points to another web site (like href="http://www.example.com/flower.jpg")
A relative URL - points to a file within a web site (like href="flower.jpg")
index.html
Example:HTML
<source media="screen and (min-color-index:256)" srcset="https://horje.com/avatar.png">
Output should be:
How to add HTML <source> type Attribute
Definition and Usage
The type attribute specifies the Internet media type (formerly known as MIME type) of the media resource.
Browser Support
The numbers in the table specify the first browser version that fully supports the attribute.
Syntax
<source type="media_type">
Attribute Values
Value
Description
media_type
Specifies the Internet media type of the media resource.
Common media types:
For video:
video/ogg
video/mp4
video/webm
For audio:
audio/ogg
audio/mpeg
Look at IANA Media Types for a complete list of standard media types
index.html
Example:HTML
<!DOCTYPE html>
<html>
<body>
<h1>The video element</h1>
<video width="320" height="240" controls>
<source src="https://www.sample-videos.com/video321/mp4/720/big_buck_bunny_720p_1mb.mp4" type="video/mp4">
<source src="https://www.sample-videos.com/video321/mp4/720/big_buck_bunny_720p_1mb.mp4" type="video/ogg">
Your browser does not support the video tag.
</video>
</body>
</html>
The <span> tag is an inline container used to mark up a part of a text, or a part of a document.
The <span> tag is easily styled by CSS or manipulated with JavaScript using the class or id attribute.
The <span> tag is much like the <div> element, but <div> is a block-level element and <span> is an inline element.
Browser Support
Global Attributes
The <span> tag also supports the Global Attributes in HTML.
Event Attributes
The <span> tag also supports the Event Attributes in HTML.
How to create HTML <span> Tag
A <span> element which is used to color a part of a text.
index.html
Example:HTML
<!DOCTYPE html>
<html>
<body>
<h1>The span element</h1>
<p>My mother has <span style="color:blue;font-weight:bold">blue</span> eyes and my father has <span style="color:darkolivegreen;font-weight:bold">dark green</span> eyes.</p>
</body>
</html>
The <style> tag is used to define style information (CSS) for a document.
Inside the <style> element you specify how HTML elements should render in a browser.
The <style> element must be included inside the <head> section of the document.
Tips and Notes
Note: When a browser reads a style sheet, it will format the HTML document according to the information in the style sheet. If some properties have been defined for the same selector (element) in different style sheets, the value from the last read style sheet will be used (see example below)!
Tip: To link to an external style sheet, use the <link> tag.
Tip: To learn more about style sheets, please read our CSS Tutorial.
Browser Support
Attributes
Attribute
Value
Description
media
media_query
Specifies what media/device the media resource is optimized for
type
text/css
Specifies the media type of the <style> tag
Global Attributes
The <style> tag also supports the Global Attributes in HTML.
Event Attributes
The <style> tag also supports the Event Attributes in HTML.
How to create HTML <style> Tag
Use of the <style> element to apply a simple style sheet to an HTML document.
index.html
Example:HTML
<!DOCTYPE html>
<html>
<head>
<style>
h1 {color:red;}
p {color:blue;}
</style>
</head>
<body>
<h1>This is a heading</h1>
<p>This is a paragraph.</p>
</body>
</html>
Output should be:
How to add Multiple styles for the same elements in HTML <style> Tag
Multiple styles for the same elements.
index.html
Example:HTML
<!DOCTYPE html>
<html>
<head>
<style>
h1 {color:red;}
p {color:blue;}
</style>
<style>
h1 {color:green;}
p {color:pink;}
</style>
</head>
<body>
<h1>This is a heading</h1>
<p>This is a paragraph.</p>
<p>Notice that if some properties have been defined for the same selector (element) in different style sheets, the value from the last read style sheet will be used!</p>
</body>
</html>
Output should be:
How to set Default CSS Settings in HTML <style> Tag
Most browsers will display the <style> element with the following default values.
index.html
Example:HTML
<style>
style {
display: none;
}
</style>
How to add HTML <style> media Attribute in HTML <style> Tag
Definition and Usage
The media attribute specifies what media/device the CSS style is optimized for.
This attribute is used to specify that the style is for special devices (like iPhone), speech or print media.
Teletypes and similar media using a fixed-pitch character grid
tv
Television type devices (low resolution, limited scroll ability)
Values
Value
Description
width
Specifies the width of the targeted display area.
"min-" and "max-" prefixes can be used.
Example: media="screen and (min-width:500px)"
height
Specifies the height of the targeted display area.
"min-" and "max-" prefixes can be used.
Example: media="screen and (max-height:700px)"
device-width
Specifies the width of the target display/paper.
"min-" and "max-" prefixes can be used.
Example: media="screen and (device-width:500px)"
device-height
Specifies the height of the target display/paper.
"min-" and "max-" prefixes can be used.
Example: media="screen and (device-height:500px)"
orientation
Specifies the orientation of the target display/paper.
Possible values: "portrait" or "landscape"
Example: media="all and (orientation: landscape)"
aspect-ratio
Specifies the width/height ratio of the targeted display area.
"min-" and "max-" prefixes can be used.
Example: media="screen and (aspect-ratio:16/9)"
device-aspect-ratio
Specifies the device-width/device-height ratio of the target display/paper.
"min-" and "max-" prefixes can be used.
Example: media="screen and (aspect-ratio:16/9)"
color
Specifies the bits per color of target display.
"min-" and "max-" prefixes can be used.
Example: media="screen and (color:3)"
color-index
Specifies the number of colors the target display can handle.
"min-" and "max-" prefixes can be used.
Example: media="screen and (min-color-index:256)"
monochrome
Specifies the bits per pixel in a monochrome frame buffer.
"min-" and "max-" prefixes can be used.
Example: media="screen and (monochrome:2)"
resolution
Specifies the pixel density (dpi or dpcm) of the target display/paper.
"min-" and "max-" prefixes can be used.
Example: media="print and (resolution:300dpi)"
scan
Specifies scanning method of a tv display.
Possible values are "progressive" and "interlace".
Example: media="tv and (scan:interlace)"
grid
Specifies if the output device is grid or bitmap.
Possible values are "1" for grid, and "0" otherwise.
Example: media="handheld and (grid:1)"
index.html
Example:HTML
<style media="print">
h1 {color:#000000;}
p {color:#000000;}
body {background-color:#FFFFFF;}
</style>
try
How to add and Value in HTML <style> media Attribute
and
Specifies an AND operator
index.html
Example:HTML
<!DOCTYPE html>
<html>
<head>
<style>
h1 {color:#FF0000;}
p {color:#0000FF;}
body {background-color:#FFEFD6;}
</style>
<style media="screen and (min-width:500px)">
h1 {color:#000000;}
p {color:#000000;}
body {background-color:#FFFFFF;}
</style>
</head>
<body>
<h1>Horje Example</h1>
<p><a href="/learn/816/what-is-html-style-tag" target="_blank">Click here</a> to open this page in a new window (without the tryit part).</p>
<p>If you print this page, or open it in print preview, you will see that it is styled with the media="print" stylesheet. The "print" stylesheet contains black text on white background.</p>
</body>
</html>
Output should be:
How to add not Value in HTML <style> media Attribute
not
Specifies a NOT operator
index.html
Example:HTML
<!DOCTYPE html>
<html>
<head>
<style>
h1 {color:#FF0000;}
p {color:#0000FF;}
body {background-color:#FFEFD6;}
</style>
<style media="screen not (color:3)">
h1 {color:#000000;}
p {color:#000000;}
body {background-color:#FFFFFF;}
</style>
</head>
<body>
<h1>Horje Example</h1>
<p><a href="/learn/816/what-is-html-style-tag" target="_blank">Click here</a> to open this page in a new window (without the tryit part).</p>
<p>If you print this page, or open it in print preview, you will see that it is styled with the media="print" stylesheet. The "print" stylesheet contains black text on white background.</p>
</body>
</html>
Output should be:
How to add , Value in HTML <style> media Attribute
,
Specifies an OR operator
index.html
Example:HTML
<!DOCTYPE html>
<html>
<head>
<style>
h1 {color:#FF0000;}
p {color:#0000FF;}
body {background-color:#FFEFD6;}
</style>
<style media="screen , (color:3)">
h1 {color:#000000;}
p {color:#000000;}
body {background-color:#FFFFFF;}
</style>
</head>
<body>
<h1>Horje Example</h1>
<p><a href="/learn/816/what-is-html-style-tag" target="_blank">Click here</a> to open this page in a new window (without the tryit part).</p>
<p>If you print this page, or open it in print preview, you will see that it is styled with the media="print" stylesheet. The "print" stylesheet contains black text on white background.</p>
</body>
</html>
Output should be:
How to add all Value in HTML <style> media Attribute
all
Default. Suitable for all devices
index.html
Example:HTML
<!DOCTYPE html>
<html>
<head>
<style>
h1 {color:#FF0000;}
p {color:#0000FF;}
body {background-color:#FFEFD6;}
</style>
<style media="all and (orientation: landscape)">
h1 {color:#000000;}
p {color:#000000;}
body {background-color:#FFFFFF;}
</style>
</head>
<body>
<h1>Horje Example</h1>
<p><a href="/learn/816/what-is-html-style-tag" target="_blank">Click here</a> to open this page in a new window (without the tryit part).</p>
<p>If you print this page, or open it in print preview, you will see that it is styled with the media="print" stylesheet. The "print" stylesheet contains black text on white background.</p>
</body>
</html>
Output should be:
How to add aural Value in HTML <style> media Attribute
aural
Speech synthesizers
index.html
Example:HTML
<!DOCTYPE html>
<html>
<head>
<style>
h1 {color:#FF0000;}
p {color:#0000FF;}
body {background-color:#FFEFD6;}
</style>
<style media="aural and (orientation: landscape)">
h1 {color:#000000;}
p {color:#000000;}
body {background-color:#FFFFFF;}
</style>
</head>
<body>
<h1>Horje Example</h1>
<p><a href="/learn/816/what-is-html-style-tag" target="_blank">Click here</a> to open this page in a new window (without the tryit part).</p>
<p>If you print this page, or open it in print preview, you will see that it is styled with the media="print" stylesheet. The "print" stylesheet contains black text on white background.</p>
</body>
</html>
Output should be:
How to add braille Value in HTML <style> media Attribute
braille
Braille feedback devices
index.html
Example:HTML
<!DOCTYPE html>
<html>
<head>
<style>
h1 {color:#FF0000;}
p {color:#0000FF;}
body {background-color:#FFEFD6;}
</style>
<style media="braille and (orientation: landscape)">
h1 {color:#000000;}
p {color:#000000;}
body {background-color:#FFFFFF;}
</style>
</head>
<body>
<h1>Horje Example</h1>
<p><a href="/learn/816/what-is-html-style-tag" target="_blank">Click here</a> to open this page in a new window (without the tryit part).</p>
<p>If you print this page, or open it in print preview, you will see that it is styled with the media="print" stylesheet. The "print" stylesheet contains black text on white background.</p>
</body>
</html>
Output should be:
How to add handheld Value in HTML <style> media Attribute
<!DOCTYPE html>
<html>
<head>
<style>
h1 {color:#FF0000;}
p {color:#0000FF;}
body {background-color:#FFEFD6;}
</style>
<style media="handheld and (orientation: landscape)">
h1 {color:#000000;}
p {color:#000000;}
body {background-color:#FFFFFF;}
</style>
</head>
<body>
<h1>Horje Example</h1>
<p><a href="/learn/816/what-is-html-style-tag" target="_blank">Click here</a> to open this page in a new window (without the tryit part).</p>
<p>If you print this page, or open it in print preview, you will see that it is styled with the media="print" stylesheet. The "print" stylesheet contains black text on white background.</p>
</body>
</html>
Output should be:
How to add projection Value in HTML <style> media Attribute
projection
Projectors
index.html
Example:HTML
<!DOCTYPE html>
<html>
<head>
<style>
h1 {color:#FF0000;}
p {color:#0000FF;}
body {background-color:#FFEFD6;}
</style>
<style media="projection and (orientation: landscape)">
h1 {color:#000000;}
p {color:#000000;}
body {background-color:#FFFFFF;}
</style>
</head>
<body>
<h1>Horje Example</h1>
<p><a href="/learn/816/what-is-html-style-tag" target="_blank">Click here</a> to open this page in a new window (without the tryit part).</p>
<p>If you print this page, or open it in print preview, you will see that it is styled with the media="print" stylesheet. The "print" stylesheet contains black text on white background.</p>
</body>
</html>
Output should be:
How to add print Value in HTML <style> media Attribute
print
Print preview mode/printed pages
index.html
Example:HTML
<!DOCTYPE html>
<html>
<head>
<style>
h1 {color:#FF0000;}
p {color:#0000FF;}
body {background-color:#FFEFD6;}
</style>
<style media="print and (resolution:300dpi)">
h1 {color:#000000;}
p {color:#000000;}
body {background-color:#FFFFFF;}
</style>
</head>
<body>
<h1>Horje Example</h1>
<p><a href="/learn/816/what-is-html-style-tag" target="_blank">Click here</a> to open this page in a new window (without the tryit part).</p>
<p>If you print this page, or open it in print preview, you will see that it is styled with the media="print" stylesheet. The "print" stylesheet contains black text on white background.</p>
</body>
</html>
Output should be:
How to add screen Value in HTML <style> media Attribute
screen
Computer screens
index.html
Example:HTML
<!DOCTYPE html>
<html>
<head>
<style>
h1 {color:#FF0000;}
p {color:#0000FF;}
body {background-color:#FFEFD6;}
</style>
<style media="screen and (min-width:500px)">
h1 {color:#000000;}
p {color:#000000;}
body {background-color:#FFFFFF;}
</style>
</head>
<body>
<h1>Horje Example</h1>
<p><a href="/learn/816/what-is-html-style-tag" target="_blank">Click here</a> to open this page in a new window (without the tryit part).</p>
<p>If you print this page, or open it in print preview, you will see that it is styled with the media="print" stylesheet. The "print" stylesheet contains black text on white background.</p>
</body>
</html>
Output should be:
How to add tty Value in HTML <style> media Attribute
tty
Teletypes and similar media using a fixed-pitch character grid
index.html
Example:HTML
<!DOCTYPE html>
<html>
<head>
<style>
h1 {color:#FF0000;}
p {color:#0000FF;}
body {background-color:#FFEFD6;}
</style>
<style media="tty and (min-width:500px)">
h1 {color:#000000;}
p {color:#000000;}
body {background-color:#FFFFFF;}
</style>
</head>
<body>
<h1>Horje Example</h1>
<p><a href="/learn/816/what-is-html-style-tag" target="_blank">Click here</a> to open this page in a new window (without the tryit part).</p>
<p>If you print this page, or open it in print preview, you will see that it is styled with the media="print" stylesheet. The "print" stylesheet contains black text on white background.</p>
</body>
</html>
Output should be:
How to add tv Value in HTML <style> media Attribute
tv
Television type devices (low resolution, limited scroll ability)
index.html
Example:HTML
<!DOCTYPE html>
<html>
<head>
<style>
h1 {color:#FF0000;}
p {color:#0000FF;}
body {background-color:#FFEFD6;}
</style>
<style media="tv and (scan:interlace)">
h1 {color:#000000;}
p {color:#000000;}
body {background-color:#FFFFFF;}
</style>
</head>
<body>
<h1>Horje Example</h1>
<p><a href="/learn/816/what-is-html-style-tag" target="_blank">Click here</a> to open this page in a new window (without the tryit part).</p>
<p>If you print this page, or open it in print preview, you will see that it is styled with the media="print" stylesheet. The "print" stylesheet contains black text on white background.</p>
</body>
</html>
Output should be:
How to add width Value in HTML <style> media Attribute
width
Specifies the width of the targeted display area.
"min-" and "max-" prefixes can be used.
Example: media="screen and (min-width:500px)"
index.html
Example:HTML
<!DOCTYPE html>
<html>
<head>
<style>
h1 {color:#FF0000;}
p {color:#0000FF;}
body {background-color:#FFEFD6;}
</style>
<style media="screen and (min-width:500px)">
h1 {color:#000000;}
p {color:#000000;}
body {background-color:#FFFFFF;}
</style>
</head>
<body>
<h1>Horje Example</h1>
<p><a href="/learn/816/what-is-html-style-tag" target="_blank">Click here</a> to open this page in a new window (without the tryit part).</p>
<p>If you print this page, or open it in print preview, you will see that it is styled with the media="print" stylesheet. The "print" stylesheet contains black text on white background.</p>
</body>
</html>
Output should be:
How to add height Value in HTML <style> media Attribute
height
Specifies the height of the targeted display area.
"min-" and "max-" prefixes can be used.
Example: media="screen and (max-height:700px)"
index.html
Example:HTML
<!DOCTYPE html>
<html>
<head>
<style>
h1 {color:#FF0000;}
p {color:#0000FF;}
body {background-color:#FFEFD6;}
</style>
<style media="screen and (max-height:700px)">
h1 {color:#000000;}
p {color:#000000;}
body {background-color:#FFFFFF;}
</style>
</head>
<body>
<h1>Horje Example</h1>
<p><a href="/learn/816/what-is-html-style-tag" target="_blank">Click here</a> to open this page in a new window (without the tryit part).</p>
<p>If you print this page, or open it in print preview, you will see that it is styled with the media="print" stylesheet. The "print" stylesheet contains black text on white background.</p>
</body>
</html>
Output should be:
How to add device-width Value in HTML <style> media Attribute
device-width
Specifies the width of the target display/paper.
"min-" and "max-" prefixes can be used.
Example: media="screen and (device-width:500px)"
index.html
Example:HTML
<!DOCTYPE html>
<html>
<head>
<style>
h1 {color:#FF0000;}
p {color:#0000FF;}
body {background-color:#FFEFD6;}
</style>
<style media="screen and (device-width:500px)">
h1 {color:#000000;}
p {color:#000000;}
body {background-color:#FFFFFF;}
</style>
</head>
<body>
<h1>Horje Example</h1>
<p><a href="/learn/816/what-is-html-style-tag" target="_blank">Click here</a> to open this page in a new window (without the tryit part).</p>
<p>If you print this page, or open it in print preview, you will see that it is styled with the media="print" stylesheet. The "print" stylesheet contains black text on white background.</p>
</body>
</html>
Output should be:
How to add device-height Value in HTML <style> media Attribute
device-height
Specifies the height of the target display/paper.
"min-" and "max-" prefixes can be used.
Example: media="screen and (device-height:500px)"
index.html
Example:HTML
<!DOCTYPE html>
<html>
<head>
<style>
h1 {color:#FF0000;}
p {color:#0000FF;}
body {background-color:#FFEFD6;}
</style>
<style media="screen and (device-height:500px)">
h1 {color:#000000;}
p {color:#000000;}
body {background-color:#FFFFFF;}
</style>
</head>
<body>
<h1>Horje Example</h1>
<p><a href="/learn/816/what-is-html-style-tag" target="_blank">Click here</a> to open this page in a new window (without the tryit part).</p>
<p>If you print this page, or open it in print preview, you will see that it is styled with the media="print" stylesheet. The "print" stylesheet contains black text on white background.</p>
</body>
</html>
Output should be:
How to add orientation Value in HTML <style> media Attribute
orientation
Specifies the orientation of the target display/paper.
Possible values: "portrait" or "landscape"
Example: media="all and (orientation: landscape)"
index.html
Example:HTML
<!DOCTYPE html>
<html>
<head>
<style>
h1 {color:#FF0000;}
p {color:#0000FF;}
body {background-color:#FFEFD6;}
</style>
<style media="all and (orientation: landscape)">
h1 {color:#000000;}
p {color:#000000;}
body {background-color:#FFFFFF;}
</style>
</head>
<body>
<h1>Horje Example</h1>
<p><a href="/learn/816/what-is-html-style-tag" target="_blank">Click here</a> to open this page in a new window (without the tryit part).</p>
<p>If you print this page, or open it in print preview, you will see that it is styled with the media="print" stylesheet. The "print" stylesheet contains black text on white background.</p>
</body>
</html>
Output should be:
How to add aspect-ratio Value in HTML <style> media Attribute
aspect-ratio
Specifies the width/height ratio of the targeted display area.
"min-" and "max-" prefixes can be used.
Example: media="screen and (aspect-ratio:16/9)"
index.html
Example:HTML
<!DOCTYPE html>
<html>
<head>
<style>
h1 {color:#FF0000;}
p {color:#0000FF;}
body {background-color:#FFEFD6;}
</style>
<style media="screen and (aspect-ratio:16/9)">
h1 {color:#000000;}
p {color:#000000;}
body {background-color:#FFFFFF;}
</style>
</head>
<body>
<h1>Horje Example</h1>
<p><a href="/learn/816/what-is-html-style-tag" target="_blank">Click here</a> to open this page in a new window (without the tryit part).</p>
<p>If you print this page, or open it in print preview, you will see that it is styled with the media="print" stylesheet. The "print" stylesheet contains black text on white background.</p>
</body>
</html>
Output should be:
How to add device-aspect-ratio Value in HTML <style> media Attribute
device-aspect-ratio
Specifies the device-width/device-height ratio of the target display/paper.
"min-" and "max-" prefixes can be used.
Example: media="screen and (aspect-ratio:16/9)"
index.html
Example:HTML
<!DOCTYPE html>
<html>
<head>
<style>
h1 {color:#FF0000;}
p {color:#0000FF;}
body {background-color:#FFEFD6;}
</style>
<style media="screen and (aspect-ratio:16/9)">
h1 {color:#000000;}
p {color:#000000;}
body {background-color:#FFFFFF;}
</style>
</head>
<body>
<h1>Horje Example</h1>
<p><a href="/learn/816/what-is-html-style-tag" target="_blank">Click here</a> to open this page in a new window (without the tryit part).</p>
<p>If you print this page, or open it in print preview, you will see that it is styled with the media="print" stylesheet. The "print" stylesheet contains black text on white background.</p>
</body>
</html>
Output should be:
How to add color Value in HTML <style> media Attribute
color
Specifies the bits per color of target display.
"min-" and "max-" prefixes can be used.
Example: media="screen and (color:3)"
index.html
Example:HTML
<!DOCTYPE html>
<html>
<head>
<style>
h1 {color:#FF0000;}
p {color:#0000FF;}
body {background-color:#FFEFD6;}
</style>
<style media="screen and (color:3)">
h1 {color:#000000;}
p {color:#000000;}
body {background-color:#FFFFFF;}
</style>
</head>
<body>
<h1>Horje Example</h1>
<p><a href="/learn/816/what-is-html-style-tag" target="_blank">Click here</a> to open this page in a new window (without the tryit part).</p>
<p>If you print this page, or open it in print preview, you will see that it is styled with the media="print" stylesheet. The "print" stylesheet contains black text on white background.</p>
</body>
</html>
Output should be:
How to add color-index Value in HTML <style> media Attribute
color-index
Specifies the number of colors the target display can handle.
"min-" and "max-" prefixes can be used.
Example: media="screen and (min-color-index:256)"
index.html
Example:HTML
<!DOCTYPE html>
<html>
<head>
<style>
h1 {color:#FF0000;}
p {color:#0000FF;}
body {background-color:#FFEFD6;}
</style>
<style media="screen and (min-color-index:256)">
h1 {color:#000000;}
p {color:#000000;}
body {background-color:#FFFFFF;}
</style>
</head>
<body>
<h1>Horje Example</h1>
<p><a href="/learn/816/what-is-html-style-tag" target="_blank">Click here</a> to open this page in a new window (without the tryit part).</p>
<p>If you print this page, or open it in print preview, you will see that it is styled with the media="print" stylesheet. The "print" stylesheet contains black text on white background.</p>
</body>
</html>
Output should be:
How to add monochrome Value in HTML <style> media Attribute
monochrome
Specifies the bits per pixel in a monochrome frame buffer.
"min-" and "max-" prefixes can be used.
Example: media="screen and (monochrome:2)"
index.html
Example:HTML
<!DOCTYPE html>
<html>
<head>
<style>
h1 {color:#FF0000;}
p {color:#0000FF;}
body {background-color:#FFEFD6;}
</style>
<style media="screen and (monochrome:2)">
h1 {color:#000000;}
p {color:#000000;}
body {background-color:#FFFFFF;}
</style>
</head>
<body>
<h1>Horje Example</h1>
<p><a href="/learn/816/what-is-html-style-tag" target="_blank">Click here</a> to open this page in a new window (without the tryit part).</p>
<p>If you print this page, or open it in print preview, you will see that it is styled with the media="print" stylesheet. The "print" stylesheet contains black text on white background.</p>
</body>
</html>
Output should be:
How to add resolution Value in HTML <style> media Attribute
resolution
Specifies the pixel density (dpi or dpcm) of the target display/paper.
"min-" and "max-" prefixes can be used.
Example: media="print and (resolution:300dpi)"
index.html
Example:HTML
<!DOCTYPE html>
<html>
<head>
<style>
h1 {color:#FF0000;}
p {color:#0000FF;}
body {background-color:#FFEFD6;}
</style>
<style media="tv and (scan:interlace)">
h1 {color:#000000;}
p {color:#000000;}
body {background-color:#FFFFFF;}
</style>
</head>
<body>
<h1>Horje Example</h1>
<p><a href="/learn/816/what-is-html-style-tag" target="_blank">Click here</a> to open this page in a new window (without the tryit part).</p>
<p>If you print this page, or open it in print preview, you will see that it is styled with the media="print" stylesheet. The "print" stylesheet contains black text on white background.</p>
</body>
</html>
Output should be:
How to add scan Value in HTML <style> media Attribute
scan
Specifies scanning method of a tv display.
Possible values are "progressive" and "interlace".
Example: media="tv and (scan:interlace)"
index.html
Example:HTML
<!DOCTYPE html>
<html>
<head>
<style>
h1 {color:#FF0000;}
p {color:#0000FF;}
body {background-color:#FFEFD6;}
</style>
<style media="tv and (scan:interlace)">
h1 {color:#000000;}
p {color:#000000;}
body {background-color:#FFFFFF;}
</style>
</head>
<body>
<h1>Horje Example</h1>
<p><a href="/learn/816/what-is-html-style-tag" target="_blank">Click here</a> to open this page in a new window (without the tryit part).</p>
<p>If you print this page, or open it in print preview, you will see that it is styled with the media="print" stylesheet. The "print" stylesheet contains black text on white background.</p>
</body>
</html>
Output should be:
How to add grid Value in HTML <style> media Attribute
grid
Specifies if the output device is grid or bitmap.
Possible values are "1" for grid, and "0" otherwise.
Example: media="handheld and (grid:1)"
index.html
Example:HTML
<!DOCTYPE html>
<html>
<head>
<style>
h1 {color:#FF0000;}
p {color:#0000FF;}
body {background-color:#FFEFD6;}
</style>
<style media="handheld and (grid:1)">
h1 {color:#000000;}
p {color:#000000;}
body {background-color:#FFFFFF;}
</style>
</head>
<body>
<h1>Horje Example</h1>
<p><a href="/learn/816/what-is-html-style-tag" target="_blank">Click here</a> to open this page in a new window (without the tryit part).</p>
<p>If you print this page, or open it in print preview, you will see that it is styled with the media="print" stylesheet. The "print" stylesheet contains black text on white background.</p>
</body>
</html>
Output should be:
How to add HTML <style> type Attribute
Definition and Usage
The type attribute specifies the Internet media type (formerly known as MIME type) of the <style> tag.
The type attribute identifies the content between the <style> and </style> tags.
The default value is "text/css", which indicates that the content is CSS.
Browser Support
Syntax
<style type="media_type">
Use the type attribute to specify the media type of the <style> tag :
Attribute Values
Value
Description
media_type
The Internet media type of the style sheet. For now, the only supported value is "text/css". Look at IANA Media Types for a complete list of standard media types
index.html
Example:HTML
<!DOCTYPE html>
<html>
<head>
<style>
h1 {color:red;}
p {color:blue;}
</style>
</head>
<body>
<h1>This is a heading</h1>
<p>This is a paragraph.</p>
</body>
</html>
The <sub> tag defines subscript text. Subscript text appears half a character below the normal line, and is sometimes rendered in a smaller font. Subscript text can be used for chemical formulas, like H2O.
Tip: Use the <sup> tag to define superscripted text.
Browser Support
Global Attributes
The <sub> tag also supports the Global Attributes in HTML.
Event Attributes
The <sub> tag also supports the Event Attributes in HTML.
How to create HTML <sub> Tag
It subscripts text.
index.html
Example:HTML
<!DOCTYPE html>
<html>
<body>
<h1>The sub and sup elements</h1>
<p>This text contains <sub>subscript</sub> text.</p>
<p>This text contains <sup>superscript</sup> text.</p>
</body>
</html>
Output should be:
How to set Default CSS Settings in HTML <sub> Tag
Most browsers will display the <sub> element with the following default values.
index.html
Example:HTML
<!DOCTYPE html>
<html>
<head>
<style>
sub {
vertical-align: sub;
font-size: smaller;
}
</style>
</head>
<body>
<p>A sub element is displayed like this:</p>
<p>This text contains <sub>subscript text</sub></p>
<p>Change the default CSS settings to see the effect.</p>
</body>
</html>
The <summary> tag defines a visible heading for the <details> element. The heading can be clicked to view/hide the details.
Note: The <summary> element should be the first child element of the <details> element.
Browser Support
The numbers in the table specify the first browser version that fully supports the element.
Global Attributes
The <summary> tag also supports the Global Attributes in HTML.
Event Attributes
The <summary> tag also supports the Event Attributes in HTML.
How to create HTML <summary> Tag
It is using the <summary> element.
index.html
Example:HTML
<details>
<summary>Epcot Center</summary>
<p>Epcot is a theme park at Walt Disney World Resort featuring exciting attractions, international pavilions, award-winning fireworks and seasonal special events.</p>
</details>
Output should be:
How to use CSS to style <details> and <summary>
More Example.
index.html
Example:HTML
<!DOCTYPE html>
<html>
<head>
<style>
details > summary {
padding: 4px;
width: 200px;
background-color: #eeeeee;
border: none;
box-shadow: 1px 1px 2px #bbbbbb;
cursor: pointer;
}
details > p {
background-color: #eeeeee;
padding: 4px;
margin: 0;
box-shadow: 1px 1px 2px #bbbbbb;
}
</style>
</head>
<body>
<h1>The details and summary elements + CSS</h1>
<details>
<summary>Epcot Center</summary>
<p>Epcot is a theme park at Walt Disney World Resort featuring exciting attractions, international pavilions, award-winning fireworks and seasonal special events.</p>
</details>
</body>
</html>
Output should be:
How to set Default CSS Settings in HTML <summary> Tag
Most browsers will display the <summary> element with the following default values.
The <sup> tag defines superscript text. Superscript text appears half a character above the normal line, and is sometimes rendered in a smaller font. Superscript text can be used for footnotes, like WWW[1].
Tip: Use the <sub> tag to define subscript text.
Browser Support
Global Attributes
The <sup> tag also supports the Global Attributes in HTML.
Event Attributes
The <sup> tag also supports the Event Attributes in HTML.
How to create HTML <sup> Tag
It superscripts text.
index.html
Example:HTML
<!DOCTYPE html>
<html>
<body>
<h1>The sub and sup elements</h1>
<p>This text contains <sub>subscript</sub> text.</p>
<p>This text contains <sup>superscript</sup> text.</p>
</body>
</html>
Output should be:
How to set Default CSS Settings in HTML <sup> Tag
Most browsers will display the <sup> element with the following default values.
index.html
Example:HTML
<!DOCTYPE html>
<html>
<head>
<style>
sup {
vertical-align: super;
font-size: smaller;
}
</style>
</head>
<body>
<p>A sup element is displayed like this:</p>
<p>This text contains <sup>superscript text</sup></p>
<p>Change the default CSS settings to see the effect.</p>
</body>
</html>
The <svg> tag defines a container for SVG graphics.
SVG has several methods for drawing paths, boxes, circles, text, and graphic images.
To learn more about SVG, please read our SVG Tutorial.
Browser Support
How to create HTML <svg> Tag
It draws a circle.
index.html
Example:HTML
<svg width="100" height="100">
<circle cx="50" cy="50" r="40" stroke="green" stroke-width="4" fill="yellow" />
Sorry, your browser does not support inline SVG.
</svg>
The <tbody> tag is used to group the body content in an HTML table.
The <tbody> element is used in conjunction with the <thead> and <tfoot> elements to specify each part of a table (body, header, footer).
Browsers can use these elements to enable scrolling of the table body independently of the header and footer. Also, when printing a large table that spans multiple pages, these elements can enable the table header and footer to be printed at the top and bottom of each page.
Note: The <tbody> element must have one or more <tr> tags inside.
The <tbody> tag must be used in the following context: As a child of a <table> element, after any <caption>, <colgroup>, and <thead> elements.
Tip: The <thead>, <tbody>, and <tfoot> elements will not affect the layout of the table by default. However, you can use CSS to style these elements (see example below)!
Browser Support
Global Attributes
The <tbody> tag also supports the Global Attributes in HTML.
Event Attributes
The <tbody> tag also supports the Event Attributes in HTML.
How to create HTML <tbody> Tag
An HTML table with a <thead>, <tbody>, and a <tfoot> element.
How to specify no word-wrapping in table cell (with CSS)
Add Nowrap to td
index.html
Example:HTML
<table>
<tr>
<th>Poem</th>
</tr>
<tr>
<td style="white-space:nowrap">Never increase, beyond what is necessary, the number of entities required to explain anything</td>
</tr>
</table>
Output should be:
How to vertical align content inside <td> (with CSS)
The <template> tag is used as a container to hold some HTML content hidden from the user when the page loads.
The content inside <template> can be rendered later with a JavaScript.
You can use the <template> tag if you have some HTML code you want to use over and over again, but not until you ask for it. To do this without the <template> tag, you have to create the HTML code with JavaScript to prevent the browser from rendering the code.
Browser Support
Global Attributes
The <template> tag supports the Global Attributes in HTML.
How to create HTML <template> Tag
Use <template> to hold some content that will be hidden when the page loads. Use JavaScript to display it:
index.html
Example:HTML
<button onclick="showContent()">Show hidden content</button>
<template>
<h2>Flower</h2>
<img src="img_white_flower.jpg" width="214" height="204">
</template>
<script>
function showContent() {
let temp = document.getElementsByTagName("template")[0];
let clon = temp.content.cloneNode(true);
document.body.appendChild(clon);
}
</script>
Output should be:
How to fill the web page with one new div element on HTML <template> Tag
Fill the web page with one new div element for each item in an array. The HTML code of each div element is inside the template element.
index.html
Example:HTML
<template>
<div class="myClass">I like: </div>
</template>
<script>
let myArr = ["Audi", "BMW", "Ford", "Honda", "Jaguar", "Nissan"];
function showContent() {
let temp, item, a, i;
temp = document.getElementsByTagName("template")[0];
item = temp.content.querySelector("div");
for (i = 0; i < myArr.length; i++) {
a = document.importNode(item, true);
a.textContent += myArr[i];
document.body.appendChild(a);
}
}
</script>
Output should be:
How to check browser support for <template>
Test template Support
index.html
Example:HTML
<script>
if (document.createElement("template").content) {
document.write("Your browser supports template!");
} else {
document.write("Your browser does not supports template!");
}
</script>
The <textarea> tag defines a multi-line text input control.
The <textarea> element is often used in a form, to collect user inputs like comments or reviews.
A text area can hold an unlimited number of characters, and the text renders in a fixed-width font (usually Courier).
The size of a text area is specified by the cols and rows attributes (or with CSS).
The name attribute is needed to reference the form data after the form is submitted (if you omit the name attribute, no data from the text area will be submitted).
The id attribute is needed to associate the text area with a label.
Tip: Always add the <label> tag for best accessibility practices!
Browser Support
Attributes
Attribute
Value
Description
autofocus
autofocus
Specifies that a text area should automatically get focus when the page loads
cols
number
Specifies the visible width of a text area
dirname
textareaname.dir
Specifies that the text direction of the textarea will be submitted
disabled
disabled
Specifies that a text area should be disabled
form
form_id
Specifies which form the text area belongs to
maxlength
number
Specifies the maximum number of characters allowed in the text area
name
text
Specifies a name for a text area
placeholder
text
Specifies a short hint that describes the expected value of a text area
readonly
readonly
Specifies that a text area should be read-only
required
required
Specifies that a text area is required/must be filled out
rows
number
Specifies the visible number of lines in a text area
wrap
hard
soft
Specifies how the text in a text area is to be wrapped when submitted in a form
Global Attributes
The <textarea> tag also supports the Global Attributes in HTML.
Event Attributes
The <textarea> tag also supports the Event Attributes in HTML.
How to create HTML <textarea> Tag
It is A multi-line text input control (text area).
index.html
Example:HTML
<label for="w3review">Review of W3Schools:</label>
<textarea id="w3review" name="w3review" rows="4" cols="50">
At horje.com you will learn how to make a website. They offer free tutorials in all web development technologies.
</textarea>
Output should be:
How to Disable default resize option HTML textarea
The textarea element - Disable default resize option.
index.html
Example:HTML
<!DOCTYPE html>
<html>
<head>
<style>
textarea {
resize: none;
}
</style>
</head>
<body>
<h1>The textarea element - Disable default resize option</h1>
<p><label for="w3review">Review of Horje:</label></p>
<textarea id="w3review" name="w3review" rows="4" cols="50">
At horje.com you will learn how to make a website. They offer free tutorials in all web development technologies.
Output should be:
How to add HTML <textarea> autofocus Attribute on HTML <textarea> Tag
It is A text area with autofocus.
index.html
Example:HTML
<textarea autofocus>
At w3schools.com you will learn how to make a website. We offer free tutorials in all web development technologies.
</textarea>
Output should be:
How to add HTML <textarea> cols Attribute
It is A text area with a specified height and width.
index.html
Example:HTML
<!DOCTYPE html>
<html>
<body>
<h1>The textarea rows and cols attributes</h1>
<textarea rows="4" cols="50">
At horje.com you will learn how to make a website. We offer free tutorials in all web development technologies.
</textarea>
<p>This textarea has 4 visible rows.</p>
<p>You can change that by changing the value of the "rows" attribute.</p>
</body>
</html>
Output should be:
How to add HTML <textarea> dirname Attribute
It is An HTML form where the field's text direction will be submitted.
<!DOCTYPE html>
<html>
<body>
<h1>The textarea disabled attribute</h1>
<textarea disabled>
At horje.com you will learn how to make a website. We offer free tutorials in all web development technologies.
</textarea>
</body>
</html>
Output should be:
How to add HTML <textarea> form Attribute
It is A text area located outside a form (but still a part of the form).
index.html
Example:HTML
<!DOCTYPE html>
<html>
<body>
<h1>The textarea form attribute</h1>
<form action="/action_page.php" id="usrform">
Name: <input type="text" name="usrname">
<input type="submit">
</form>
<br>
<textarea rows="4" cols="50" name="comment" form="usrform">
Enter text here...</textarea>
<p>The text area above is outside the form element, but should still be a part of the form.</p>
</body>
</html>
Output should be:
How to add HTML <textarea> maxlength Attribute
It is A text area with a maximum length of 50 characters.
index.html
Example:HTML
<textarea maxlength="50">
Enter text here...
</textarea>
Output should be:
How to add HTML <textarea> name Attribute
It is A text area with a name attribute.
Definition and Usage
The name attribute specifies a name for a text area.
The name attribute is used to reference elements in a JavaScript, or to reference form data after a form is submitted.
Syntax
<textarea name="text">
Attribute Values
Value
Description
text
Specifies the name of the text area
index.html
Example:HTML
<form action="/action_page.php">
<textarea name="comment">Enter text here...</textarea>
<input type="submit">
</form>
Output should be:
How to add HTML <textarea> placeholder Attribute
Definition and Usage
The placeholder attribute specifies a short hint that describes the expected value of a text area.
The short hint is displayed in the text area before the user enters a value.
Browser Support
The numbers in the table specify the first browser version that fully supports the attribute.
Syntax
<textarea placeholder="text">
Attribute Values
Value
Description
text
Specifies a short hint that describes the expected value of the text area
When present, it specifies that a text area should be read-only.
In a read-only text area, the content cannot be changed, but a user can tab to it, highlight it and copy content from it.
The readonly attribute can be set to keep a user from using a text area until some other condition has been met (like selecting a checkbox, etc.). Then, a JavaScript is required to remove the readonly value, and make the text area editable.
Browser Support
Syntax
<textarea readonly>
index.html
Example:HTML
<textarea readonly>
At w3schools.com you will learn how to make a website. We offer free tutorials in all web development technologies.
</textarea>
The rows attribute specifies the visible height of a text area, in lines.
Note: The size of a textarea can also be specified by the CSS height and width properties.
Browser Support
Syntax
<textarea rows="number">
Attribute Values
Value
Description
number
Specifies the height of the text area (in lines). Default value is 2
index.html
Example:HTML
<textarea rows="4" cols="50">
At w3schools.com you will learn how to make a website. We offer free tutorials in all web development technologies.
</textarea>
Output should be:
How to add HTML <textarea> wrap Attribute
Definition and Usage
The wrap attribute specifies how the text in a text area is to be wrapped when submitted in a form.
Browser Support
Syntax
<textarea wrap="soft|hard">
Attribute Values
Value
Description
soft
The text in the textarea is not wrapped when submitted in a form. This is default
hard
The text in the textarea is wrapped (contains newlines) when submitted in a form. When "hard" is used, the cols attribute must be specified
index.html
Example:HTML
<textarea rows="2" cols="20" wrap="hard">
At W3Schools you will find free Web-building tutorials.
</textarea>
Output should be:
How to add HTML <textarea> soft wrap Attribute
soft
The text in the textarea is not wrapped when submitted in a form. This is default
index.html
Example:HTML
<!DOCTYPE html>
<html>
<body>
<h1>The textarea wrap attribute</h1>
<form action="/action_page.php">
<textarea rows="2" cols="20" name="usrtxt" wrap="soft">
At horje you will find free Web-building tutorials.
</textarea>
<input type="submit">
</form>
</body>
</html>
Output should be:
How to add HTML <textarea> hard wrap Attribute
index.html
Example:HTML
<!DOCTYPE html>
<html>
<body>
<h1>The textarea wrap attribute</h1>
<form action="/action_page.php">
<textarea rows="2" cols="20" name="usrtxt" wrap="hard">
At horje you will find free Web-building tutorials.
</textarea>
<input type="submit">
</form>
</body>
</html>
The <tfoot> tag is used to group footer content in an HTML table.
The <tfoot> element is used in conjunction with the <thead> and <tbody> elements to specify each part of a table (footer, header, body).
Browsers can use these elements to enable scrolling of the table body independently of the header and footer. Also, when printing a large table that spans multiple pages, these elements can enable the table header and footer to be printed at the top and bottom of each page.
Note: The <tfoot> element must have one or more <tr> tags inside.
The <tfoot> tag must be used in the following context: As a child of a <table> element, after any <caption>, <colgroup>, <thead>, and <tbody> elements.
Tip: The <thead>, <tbody>, and <tfoot> elements will not affect the layout of the table by default. However, you can use CSS to style these elements (see example below)!
Browser Support
Global Attributes
The <tfoot> tag also supports the Global Attributes in HTML.
Event Attributes
The <tfoot> tag also supports the Event Attributes in HTML.
How to create HTML <tfoot> Tag
It is An HTML table with a <thead>, <tbody>, and a <tfoot> element.
It is An HTML table with a header cell that spans two columns.
Definition and Usage
The colspan attribute defines the number of columns a header cell should span.
Browser Support
Note: Only Firefox supports colspan="0", which has a special meaning (look below in the "Attribute Values" table).
Syntax
<th colspan="number">
Attribute Values
Value
Description
number
Sets the number of columns a header cell should span. Note: colspan="0" tells the browser to span the cell to the last column of the column group (colgroup)
It is An HTML table with a header cell that spans three rows.
Definition and Usage
The rowspan attribute defines the number of rows a header cell should span.
Browser Support
Syntax
<th rowspan="number">
Attribute Values
Value
Description
number
Sets the number of rows a header cell should span. Note: rowspan="0" tells the browser to span the cell to the last row of the table section (thead, tbody, or tfoot)
The <thead> tag is used to group header content in an HTML table.
The <thead> element is used in conjunction with the <tbody> and <tfoot> elements to specify each part of a table (header, body, footer).
Browsers can use these elements to enable scrolling of the table body independently of the header and footer. Also, when printing a large table that spans multiple pages, these elements can enable the table header and footer to be printed at the top and bottom of each page.
Note: The <thead> element must have one or more <tr> tags inside.
The <thead> tag must be used in the following context: As a child of a <table> element, after any <caption> and <colgroup> elements, and before any <tbody>, <tfoot>, and <tr> elements.
Tip: The <thead>, <tbody>, and <tfoot> elements will not affect the layout of the table by default. However, you can use CSS to style these elements (see example below)!
Browser Support
Global Attributes
The <thead> tag also supports the Global Attributes in HTML.
Event Attributes
The <thead> tag also supports the Event Attributes in HTML.
How to create HTML <thead> Tag
It is An HTML table with a <thead>, <tbody>, and a <tfoot> element.
The <time> tag defines a specific time (or datetime).
The datetime attribute of this element is used translate the time into a machine-readable format so that browsers can offer to add date reminders through the user's calendar, and search engines can produce smarter search results.
Browser Support
The numbers in the table specify the first browser version that fully supports the element.
Attributes
Attribute
Value
Description
datetime
datetime
Represent a machine-readable format of the <time> element
Global Attributes
The <time> tag also supports the Global Attributes in HTML.
Event Attributes
The <time> tag also supports the Event Attributes in HTML.
How to create HTML <time> Tag
It will define a time and a date.
index.html
Example:HTML
<!DOCTYPE html>
<html>
<body>
<h1>The time element</h1>
<p>Open from <time>10:00</time> to <time>21:00</time> every weekday.</p>
<p>I have a date on <time datetime="2008-02-14 20:00">Valentines day</time>.</p>
<p><b>Note:</b> The time element does not render as anything special in any of the major browsers.</p>
</body>
</html>
Output should be:
How to add HTML <time> datetime Attribute
It is A time element with a machine-readable datetime attribute.
Definition and Usage.
The datetime attribute represent a machine-readable format of a <time> element.
Browser Support
Syntax
<time datetime="YYYY-MM-DDThh:mm:ssTZD">
Attribute Values
Value
Description
YYYY-MM-DDThh:mm:ssTZD
or
PTDHMS
The date or time being specified. Explanation of components:
YYYY - year (e.g. 2011)
MM - month (e.g. 01 for January)
DD - day of the month (e.g. 08)
T or a space - a separator (required if time is also specified)
hh - hour (e.g. 22 for 10.00pm)
mm - minutes (e.g. 55)
ss - seconds (e.g. 03)
TZD - Time Zone Designator (Z denotes Zulu, also known as Greenwich Mean Time)
P - a prefix for "Period"
D - a prefix for "Days"
H - a prefix for "Hours"
M - a prefix for "Minutes"
S - a prefix for "Seconds"
index.html
Example:HTML
<!DOCTYPE html>
<html>
<body>
<h1>The time datetime attribute</h1>
<p>I have a date on <time datetime="2017-02-14 20:00">Valentines day</time>.</p>
<p><b>Note:</b> The time element does not render as anything special in any of the major browsers.</p>
</body>
</html>
Output should be:
How to add various date and time format in HTML
Examples of valid datetime values.
index.html
Example:HTML
Dates:
<time datetime="1914"> <!-- means the year 1914 -->
<time datetime="1914-12"> <!-- means December 1914 -->
<time datetime="1914-12-20"> <!-- means 20 December 1914 -->
<time datetime="12-20"> <!-- means 20 December any year -->
<time datetime="1914-W15"> <!-- means week 15 of year 1914 -->
Date and Times:
<time datetime="1914-12-20T08:00"> <!-- means 20 December 1914 at 8am -->
<time datetime="1914-12-20 08:00"> <!-- also means 20 December 1914 at 8am -->
<time datetime="1914-12-20 08:30:45"> <!-- with minutes and seconds -->
<time datetime="1914-12-20 08:30:45.687"> <!-- with minutes, seconds, and milliseconds -->
Times:
<time datetime="08:00"> <!-- means 8am -->
<time datetime="08:00-03:00"> <!-- means 8am in Rio de Janeiro (UTC-3 hours) -->
<time datetime="08:00+03:00"> <!-- means 8am in Madagascar (UTC+3 hours) -->
Durations:
<time datetime="P2D"> <!-- means a duration of 2 days -->
<time datetime="PT15H10M"> <!-- means a duration of 15 hours and 10 minutes -->
The <title> tag defines the title of the document. The title must be text-only, and it is shown in the browser's title bar or in the page's tab.
The <title> tag is required in HTML documents!
The contents of a page title is very important for search engine optimization (SEO)! The page title is used by search engine algorithms to decide the order when listing pages in search results.
The <title> element:
defines a title in the browser toolbar
provides a title for the page when it is added to favorites
displays a title for the page in search-engine results
Here are some tips for creating good titles:
Go for a longer, descriptive title (avoid one- or two-word titles)
Search engines will display about 50-60 characters of the title, so try not to have titles longer than that
Do not use just a list of words as the title (this may reduce the page's position in search results)
So, try to make the title as accurate and meaningful as possible!
Note: You can NOT have more than one <title> element in an HTML document.
Global Attributes
The <title> tag also supports the Global Attributes in HTML.
How to create HTML <title> Tag
It Defines a title for your HTML document.
It will show a title of your HTML Page in Browser.
The <tt> tag was used in HTML 4 to define teletype text.
What to Use Instead?
Consider the <kbd> element (for keyboard input), the <var> element (for variables), the <code> element (for computer code), the <samp> element (for computer output), or use CSS instead.
What to Use Instead of HTML <tt> Tag?
It Defines a teletype/monospace font for a <p> element (with CSS).
index.html
Example:HTML
<p style="font-family:'Lucida Console', monospace">This text is monospace text.</p>
The <u> tag represents some text that is unarticulated and styled differently from normal text, such as misspelled words or proper names in Chinese text. The content inside is typically displayed with an underline. You can change this with CSS (see example below).
Tip: Avoid using the <u> element where it could be confused for a hyperlink!
Browser Support
Global Attributes
The <u> tag also supports the Global Attributes in HTML.
Event Attributes
The <u> tag also supports the Event Attributes in HTML.
How to create HTML <u> Tag
It is marked up a misspelled word with the <u> tag.
index.html
Example:HTML
<p>This is some <u>mispeled</u> text.</p>
Output should be:
How to Use CSS to style misspelled text
The u element + CSS. This is some mispeled text.
index.html
Example:HTML
<!DOCTYPE html>
<html>
<head>
<style>
.spelling-error {
text-decoration-line: underline;
text-decoration-style: wavy;
text-decoration-color: red;
}
</style>
</head>
<body>
<h1>The u element + CSS</h1>
<p>This is some <u class="spelling-error">mispeled</u> text.</p>
</body>
</html>
Output should be:
How to set Default CSS Settings on HTML <u> Tag
Most browsers will display the <u> element with the following default values,
A u element is displayed like this:
Some underlined text
Change the default CSS settings to see the effect.
index.html
Example:HTML
<!DOCTYPE html>
<html>
<head>
<style>
u {
text-decoration: underline;
}
</style>
</head>
<body>
<p>A u element is displayed like this:</p>
<u>Some underlined text</u>
<p>Change the default CSS settings to see the effect.</p>
</body>
</html>
How to Set the different list style types (with CSS) on HTML <ul> Tag
All the different list types for ul with CSS.
index.html
Example:HTML
<!DOCTYPE html>
<html>
<body>
<h1>All the different list types for ul with CSS</h1>
<ul style="list-style-type:circle">
<li>Coffee</li>
<li>Tea</li>
<li>Milk</li>
</ul>
<ul style="list-style-type:disc">
<li>Coffee</li>
<li>Tea</li>
<li>Milk</li>
</ul>
<ul style="list-style-type:square">
<li>Coffee</li>
<li>Tea</li>
<li>Milk</li>
</ul>
</body>
</html>
Output should be:
How to Expand and reduce line-height in lists (with CSS) on
Modify lineheight of lists with CSS.
index.html
Example:HTML
<!DOCTYPE html>
<html>
<body>
<h1>Modify lineheight of lists with CSS</h1>
<p>Expand line height in a list:</p>
<ul style="line-height:180%">
<li>Coffee</li>
<li>Tea</li>
<li>Milk</li>
</ul>
<p>Reduce line height in a list:</p>
<ul style="line-height:80%">
<li>Coffee</li>
<li>Tea</li>
<li>Milk</li>
</ul>
</body>
</html>
Output should be:
How to Create a list inside a list (a nested list) on HTML <ul> Tag
The <var> tag is used to defines a variable in programming or in a mathematical expression. The content inside is typically displayed in italic.
Tip: This tag is not deprecated. However, it is possible to achieve richer effect by using CSS.
Also look at:
Tag
Description
<code>
Defines a piece of computer code
<samp>
Defines sample output from a computer program
<kbd>
Defines keyboard input
<pre>
Defines preformatted text
Browser Support
Global Attributes
The <var> tag also supports the Global Attributes in HTML.
Event Attributes
The <var> tag also supports the Event Attributes in HTML
How to create HTML <var> Tag
It Defines some text as variables in a document.
index.html
Example:HTML
<p>The area of a triangle is: 1/2 x <var>b</var> x <var>h</var>, where <var>b</var> is the base, and <var>h</var> is the vertical height.</p>
Output should be:
How to set Default CSS Settings on HTML <var> Tag
Most browsers will display the <var> element with the following default values.
index.html
Example:HTML
<style>
var {
font-style: italic;
}
</style>
<p>The area of a triangle is: 1/2 x <var>b</var> x <var>h</var>, where <var>b</var> is the base, and <var>h</var> is the vertical height.</p>
The <video> tag is used to embed video content in a document, such as a movie clip or other video streams.
The <video> tag contains one or more <source> tags with different video sources. The browser will choose the first source it supports.
The text between the <video> and </video> tags will only be displayed in browsers that do not support the <video> element.
There are three supported video formats in HTML: MP4, WebM, and OGG.
Browser
MP4
WebM
Ogg
Edge
YES
YES
YES
Chrome
YES
YES
YES
Firefox
YES
YES
YES
Safari
YES
YES
NO
Opera
YES
YES
YES
Tips and Notes
Tip: For audio files, look at the <audio> tag.
Browser Support
The numbers in the table specify the first browser version that fully supports the element.
Optional Attributes
Attribute
Value
Description
autoplay
autoplay
Specifies that the video will start playing as soon as it is ready
controls
controls
Specifies that video controls should be displayed (such as a play/pause button etc).
height
pixels
Sets the height of the video player
loop
loop
Specifies that the video will start over again, every time it is finished
muted
muted
Specifies that the audio output of the video should be muted
poster
URL
Specifies an image to be shown while the video is downloading, or until the user hits the play button
preload
auto
metadata
none
Specifies if and how the author thinks the video should be loaded when the page loads
src
URL
Specifies the URL of the video file
width
pixels
Sets the width of the video player
Global Attributes
The <video> tag also supports the Global Attributes in HTML.
Event Attributes
The <video> tag also supports the Event Attributes in HTML.
Related Pages
HTML DOM reference: HTML Audio/Video DOM Reference
Default CSS Settings
None.
How to create HTML <video> Tag
It will Play a video in HTML Page.
index.html
Example:HTML
<!DOCTYPE html>
<html>
<body>
<h1>The video element</h1>
<video width="320" height="240" controls>
<source src="https://www.sample-videos.com/video321/mp4/720/big_buck_bunny_720p_1mb.mp4" type="video/mp4">
<source src="https://www.sample-videos.com/video321/mp4/720/big_buck_bunny_720p_1mb.mp4" type="video/ogg">
Your browser does not support the video tag.
</video>
</body>
</html>
Output should be:
How to add HTML <video> autoplay Attribute on HTML <video> Tag
Definition and Usage
The autoplay attribute is a boolean attribute.
When present, the video will automatically start playing.
Note: Chromium browsers do not allow autoplay in most cases. However, muted autoplay is always allowed.
Add muted after autoplay to let your video file start playing automatically (but muted).
Browser Support
The numbers in the table specify the first browser version that fully supports the attribute.
Syntax
<video autoplay>
index.html
Example:HTML
<!DOCTYPE html>
<html>
<body>
<h1>The video autoplay attribute</h1>
<video width="320" height="240" controls autoplay>
<source src="https://www.sample-videos.com/video321/mp4/720/big_buck_bunny_720p_1mb.mp4" type="video/mp4">
<source src="https://www.sample-videos.com/video321/mp4/720/big_buck_bunny_720p_1mb.mp4" type="video/ogg">
Your browser does not support the video tag.
</video>
</body>
</html>
Output should be:
How to add HTML <video> controls Attribute on HTML <video> Tag
It is A <video> element with browser default controls.
Definition and Usage
The controls attribute is a boolean attribute.
When present, it specifies that video controls should be displayed.
Video controls should include:
Play
Pause
Seeking
Volume
Fullscreen toggle
Captions/Subtitles (when available)
Track (when available)
Browser Support
The numbers in the table specify the first browser version that fully supports the attribute.
Syntax
<video controls>
index.html
Example:HTML
<!DOCTYPE html>
<html>
<body>
<h1>The video controls attribute</h1>
<video width="320" height="240" controls>
<source src="https://www.sample-videos.com/video321/mp4/720/big_buck_bunny_720p_1mb.mp4" type="video/mp4">
<source src="https://www.sample-videos.com/video321/mp4/720/big_buck_bunny_720p_1mb.mp4" type="video/ogg">
Your browser does not support the video tag.
</video>
</body>
</html>
Output should be:
How to add HTML <video> height Attribute on HTML <video> Tag
It is A video player with a specified height and width.
Definition and Usage
The height attribute specifies the height of a video player, in pixels.
Tip: Always specify both the height and width attributes for videos. If these attributes are set, the required space for the video is reserved when the page is loaded. However, without these attributes, the browser does not know the size of the video, and cannot reserve the appropriate space to it. The effect will be that the page layout will change during loading (while the video loads).
Note: Do not rescale video with the height and width attributes! Downsizing a large video with these attributes forces a user to download the original video (even if it looks small on the page). The correct way to rescale a video is with a program, before using it on a web page.
Browser Support
Syntax
<video height="pixels">
Attribute Values
Value
Description
pixels
The height of the video, in pixels (i.e. height="100")
index.html
Example:HTML
<!DOCTYPE html>
<html>
<body>
<h1>The video width and height attributes</h1>
<video width="320" height="240" controls>
<source src="https://www.sample-videos.com/video321/mp4/720/big_buck_bunny_720p_1mb.mp4" type="video/mp4">
<source src="https://www.sample-videos.com/video321/mp4/720/big_buck_bunny_720p_1mb.mp4" type="video/ogg">
Your browser does not support the video tag.
</video>
</body>
</html>
Output should be:
How to add HTML <video> loop Attribute in HTML <video> Tag
It is A video that will start over again, every time it is finished.
Definition and Usage
The loop attribute is a boolean attribute.
When present, it specifies that the video will start over again, every time it is finished.
Browser Support
The numbers in the table specify the first browser version that fully supports the attribute.
Syntax
<video loop>
index.html
Example:HTML
<!DOCTYPE html>
<html>
<body>
<h1>The video loop attribute</h1>
<video width="320" height="240" controls loop>
<source src="https://www.sample-videos.com/video321/mp4/720/big_buck_bunny_720p_1mb.mp4" type="video/mp4">
<source src="https://www.sample-videos.com/video321/mp4/720/big_buck_bunny_720p_1mb.mp4" type="video/ogg">
Your browser does not support the video tag.
</video>
</body>
</html>
Output should be:
How to add HTML <video> muted Attribute in
Definition and Usage
The muted attribute is a boolean attribute.
When present, it specifies that the audio output of the video should be muted.
Browser Support
The numbers in the table specify the first browser version that fully supports the attribute.
Syntax
<video muted>
index.html
Example:HTML
<!DOCTYPE html>
<html>
<body>
<h1>The video muted attribute</h1>
<video width="320" height="240" controls muted>
<source src="https://www.sample-videos.com/video321/mp4/720/big_buck_bunny_720p_1mb.mp4" type="video/mp4">
<source src="https://www.sample-videos.com/video321/mp4/720/big_buck_bunny_720p_1mb.mp4" type="video/ogg">
Your browser does not support the video tag.
</video>
</body>
</html>
Output should be:
How to add HTML <video> poster Attribute in HTML <video> Tag
It is A video player with a poster image.
Before playing video, It will show a default image.
Definition and Usage
The poster attribute specifies an image to be shown while the video is downloading, or until the user hits the play button. If this is not included, the first frame of the video will be used instead.
Browser Support
The numbers in the table specify the first browser version that fully supports the attribute.
Syntax
<video poster="URL">
Attribute Values
Value
Description
URL
Specifies the URL of the image file.
Possible values:
An absolute URL - points to another web site (like href="http://www.example.com/poster.jpg")
A relative URL - points to a file within a web site (like href="poster.jpg")
index.html
Example:HTML
<!DOCTYPE html>
<html>
<body>
<h1>The video poster attribute</h1>
<video width="320" height="240" poster="https://horje.com/avatar.png" controls>
<source src="https://www.sample-videos.com/video321/mp4/720/big_buck_bunny_720p_1mb.mp4" type="video/mp4">
<source src="https://www.sample-videos.com/video321/mp4/720/big_buck_bunny_720p_1mb.mp4" type="video/ogg">
Your browser does not support the video tag.
</video>
</body>
</html>
Output should be:
How to add HTML <video> preload Attribute in HTML <video> Tag
Author thinks that the video should NOT be loaded when the page loads.
Definition and Usage
The preload attribute specifies if and how the author thinks that the video should be loaded when the page loads.
The preload attribute allows the author to provide a hint to the browser about what he/she thinks will lead to the best user experience. This attribute may be ignored in some instances.
Note: The preload attribute is ignored if autoplay is present.
Browser Support
The numbers in the table specify the first browser version that fully supports the attribute.
Syntax
<video preload="auto|metadata|none">
Attribute Values
Value
Description
auto
The author thinks that the browser should load the entire video when the page loads
metadata
The author thinks that the browser should load only metadata when the page loads
none
The author thinks that the browser should NOT load the video when the page loads
index.html
Example:HTML
<!DOCTYPE html>
<html>
<body>
<h1>The video preload attribute</h1>
<video width="320" height="240" controls preload="none">
<source src="https://www.sample-videos.com/video321/mp4/720/big_buck_bunny_720p_1mb.mp4" type="video/mp4">
<source src="https://www.sample-videos.com/video321/mp4/720/big_buck_bunny_720p_1mb.mp4" type="video/ogg">
Your browser does not support the video tag.
</video>
</body>
</html>
Output should be:
How to add HTML <video> src Attribute in HTML <video> Tag
It will Play a video.
Definition and Usage
The src attribute specifies the location (URL) of the video file.
The example above uses an Ogg file, and will work in Chrome, Edge, Firefox and Opera.
To play the video in old Internet Explorer and Safari, we must use an MPEG4 file.
To make it work in all browsers - add several <source> elements inside the <video> element. Each <source> elements can link to different video files. The browser will use the first recognized format:
Browser Support
The numbers in the table specify the first browser version that fully supports the attribute.
The src attribute is supported in all of the major browsers, however, the file format defined may not be supported in all browsers.
Syntax
<video src="URL">
Attribute Values
Value
Description
URL
The URL of the video file.
Possible values:
An absolute URL - points to another web site (like src="http://www.example.com/movie.ogg")
A relative URL - points to a file within a web site (like src="movie.ogg")
index.html
Example:HTML
<!DOCTYPE html>
<html>
<body>
<h1>The video src attribute</h1>
<video width="320" height="240" controls src="https://www.sample-videos.com/video321/mp4/720/big_buck_bunny_720p_1mb.mp4">
Your browser does not support the video tag.
</video>
<p><b>Note:</b> The .ogg fileformat is not supported in old IE and Safari.</p>
</body>
</html>
Output should be:
More Example of HTML <video> src
Play a video simple.
index.html
Example:HTML
<!DOCTYPE html>
<html>
<body>
<video width="320" height="240" controls>
<source src="https://www.sample-videos.com/video321/mp4/720/big_buck_bunny_720p_1mb.mp4" type="video/mp4">
<source src="https://www.sample-videos.com/video321/mp4/720/big_buck_bunny_720p_1mb.mp4" type="video/ogg">
Your browser does not support the video tag.
</video>
</body>
</html>
Output should be:
How to add HTML <video> width Attribute in HTML <video> Tag
This is A video player with a specified width and height.
Definition and Usage
The width attribute specifies the width of a video player, in pixels.
Tip: Always specify both the height and width attributes for videos. If these attributes are set, the required space for the video is reserved when the page is loaded. However, without these attributes, the browser does not know the size of the video, and cannot reserve the appropriate space to it. The effect will be that the page layout will change during loading (while the video loads).
Note: Do not rescale video with the height and width attributes! Downsizing a large video with these attributes forces a user to download the original video (even if it looks small on the page). The correct way to rescale a video is with a program, before using it on a web page.
Browser Support
Syntax
<video width="pixels">
Attribute Values
Value
Description
pixels
The width of the video, in pixels (i.e. width="100")
index.html
Example:HTML
<!DOCTYPE html>
<html>
<body>
<h1>The video width and height attributes</h1>
<video width="320" height="240" controls>
<source src="https://www.sample-videos.com/video321/mp4/720/big_buck_bunny_720p_1mb.mp4" type="video/mp4">
<source src="https://www.sample-videos.com/video321/mp4/720/big_buck_bunny_720p_1mb.mp4" type="video/ogg">
Your browser does not support the video tag.
</video>
</body>
</html>


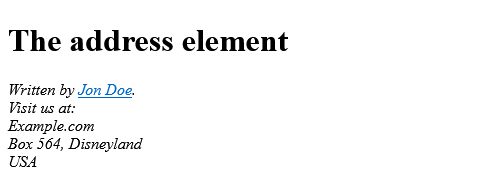


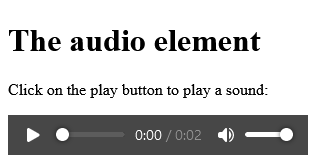


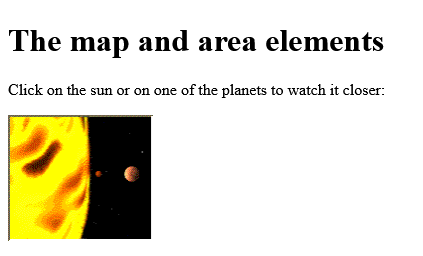


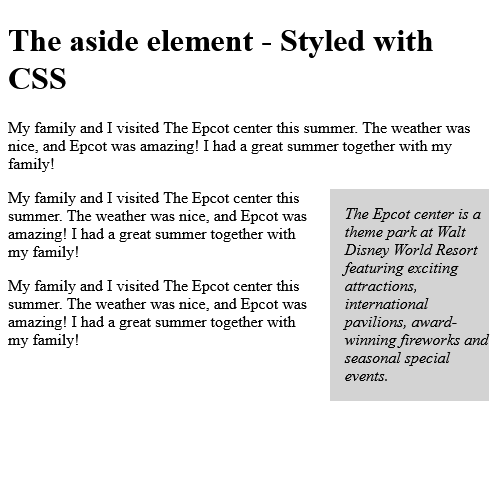


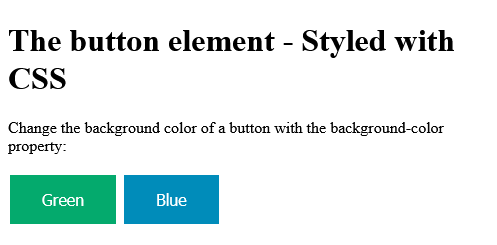


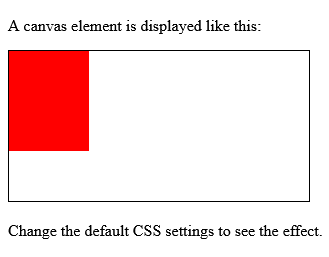


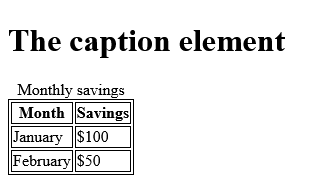


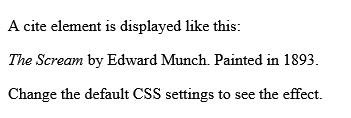


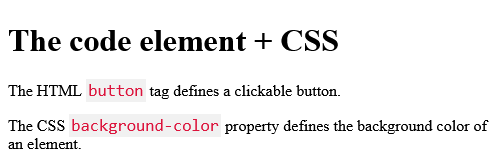
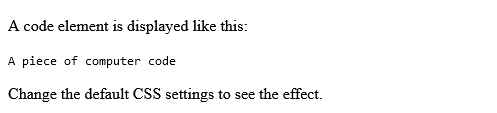


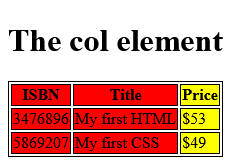

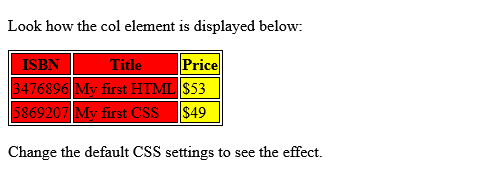


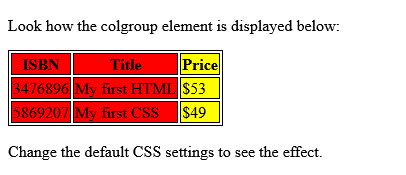


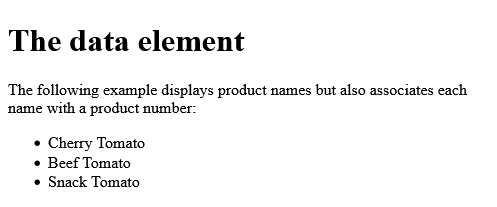

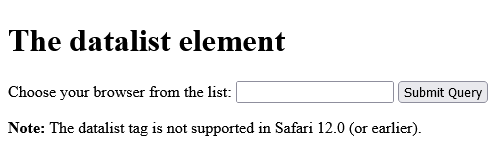

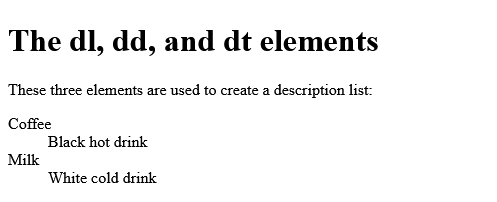


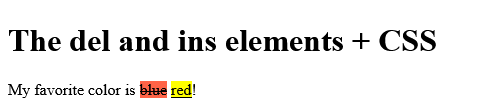
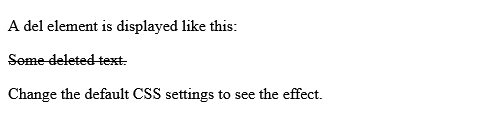


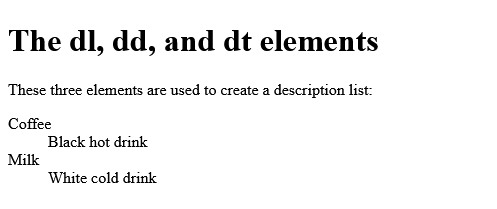


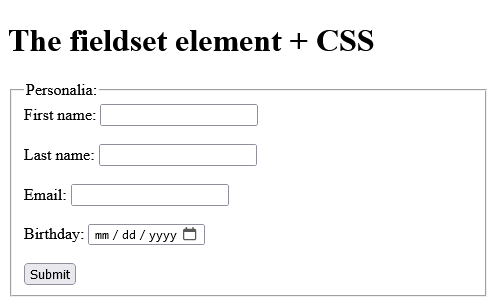


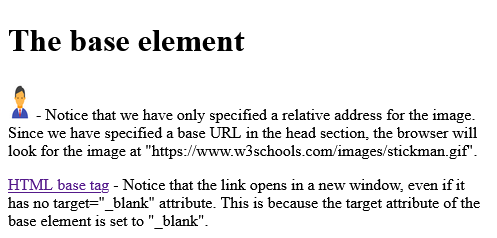


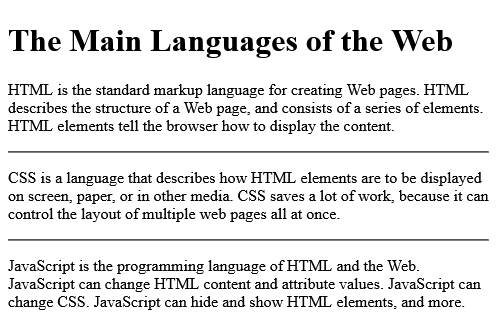


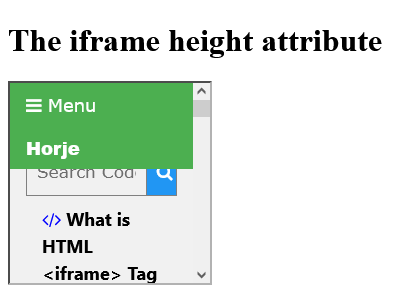


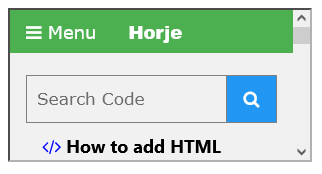


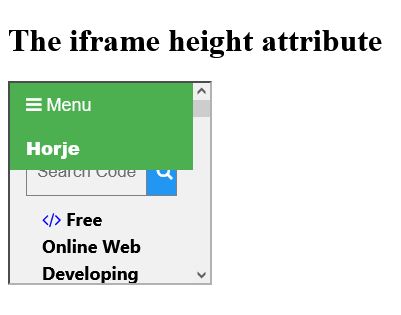


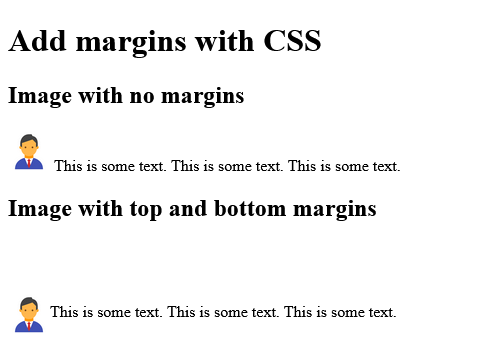
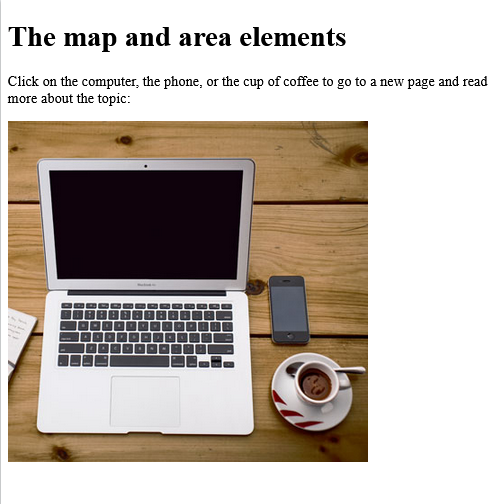


![How to add HTML <input> pattern characters [^'\x22]+](https://horje.com/uploads/demo/2024-03-16-07-15-38-screenshot_2024-03-16_at_13-15-23_w3schools_online_html_editor.png)


 ">
"> 
 ">
"> 
 ">
"> 
 ">
"> 
 ">
"> 
 ">
"> 
 ">
"> 
 ">
"> 
 ">
"> 

 ">
"> 
 ">
"> 
 ">
"> 
 ">
"> 
 ">
"> 
 ">
"> 
 ">
"> 
 ">
"> 
 ">
"> 
 ">
"> 
 ">
"> 
 ">
"> 
 ">
"> 


 label Tag">
 label Tag">
 label Tag">
 label Tag">
 label Tag">
 label Tag">
 label Tag">
 label Tag">


 on label Tag">
 on label Tag">
 on label Tag">
  Max Attribute on label Tag">
  Min Attribute on label Tag">
 on label Tag">
 on label Tag">
 on label Tag">
 on label Tag">
 on label Tag">
 on label Tag">