Tips (Total 166)
# Tips-1) What is HTML accept Attribute HTML Input
Definition and Usage
The accept attribute specifies the types of files that the server accepts (that can be submitted through a file upload).
Note: The accept attribute can only be used with <input type="file">.
Tip: Do not use this attribute as a validation tool. File uploads should be validated on the server.
Applies to
The accept attribute can be used on the following element:
| Element | Attribute |
|---|---|
| <input> | accept |
Specify that the server accepts only image files in the file upload.
How to Specify that the server accepts only image files in the file upload
The input accept attribute. Note: Because of security issues, this example will not allow you to upload files.
index.html
Example:
HTML
<!DOCTYPE html>
<html>
<body>

<h1>The input accept attribute</h1>

<form action="/action_page.php">
  <label for="img">Select image:</label>
  <input type="file" id="img" name="img" accept="image/*">
  <input type="submit">
</form>

<p><strong>Note:</strong> Because of security issues, this example will not allow you to upload files.</p>

</body>
</html>
Output should be:

# Tips-2) What is HTML accept-charset Attribute
Definition and Usage
The accept-charset attribute specifies the character encodings that are to be used for the form submission.
The default value is the reserved string "UNKNOWN" (indicates that the encoding equals the encoding of the document containing the <form> element).
Applies to
The accept-charset attribute can be used on the following element:
| Element | Attribute |
|---|---|
| <form> | accept-charset |
How to set A form with an accept-charset attribute
The form accept-charset attribute
index.html
Example:
HTML
<!DOCTYPE html>
<html>
<body>

<h1>The form accept-charset attribute</h1>

<form action="/action_page.php" accept-charset="utf-8">
  <label for="fname">First name:</label>
  <input type="text" id="fname" name="fname"><br><br>
  <input type="submit" value="Submit">
</form>

</body>
</html>
Output should be:

# Tips-3) What is HTML accesskey Attribute
Definition and Usage
The accesskey attribute specifies a shortcut key to activate/focus an element.
Note: The way of accessing the shortcut key is varying in different browsers:
| Browser | Windows | Linux | Mac |
|---|---|---|---|
| Internet Explorer | [Alt] + accesskey | N/A | |
| Chrome | [Alt] + accesskey | [Alt] + accesskey | [Control] [Alt] + accesskey |
| Firefox | [Alt] [Shift] + accesskey | [Alt] [Shift] + accesskey | [Control] [Alt] + accesskey |
| Safari | [Alt] + accesskey | N/A | [Control] [Alt] + accesskey |
| Opera | Opera 15 or newer: [Alt] + accesskey Opera 12.1 or older: [Shift] [Esc] + accesskey |
||
However, in most browsers the shortcut can be set to another combination of keys.
Tip: The behavior if more than one element has the same access key differs:
- IE, Firefox: The next element with the pressed access key will be activated
- Chrome, Safari: The last element with the pressed access key will be activated
- Opera: The first element with the pressed access key will be activated
Applies to
The accesskey is part of the Global Attributes, and can be used on any HTML element.
| Element | Attribute |
|---|---|
| All HTML elements | accesskey |
How to add HTML accesskey Attribute
Two hyperlinks with specified accesskeys.
index.html
Example:
HTML
<!DOCTYPE html>
<html>
<body>

<a href="https://horje.com/sub/31/196/html" accesskey="h">HTML tutorial</a><br>
<a href="https://horje.com/sub/31/364/css" accesskey="c">CSS tutorial</a>

<p>The accesskey attribute specifies a shortcut key to activate/focus an element.</p>
<p><strong>Note:</strong> The shortcut is varying in different browsers:</p>
<ul>
    <li>Edge, IE, Chrome, Safari, Opera 15+: [ALT] + <em>accesskey</em></li>
    <li>Opera prior version 15: [SHIFT] [ESC] + <em>accesskey</em></li>
    <li>Firefox: [ALT] [SHIFT] + <em>accesskey</em></li>
</ul>

</body>
</html>
Output should be:
# Tips-4) What is HTML action Attribute
Definition and Usage
The action attribute specifies where to send the form-data when a form is submitted.

Applies to
The action attribute can be used on the following element:
| Element | Attribute |
|---|---|
| <form> | action |
How to add HTML action Attribute
On submit, send the form-data to a file named "/action_page.php" (to process the input).
index.html
Example:
HTML
 <form action="/action_page.php" method="get">
  First name: <input type="text" name="fname"><br>
  Last name: <input type="text" name="lname"><br>
  <input type="submit" value="Submit">
</form>
Output should be:
# Tips-5) What is HTML alt Attribute
Definition and Usage
The alt attribute provides alternative information for an image if a user for some reason cannot view it (because of slow connection, an error in the src attribute, or if the user uses a screen reader).
Note: The alt attribute is required for the <img> element.
Note: For <input> elements, the alt attribute can only be used with <input type="image">.
Tip: To create a tooltip for an image, use the title attribute!
Applies to
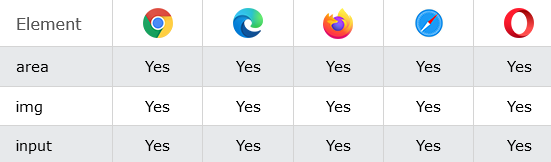
The alt attribute can be used on the following elements:
| Elements | Attribute |
|---|---|
| <area> | alt |
| <img> | alt |
| <input> | alt |
How to add An image map with clickable areas in HTML
Click on the computer, the phone, or the cup of coffee to go to a new page and read more about the topic.
index.html
Example:
HTML
<!DOCTYPE html>
<html>
<body>

<h1>The map and area elements</h1>

<p>Click on the computer, the phone, or the cup of coffee to go to a new page and read more about the topic:</p>

<img src="https://horje.com/avatar.png" alt="Workplace" usemap="#workmap" width="400" height="379">

<map name="workmap">
  <area shape="rect" coords="34,44,270,350" alt="Computer" href="computer.htm">
  <area shape="rect" coords="290,172,333,250" alt="Phone" href="phone.htm">
  <area shape="circle" coords="337,300,44" alt="Cup of coffee" href="coffee.htm">
</map>

</body>
</html>
Output should be:

How to add An image with an alternate text specified
The img element.
index.html
Example:
HTML
<!DOCTYPE html>
<html>
<body>

<h1>The img element</h1>

<img src="https://horje.com/avatar.png" alt="Girl in a jacket" width="500" height="600">

</body>
</html>
Output should be:
How to add An HTML form with an image that represents the submit button
Note: The image input type sends the X and Y coordinates of the click that activated the image button as default.
index.html
Example:
HTML
<!DOCTYPE html>
<html>
<body>

<h1>The input alt attribute</h1>

<p>Click on the image, and the input will be sent to a page on the server called "/action_page.php".</p>

<form action="/action_page.php">
  <label for="fname">First name:</label>
  <input type="text" id="fname" name="fname">
  <input type="image" src="https://horje.com/avatar.png" alt="Submit" width="48" height="48">
</form>

<p><b>Note:</b> The image input type sends the X and Y coordinates of the click that activated the image button as default.</p>

</body>
</html>
Output should be:

Browser Support
The alt attribute has the following browser support for each element.
index.html
Output should be:
# Tips-6) What is HTML async Attribute
Definition and Usage
The async attribute is a boolean attribute.
When present, it specifies that the script will be executed asynchronously as soon as it is available.
Note: The async attribute is only for external scripts (and should only be used if the src attribute is present).
Note: There are several ways an external script can be executed:
- If
asyncis present: The script is executed asynchronously with the rest of the page (the script will be executed while the page continues the parsing) - If
asyncis not present anddeferis present: The script is executed when the page has finished parsing - If neither
asyncordeferis present: The script is fetched and executed immediately, before the browser continues parsing the page
Applies to
The async attribute can be used on the following element:
| Elements | Attribute |
|---|---|
| <script> | async |
Browser Support
The numbers in the table specify the first browser version that fully supports the attribute.

How to add HTML async Attribute in HTML Page
It is A script that will be run asynchronously as soon as it is available.
index.html
Example:
HTML
<!DOCTYPE html>
<html>
<body>

<h1>The script async attribute</h1>

<p id="p1">Hello World!</p>
<script src="demo_async.js" async></script>

</body>
</html>
Output should be:

# Tips-7) What is HTML autocomplete Attribute in HTML
Definition and Usage
The autocomplete attribute specifies whether a form or an input field should have autocomplete on or off.
Autocomplete allows the browser to predict the value. When a user starts to type in a field, the browser should display options to fill in the field, based on earlier typed values.
Tip: It is possible to have autocomplete "on" for the form, and "off" for specific input fields, or vice versa.
Note: The autocomplete attribute works with the following <input> types: text, search, url, tel, email, password, datepickers, range, and color.
Applies to
The autocomplete attribute can be used on the following elements:
| Elements | Attribute |
|---|---|
| <form> | autocomplete |
| <input> | autocomplete |
Browser Support
The autocomplete attribute has the following browser support for each element:

How to add HTML autocomplete Attribute in HTML Page
It is A form with autocomplete on.
index.html
Example:
HTML
<!DOCTYPE html>
<html>
<body>

<h1>The form autocomplete attribute</h1>

<p>Fill in and submit the form, then reload the page, start to fill in the form again - and see how autocomplete works.</p>
<p>Then, try to set autocomplete to "off".</p>

<form action="/action_page.php" method="get" autocomplete="on">
  <label for="fname">First name:</label>
  <input type="text" id="fname" name="fname"><br><br>
  <label for="email">Email:</label>
  <input type="text" id="email" name="email"><br><br>
  <input type="submit">
</form>

<p><b>Note:</b> The autocomplete attribute of the form element is not supported in Opera 12 and earlier versions.</p>

</body>
</html>
Output should be:

How to add An HTML form with autocomplete on (and off for one input field)
The autocomplete attribute
Fill in and submit the form, then reload the page to see how autocomplete works.
Notice that autocomplete is "on" for the form, but "off" for the e-mail field!
index.html
Example:
HTML
<!DOCTYPE html>
<html>
<body>

<h1>The autocomplete attribute</h1>

<p>Fill in and submit the form, then reload the page to see how autocomplete works.</p>
<p>Notice that autocomplete is "on" for the form, but "off" for the e-mail field!</p>

<form action="/action_page.php" autocomplete="on">
  <label for="fname">First name:</label>
  <input type="text" id="fname" name="fname"><br><br>
  <label for="lname">Last name:</label>
  <input type="text" id="lname" name="lname"><br><br>
  <label for="email">Email:</label>
  <input type="email" id="email" name="email" autocomplete="off"><br><br>
  <input type="submit">
</form>

</body>
</html>
Output should be:

# Tips-8) What is HTML autofocus Attribute
Definition and Usage
The autofocus attribute is a boolean attribute.
When present, it specifies that the element should automatically get focus when the page loads.
Applies to
The autofocus attribute can be used on the following elements:
| Elements | Attribute |
|---|---|
| <button> | autofocus |
| <input> | autofocus |
| <select> | autofocus |
| <textarea> | autofocus |
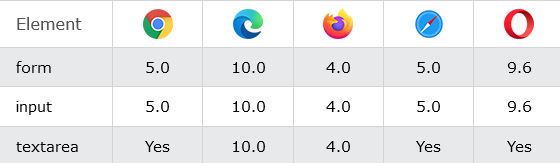
Browser Support
The autofocus attribute has the following browser support for each element:
How to add A button with autofocus in HTML Page
The button autofocus attribute.
index.html
Example:
HTML
<!DOCTYPE html>
<html>
<body>

<h1>The button autofocus attribute</h1>

<button type="button" autofocus onclick="alert('Hello world!')">Click Me!</button>

</body>
</html>
Output should be:

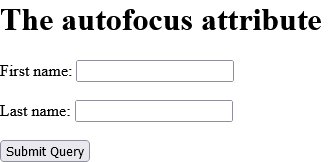
How to add The autofocus attribute
Let the "First name" input field automatically get focus when the page loads.
index.html
Example:
HTML
<!DOCTYPE html>
<html>
<body>

<h1>The autofocus attribute</h1>

<form action="/action_page.php">
  <label for="fname">First name:</label>
  <input type="text" id="fname" name="fname" autofocus><br><br>
  <label for="lname">Last name:</label>
  <input type="text" id="lname" name="lname"><br><br>
  <input type="submit">
</form>

</body>
</html>
Output should be:
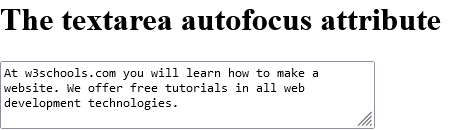
How to add A text area with autofocus
The textarea autofocus attribute.
index.html
Example:
HTML
<!DOCTYPE html>
<html>
<body>

<h1>The textarea autofocus attribute</h1>

<textarea rows="4" cols="50" autofocus>
At w3schools.com you will learn how to make a website. We offer free tutorials in all web development technologies.
</textarea>

</body>
</html>
Output should be:
# Tips-9) What is HTML autoplay Attribute
Definition and Usage
The autoplay attribute is a boolean attribute.
When present, the audio/video will automatically start playing as soon as it can do so without stopping.
Applies to
The autoplay attribute can be used on the following elements:
| Elements | Attribute |
|---|---|
| <audio> | autoplay |
| <video> | autoplay |
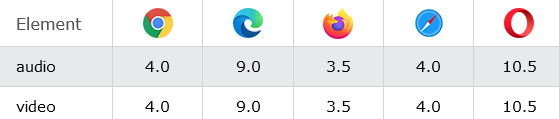
Browser Support
The autoplay attribute has the following browser support for each element:
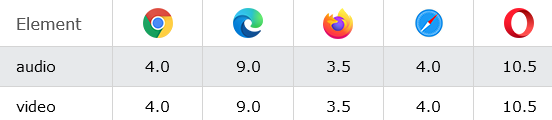
How to add An audio file that will automatically start playing
The audio autoplay attribute. Click on the play button to play a sound.
index.html
Example:
HTML
<!DOCTYPE html>
<html>
<body>

<h1>The audio autoplay attribute</h1>

<p>Click on the play button to play a sound:</p>

<audio controls autoplay>
  <source src="https://samplelib.com/lib/preview/mp3/sample-3s.mp3" type="audio/ogg">
  <source src="https://samplelib.com/lib/preview/mp3/sample-3s.mp3" type="audio/mpeg">
  Your browser does not support the audio element.
</audio>

</body>
</html>
Output should be:

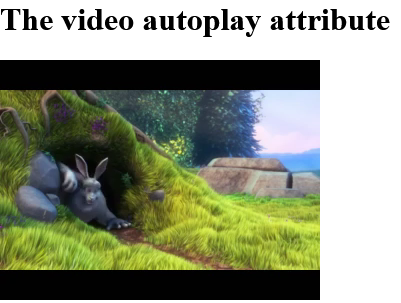
How to add A video that will automatically start playing in HTML Page
The video autoplay attribute.
index.html
Example:
HTML
<!DOCTYPE html>
<html>
<body>

<h1>The video autoplay attribute</h1>

<video width="320" height="240" controls autoplay>
  <source src="https://www.sample-videos.com/video321/mp4/240/big_buck_bunny_240p_30mb.mp4" type="video/mp4">
  <source src="movie.ogg" type="video/ogg">
  Your browser does not support the video tag.
</video>

</body>
</html>
Output should be:
# Tips-10) What is HTML charset Attribute
Definition and Usage
When used by the <meta> element, the charset attribute specifies the character encoding for the HTML document.
When used by the <script> element, the charset attribute specifies the character encoding used in an external script file.
The HTML5 specification encourages web developers to use the UTF-8 character set, which covers almost all of the characters and symbols in the world!
Applies to
The charset attribute can be used on the following elements:
| Elements | Attribute |
|---|---|
| <meta> | charset |
| <script> | charset |
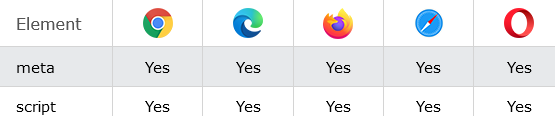
Browser Support
The charset attribute has the following browser support for each element.
How to Specify the character encoding for the HTML document
See the example.
index.html
Example:
HTML
<!DOCTYPE html>
<html>

<head>
<meta charset="UTF-8">
</head>

<body>
<h1>My Website</h1>
<p>Some text...</p>
</body>

</html>
Output should be:

How to add An external JavaScript with an UTF-8 character set
The script charset attribute.
index.html
Example:
HTML
<!DOCTYPE html>
<html>
<body>

<h1>The script charset attribute</h1>

<script charset="UTF-8" src="demo_script_charset.js">
</script>

<p>The Greek characters display correctly because they are part of the "UTF-8" character set.</p>
<p>Try changing character sets to "ISO-8859-1" (default), "windows-1252" or "UTF-16".</p>

</body>
</html>
Output should be:

# Tips-11) What is HTML checked Attribute
Definition and Usage
The checked attribute is a boolean attribute.
When present, it specifies that an <input> element should be pre-selected (checked) when the page loads.
The checked attribute can be used with <input type="checkbox"> and <input type="radio">.
The checked attribute can also be set after the page load, with a JavaScript.
Applies to
The checked attribute can be used on the following element:
| Element | Attribute |
|---|---|
| <input> | checked |
Browser Support
The numbers in the table specify the first browser version that fully supports the attribute.

How to add An HTML form with a pre-selected checkbox
The input checked attribute.
index.html
Example:
HTML
 <form action="/action_page.php">
  <input type="checkbox" name="vehicle" value="Bike"> I have a bike<br>
  <input type="checkbox" name="vehicle" value="Car" checked> I have a car<br>
  <input type="submit" value="Submit">
</form>
Output should be:

# Tips-12) What is HTML cite Attribute
Definition and Usage
The cite attribute specifies a URL to a document that explains the quote, or why the text was inserted/changed.
Applies to
The cite attribute can be used on the following elements:
| Elements | Attribute |
|---|---|
| <blockquote> | cite |
| <del> | cite |
| <ins> | cite |
| <q> | cite |
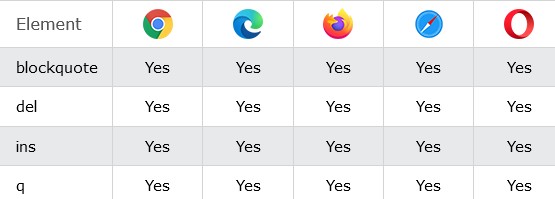
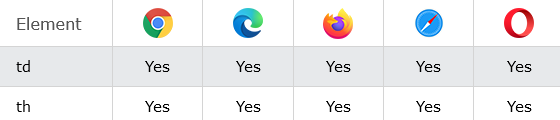
Browser Support
The cite attribute has the following browser support for each element:
How to add A section that is quoted from another source
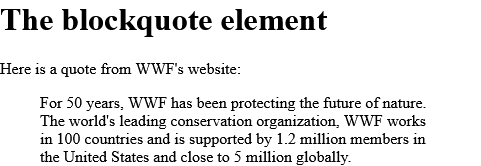
It is The blockquote element.
index.html
Example:
HTML
<!DOCTYPE html>
<html>
<body>

<h1>The blockquote element</h1>

<p>Here is a quote from WWF's website:</p>

<blockquote cite="http://www.worldwildlife.org/who/index.html">
For 50 years, WWF has been protecting the future of nature. The world's leading conservation organization, WWF works in 100 countries and is supported by 1.2 million members in the United States and close to 5 million globally.
</blockquote>

</body>
</html>
Output should be:
How to add A deleted text with a URL to a document that explains why the text was deleted
It is The del cite attribute.
index.html
Example:
HTML
<!DOCTYPE html>
<html>
<body>

<h1>The del cite attribute</h1>

<p><del cite="del_demo_cite.htm">This text has been deleted</del></p>

</body>
</html>
Output should be:
How to add An inserted text with a URL to a document that explains why the text was inserted
It is The ins cite attribute.
index.html
Example:
HTML
<!DOCTYPE html>
<html>
<body>

<h1>The ins cite attribute</h1>

<p>This is a text. <ins cite="why_inserted.htm">This is an inserted text.</ins></p>

<p><b>Note:</b> The cite attribute does not render as anything special in any of the major browsers.</p>

</body>
</html>
Output should be:

How to Specify the source URL of a quote
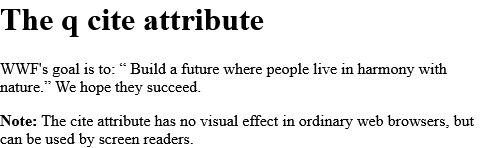
It is The q cite attribute.
index.html
Example:
HTML
<!DOCTYPE html>
<html>
<body>

<h1>The q cite attribute</h1>

<p>WWF's goal is to:
<q cite="http://www.wwf.org">
Build a future where people live in harmony with nature.</q>
We hope they succeed.
</p>

<p><b>Note:</b> The cite attribute has no visual effect in ordinary web browsers, but can be used by screen readers.</p>

</body>
</html>
Output should be:
# Tips-13) What is HTML class Attribute
Definition and Usage
The class attribute specifies one or more classnames for an element.
The class attribute is mostly used to point to a class in a style sheet. However, it can also be used by a JavaScript (via the HTML DOM) to make changes to HTML elements with a specified class.
Applies to
The class attribute is part of the Global Attributes, and can be used on any HTML element.
| Element | Attribute |
|---|---|
| All HTML elements | class |
Browser Support

How to Use of the class attribute in an HTML document
Note that this is an important paragraph.
index.html
Example:
HTML
<!DOCTYPE html>
<html>
<head>
<style>
h1.intro {
  color: blue;
}

p.important {
  color: green;
}
</style>
</head>
<body>

<h1 class="intro">Header 1</h1>
<p>A paragraph.</p>
<p class="important">Note that this is an important paragraph. :)</p>

</body>
</html>
Output should be:

# Tips-14) What is HTML cols Attribute
Definition and Usage
The cols attribute specifies the visible width of a text area.
Tip: The size of a textarea can also be set by the CSS height and width properties.
Applies to
The cols attribute can be used on the following element:
| Elements | Attribute |
|---|---|
| <textarea> | cols |
Browser Support

How to add A text area with a specified height and width
The textarea rows and cols attributes.
index.html
Example:
HTML
<!DOCTYPE html>
<html>
<body>

<h1>The textarea rows and cols attributes</h1>

<textarea rows="4" cols="50">
At w3schools.com you will learn how to make a website. We offer free tutorials in all web development technologies.
</textarea>

<p>This textarea has 4 visible rows.</p>
<p>You can change that by changing the value of the "rows" attribute.</p>

</body>
</html>
Output should be:

# Tips-15) What is HTML colspan Attribute
Definition and Usage
The colspan attribute defines the number of columns a table cell should span.
Applies to
The colspan attribute can be used on the following elements:
| Elements | Attribute |
|---|---|
| <td> | colspan |
| <th> | colspan |
Browser Support
The colspan attribute has the following browser support for each element:
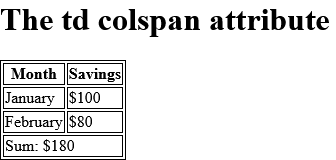
How to add An HTML table with a table cell that spans two columns
The td colspan attribute.
index.html
Example:
HTML
<!DOCTYPE html>
<html>
<head>
<style>
table, th, td {
  border: 1px solid black;
}
</style>
</head>
<body>

<h1>The td colspan attribute</h1>

<table>
  <tr>
    <th>Month</th>
    <th>Savings</th>
  </tr>
  <tr>
    <td>January</td>
    <td>$100</td>
  </tr>
  <tr>
    <td>February</td>
    <td>$80</td>
  </tr>
  <tr>
    <td colspan="2">Sum: $180</td>
  </tr>
</table>

</body>
</html>
Output should be:
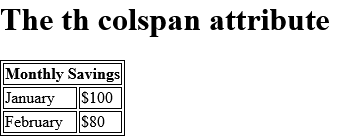
How to add An HTML table with a header cell that spans two columns
The th colspan attribute.
index.html
Example:
HTML
<!DOCTYPE html>
<html>
<head>
<style>
table, th, td {
  border: 1px solid black;
}
</style>
</head>
<body>

<h1>The th colspan attribute</h1>

<table>
  <tr>
    <th colspan="2">Monthly Savings</th>
  </tr>
  <tr>
    <td>January</td>
    <td>$100</td>
  </tr>
  <tr>
    <td>February</td>
    <td>$80</td>
  </tr>
</table>

</body>
</html>
Output should be:
# Tips-16) What is HTML content Attribute
Definition and Usage
The content attribute gives the value associated with the http-equiv or name attribute.
Applies to
The content attribute can be used on the following element:
| Element | Attribute |
|---|---|
| <meta> | content |
Browser Support

How to Describe metadata within an HTML document
The meta elements of this document describe the document and its keywords.
index.html
Example:
HTML
<!DOCTYPE html>
<html>
<head>
  <meta name="description" content="Free Web tutorials">
  <meta name="keywords" content="HTML,CSS,XML,JavaScript">
</head>
<body>

<p>The meta elements of this document describe the document and its keywords.</p>

</body>
</html>
Output should be:

# Tips-17) What is HTML contenteditable Attribute
Definition and Usage
The contenteditable attribute specifies whether the content of an element is editable or not.
Note: When the contenteditable attribute is not set on an element, the element will inherit it from its parent.
Applies to
The contenteditable attribute is a Global Attribute, and can be used on any HTML element.
| Element | Attribute |
|---|---|
| All HTML elements | contenteditable |
Browser Support
The numbers in the table specify the first browser version that fully supports the attribute.

How to add An editable paragraph
See the Example.
index.html
Example:
HTML
<!DOCTYPE html>
<html>
<body>

<p contenteditable="true">This is a paragraph. It is editable. Try to change this text.</p>

</body>
</html>
Output should be:

# Tips-18) What is HTML controls Attribute
Definition and Usage
The controls attribute is a boolean attribute.
When present, it specifies that audio/video controls should be displayed.
Controls should include:
- Play
- Pause
- Seeking
- Volume
- Fullscreen toggle (for video only)
- Captions/Subtitles (for video only, when available)
- Track (for video only, when available)
Applies to
The controls attribute can be used on the following elements:
| Elements | Attribute |
|---|---|
| <audio> | controls |
| <video> | controls |
Browser Support
The controls attribute has the following browser support for each element:
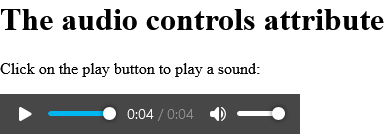
How to add An <audio> element with browser default controls
The audio controls attribute. Click on the play button to play a sound.
index.html
Example:
HTML
<!DOCTYPE html>
<html>
<body>

<h1>The audio controls attribute</h1>

<p>Click on the play button to play a sound:</p>

<audio controls>
  <source src="https://freetestdata.com/wp-content/uploads/2021/09/Free_Test_Data_100KB_MP3.mp3" type="audio/ogg">
  <source src="https://freetestdata.com/wp-content/uploads/2021/09/Free_Test_Data_100KB_MP3.mp3" type="audio/mpeg">
  Your browser does not support the audio element.
</audio>

</body>
</html>
try
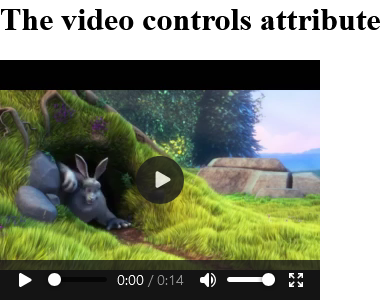
How to add A <video> element with browser default controls
The video controls attribute.
index.html
Example:
HTML
<!DOCTYPE html>
<html>
<body>

<h1>The video controls attribute</h1>

<video width="320" height="240" controls>
  <source src="https://www.sample-videos.com/video321/mp4/240/big_buck_bunny_240p_1mb.mp4" type="video/mp4">
  <source src="https://www.sample-videos.com/video321/mp4/240/big_buck_bunny_240p_1mb.mp4" type="video/ogg">
  Your browser does not support the video tag.
</video>

</body>
</html>
Output should be:
# Tips-19) What is HTML coords Attribute
Definition and Usage
The coords attribute specifies the coordinates of an area in an image map.
The coords attribute is used together with the shape attribute to specify the size, shape, and placement of an area.
Tip: The coordinates of the top-left corner of an area are 0,0.
Applies to
The coords attribute can be used on the following element:
| Element | Attribute |
|---|---|
| <area> | coords |
Browser Support

How to An image map with clickable areas
The map and area elements. Click on the computer, the phone, or the cup of coffee to go to a new page and read more about the topic:a.
index.html
Example:
HTML
<!DOCTYPE html>
<html>
<body>

<h1>The map and area elements</h1>

<p>Click on the computer, the phone, or the cup of coffee to go to a new page and read more about the topic:</p>

<img src="https://horje.com/avatar.png" alt="Workplace" usemap="#workmap" width="400" height="379">

<map name="workmap">
  <area shape="rect" coords="34,44,270,350" alt="Computer" href="computer.htm">
  <area shape="rect" coords="290,172,333,250" alt="Phone" href="phone.htm">
  <area shape="circle" coords="337,300,44" alt="Cup of coffee" href="coffee.htm">
</map>

</body>
</html>
# Tips-20) What is HTML data Attribute
Definition and Usage
The data attribute specifies the URL of the resource to be used by the object.
Applies to
The data attribute can be used on the following element:
| Element | Attribute |
|---|---|
| <object> | data |
Browser Support

How to use the <object> element to embed a Flash file
The object element.
index.html
Example:
HTML
<!DOCTYPE html>
<html>
<body>

<h1>The object element</h1>

<object data="https://horje.com/avatar.png" width="300" height="200"></object>

</body>
</html>
Output should be:

# Tips-21) What is HTML data-* Attribute
Definition and Usage
The data-* attribute is used to store custom data private to the page or application.
The data-* attribute gives us the ability to embed custom data attributes on all HTML elements.
The stored (custom) data can then be used in the page's JavaScript to create a more engaging user experience (without any Ajax calls or server-side database queries).
The data-* attribute consist of two parts:
- The attribute name should not contain any uppercase letters, and must be at least one character long after the prefix "data-"
- The attribute value can be any string
Note: Custom attributes prefixed with "data-" will be completely ignored by the user agent.
Applies to
The data-* attribute is a Global Attribute, and can be used on any HTML element.
| Element | Attribute |
|---|---|
| All HTML elements | data-* |
How to Use the data-* attribute to embed custom data
Click on a species to see what type it is.
index.html
Example:
HTML
<!DOCTYPE html>
<html>
<head>
<script>
function showDetails(animal) {
  let animalType = animal.getAttribute("data-animal-type");
  alert("The " + animal.innerHTML + " is a " + animalType + ".");
}
</script>
</head>
<body>

<h1>Species</h1>
<p>Click on a species to see what type it is:</p>

<ul>
  <li onclick="showDetails(this)" id="owl" data-animal-type="bird">Owl</li>
  <li onclick="showDetails(this)" id="salmon" data-animal-type="fish">Salmon</li>
  <li onclick="showDetails(this)" id="tarantula" data-animal-type="spider">Tarantula</li>
</ul>

</body>
</html>
Output should be:

# Tips-22) What is HTML datetime Attribute
Definition and Usage
The datetime attribute specifies the date and time when the text was deleted/inserted.
When used together with the <time> element, it represents a date and/or time of the <time> element.
Applies to
The datetime attribute can be used on the following elements:
| Elements | Attribute |
|---|---|
| <del> | datetime |
| <ins> | datetime |
| <time> | datetime |
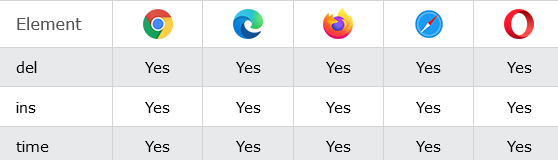
Browser Support
The datetime attribute has the following browser support for each element.
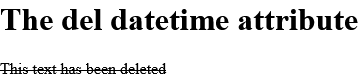
How to add A deleted text with a date and time of when the text was deleted
The del datetime attribute.
index.html
Example:
HTML
<!DOCTYPE html>
<html>
<body>

<h1>The del datetime attribute</h1>

<p><del datetime="2015-11-15T22:55:03Z">This text has been deleted</del></p>

</body>
</html>
Output should be:
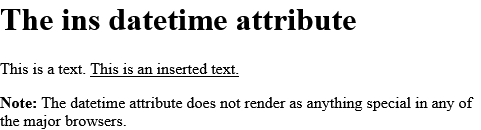
How to add An inserted text with a date and time of when the text was inserted
The ins datetime attribute
This is a text. This is an inserted text.
Note: The datetime attribute does not render as anything special in any of the major browsers.
index.html
Example:
HTML
<!DOCTYPE html>
<html>
<body>

<h1>The ins datetime attribute</h1>

<p>This is a text. <ins datetime="2015-09-15T22:55:03Z">This is an inserted text.</ins></p>

<p><b>Note:</b> The datetime attribute does not render as anything special in any of the major browsers.</p>

</body>
</html>
Output should be:

How to add A time element with a machine-readable datetime attribute
The time datetime attribute
I have a date on Valentines day.
Note: The time element does not render as anything special in any of the major browsers.
index.html
Example:
HTML
<!DOCTYPE html>
<html>
<body>

<h1>The time datetime attribute</h1>

<p>I have a date on <time datetime="2017-02-14 20:00">Valentines day</time>.</p>

<p><b>Note:</b> The time element does not render as anything special in any of the major browsers.</p>

</body>
</html>
Output should be:
# Tips-23) What is HTML controls Attribute
Definition and Usage
The controls attribute is a boolean attribute.
When present, it specifies that audio/video controls should be displayed.
Controls should include:
- Play
- Pause
- Seeking
- Volume
- Fullscreen toggle (for video only)
- Captions/Subtitles (for video only, when available)
- Track (for video only, when available)
Applies to
The controls attribute can be used on the following elements:
| Elements | Attribute |
|---|---|
| <audio> | controls |
| <video> | controls |

How to add A video with two subtitle tracks. "English" subtitle is the default
See the Example.
index.html
Example:
HTML
 <video width="320" height="240" controls>
  <source src="https://www.sample-videos.com/video321/mp4/240/big_buck_bunny_240p_1mb.mp4" type="video/mp4">
  <source src="https://www.sample-videos.com/video321/mp4/240/big_buck_bunny_240p_1mb.mp4" type="video/ogg">
  <track src="subtitles_en.vtt" kind="subtitles" srclang="en" label="English" default>
  <track src="subtitles_no.vtt" kind="subtitles" srclang="no" label="Norwegian">
</video>
Output should be:

How to add A <video> element with browser default controls in HTML Page
The video controls attribute.
index.html
Example:
HTML
<!DOCTYPE html>
<html>
<body>

<h1>The video controls attribute</h1>

<video width="320" height="240" controls>
  <source src="https://www.sample-videos.com/video321/mp4/240/big_buck_bunny_240p_1mb.mp4" type="video/mp4">
  <source src="https://www.sample-videos.com/video321/mp4/240/big_buck_bunny_240p_1mb.mp4" type="video/ogg">
  Your browser does not support the video tag.
</video>

</body>
</html>
Output should be:

What is HTML default Attribute
Definition and Usage
The default attribute is a boolean attribute.
When present, it specifies that the track is to be enabled if the user's preferences do not indicate that another track would be more appropriate.
Note: There must not be more than one <track> element with a default attribute per <media> element.
Applies to
The default attribute can be used on the following element:
| Element | Attribute |
|---|---|
| <track> | default |
Browser Support
The numbers in the table specify the first browser version that fully supports the attribute.

index.html
Example:
HTML
 <video width="320" height="240" controls>
  <source src="https://www.sample-videos.com/video321/mp4/240/big_buck_bunny_240p_1mb.mp4" type="video/mp4">
  <source src="https://www.sample-videos.com/video321/mp4/240/big_buck_bunny_240p_1mb.mp4" type="video/ogg">
  <track src="subtitles_en.vtt" kind="subtitles" srclang="en" label="English" default>
  <track src="subtitles_no.vtt" kind="subtitles" srclang="no" label="Norwegian">
</video>
Output should be:
# Tips-24) What is HTML default Attribute
Definition and Usage
The default attribute is a boolean attribute.
When present, it specifies that the track is to be enabled if the user's preferences do not indicate that another track would be more appropriate.
Note: There must not be more than one <track> element with a default attribute per <media> element.
Applies to
The default attribute can be used on the following element:
| Element | Attribute |
|---|---|
| <track> | default |
Browser Support
The numbers in the table specify the first browser version that fully supports the attribute.

How to add A video with two subtitle tracks. "English" subtitle is the default
A video with two subtitle tracks. "English" subtitle is the default.
index.html
Example:
HTML
  <source src="https://www.sample-videos.com/video321/mp4/240/big_buck_bunny_240p_1mb.mp4" type="video/mp4">

 <video width="320" height="240" controls>
  <source src="https://www.sample-videos.com/video321/mp4/240/big_buck_bunny_240p_1mb.mp4" type="video/mp4">
  <source src="https://www.sample-videos.com/video321/mp4/240/big_buck_bunny_240p_1mb.mp4" type="video/ogg">
  <track src="subtitles_en.vtt" kind="subtitles" srclang="en" label="English" default>
  <track src="subtitles_no.vtt" kind="subtitles" srclang="no" label="Norwegian">
</video>
Output should be:

# Tips-25) What is HTML defer Attribute
Definition and Usage
The defer attribute is a boolean attribute.
When present, it specifies that the script is executed when the page has finished parsing.
Note: The defer attribute is only for external scripts (should only be used if the src attribute is present).
Note: There are several ways an external script can be executed:
- If
asyncis present: The script is executed asynchronously with the rest of the page (the script will be executed while the page continues the parsing) - If
asyncis not present anddeferis present: The script is executed when the page has finished parsing - If neither
asyncordeferis present: The script is fetched and executed immediately, before the browser continues parsing the page
Applies to
The defer attribute can be used on the following element:
| Element | Attribute |
|---|---|
| <script> | defer |
Browser Support
The numbers in the table specify the first browser version that fully supports the attribute.

How to add A script that will not run until after the page has loaded
The script defer attribute
index.html
Example:
HTML
<!DOCTYPE html>
<html>
<body>

<h1>The script defer attribute</h1>

<script src="demo_defer.js" defer></script>

<p>The script above requests information from the paragraph below. Normally, this is not possible, because the script is executed before the paragraph exists.</p>

<p id="p1">Hello World!</p>

<p>However, the defer attribute specifies that the script should be executed later. This way the script can request information from the paragraph.</p>

</body>
</html>
Output should be:

# Tips-26) What is HTML dir Attribute
Definition and Usage
The dir attribute specifies the text direction of the element's content.
The dir attribute can have the following values:
- ltr - means left-to-right text direction
- rtl - means right to left text direction
- auto - lets the user agent decide the text direction, based on the content (only recommended if the text direction is unknown)
Applies to
The dir attribute is a Global Attribute, and can be used on any HTML element.
| Element | Attribute |
|---|---|
| All HTML elements | dir |
Browser Support

How to add A paragraph with a right-to-left direction
Write this text right-to-left!
index.html
Example:
TRY
<!DOCTYPE html>
<html>
<body>

<p dir="rtl">Write this text right-to-left!</p>

</body>
</html>
# Tips-27) What is HTML dirname Attribute
Definition and Usage
The dirname attribute enables the submission of the text direction of the input field/textarea
The dirname attribute's value is always the name of the input field/textarea, followed by ".dir".
Applies to
The dirname attribute can be used on the following elements:
| Elements | Attribute |
|---|---|
| <input> | dirname |
| <textarea> | dirname |
Browser Support
The dirname attribute has the following browser support for each element.

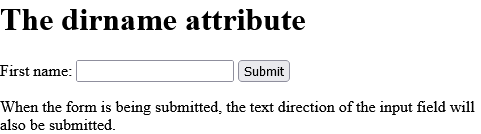
How to add An HTML form where the field's text direction will be submitted
Input Example
index.html
Example:
HTML
<!DOCTYPE html>
<html>
<body>

<h1>The dirname attribute</h1>

<form action="/action_page.php">
  <label for="fname">First name:</label>
  <input type="text" id="fname" name="fname" dirname="fname.dir">
  <input type="submit" value="Submit">
</form>

<p>When the form is being submitted, the text direction of the input field will also be submitted.</p>

</body>
</html>
Output should be:
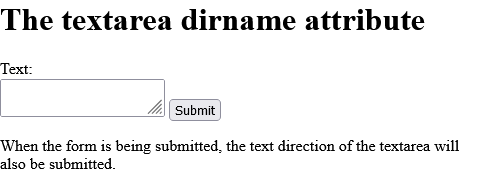
How to add An HTML form where the field's text direction will be submitted
Textarea Example.
index.html
Example:
HTML
<!DOCTYPE html>
<html>
<body>

<h1>The textarea dirname attribute</h1>

<form action="/action_page.php">
  Text:<br>
  <textarea name="explanation"dirname="explanation.dir"></textarea>
  <input type="submit" value="Submit">
</form>

<p>When the form is being submitted, the text direction of the textarea will also be submitted.</p>

</body>
</html>
Output should be:
# Tips-28) What is HTML disabled Attribute
Definition and Usage
The disabled attribute is a boolean attribute.
When present, it specifies that the element should be disabled.
A disabled element is unusable.
The disabled attribute can be set to keep a user from using the element until some other condition has been met (like selecting a checkbox, etc.). Then, a JavaScript could remove the disabled value, and make the element usable again.
Applies to
The disabled attribute can be used on the following elements:
| Elements | Attribute |
|---|---|
| <button> | disabled |
| <fieldset> | disabled |
| <input> | disabled |
| <optgroup> | disabled |
| <option> | disabled |
| <select> | disabled |
| <textarea> | disabled |
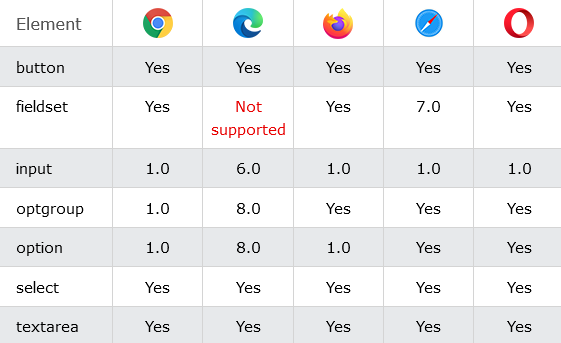
Browser Support
The disabled attribute has the following browser support for each element.
How to add A disabled button
Button Example.
index.html
Example:
HTML
<button type="button" disabled>Click Me!</button>
Output should be:

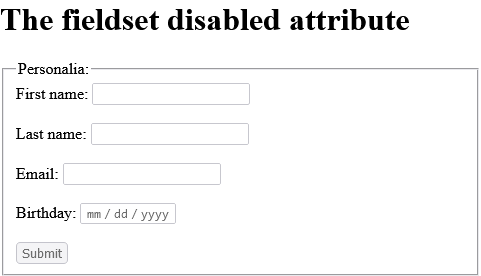
How to Disable a group of related form elements
Fieldset Example.
index.html
Example:
HTML
 <fieldset disabled>
  <legend>Personalia:</legend>
  Name: <input type="text"><br>
  Email: <input type="text"><br>
  Date of birth: <input type="text">
</fieldset>
Output should be:
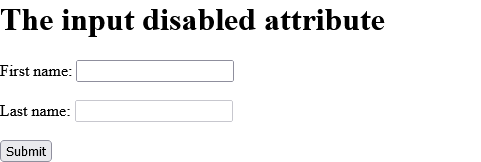
How to add An HTML form with a disabled input field
Input Example
An HTML form with a disabled input field.
index.html
Example:
HTML
 <form action="/action_page.php">
  First name: <input type="text" name="fname"><br>
  Last name: <input type="text" name="lname" disabled><br>
  <input type="submit" value="Submit">
</form>
Output should be:
How to add A disabled option-group
Optgroup Example. A disabled option-group.
index.html
Example:
HTML
 <select>
  <optgroup label="German Cars" disabled>
    <option value="mercedes">Mercedes</option>
    <option value="audi">Audi</option>
  </optgroup>
</select>
Output should be:
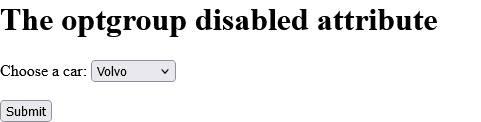
How to add A drop-down list with one disabled option
Option Example. A drop-down list with one disabled option.
index.html
Example:
HTML
 <select>
  <option value="volvo" disabled>Volvo</option>
  <option value="saab">Saab</option>
  <option value="vw">VW</option>
  <option value="audi">Audi</option>
</select>
Output should be:

How to add A disabled drop-down list
Select Example.
index.html
Example:
HTML
 <select disabled>
  <option value="volvo">Volvo</option>
  <option value="saab">Saab</option>
  <option value="mercedes">Mercedes</option>
  <option value="audi">Audi</option>
</select>
Output should be:

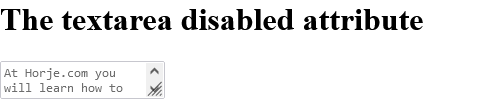
How to add A disabled text area:
Textarea Example.
index.html
Example:
HTML
<!DOCTYPE html>
<html>
<body>

<h1>The textarea disabled attribute</h1>

<textarea disabled>
At Horje.com you will learn how to make a website. We offer free tutorials in all web development technologies.
</textarea>

</body>
</html>
Output should be:
# Tips-29) What is HTML download Attribute
Definition and Usage
The download attribute specifies that the target will be downloaded when a user clicks on the hyperlink.
This attribute is only used if the href attribute is set.
The value of the download attribute will be the new name of the downloaded file. There are no restrictions on allowed values, and the browser will automatically detect the correct file extension and add it to the file (.img, .pdf, .txt, .html, etc.).
If the value is omitted, the original filename is used.
Applies to
The download attribute can be used on the following elements:
| Elements | Attribute |
|---|---|
| <a> | download |
| <area> | download |
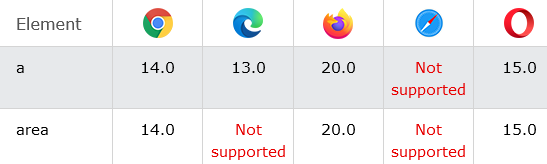
Browser Support
The download attribute has the following browser support for each element:
How to Download file when clicking on the link (instead of navigating to the file)
Click on the image to download it.
index.html
Example:
HTML
<!DOCTYPE html>
<html>
<body>

<h1>The a download attribute</h1>

<p>Click on the image to download it:<p>
<a href="https://horje.com/avatar.png" download>
  <img src="https://horje.com/avatar.png" alt="Horje" width="104" height="142">
</a>

<p><b>Note:</b> The download attribute is not supported in IE or Edge (prior version 18), or in Safari (prior version 10.1).</p>

</body>
</html>
Output should be:

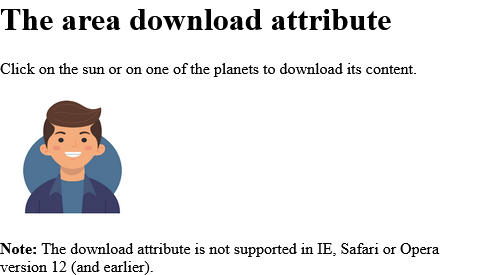
How to add An image map with clickable areas that will be downloaded when clicked on
Area Example.
Click on the sun or on one of the planets to download its content.
index.html
Example:
HTML
<!DOCTYPE html>
<html>
<body>

<h1>The area download attribute</h1>

<p>Click on the sun or on one of the planets to download its content.</p>

<img src="https://horje.com/avatar.png" width="145" height="126" alt="Planets" usemap="#planetmap">

<map name="planetmap">
  <area shape="rect" coords="0,0,82,126" alt="Sun" href="https://horje.com/avatar.png" download>
  <area shape="circle" coords="90,58,3" alt="Mercury" href="merglobe.gif" download>
  <area shape="circle" coords="124,58,8" alt="Venus" href="https://horje.com/avatar.png" download>
</map>

<p><b>Note:</b> The download attribute is not supported in IE, Safari or Opera version 12 (and earlier).</p>

</body>
</html>
Output should be:
# Tips-30) What is HTML draggable Attribute
Definition and Usage
The draggable attribute specifies whether an element is draggable or not.
Tip: Links and images are draggable by default.
Tip: The draggable attribute is often used in drag and drop operations. Read our HTML Drag and Drop tutorial to learn more.
Applies to
The draggable attribute is a Global Attribute, and can be used on any HTML element.
| Element | Attribute |
|---|---|
| All HTML elements | draggable |
Browser Support
The numbers in the table specify the first browser version that fully supports the attribute.

How to add A draggable paragraph
<p draggable="true">This is a draggable paragraph.</p>
Output should be:

# Tips-31) What is HTML enctype Attribute
Definition and Usage
The enctype attribute specifies how the form-data should be encoded when submitting it to the server.
Note: The enctype attribute can be used only if method="post".
Applies to
The enctype attribute can be used on the following element:
| Element | Attribute |
|---|---|
| <form> | enctype |
Browser Support

How to Send form-data encoded as "multipart/form-data"
The form enctype attribute.
index.html
Example:
HTML
<!DOCTYPE html>
<html>
<body>

<h1>The form enctype attribute</h1>

<form action="/action_page_binary.asp" method="post" enctype="multipart/form-data">
  <label for="fname">First name:</label>
  <input type="text" id="fname" name="fname"><br><br>
  <label for="lname">Last name:</label>
  <input type="text" id="lname" name="lname"><br><br>
  <input type="submit" value="Submit">
</form>

</body>
</html>
# Tips-32) What is HTML enterkeyhint Attribute
Definition and Usage
The enterkeyhint attribute allows you to change the appearance of the "Enter" key on a virtual keyboard.
Here is an input field with the enterkeyhint value set to "search":
<input type="text" enterkeyhint="search">
Result (do you see the blue "search" button):

If you set the enterkeyhint value to "go":
<input type="text" enterkeyhint="go">
The result will be like this:

Applies to
The enterkeyhint attribute is a Global Attribute, and can be used on any HTML element, but the element must be editable.
| Element | Attribute |
|---|---|
| All HTML elements | enterkeyhint |
Browser Support

How to Controll a virtual keyboard's "Enter" button with the enterkeyhint attribute
Run the example with a phone or tablet to see the result.
index.html
Example:
HTML
<!DOCTYPE html>
<html>
<meta name="viewport" content="width=device-width, initial-scale=1.0">
<style>
body {
  font-family:"Segoe UI", Tahoma, Geneva, Verdana, sans-serif;
  text-align:center;
}
</style>
<body>

<h2>The enterkeyhint Attribute</h2>

<p>Browse this page with a phone.</p>

<p>Click the input field:</p>

<input type="text" enterkeyhint="search">

<p>And check the "Enter" button on the keyboard.</p>

</body>
</html>
Output should be:

# Tips-33) What is HTML for Attribute
Definition and Usage
When used together with the <label> element, the for attribute specifies which form element a label is bound to.
When used together with the <output> element, the for attribute specifies the relationship between the result of the calculation, and the elements used in the calculation.
Applies to
The for attribute can be used on the following elements:
| Elements | Attribute |
|---|---|
| <label> | for |
| <output> | for |

How to add Three radio buttons with labels
The label element. Click on one of the text labels to toggle the related radio button.
index.html
Example:
HTML
<!DOCTYPE html>
<html>
<body>

<h1>The label element</h1>

<p>Click on one of the text labels to toggle the related radio button:</p>

<form action="/action_page.php">
  <input type="radio" id="html" name="fav_language" value="HTML">
  <label for="html">HTML</label><br>
  <input type="radio" id="css" name="fav_language" value="CSS">
  <label for="css">CSS</label><br>
  <input type="radio" id="javascript" name="fav_language" value="JavaScript">
  <label for="javascript">JavaScript</label><br><br>
  <input type="submit" value="Submit">
</form>

</body>
</html>
Output should be:

How to Perform a calculation and show the result in an <output> element
Output Example.
index.html
Example:
HTML
<!DOCTYPE html>
<html>
<body>

<h1>The output element</h1>

<form oninput="x.value=parseInt(a.value)+parseInt(b.value)">
<input type="range" id="a" value="50">
+<input type="number" id="b" value="25">
=<output name="x" for="a b"></output>
</form>

<p><strong>Note:</strong> The output element is not supported in Edge 12 (or earlier).</p>

</body>
</html>
Output should be:

# Tips-34) What is HTML form Attribute
Definition and Usage
The form attribute specifies the form the element belongs to.
The value of this attribute must be equal to the id attribute of a <form> element in the same document.
Applies to
The form attribute can be used on the following elements:
| Elements | Attribute |
|---|---|
| <button> | form |
| <fieldset> | form |
| <input> | form |
| <label> | form |
| <meter> | form |
| <object> | form |
| <output> | form |
| <select> | form |
| <textarea> | form |
Browser Support
The form attribute has the following browser support for each element:

How to add A button located outside a form (but still a part of the form)
Button Example.
index.html
Example:
HTML
 <form action="/action_page.php" method="get" id="form1">
  First name: <input type="text" name="fname"><br>
  Last name: <input type="text" name="lname"><br>
</form>

<button type="submit" form="form1" value="Submit">Submit</button>
Output should be:

How to add A <fieldset> element located outside a form (but still a part of the form)
Fieldset Example.
index.html
Example:
HTML
 <form action="/action_page.php" method="get" id="form1">
  What is your favorite color? <input type="text" name="fav_color"><br>
  <input type="submit">
</form>

<fieldset form="form1">
  Name: <input type="text" name="username"><br>
  Email: <input type="text" name="usermail"><br>
</fieldset>
Output should be:

How to add An input field located outside the HTML form (but still a part of the form)
Input Example.
index.html
Example:
HTML
 <form action="/action_page.php" id="form1">
  First name: <input type="text" name="fname"><br>
  <input type="submit" value="Submit">
</form>

Last name: <input type="text" name="lname" form="form1">
Output should be:

How to add A <label> element located outside a form (but still a part of the form)
Label Example.
index.html
Example:
HTML
 <form action="/action_page.php" id="form1">
  <input type="radio" id="html" name="fav_language" value="HTML"><br>
  <input type="radio" id="css" name="fav_language" value="CSS">
  <label for="css">CSS</label><br>
  <input type="radio" id="javascript" name="fav_language" value="JavaScript">
  <label for="javascript">JavaScript</label><br><br>
  <input type="submit" value="Submit">
</form>

<label for="html">HTML</label>
Output should be:

How to add A <meter> element located outside a form (but still a part of the form)
Meter Example.
index.html
Example:
HTML
 <form action="/action_page.php" method="get" id="form1">
  First name: <input type="text" name="fname"><br>
  <input type="submit" value="Submit">
</form>

<meter form="form1" name="x1" min="0" low="40" high="90" max="100" value="95"></meter>
Output should be:

How to add An <object> element located outside a form (but still a part of the form)
Object Example.
index.html
Example:
HTML
 <form action="/action_page.php" id="form1">
  First name: <input type="text" name="fname"><br>
  <input type="submit" value="Submit">
</form>

<object data="helloworld.swf" height="400" width="400" form="form1" name="obj1"></object>
Output should be:

How to add An <output> element located outside a form (but still a part of the form)
Output Example.
index.html
Example:
HTML
 <form action="/action_page.php" id="numform"
oninput="x.value=parseInt(a.value)+parseInt(b.value)">0
<input type="range" id="a" name="a" value="50">100
+<input type="number" id="b" name="b" value="50">
<br><br>
<input type="submit">
</form>

<output form="numform" name="x" for="a b"></output>
Output should be:

How to add A drop-down list located outside a form (but still a part of the form)
Select Example.
index.html
Example:
HTML
 <form action="/action_page.php" id="carform">
  Firstname:<input type="text" name="fname">
  <input type="submit">
</form>

<select name="carlist" form="carform">
  <option value="volvo">Volvo</option>
  <option value="saab">Saab</option>
  <option value="opel">Opel</option>
  <option value="audi">Audi</option>
</select>
Output should be:

How to add A text area located outside a form (but still a part of the form)
Textarea Example.
index.html
Example:
HTML
 <form action="/action_page.php" id="usrform">
  Name: <input type="text" name="usrname">
  <input type="submit">
</form>

<textarea name="comment" form="usrform">Enter text here...</textarea>
Output should be:

# Tips-35) What is HTML formaction Attribute
Definition and Usage
The formaction attribute specifies where to send the form-data when a form is submitted. This attribute overrides the form's action attribute.
The formaction attribute is only used for inputs/buttons with type="submit".
Applies to
The formaction attribute can be used on the following elements:
| Elements | Attribute |
|---|---|
| <button> | formaction |
| <input> | formaction |
Browser Support
The formaction attribute has the following browser support for each element:

How to add A form with two submit buttons
The first submit button submits the form data to "action_page.php", and the second submits to "action_page2.php"
index.html
Example:
HTML
 <form action="/action_page.php" method="get">
  First name: <input type="text" name="fname"><br>
  Last name: <input type="text" name="lname"><br>
  <button type="submit">Submit</button><br>
  <button type="submit" formaction="/action_page2.php">Submit to another page</button>
</form>
Output should be:

How to add An HTML form with two submit buttons, with different actions
Input Example.
index.html
Example:
HTML
 <form action="/action_page.php">
  First name: <input type="text" name="fname"><br>
  Last name: <input type="text" name="lname"><br>
  <input type="submit" value="Submit"><br>
  <input type="submit" formaction="/action_page2.php" value="Submit to another page">
</form>
Output should be:

# Tips-36) What is HTML headers Attribute
Definition and Usage
The headers attribute specifies one or more header cells a table cell is related to.
Applies to
The headers attribute can be used on the following elements:
| Elements | Attribute |
|---|---|
| <td> | headers |
| <th> | headers |
Browser Support
The headers attribute has the following browser support for each element.

How to add Specify the <th> element each <td> element is related to
Td Example
index.html
Example:
HTML
 <table>
  <tr>
    <th id="name">Name</th>
    <th id="email">Email</th>
    <th id="phone">Phone</th>
    <th id="addr">Address</th>
  </tr>
  <tr>
    <td headers="name">John Doe</td>
    <td headers="email">[email protected]</td>
    <td headers="phone">+45342323</td>
    <td headers="addr">Rosevn 56,4300 Sandnes,Norway</td>
  </tr>
</table>
Output should be:

How to add Specify the <th> element each header cell is related to
Th Example.
index.html
Example:
HTML
 <table>
  <tr>
    <th id="name" colspan="2">Name</th>
  </tr>
  <tr>
    <th headers="name">Firstname</th>
    <th headers="name">Lastname</th>
  </tr>
</table>
Output should be:

# Tips-37) What is HTML height Attribute
Definition and Usage
The height attribute specifies the height of the element, in pixels.
Applies to
The height attribute can be used on the following elements:
| Elements | Attribute |
|---|---|
| <canvas> | height |
| <embed> | height |
| <iframe> | height |
| <img> | height |
| <input> | height |
| <object> | height |
| <video> | height |
Browser Support
The height attribute has the following browser support for each element.

How to add A <canvas> element with a height and width of 200 pixels
Canvas Example.
index.html
Example:
HTML
<canvas id="myCanvas" width="200" height="200" style="border:1px solid">
Output should be:

How to add A flash animation with a height and width of 200 pixels
Embed Example.
index.html
Example:
HTML
<embed src="helloworld.swf" width="200" height="200">
Output should be:

How to add An <iframe> with a specified height and width of 200 pixels
Iframe Example.
index.html
Example:
HTML
 <iframe src="https://horje.com" width="200" height="200">
</iframe>
Output should be:

How to add An image with a height and width of 42 pixels
Img Example.
index.html
Example:
HTML
<img src="smiley.gif" alt="Smiley face" height="42" width="42">
Output should be:

How to Define an image as the submit button, with height and width attributes
Input Example.
index.html
Example:
HTML
<form action="/action_page.php">
  <label for="fname">First name:</label>
  <input type="text" id="fname" name="fname"><br><br>
  <label for="lname">Last name:</label>
  <input type="text" id="lname" name="lname"><br><br>
  <input type="image" src="https://horje.com/avatar.png" alt="Submit" width="48" height="48">
</form>
Output should be:

How to add A flash animation with a height and width of 400 pixels
Object Example.
index.html
Example:
HTML
<object data="https://horje.com/avatar.png" width="300" height="200"></object>
Output should be:

How to add A video player with a specified height and width
Video Example.
index.html
Example:
HTML
<video width="320" height="240" controls>
  <source src="https://www.sample-videos.com/video321/mp4/240/big_buck_bunny_240p_2mb.mp4" type="video/mp4">
  <source src="https://www.sample-videos.com/video321/mp4/240/big_buck_bunny_240p_2mb.mp4" type="video/ogg">
  Your browser does not support the video tag.
</video>
Output should be:

# Tips-38) What is HTML hidden Attribute
Definition and Usage
The hidden attribute is a boolean attribute.
When present, it specifies that an element is not yet, or is no longer, relevant.
Browsers should not display elements that have the hidden attribute specified.
The hidden attribute can also be used to keep a user from seeing an element until some other condition has been met (like selecting a checkbox, etc.). Then, a JavaScript could remove the hidden attribute, and make the element visible.
Applies to
The hidden attribute is a Global Attribute, and can be used on any HTML element.
| Element | Attribute |
|---|---|
| All HTML elements | hidden |
Browser Support

How to add A hidden paragraph
This is a visible paragraph.
index.html
Example:
HTML
<p hidden>This paragraph should be hidden.</p>
<p>This is a visible paragraph.</p>
Output should be:

# Tips-39) What is HTML high Attribute
Definition and Usage
The high attribute specifies the range where the gauge's value is considered to be a high value.
The high attribute value must be less than the max attribute value, and it also must be greater than the low and min attribute values.
Applies to
The high attribute can be used on the following element:
| Element | Attribute |
|---|---|
| <meter> | high |
Browser Support

How to add A gauge with a current value and min, max, high, and low segments
The max attribute specifies the upper bound of the gauge. The min attribute specifies the lower bound of the gauge. The value attribute specifies the current value of the gauge.
index.html
Example:
HTML
<meter min="0" low="40" high="90" max="100" value="95"></meter>
Output should be:

# Tips-40) What is HTML href Attribute
Definition and Usage
For <a> and <area> elements, the href attribute specifies the URL of the page the link goes to.
For <base> elements, the href attribute specifies the base URL for all relative URLs on a page.
For <link> elements, the href attribute specifies the location (URL) of the external resource (most often a style sheet file).
Applies to
The href attribute can be used on the following elements:
| Elements | Attribute |
|---|---|
| <a> | href |
| <area> | href |
| <base> | href |
| <link> | href |
Browser Support
The href attribute has the following browser support for each element.

How to add The href attribute specifies the link's destination
The a href attribute.
index.html
Example:
HTML
<p>An absolute URL: <a href="https://horje.com">Horje</a></p>
<p>A relative URL: <a href="tag_a.asp">The a tag</a></p>
Output should be:

How to add An image map, with clickable areas
Click on the computer, the phone, or the cup of coffee to go to a new page and read more about the topic:
index.html
Example:
HTML
<img src="https://horje.com/avatar.png" alt="Workplace" usemap="#workmap" width="400" height="379">

<map name="workmap">
  <area shape="rect" coords="34,44,270,350" alt="Computer" href="computer.htm">
  <area shape="rect" coords="290,172,333,250" alt="Phone" href="phone.htm">
  <area shape="circle" coords="337,300,44" alt="Cup of coffee" href="coffee.htm">
</map>
Output should be:

How to add Specify a base URL for all relative URLs on a page
Base Example.
index.html
Example:
HTML
<head>
  <base href="https://horje.com">
</head>
Output should be:

How to add Link to an external stylesheet
Link Example.
index.html
Example:
HTML
<!DOCTYPE html>
<html>
<head>
  <link rel="stylesheet" href="https://www.w3schools.com/tags/styles.css">
</head>
<body>

<h1>Hello World!</h1>

<h2>I am formatted with a linked style sheet.</h2>

<p>Me too!</p>

</body>
</html>
Output should be:

# Tips-41) What is HTML hreflang Attribute
Definition and Usage
The hreflang attribute specifies the language of the linked document.
Note: This attribute is purely advisory.
Applies to
The hreflang attribute can be used on the following elements:
| Elements | Attribute |
|---|---|
| <a> | hreflang |
| <area> | hreflang |
| <link> | hreflang |
Browser Support
The hreflang attribute has the following browser support for each element:

How to add The hreflang attribute specifies the language of the document in the link
A Exampleindex.html
Example:
HTML
<!DOCTYPE html>
<html>
<body>

<h1>The a hreflang attribute</h1>

<p><a hreflang="en" href="https://horje.com">Horje.com</a></p>

</body>
</html>
Output should be:

How to add An image map, with clickable areas - HTML hreflang
Area Exampleindex.html
Example:
HTML
<img src="https://horje.com/avatar.png" width="145" height="126" alt="Planets" usemap="#planetmap">

<map name="planetmap">
  <area shape="rect" coords="0,0,82,126" alt="Sun" href="sun.htm" hreflang="en">
</map>
Output should be:

How to add the hreflang attribute indicates that the linked document is in English
Link Example.index.html
Example:
HTML
<link href="tag_link.asp" rel="parent" rev="subsection" hreflang="en">
Output should be:

# Tips-42) What is HTML http-equiv Attribute
Definition and Usage
The http-equiv attribute provides an HTTP header for the information/value of the content attribute.
The http-equiv attribute can be used to simulate an HTTP response header.
Applies to
The http-equiv attribute can be used on the following element:
| Element | Attribute |
|---|---|
| http-equiv |
Browser Support

How to add Refresh document every 30 seconds
Meta Example.
index.html
Example:
HTML
<meta http-equiv="refresh" content="30">
Output should be:

# Tips-43) What is HTML id Attribute
Definition and Usage
The id attribute specifies a unique id for an HTML element (the value must be unique within the HTML document).
The id attribute is most used to point to a style in a style sheet, and by JavaScript (via the HTML DOM) to manipulate the element with the specific id.
Applies to
The id attribute is a Global Attribute, and can be used on any HTML element.
| Element | Attribute |
|---|---|
| All HTML elements | id |
Browser Support

How to Use the id attribute to manipulate text with JavaScript
See Example.
index.html
Example:
HTML
<!DOCTYPE HTML>
<html>
<body>

<h1 id="myHeader">Hello World!</h1>
<button onclick="displayResult()">Change text</button>

<script>
function displayResult() {
  document.getElementById("myHeader").innerHTML = "Have a nice day!";
}
</script>

</body>
</html>
Output should be:

# Tips-44) What is HTML inert Attribute
Definition and Usage
The inert attribute disables an element and all the elements inside.
The elements are still visible, but they have no function: buttons and links cannot be clicked, input fields are disabled etc., and they are ignored by screen readers.
Applies to
The inert attribute is a Global Attribute, and can be used on any HTML element.
| Element | Attribute |
|---|---|
| All HTML elements | inert |
Browser Support

How to Disable a section with the inert attribute
The button, the link, and the input field above are disabled because of the inert attribute.
index.html
Example:
HTML
 <div inert>
  <button onclick="alert(42)">
  <input type="text">
  <a href="https://horje.com">Horje.com</a>
</div>
Output should be:

# Tips-45) What is HTML inputmode Attribute
Definition and Usage
The inputmode attribute allows you to change the appearance of the keyboard on a phone or tablet (any device with a virtual keyboard).
Here is an input field wtih the input mode set so "numeric":
<input type="text" inputmode="numeric">
Result:

If you set inputmode to "email":
<input type="text" inputmode="email">
The result will be like this:

Applies to
The inputmode attribute is a Global Attribute, and can be used on any HTML element, but the element must be editable.
| Element | Attribute |
|---|---|
| All HTML elements | inputmode |
Browser Support

How to Show only numeric keys on the (virtual) keyboard
Run the example with a phone or tablet to see the result.
index.html
Example:
HTML
<input type="text" inputmode="numeric">
Output should be:

# Tips-46) What is HTML ismap Attribute
Definition and Usage
The ismap attribute is a boolean attribute.
When present, it specifies that the image is part of a server-side image map (an image map is an image with clickable areas).
When clicking on a server-side image map, the click coordinates are sent to the server as a URL query string.
Note: The ismap attribute is allowed only if the <img> element is a descendant of an <a> element with a valid href attribute.
Applies to
The ismap attribute can be used on the following element:
| Element | Attribute |
|---|---|
| <img> | ismap |
Browser Support

How to add A server-side image map
Click the image, and the click coordinates will be sent to the server as a URL query string.
index.html
Example:
HTML
<a href="/action_page.php">
  <img src="https://horje.com/avatar.png" alt="Horje.com" width="100" height="132" ismap>
</a>
Output should be:

# Tips-47) What is HTML kind Attribute
Definition and Usage
The kind attribute specifies the kind of text track.
Applies to
The kind attribute can be used on the following element:
| Element | Attribute |
|---|---|
| <track> | kind |
Browser Support
The numbers in the table specify the first browser version that fully supports the attribute.

How to add A video with two subtitle tracks
See Example.
index.html
Example:
HTML
 <video width="320" height="240" controls>
  <source src="https://www.sample-videos.com/video321/flv/360/big_buck_bunny_360p_5mb.flv" type="video/mp4">
  <source src="https://www.sample-videos.com/video321/flv/360/big_buck_bunny_360p_5mb.flv" type="video/ogg">
  <track src="subtitles_en.vtt" kind="subtitles" srclang="en" label="English">
  <track src="subtitles_no.vtt" kind="subtitles" srclang="no" label="Norwegian">
</video>
Output should be:

# Tips-48) What is HTML label Attribute
Definition and Usage
The label attribute specifies the title of the text track.
The title of the text track is used by the browser when listing available text tracks.
Applies to
The label attribute can be used on the following element:
| Element | Attribute |
|---|---|
| <track> | label |
Browser Support
The numbers in the table specify the first browser version that fully supports the attribute.

How to add A video with two subtitle tracks, both with a label defined
See Example.
index.html
Example:
HTML
 <video width="320" height="240" controls>
  <source src="https://www.sample-videos.com/video321/flv/360/big_buck_bunny_360p_5mb.flv" type="video/mp4">
  <source src="https://www.sample-videos.com/video321/flv/360/big_buck_bunny_360p_5mb.flv" type="video/ogg">
  <track src="subtitles_en.vtt" kind="subtitles" srclang="en" label="English">
  <track src="subtitles_no.vtt" kind="subtitles" srclang="no" label="Norwegian">
</video>
Output should be:

# Tips-49) What is HTML lang Attribute
Definition and Usage
The lang attribute specifies the language of the element's content.
Common examples are "en" for English, "es" for Spanish, "fr" for French and so on.
Applies to
The lang attribute is a Global Attribute, and can be used on any HTML element.
| Element | Attribute |
|---|---|
| All HTML elements | lang |
Browser Support

How to add Some French text in a paragraph
This is a paragraph.
index.html
Example:
HTML
<p lang="fr">Ceci est un paragraphe.</p>
Output should be:

# Tips-50) What is HTML list Attribute
Definition and Usage
The list attribute refers to a <datalist> element that contains pre-defined options for an <input> element.
Applies to
The list attribute can be used on the following element:
| Element | Attribute |
|---|---|
| <input> | list |
Browser Support
The numbers in the table specify the first browser version that fully supports the attribute.

How to add An <input> element with pre-defined values in a <datalist>
Note: The datalist tag is not supported in Safari 12.0 (or earlier).
index.html
Example:
HTML
 <input list="browsers">

<datalist id="browsers">
  <option value="Internet Explorer">
  <option value="Firefox">
  <option value="Google Chrome">
  <option value="Opera">
  <option value="Safari">
</datalist>
Output should be:

# Tips-51) What is HTML loop Attribute
Definition and Usage
The loop attribute is a boolean attribute.
When present, it specifies that the audio will start over again, every time it is finished.
Applies to
The loop attribute can be used on the following elements:
| Elements | Attribute |
|---|---|
| <audio> | loop |
| <video> | loop |
Browser Support
The loop attribute has the following browser support for each element:

How to add A song that will start over again, every time it is finished
Audio Example.
index.html
Example:
HTML
<audio controls loop>
  <source src="https://download.samplelib.com/mp3/sample-3s.mp3" type="audio/ogg">
  <source src="https://download.samplelib.com/mp3/sample-3s.mp3" type="audio/mpeg">
  Your browser does not support the audio element.
</audio>
Output should be:

How to add A video that will start over again, every time it is finished
Video Example.
index.html
Example:
HTML
<video width="320" height="240" controls loop>
  <source src="https://www.sample-videos.com/video321/mp4/240/big_buck_bunny_240p_30mb.mp4" type="video/mp4">
  <source src="https://www.sample-videos.com/video321/mp4/240/big_buck_bunny_240p_30mb.mp4" type="video/ogg">
  Your browser does not support the video tag.
</video>
Output should be:

# Tips-52) What is HTML low Attribute
Definition and Usage
The low attribute specifies the range where the gauge's value is considered to be a low value.
The low attribute value must be greater than the min attribute value, and it also must be less than the high and max attribute values.
Applies to
The low attribute can be used on the following element:
| Element | Attribute |
|---|---|
| <meter> | low |
Browser Support
The numbers in the table specify the first browser version that fully supports the attribute.

How to add A gauge with a current value and min, max, high, and low segments - HTML low Attribute
The high attribute specifies the range where the gauge's value is considered to be a high value. The low attribute specifies the range where the gauge's value is considered to be a low value. The max attribute specifies the upper bound of the gauge. The min attribute specifies the lower bound of the gauge. The value attribute specifies the current value of the gauge.
index.html
Example:
HTML
<meter min="0" low="40" high="90" max="100" value="95"></meter>
Output should be:

# Tips-53) What is HTML max Attribute
Definition and Usage
The max attribute specifies the maximum value of the element.
When used by the <progress> element, the max attribute specifies how much work the task requires in total.
Applies to
The max attribute can be used on the following elements:
| Elements | Attribute |
|---|---|
| <input> | max |
| <meter> | max |
| <progress> | max |
Browser Support
The max attribute has the following browser support for each element.

How to Use of the min and max attributes
Input Example.
index.html
Example:
HTML
<form action="/action_page.php">
  <label for="datemax">Enter a date before 1980-01-01:</label>
  <input type="date" id="datemax" name="datemax" max="1979-12-31"><br><br>

  <label for="datemin">Enter a date after 2000-01-01:</label>
  <input type="date" id="datemin" name="datemin" min="2000-01-02"><br><br>

  <label for="quantity">Quantity (between 1 and 5):</label>
  <input type="number" id="quantity" name="quantity" min="1" max="5"><br><br>

  <input type="submit">
</form>
Output should be:

How to add A gauge with a current value and min, max, high, and low segments - HTML max Attribute
Meter Example.
index.html
Example:
HTML
<meter min="0" low="40" high="90" max="100" value="95"></meter>
Output should be:

How to add Downloading in progress
Progress Example.
index.html
Example:
HTML
<progress value="22" max="100"></progress>
Output should be:

# Tips-54) What is HTML maxlength Attribute
Definition and Usage
The maxlength attribute specifies the maximum number of characters allowed in the element.
Applies to
The maxlength attribute can be used on the following elements:
| Elements | Attribute |
|---|---|
| <input> | maxlength |
| <textarea> | maxlength |
Browser Support
The maxlength attribute has the following browser support for each element.

How to add An <input> element with a maximum length of 10 characters
Input Example.
index.html
Example:
HTML
<form action="/action_page.php">
  <label for="username">Username:</label>
  <input type="text" id="username" name="username" maxlength="10"><br><br>
  <input type="submit" value="Submit">
</form>
Output should be:

How to add A text area with a maximum length of 50 characters
Textarea Example.
index.html
Example:
HTML
 <textarea maxlength="50">
Enter text here...
</textarea>
Output should be:

# Tips-55) What is HTML media Attribute
Definition and Usage
The media attribute specifies what media/device the linked document is optimized for.
This attribute is used to specify that the target URL is designed for special devices (like iPhone) , speech or print media.
This attribute can accept several values.
Applies to
The media attribute can be used on the following elements:
| Elements | Attribute |
|---|---|
| <a> | media |
| <area> | media |
| <link> | media |
| <source> | media |
| <style> | media |
Browser Support
The media attribute has the following browser support for each element.

How to add A link with a media attribute
A Example.
index.html
Example:
HTML
<!DOCTYPE html>
<html>
<body>

<h1>The a media attribute</h1>

<p>
<a href="att_a_media.asp?output=print" media="print and (resolution:300dpi)">Open media attribute page for print</a>
</p>

</body>
</html>
Output should be:

How to add An image map, with a clickable area
Area Example.
index.html
Example:
HTML
<!DOCTYPE html>
<html>
<body>

<h1>The area media attribute</h1>

<p>Click on the sun to watch it closer:</p>

<img src="https://horje.com/avatar.png" width="145" height="126" alt="Planets" usemap="#planetmap">

<map name="planetmap">
  <area shape="rect" coords="0,0,82,126" alt="Sun" href="sun.htm" media="screen and (min-color-index:256)">
</map>

</body>
</html>
Output should be:

How to add Two different style sheets for two different media types (screen and print)
Link Example.
index.html
Example:
HTML
<!DOCTYPE html>
<html>
<head>
  <link rel="stylesheet" type="text/css" href="https://www.w3schools.com/tags/demo_screen.css">
  <link rel="stylesheet" type="text/css" href="https://www.w3schools.com/tags/demo_print.css" media="print">
</head>
<body>

<h1>Horje Example</h1>
<p><a href="tryhtml_link_media.htm" target="_blank">Click here</a> to open this page in a new window (without the tryit part).</p>
<p>If you print this page, or open it in print preview, you will see that it is styled with the media="print" stylesheet. The "print" stylesheet contains black text on white background.</p>

</body>
</html>
Output should be:

How to Use of the media attribute
Source Example.
index.html
Example:
HTML
<picture>
  <source media="(min-width: 650px)" srcset="https://horje.com/avatar.png">
  <source media="(min-width: 465px)" srcset="https://horje.com/avatar.png">
  <img src="https://horje.com/avatar.png" alt="Flowers" style="width:auto;">
</picture>
Output should be:

How to add Specify the style to use for print
Style Example.
index.html
Example:
HTML
<style>
h1 {color:#FF0000;}
p {color:#0000FF;}
body {background-color:#FFEFD6;}
</style>
Output should be:

# Tips-56) What is HTML method Attribute
Definition and Usage
The method attribute specifies how to send form-data (the form-data is sent to the page specified in the action attribute).
The form-data can be sent as URL variables (with method="get") or as HTTP post transaction (with method="post").
Notes on GET:
- Appends form-data into the URL in name/value pairs
- The length of a URL is limited (about 3000 characters)
- Never use GET to send sensitive data! (will be visible in the URL)
- Useful for form submissions where a user want to bookmark the result
- GET is better for non-secure data, like query strings in Google
Notes on POST:
- Appends form-data inside the body of the HTTP request (data is not shown is in URL)
- Has no size limitations
- Form submissions with POST cannot be bookmarked
Applies to
The method attribute can be used on the following element:
| Element | Attribute |
|---|---|
| <form> | method |
Browser Support

How to Submit a form using the "get" method
Click on the submit button, and the input will be sent to a page on the server called "action_page.php".
index.html
Example:
HTML
<form action="/action_page.php" method="get" target="_blank">
  <label for="fname">First name:</label>
  <input type="text" id="fname" name="fname"><br><br>
  <label for="lname">Last name:</label>
  <input type="text" id="lname" name="lname"><br><br>
  <input type="submit" value="Submit">
</form>
Output should be:

# Tips-57) What is HTML min Attribute
Definition and Usage
The min attribute specifies the minimum value of an element element.
When used together with the <meter> element, the min attribute specifies the lower bound of the gauge.
Applies to
The min attribute can be used on the following elements:
| Elements | Attribute |
|---|---|
| <input> | min |
| <meter> | min |
Browser Support
The min attribute has the following browser support for each element

How to Use of the min and max attributes - Input Example
Input Example.
index.html
Example:
HTML
 <form action="/action_page.php">

  Enter a date before 1980-01-01:
  <input type="date" name="bday" max="1979-12-31">

  Enter a date after 2000-01-01:
  <input type="date" name="bday" min="2000-01-02">

  Quantity (between 1 and 5):
  <input type="number" name="quantity" min="1" max="5">

  <input type="submit">

</form>
Output should be:

How to use A gauge with a current value and min, max, high, and low segments - Meter Example
Meter Example.
index.html
Example:
HTML
<meter min="0" low="40" high="90" max="100" value="95"></meter>
Output should be:

# Tips-58) What is HTML multiple Attribute
Definition and Usage
The multiple attribute is a boolean attribute.
When present, it specifies that the user is allowed to enter/select more than one value.
Applies to
The multiple attribute can be used on the following elements:
| Elements | Attribute |
|---|---|
| <input> | multiple |
| <select> | multiple |
Browser Support
The multiple attribute has the following browser support for each element:

How to add A file upload field that accepts multiple values
Input Example.
index.html
Example:
HTML
 <form action="/action_page.php">
  Select images: <input type="file" name="img" multiple>
  <input type="submit">
</form>
Output should be:

How to add A drop-down list that allows multiple selections
Select Example.
index.html
Example:
HTML
 <select multiple>
  <option value="volvo">Volvo</option>
  <option value="saab">Saab</option>
  <option value="opel">Opel</option>
  <option value="audi">Audi</option>
</select>
Output should be:

# Tips-59) What is HTML muted Attribute
Definition and Usage
The muted attribute is a boolean attribute.
When present, it specifies that the audio output of the video should be muted.
Applies to
The muted attribute can be used on the following element:
| Element | Attribute |
|---|---|
| <video> | muted |
Browser Support
The numbers in the table specify the first browser version that fully supports the attribute.

How to A muted video
index.html
Example:
HTML
<video width="320" height="240" controls muted>
  <source src="https://www.sample-videos.com/video321/mp4/240/big_buck_bunny_240p_5mb.mp4" type="video/mp4">
  <source src="https://www.sample-videos.com/video321/mp4/240/big_buck_bunny_240p_5mb.mp4" type="video/ogg">
  Your browser does not support the video tag.
</video>
Output should be:

# Tips-60) What is HTML name Attribute
Definition and Usage
The name attribute specifies a name for an HTML element.
This name attribute can be used to reference the element in a JavaScript.
For a <form> element, the name attribute is used as a reference when the data is submitted.
For an <iframe> element, the name attribute can be used to target a form submission.
For a <map> element, the name attribute is associated with the <img>'s usemap attribute and creates a relationship between the image and the map.
For a <meta> element, the name attribute specifies a name for the information/value of the content attribute.
For a <param> element, the name attribute is used together with the value attribute to specify parameters for the plugin specified with the <object> tag.
Applies to
The name attribute can be used on the following elements:
| Elements | Attribute |
|---|---|
| <button> | name |
| <fieldset> | name |
| <form> | name |
| <iframe> | name |
| <input> | name |
| <map> | name |
| <meta> | name |
| <object> | name |
| <output> | name |
| <param> | name |
| <select> | name |
| <textarea> | name |
Browser Support
The name attribute has the following browser support for each element.
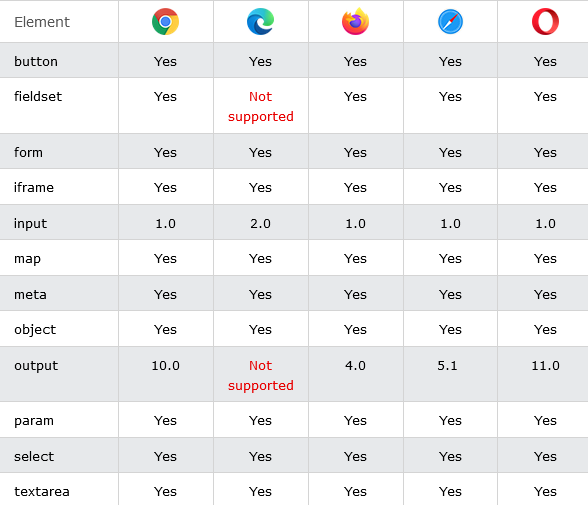
How to add Two buttons with equal names, that submit different values when clicked
The button name attribute.
index.html
Example:
HTML
 <form action="/action_page.php" method="get">
  Choose your favorite subject:
  <button name="subject" type="submit" value="HTML">HTML</button>
  <button name="subject" type="submit" value="CSS">CSS</button>
</form>
Output should be:

How to add A <fieldset> with a name attribute
Fieldset Example.
index.html
Example:
HTML
 <fieldset name="personalia">
  Name: <input type="text"><br>
  Email: <input type="text"><br>
</fieldset>
Output should be:
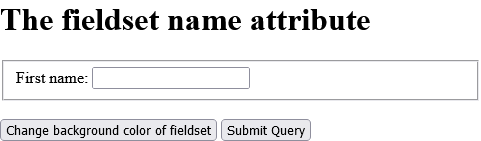
How to add An HTML form with a name attribute
Form Example.
index.html
Example:
HTML
 <form action="/action_page.php" method="get" name="myForm">
  First name: <input type="text" name="fname"><br>
  Last name: <input type="text" name="lname"><br>
  <input type="button" onclick="formSubmit()" value="Send form data!">
</form>
Output should be:
How to add An <iframe> that act as a target for a link
Iframe Example.
index.html
Example:
HTML
<iframe src="https://horje.com/" name="iframe_a">
<p>Your browser does not support iframes.</p>
</iframe>
</br>
<a href="https://horje.com/" target="iframe_a">Horje.com</a>
Output should be:
How to add An HTML form with three input fields; two text fields and one submit button
Input Example.
index.html
Example:
HTML
 <form action="/action_page.php">
  Name: <input type="text" name="fullname"><br>
  Email: <input type="text" name="email"><br>
  <input type="submit" value="Submit">
</form>
Output should be:

How to add An image map, with clickable areas - HTML name
Map Example.
index.html
Example:
HTML
<img src="https://horje.com/avatar.png" alt="Workplace" usemap="#workmap" width="400" height="379">

<map name="workmap">
  <area shape="rect" coords="34,44,270,350" alt="Computer" href="computer.htm">
  <area shape="rect" coords="290,172,333,250" alt="Phone" href="phone.htm">
  <area shape="circle" coords="337,300,44" alt="Cup of coffee" href="coffee.htm">
</map>
Output should be:
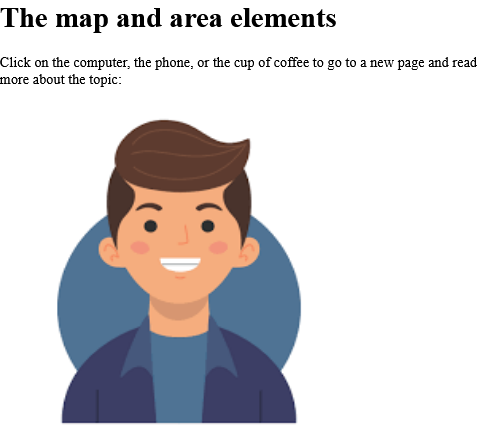
How to Use the name attribute to define a description, keywords, and the author of an HTML document
Meta Example.
index.html
Example:
HTML
 <head>
<meta name="description" content="Free Web tutorials">
<meta name="keywords" content="HTML,CSS,JavaScript">
<meta name="author" content="Hege Refsnes">
</head>
Output should be:

How to add An <object> element with a name attribute with Image
Object Example.
index.html
Example:
HTML
<object data="https://horje.com/avatar.png" name="obj1" width="300" height="200">
</object>
Output should be:
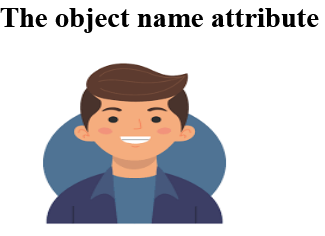
How to add Perform a calculation and show the result in an <output> element
Output Example.
index.html
Example:
HTML
 <form oninput="x.value=parseInt(a.value)+parseInt(b.value)">0
  <input type="range" id="a" value="50">100
  +<input type="number" id="b" value="50">
  =<output name="x" for="a b"></output>
</form>
Output should be:
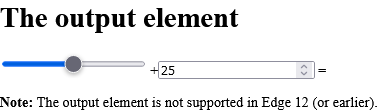
How to Set the "autoplay" parameter to "true", so the sound will start playing as soon as the page loads
Param Example.
index.html
Example:
HTML
<!DOCTYPE html>
<html>
<body>

<h1>The param element</h1>

<object data="https://download.samplelib.com/wav/sample-3s.wav">
<param name="autoplay" value="true">
</object>

</body>
</html>
Output should be:
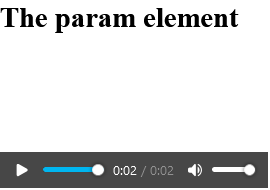
How to add A drop-down list with a name attribute
Select .Example
index.html
Example:
HTML
 <select name="cars">
  <option value="volvo">Volvo</option>
  <option value="saab">Saab</option>
  <option value="opel">Opel</option>
  <option value="audi">Audi</option>
</select>
Output should be:

How to add A text area with a name attribute
Textarea Example.
index.html
Example:
HTML
 <form action="/action_page.php">
  <textarea name="comment">Enter text here...</textarea>
  <input type="submit">
</form>
Output should be:
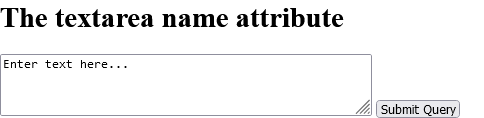
# Tips-61) What is HTML novalidate Attribute
Definition and Usage
The novalidate attribute is a boolean attribute.
When present, it specifies that the form-data (input) should not be validated when submitted.
Applies to
The novalidate attribute can be used on the following element:
| Element | Attribute |
|---|---|
| <form> | novalidate |
Browser Support
The numbers in the table specify the first browser version that fully supports the attribute.

How to Indicate that the form is not to be validated on submit
Form Example.
index.html
Example:
HTML
 <form action="/action_page.php" novalidate>
  E-mail: <input type="email" name="user_email">
  <input type="submit">
</form>
Output should be:

# Tips-62) What is HTML onabort Attribute
Definition and Usage
The onabort attribute defines a script to be run if the loading of the media file aborts.
This event occurs when the media data download has been aborted, and not because of an error.
Applies to
The onabort attribute is part of the Event Attributes, and can be used on the following elements:
| Elements | Event |
|---|---|
| <audio> | onabort |
| <embed> | onabort |
| <img> | onabort |
| <object> | onabort |
| <video> | onabort |
Browser Support
The onabort attribute has the following browser support for each element
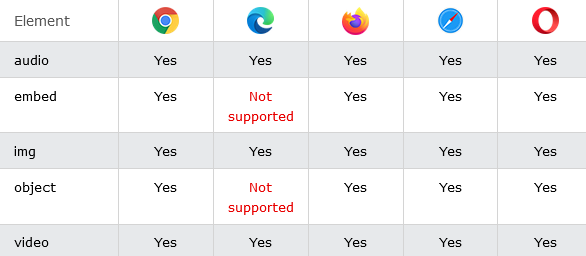
How to add Alert that the loading of a video has been aborted
Video Example.
index.html
Example:
HTML
<video id="myVideo" onabort="alert('Video load aborted')">
# Tips-63) What is HTML onafterprint Attribute
Definition and Usage
The onafterprint attribute fires when a page has started printing, or if the print dialogue box has been closed.
Tip: The onafterprint attribute is often used together with the onbeforeprint attribute.
Applies to
The onafterprint attribute is part of the Event Attributes, and can be used on the following element:
| Elements | Event |
|---|---|
| <body> | onafterprint |
Browser Support

How to Execute a JavaScript when a page has started printing, or if the print dialogue box has been closed
Try to print this document Tip: Keyboard shortcuts, such as Ctrl+P sets the page to print. Note: The onafterprint event is not supported in Safari and Opera. Note: In IE, the onafterprint event occurs before the print dialogue box, instead of after.
index.html
Example:
HTML
<script>
function myFunction() {
  alert("This document is now being printed");
}
</script>
Output should be:

# Tips-64) What is HTML onbeforeprint Attribute
Definition and Usage
The onbeforeprint attribute fires when a page is about to be printed (before the print dialogue box appears).
Tip: The onbeforeprint attribute is often used together with the onafterprint attribute.
Applies to
The onbeforeprint attribute is part of the Event Attributes, and can be used on the following element:
| Elements | Event |
|---|---|
| <body> | onbeforeprint |
Browser Support

How to Execute a JavaScript when a page is about to be printed
Try to print this document Tip: Keyboard shortcuts, such as Ctrl+P sets the page to print. Note: The onbeforeprint event is not supported in Safari and Opera.
index.html
Example:
HTML
<h1>Try to print this document</h1>
<p><b>Tip:</b> Keyboard shortcuts, such as Ctrl+P sets the page to print.</p>
<p><b>Note:</b> The onbeforeprint event is not supported in Safari and Opera.</p>

<script>
function myFunction() {
  alert("You are about to print this document!");
}
</script>
Output should be:

# Tips-65) What is HTML onbeforeunload Attribute
Definition and Usage
The onbeforeunload event fires when the document is about to be unloaded.
This event allows you to display a message in a confirmation dialog box to inform the user whether he/she wants to stay or leave the current page.
The default message that appears in the confirmation box, is different in different browsers. However, the standard message is something like "Are you sure you want to leave this page?". You cannot remove this message.
However, you can write a custom message together with the default message. See the first example on this page.
Note: In Firefox, only the default message will be displayed (not the custom message (if any)).
Applies to
The onbeforeunload attribute is part of the Event Attributes, and can be used on the following element:
| Elements | Event |
|---|---|
| <body> | onbeforeunload |
Browser Support
The numbers in the table specify the first browser version that fully supports the event.

How to Execute a JavaScript when the page is about to be unloaded
Close this window, press F5 or click on the link below to invoke the onbeforeunload event.
index.html
Example:
HTML
<!DOCTYPE html>
<html>
<body onbeforeunload="return myFunction()">

<p>Close this window, press F5 or click on the link below to invoke the onbeforeunload event.</p>

<a href="https://horje.com">Click here to go to horje.com</a>

<script>
function myFunction() {
  return "Write something clever here...";
}
</script>

</body>
</html>
Output should be:

# Tips-66) What is HTML onblur Attribute
Definition and Usage
The onblur attribute fires the moment that the element loses focus.
Onblur is most often used with form validation code (e.g. when the user leaves a form field).
Tip: The onblur attribute is the opposite of the onfocus attribute.
Applies to
The onblur attribute is part of the Event Attributes, and can be used on any HTML elements.
| Elements | Event |
|---|---|
| All HTML elements | onblur |
Browser Support

How to Validate an input field when the user leaves it
When you leave the input field, a function is triggered which transforms the input text to upper case.
index.html
Example:
HTML
Enter your name: <input type="text" name="fname" id="fname" onblur="myFunction()">

<p>When you leave the input field, a function is triggered which transforms the input text to upper case.</p>

<script>
function myFunction() {
  let x = document.getElementById("fname");
  x.value = x.value.toUpperCase();
}
</script>
Output should be:

# Tips-67) What is HTML oncanplay Attribute
Definition and Usage
The oncanplay attribute defines a script to run when the browser can start playing the specified media (when it has buffered enough to begin).
Applies to
The oncanplay attribute is part of the Event Attributes, and can be used on the following elements:
| Elements | Event |
|---|---|
| <audio> | canplay |
| <embed> | canplay |
| <object> | canplay |
| <video> | canplay |
Browser Support
The oncanplay attribute has the following browser support for each element:
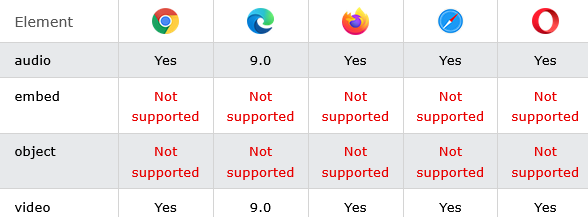
How to Run "myFunction" when the audio is ready to start playing
Audio Example.
index.html
Example:
HTML
<audio id="myAudio" controls oncanplay="myFunction()">
  <source src="https://download.samplelib.com/mp3/sample-3s.mp3" type="audio/ogg">
  <source src="https://download.samplelib.com/mp3/sample-3s.mp3" type="audio/mpeg">
  Your browser does not support the audio element.
</audio>

<script>
function myFunction() {
  alert("Can start playing the audio");
}
</script>
Output should be:

How to Run "myFunction" when the video is ready to start playing
Video Example.
index.html
Example:
HTML
<video id="myVideo" width="320" height="176" controls oncanplay="myFunction()">
  <source src="https://www.sample-videos.com/video321/mp4/240/big_buck_bunny_240p_20mb.mp4" type="video/mp4">
  <source src="https://www.sample-videos.com/video321/mp4/240/big_buck_bunny_240p_20mb.mp4" type="video/ogg">
  Your browser does not support HTML5 video.
</video>

<script>
function myFunction() {
  alert("Can start playing video");
}
</script>
Output should be:
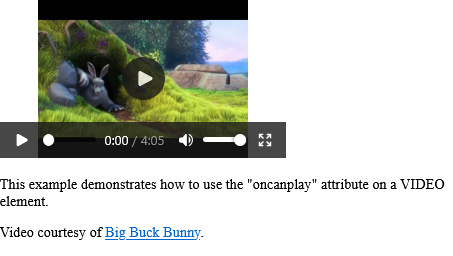
# Tips-68) What is HTML oncanplaythrough Attribute
Definition and Usage
The oncanplaythrough event occurs when the browser estimates it can play through the specified audio/video without having to stop for buffering.
Applies to
The oncanplaythrough attribute is part of the Event Attributes, and can be used on the following elements:
| Elements | Event |
|---|---|
| <audio> | canplaythrough |
| <video> | canplaythrough |
Browser Support
The oncanplaythrough attribute has the following browser support for each element.

How to Run "myFunction" when the audio is ready to start playing - Audio Example
Audio Example.
index.html
Example:
HTML
<audio id="myAudio" controls oncanplaythrough="myFunction()">
  <source src="https://download.samplelib.com/mp3/sample-3s.mp3" type="audio/ogg">
  <source src="https://download.samplelib.com/mp3/sample-3s.mp3" type="audio/mpeg">
  Your browser does not support the audio element.
</audio>

<script>
function myFunction() {
  alert("Can play the audio without any buffering");
}
</script>
Output should be:

How to Run "myFunction" when the video is ready to start playing - Video Example
Video Example.
index.html
Example:
HTML
<video id="myVideo" width="320" height="176" controls oncanplaythrough="myFunction()">
  <source src="https://www.sample-videos.com/video321/flv/240/big_buck_bunny_240p_10mb.flv" type="video/mp4">
  <source src="https://www.sample-videos.com/video321/flv/240/big_buck_bunny_240p_10mb.flv" type="video/ogg">
  Your browser does not support HTML5 video.
</video>

<script>
function myFunction() {
  alert("Can play the video without buffering");
}
</script>
Output should be:

# Tips-69) What is HTML onchange Attribute
Definition and Usage
The onchange attribute fires the moment when the value of the element is changed.
Tip: This event is similar to the oninput event. The difference is that the oninput event occurs immediately after the value of an element has changed, while onchange occurs when the element loses focus. The other difference is that the onchange event also works on <select> elements.
Applies to
The onchange attribute is part of the Event Attributes, and can be used on any HTML elements.
| Elements | Event |
|---|---|
| All HTML elements | onchange |
Browser Support

How to Execute a JavaScript when a user changes the selected option of a <select> element
Select Example.
index.html
Example:
HTML
<p>Select a new car from the list.</p>

<select id="mySelect" onchange="myFunction()">
  <option value="Audi">Audi
  <option value="BMW">BMW
  <option value="Mercedes">Mercedes
  <option value="Volvo">Volvo
</select>

<p>When you select a new car, a function is triggered which outputs the value of the selected car.</p>

<p id="demo"></p>

<script>
function myFunction() {
  let x = document.getElementById("mySelect").value;
  document.getElementById("demo").innerHTML = "You selected: " + x;
}
</script>
Output should be:

How to Execute a JavaScript when the user changes the content of an input field
Input Example.
index.html
Example:
HTML
<p>Modify the text in the input field, then click outside the field to fire the onchange event.</p>

Enter some text: <input type="text" name="txt" value="Hello" onchange="myFunction(this.value)">

<script>
function myFunction(val) {
  alert("The input value has changed. The new value is: " + val);
}
</script>
Output should be:

# Tips-70) What is HTML onclick Attribute
Definition and Usage
The onclick attribute fires on a mouse click on the element.
Applies to
The onclick attribute is part of the Event Attributes, and can be used on any HTML elements.
| Elements | Event |
|---|---|
| All HTML elements | onclick |
Browser Support

How to Execute a JavaScript when a button is clicked
Button Example.
index.html
Example:
HTML
<button onclick="myFunction()">Click me</button>

<p id="demo"></p>

<p>A function is triggered when the button is clicked. The function outputs some text in a p element with id="demo".</p>

<script>
function myFunction() {
  document.getElementById("demo").innerHTML = "Hello World";
}
</script>
Output should be:
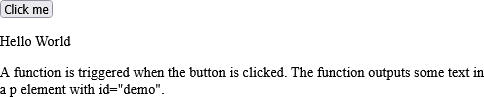
How to Click on a <p> element to change its text color to red
P Example.
index.html
Example:
HTML
<p id="demo" onclick="myFunction()">Click me to change my text color.</p>

<p>A function is triggered when the p element is clicked. The function sets the color of the p element to red.</p>

<script>
function myFunction() {
  document.getElementById("demo").style.color = "red";
}
</script>
Output should be:

# Tips-71) What is HTML oncontextmenu Attribute
Definition and Usage
The oncontextmenu attribute fires when the user right-clicks on an element to open the context menu.
Note: Although the oncontextmenu event is supported in all browsers, the contextmenu attribute is currently only supported in Firefox.
Applies to
The oncontextmenu attribute is part of the Event Attributes, and can be used on any HTML elements.
| Elements | Event |
|---|---|
| All HTML elements | oncontextmenu |
Browser Support

How to Execute a JavaScript when a context menu is triggered
Note: The contextmenu attribute only works in Firefox!
index.html
Example:
HTML
<div oncontextmenu="myFunction()" contextmenu="mymenu">
<p>Right-click inside this box to see the context menu!

<menu type="context" id="mymenu">
  <menuitem label="Refresh" onclick="window.location.reload();" icon="ico_reload.png"></menuitem>
  <menu label="Share on...">
    <menuitem label="Twitter" icon="ico_twitter.png" onclick="window.open('//twitter.com/intent/tweet?text=' + window.location.href);"></menuitem>
    <menuitem label="Facebook" icon="ico_facebook.png" onclick="window.open('//facebook.com/sharer/sharer.php?u=' + window.location.href);"></menuitem>
  </menu>
  <menuitem label="Email This Page" onclick="window.location='mailto:?body='+window.location.href;"></menuitem>
</menu>

</div>

<p><strong>Note:</strong> The contextmenu <strong>attribute</strong> only works in Firefox!</p>

<script>
function myFunction() {
  alert("You right-clicked inside the div!");
}
</script>
Output should be:

# Tips-72) What is HTML oncopy Attribute
Definition and Usage
The oncopy attribute fires when the user copies the content of an element.
Tip: The oncopy attribute also fires when the user copies an element, for example, an image, created with the <img> element.
Tip: The oncopy attribute is mostly used on <input> elements with type="text".
Tip: There are three ways to copy an element/the content of an element:
- Press CTRL + C
- Select "Copy" from the Edit menu in your browser
- Right click to display the context menu and select the "Copy" command
Applies to
The oncopy attribute is part of the Event Attributes, and can be used on any HTML elements.
| Elements | Event |
|---|---|
| All HTML elements | oncopy |
Browser Support

Note: The oncopy attribute may not work as expected in some browsers when trying to copy an image (See example above).
How to Execute a JavaScript when copying some text of an <input> element
Input Example.
index.html
Example:
HTML
<input type="text" oncopy="myFunction()" value="Try to copy this text">

<p id="demo"></p>

<script>
function myFunction() {
  document.getElementById("demo").innerHTML = "You copied text!"
}
</script>
Output should be:

How to Execute a JavaScript when copying some text of a <p> element
P Example.
index.html
Example:
HTML
<!DOCTYPE html>
<html>
<body>

<p oncopy="myFunction()">Try to copy this text</p>

<script>
function myFunction() {
  alert("You copied text!");
}
</script>

</body>
</html>
Output should be:
How to Execute a JavaScript when copying an image
Img Example.
index.html
Example:
HTML
<p>Try to copy the image below (Right click on the image and select "Copy Image").</p>

<img src="https://horje.com/avatar.png" oncopy="myFunction()" alt="The Scream" width="220" height="277">

<p><strong>Note:</strong> This example may not work as expected in some browsers.</p>

<script>
function myFunction() {
  alert("You copied image!");
}
</script>
Output should be:
# Tips-73) What is HTML oncuechange Attribute
Definition and Usage
The oncuechange attribute defines a script to run when the cue changes in a <track> element.
Applies to
The oncuechange attribute is part of the Event Attributes, and can be used on the following element:
| Element | Event |
|---|---|
| <track> | oncuechange |
Browser Support
The oncuechange attribute has the following browser support.

How to add HTML <track> Tag on HTML Page
A video with subtitle tracks for two languages:
index.html
Example:
HTML
<video width="320" height="240" controls>
  <source src="forrest_gump.mp4" type="video/mp4">
  <source src="forrest_gump.ogg" type="video/ogg">
  <track src="fgsubtitles_en.vtt" kind="subtitles" srclang="en" label="English">
  <track src="fgsubtitles_no.vtt" kind="subtitles" srclang="no" label="Norwegian">
</video>
# Tips-74) What is HTML oncut Attribute
Definition and Usage
The oncut attribute fires when the user cuts the content of an element.
Note: Although the oncut attribute is supported by all HTML elements, it is not actually possible to cut the content of, for example, a <p> element, UNLESS the element has set the contenteditable attribute to "true" (See "More Examples" below).
Tip: There are three ways to cut the content of an element:
- Press CTRL + X
- Select "Cut" from the Edit menu in your browser
- Right click to display the context menu and select the "Cut" command
Applies to
The oncut attribute is part of the Event Attributes, and can be used on any HTML elements.
| Elements | Event |
|---|---|
| All HTML elements | oncut |
Browser Support

How to Execute a JavaScript when cutting some text in an <input> element
Input Example.
index.html
Example:
HTML
<!DOCTYPE html>
<html>
<body>

<input type="text" oncut="myFunction()" value="Try to cut this text">

<p id="demo"></p>

<script>
function myFunction() {
  document.getElementById("demo").innerHTML = "You cut text!";
}
</script>

</body>
</html>
Output should be:
How to Execute a JavaScript when cutting some text of a <p> element (Note that contenteditable is set to "true")
P Example.
index.html
Example:
HTML
<!DOCTYPE html>
<html>
<body>

<p contenteditable="true" oncut="myFunction()">Try to cut this text</p>

<script>
function myFunction() {
  alert("You cut text!");
}
</script>

</body>
</html>
Output should be:

# Tips-75) What is HTML ondblclick Attribute
Definition and Usage
The ondblclick attribute fires on a mouse double-click on the element.
Applies to
The ondblclick attribute is part of the Event Attributes, and can be used on any HTML elements.
| Elements | Event |
|---|---|
| All HTML elements | ondblclick |

How to Execute a JavaScript when a button is double-clicked
Button Example.
index.html
Example:
TRY
<!DOCTYPE html>
<html>
<body>

<button ondblclick="myFunction()">Double-click me</button>

<p id="demo"></p>

<p>A function is triggered when the button is double-clicked. The function outputs some text in a p element with id="demo".</p>

<script>
function myFunction() {
  document.getElementById("demo").innerHTML = "Hello World";
}
</script>

</body>
</html>
Output should be:

How to Double-click on a <p> element to change its text color to red
P Example.
index.html
Example:
HTML
<!DOCTYPE html>
<html>
<body>

<p id="demo" ondblclick="myFunction()">Double-click me to change my text color.</p>

<p>A function is triggered when the p element is double-clicked. The function sets the color of the p element to red.</p>

<script>
function myFunction() {
  document.getElementById("demo").style.color = "red";
}
</script>

</body>
</html>
Output should be:

# Tips-76) What is HTML ondrag Attribute
Definition and Usage
The ondrag attribute fires when an element or text selection is being dragged.
To learn about Drag and Drop, read our HTML Tutorial on HTML5 Drag and Drop.
Tip: Links and images are draggable by default, and do not need the draggable attribute.
There are many event attributes that are used, and can occur, in the different stages of a drag and drop operation:
- Events fired on the draggable target (the source element):
ondragstart- fires when the user starts to drag an elementondrag- fires when an element is being draggedondragend- fires when the user has finished dragging the element
- Events fired on the drop target:
ondragenter- fires when the dragged element enters the drop targetondragover- fires when the dragged element is over the drop targetondragleave- fires when the dragged element leaves the drop targetondrop- fires when the dragged element is dropped on the drop target
Note: While dragging an element, the ondrag event fires every 350 milliseconds.
Applies to
The ondrag attribute is part of the Event Attributes, and can be used on any HTML elements.
| Elements | Event |
|---|---|
| All HTML elements | ondrag |
Browser Support
The numbers in the table specify the first browser version that fully supports the event attribute.

How to Execute a JavaScript when a <p> element is being dragged - P Example
P Example.
index.html
Example:
HTML
<!DOCTYPE HTML>
<html>
<head>
<style>
.droptarget {
  float: left;
  width: 100px;
  height: 35px;
  margin: 15px;
  padding: 10px;
  border: 1px solid #aaaaaa;
}
</style>
</head>
<body>

<p>Drag the p element back and forth between the two rectangles:</p>

<div class="droptarget" ondrop="drop(event)" ondragover="allowDrop(event)">
  <p ondragstart="dragStart(event)" ondrag="dragging(event)" draggable="true" id="dragtarget">Drag me!</p>
</div>

<div class="droptarget" ondrop="drop(event)" ondragover="allowDrop(event)"></div>

<p style="clear:both;" id="demo"></p>

<script>
function dragStart(event) {
  event.dataTransfer.setData("Text", event.target.id);
}

function dragging(event) {
  document.getElementById("demo").innerHTML = "The p element is being dragged";
}

function allowDrop(event) {
  event.preventDefault();
}

function drop(event) {
  event.preventDefault();
  let data = event.dataTransfer.getData("Text");
  event.target.appendChild(document.getElementById(data));
  document.getElementById("demo").innerHTML = "The p element was dropped";
}
</script>

</body>
</html>
Output should be:

# Tips-77) What is HTML ondragend Attribute
Definition and Usage
The ondragend attribute fires when the user has finished dragging an element or text selection.
To learn about Drag and Drop, read our HTML Tutorial on HTML5 Drag and Drop.
Tip: Links and images are draggable by default, and do not need the draggable attribute.
There are many event attributes that are used, and can occur, in the different stages of a drag and drop operation:
- Events fired on the draggable target (the source element):
ondragstart- fires when the user starts to drag an elementondrag- fires when an element is being draggedondragend- fires when the user has finished dragging the element
- Events fired on the drop target:
ondragenter- fires when the dragged element enters the drop targetondragover- fires when the dragged element is over the drop targetondragleave- fires when the dragged element leaves the drop targetondrop- fires when the dragged element is dropped on the drop target
Applies to
The ondragend attribute is part of the Event Attributes, and can be used on any HTML elements.
| Elements | Event |
|---|---|
| All HTML elements | ondragend |
Browser Support
The numbers in the table specify the first browser version that fully supports the event attribute.

How to Execute a JavaScript when the user has finished dragging a <p> element
P Example.
index.html
Example:
TRY
<!DOCTYPE HTML>
<html>
<head>
<style>
.droptarget {
  float: left;
  width: 100px;
  height: 35px;
  margin: 15px;
  padding: 10px;
  border: 1px solid #aaaaaa;
}
</style>
</head>
<body>

<p>Drag the p element back and forth between the two rectangles:</p>

<div class="droptarget" ondrop="drop(event)" ondragover="allowDrop(event)">
  <p ondragstart="dragStart(event)" ondragend="dragEnd(event)" draggable="true" id="dragtarget">Drag me!</p>
</div>

<div class="droptarget" ondrop="drop(event)" ondragover="allowDrop(event)"></div>

<p style="clear:both;" id="demo"></p>

<script>
function dragStart(event) {
  event.dataTransfer.setData("Text", event.target.id);
  document.getElementById("demo").innerHTML = "Started to drag the p element";
}

function dragEnd(event) {
  document.getElementById("demo").innerHTML = "Finished dragging the p element.";
}

function allowDrop(event) {
  event.preventDefault();
}

function drop(event) {
  event.preventDefault();
  let data = event.dataTransfer.getData("Text");
  event.target.appendChild(document.getElementById(data));
}
</script>

</body>
</html>
Output should be:

# Tips-78) What is HTML ondragenter Attribute
Definition and Usage
The ondragenter attribute fires when a draggable element or text selection enters a valid drop target.
The ondragenter and ondragleave events can help the user to understand that a draggable element is about to enter or leave a drop target. This can be done by, for example, setting a background color when the draggable element enters the drop target, and removing the color when the element is moved out of the target.
To learn about Drag and Drop, read our HTML Tutorial on HTML5 Drag a
nd Drop.
Tip: Links and images are draggable by default, and do not need the draggable attribute.
There are many event attributes that are used, and can occur, in the different stages of a drag and drop operation:
- Events fired on the draggable target (the source element):
- ondragstart - fires when the user starts to drag an element
- ondrag - fires when an element is being dragged
- ondragend - fires when the user has finished dragging the element
- Events fired on the drop target:
- ondragenter - fires when the dragged element enters the drop target
- ondragover - fires when the dragged element is over the drop target
- ondragleave - fires when the dragged element leaves the drop target
- ondrop - fires when the dragged element is dropped on the drop target
Applies to
The ondragenter attribute is part of the Event Attributes, and can be used on any HTML elements.
| Elements | Event |
|---|---|
| All HTML elements | ondragenter |
Browser Support
The numbers in the table specify the first browser version that fully supports the event attribute.

How to Execute a JavaScript when a draggable element enters a drop target
Div Example.
index.html
Example:
HTML
<!DOCTYPE HTML>
<html>
<head>
<style>
.droptarget {
  float: left;
  width: 100px;
  height: 35px;
  margin: 15px;
  margin-right: 100px;
  padding: 10px;
  border: 1px solid #aaaaaa;
}
</style>
</head>
<body>

<p>Drag the p element back and forth between the two rectangles:</p>

<div class="droptarget" ondrop="drop(event)" ondragenter="dragEnter(event)" ondragleave="dragLeave(event)" ondragover="allowDrop(event)">
  <p ondragstart="dragStart(event)" draggable="true" id="dragtarget">Drag me!</p>
</div>

<div class="droptarget" ondragenter="dragEnter(event)" ondragleave="dragLeave(event)" ondrop="drop(event)" ondragover="allowDrop(event)"></div>

<p style="clear:both;" id="demo"></p>

<script>
function dragStart(event) {
  event.dataTransfer.setData("Text", event.target.id);
}

function dragEnter(event) {
  if ( event.target.className == "droptarget" ) {
    event.target.style.border = "3px dotted red";
    document.getElementById("demo").innerHTML = "Entered the dropzone";
  }
}

function dragLeave(event) {
  if ( event.target.className == "droptarget" ) {
    event.target.style.border = "";
    document.getElementById("demo").innerHTML = "Left the dropzone";
  }
}

function allowDrop(event) {
  event.preventDefault();
}

function drop(event) {
  event.preventDefault();
  let data = event.dataTransfer.getData("Text");
  event.target.appendChild(document.getElementById(data));
}
</script>

</body>
</html>
Output should be:
# Tips-79) What is HTML ondragleave Attribute
Definition and Usage
The ondragleave attribute fires when a draggable element or text selection leaves a valid drop target.
The ondragenter and ondragleave events can help the user to understand that a draggable element is about to enter or leave a drop target. This can be done by, for example, setting a background color when the draggable element enters the drop target, and removing the color when the element is moved out of the target.
To learn about Drag and Drop, read our HTML Tutorial on HTML5 Drag and Drop.
Tip: Links and images are draggable by default, and do not need the draggable attribute.
There are many event attributes that are used, and can occur, in the different stages of a drag and drop operation:
- Events fired on the draggable target (the source element):
- ondragstart - fires when the user starts to drag an element
- ondrag - fires when an element is being dragged
- ondragend - fires when the user has finished dragging the element
- Events fired on the drop target:
- ondragenter - fires when the dragged element enters the drop target
- ondragover - fires when the dragged element is over the drop target
- ondragleave - fires when the dragged element leaves the drop target
- ondrop - fires when the dragged element is dropped on the drop target
Applies to
The ondragleave attribute is part of the Event Attributes, and can be used on any HTML elements.
| Elements | Event |
|---|---|
| All HTML elements | ondragleave |
Browser Support
The numbers in the table specify the first browser version that fully supports the event attribute.

How to Execute a JavaScript when a draggable element is moved out of a drop target
Div Example.
index.html
Example:
HTML
<!DOCTYPE HTML>
<html>
<head>
<style>
.droptarget {
  float: left;
  width: 100px;
  height: 35px;
  margin: 15px;
  margin-right: 100px;
  padding: 10px;
  border: 1px solid #aaaaaa;
}
</style>
</head>
<body>

<p>Drag the p element back and forth between the two rectangles:</p>

<div class="droptarget" ondrop="drop(event)" ondragenter="dragEnter(event)" ondragleave="dragLeave(event)" ondragover="allowDrop(event)">
  <p ondragstart="dragStart(event)" draggable="true" id="dragtarget">Drag me!</p>
</div>

<div class="droptarget" ondragenter="dragEnter(event)" ondragleave="dragLeave(event)" ondrop="drop(event)" ondragover="allowDrop(event)"></div>

<p style="clear:both;" id="demo"></p>

<script>
function dragStart(event) {
  event.dataTransfer.setData("Text", event.target.id);
}

function dragEnter(event) {
  if ( event.target.className == "droptarget" ) {
    event.target.style.border = "3px dotted red";
    document.getElementById("demo").innerHTML = "Entered the dropzone";
  }
}

function dragLeave(event) {
  if ( event.target.className == "droptarget" ) {
    event.target.style.border = "";
    document.getElementById("demo").innerHTML = "Left the dropzone";
  }
}

function allowDrop(event) {
  event.preventDefault();
}

function drop(event) {
  event.preventDefault();
  let data = event.dataTransfer.getData("Text");
  event.target.appendChild(document.getElementById(data));
}
</script>

</body>
</html>
Output should be:
# Tips-80) What is HTML ondragover Attribute
Definition and Usage
The ondragover attribute fires when a draggable element or text selection is being dragged over a valid drop target.
By default, data/elements cannot be dropped in other elements. To allow a drop, we must prevent the default handling of the element. This is done by calling the event.preventDefault() method for the ondragover attribute.
To learn about Drag and Drop, read our HTML Tutorial on HTML5 Drag and Drop.
Tip: Links and images are draggable by default, and do not need the draggable attribute.
There are many event attributes that are used, and can occur, in the different stages of a drag and drop operation:
- Events fired on the draggable target (the source element):
- ondragstart - fires when the user starts to drag an element
- ondrag - fires when an element is being dragged
- ondragend - fires when the user has finished dragging the element
- Events fired on the drop target:
- ondragenter - fires when the dragged element enters the drop target
- ondragover - fires when the dragged element is over the drop target
- ondragleave - fires when the dragged element leaves the drop target
- ondrop - fires when the dragged element is dropped on the drop target
Note: While dragging an element, the ondragover event fires every 350 milliseconds.
Applies to
The ondragover attribute is part of the Event Attributes, and can be used on any HTML elements.
| Elements | Event |
|---|---|
| All HTML elements | ondragover |
Browser Support
The numbers in the table specify the first browser version that fully supports the event attribute.

How to Execute a JavaScript when an element is being dragged over a drop target
Div Example.
index.html
Example:
HTML
<!DOCTYPE HTML>
<html>
<head>
<style>
#droptarget {
  float: left;
  width: 200px;
  height: 35px;
  margin: 55px;
  margin-top: 155px;
  padding: 10px;
  border: 1px solid #aaaaaa;
}
</style>
</head>
<body>

<p ondragstart="dragStart(event)" draggable="true" id="dragtarget">Drag me into the rectangle!</p>

<div id="droptarget" ondrop="drop(event)" ondragover="allowDrop(event)">
</div>

<p style="clear:both;" id="demo"></p>

<script>
function dragStart(event) {
  event.dataTransfer.setData("Text", event.target.id);
}

function allowDrop(event) {
  event.preventDefault();
  document.getElementById("demo").innerHTML = "The p element is OVER the droptarget.";
  event.target.style.border = "4px dotted green";
}

function drop(event) {
  event.preventDefault();
  let data = event.dataTransfer.getData("Text");
  event.target.appendChild(document.getElementById(data));
  document.getElementById("demo").innerHTML = "The p element was dropped.";
}
</script>

</body>
</html>
Output should be:

# Tips-81) How to add HTML ondragstart Attribute
Definition and Usage
The ondragstart attribute fires when the user starts to drag an element or text selection.
To learn about Drag and Drop, read our HTML Tutorial on HTML5 Drag and Drop.
Tip: Links and images are draggable by default, and do not need the draggable attribute.
There are many event attributes that are used, and can occur, in the different stages of a drag and drop operation:
- Events fired on the draggable target (the source element):
- ondragstart - fires when the user starts to drag an element
- ondrag - fires when an element is being dragged
- ondragend - fires when the user has finished dragging the element
- Events fired on the drop target:
- ondragenter - fires when the dragged element enters the drop target
- ondragover - fires when the dragged element is over the drop target
- ondragleave - fires when the dragged element leaves the drop target
- ondrop - fires when the dragged element is dropped on the drop target
Applies to
The ondragstart attribute is part of the Event Attributes, and can be used on any HTML elements.
| Elements | Event |
|---|---|
| All HTML elements | ondragstart |
Browser Support
The numbers in the table specify the first browser version that fully supports the event attribute.

How to Execute a JavaScript when the user starts to drag a <p> element
P Example. Drag the p element back and forth between the two rectangles:
index.html
Example:
HTML
<!DOCTYPE HTML>
<html>
<head>
<style>
.droptarget {
  float: left;
  width: 100px;
  height: 35px;
  margin: 15px;
  padding: 10px;
  border: 1px solid #aaaaaa;
}
</style>
</head>
<body>

<p>Drag the p element back and forth between the two rectangles:</p>

<div class="droptarget" ondrop="drop(event)" ondragover="allowDrop(event)">
  <p ondragstart="dragStart(event)" ondragend="dragEnd(event)" draggable="true" id="dragtarget">Drag me!</p>
</div>

<div class="droptarget" ondrop="drop(event)" ondragover="allowDrop(event)"></div>

<p style="clear:both;" id="demo"></p>

<script>
function dragStart(event) {
  event.dataTransfer.setData("Text", event.target.id);
  document.getElementById("demo").innerHTML = "Started to drag the p element";
}

function dragEnd(event) {
  document.getElementById("demo").innerHTML = "Finished dragging the p element.";
}

function allowDrop(event) {
  event.preventDefault();
}

function drop(event) {
  event.preventDefault();
  let data = event.dataTransfer.getData("Text");
  event.target.appendChild(document.getElementById(data));
}
</script>

</body>
</html>
Output should be:
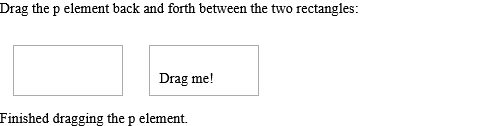
# Tips-82) What is HTML ondrop Attribute
Definition and Usage
The ondrop attribute fires when a draggable element or text selection is dropped on a valid drop target.
To learn about Drag and Drop, read our HTML Tutorial on HTML5 Drag and Drop.
Tip: Links and images are draggable by default, and do not need the draggable attribute.
There are many event attributes that are used, and can occur, in the different stages of a drag and drop operation:
- Events fired on the draggable target (the source element):
- ondragstart - fires when the user starts to drag an element
- ondrag - fires when an element is being dragged
- ondragend - fires when the user has finished dragging the element
- Events fired on the drop target:
- ondragenter - fires when the dragged element enters the drop target
- ondragover - fires when the dragged element is over the drop target
- ondragleave - fires when the dragged element leaves the drop target
- ondrop - fires when the dragged element is dropped on the drop target
Applies to
The ondrop attribute is part of the Event Attributes, and can be used on any HTML elements.
| Elements | Event |
|---|---|
| All HTML elements | ondrop |
Browser Support
The numbers in the table specify the first browser version that fully supports the event attribute.

How to Execute a JavaScript when a draggable element is dropped in a <div> element - HTML ondrop Attribute
Div Example. Drag the p element back and forth between the two rectangles.
index.html
Example:
HTML
<!DOCTYPE HTML>
<html>
<head>
<style>
.droptarget {
  float: left;
  width: 100px;
  height: 35px;
  margin: 15px;
  padding: 10px;
  border: 1px solid #aaaaaa;
}
</style>
</head>
<body>

<p>Drag the p element back and forth between the two rectangles:</p>

<div class="droptarget" ondrop="drop(event)" ondragover="allowDrop(event)">
  <p ondragstart="dragStart(event)" draggable="true" id="dragtarget">Drag me!</p>
</div>

<div class="droptarget" ondrop="drop(event)" ondragover="allowDrop(event)"></div>

<p style="clear:both;" id="demo"></p>

<script>
function dragStart(event) {
  event.dataTransfer.setData("Text", event.target.id);
  document.getElementById("demo").innerHTML = "Started to drag the p element";
}

function allowDrop(event) {
  event.preventDefault();
}

function drop(event) {
  event.preventDefault();
  let data = event.dataTransfer.getData("Text");
  event.target.appendChild(document.getElementById(data));
  document.getElementById("demo").innerHTML = "The p element was dropped";
}
</script>

</body>
</html>
Output should be:
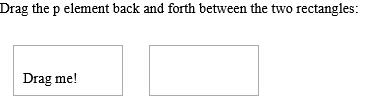
# Tips-83) What is HTML ondurationchange Attribute
Definition and Usage
The durationchange event occurs when the duration data of the specified audio/video is changed.
Note: When an audio/video is loaded, the duration will change from "NaN" to the actual duration of the audio/video.
During the loading process of an audio/video, the following events occur, in this order:
- loadstart
- durationchange
- loadedmetadata
- loadeddata
- progress
- canplay
- canplaythrough
Applies to
The ondurationchange attribute is part of the Event Attributes, and can be used on the following elements:
| Elements | Event |
|---|---|
| <audio> | durationchange |
| <video> | durationchange |
Browser Support
The ondurationchange attribute has the following browser support for each element:

How to Run "myFunction" when the audio is ready to start playing - HTML ondurationchange Attribute
Audio Example. This example demonstrates how to use the "ondurationchange" attribute on an AUDIO element. Note: When the audio is loaded, the "ondurationchange" event will occur, it changes from "NaN" to the actual duration of the audioclip.
index.html
Example:
HTML
<audio id="myAudio" controls ondurationchange="myFunction(this)">
  <source src="https://download.samplelib.com/mp3/sample-3s.mp3" type="audio/ogg">
  <source src="https://download.samplelib.com/mp3/sample-3s.mp3" type="audio/mpeg">
  Your browser does not support the audio element.
</audio>

<script>
function myFunction(x) {
  alert("The duration of this audioclip is : " + x.duration + " seconds");
}
</script>
How to Run "myFunction" when the video is ready to start playing -
Video Example. This example demonstrates how to use the "ondurationchange" attribute on a VIDEO element. Note: When the video is loaded, the "ondurationchange" event will occur, it changes from "NaN" to the actual duration of the video.
index.html
Example:
HTML
<video id="myVideo" width="320" height="176" controls ondurationchange="myFunction(this)">
  <source src="https://www.sample-videos.com/video321/mp4/240/big_buck_bunny_240p_5mb.mp4" type="video/mp4">
  <source src="https://www.sample-videos.com/video321/mp4/240/big_buck_bunny_240p_5mb.mp4" type="video/ogg">
  Your browser does not support HTML5 video.
</video>

<script>
function myFunction(x) {
  alert("The duration of this video is : " + x.duration + " seconds");
}
</script>
# Tips-84) What is HTML onemptied Attribute
Definition and Usage
Fires when the current playlist is empty
Applies to
The onemptied attribute is part of the Event Attributes, and can be used on the following elements:
| Elements | Event |
|---|---|
| <audio> | onemptied |
| <video> | onemptied |
# Tips-85) What is HTML onended Attribute
Definition and Usage
The onended event occurs when the audio/video has reached the end.
This event is useful for messages like "thanks for listening", "thanks for watching", etc.
Applies to
The onended attribute is part of the Event Attributes, and can be used on the following elements:
| Elements | Event |
|---|---|
| <audio> | ended |
| <video> | ended |
Browser Support
The onended attribute has the following browser support for each element:

How to Run "myFunction" when the audio has finished playing
Audio Example. Play the audio file: This example demonstrates how to use the "onended" attribute on an AUDIO element.
index.html
Example:
HTML
<audio id="myAudio" controls onended="myFunction()">
  <source src="https://download.samplelib.com/mp3/sample-3s.mp3" type="audio/ogg">
  <source src="https://download.samplelib.com/mp3/sample-3s.mp3" type="audio/mpeg">
  Your browser does not support the audio element.
</audio>

<p>Play the audio file:</p>

<script>
function myFunction() {
  alert("Thank you for listening");
}
</script>
Output should be:
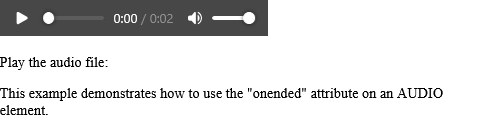
How to Run "myFunction" when the video is finished
Video Example. Play the video: This example demonstrates how to use the "onended" attribute on a VIDEO element.
index.html
Example:
HTML
<video id="myVideo" width="320" height="176" controls onended="myFunction()">
  <source src="https://www.sample-videos.com/video321/mp4/240/big_buck_bunny_240p_10mb.mp4" type="video/mp4">
  <source src="https://www.sample-videos.com/video321/mp4/240/big_buck_bunny_240p_10mb.mp4" type="video/ogg">
  Your browser does not support HTML5 video.
</video>

<p>Play the video:</p>

<script>
function myFunction() {
  alert("Thank you for watching");
}
</script>
# Tips-86) What is HTML onerror Attribute
Definition and Usage
The error event occurs when an error occurred during the loading of a media file.
Applies to
The onerror attribute is part of the Event Attributes, and can be used on the following elements:
| Elements | Event |
|---|---|
| <audio> | onerror |
| <body> | onerror |
| <embed> | onerror |
| <img> | onerror |
| <link> | onerror |
| <object> | onerror |
| <script> | onerror |
| <video> | onerror |
Browser Support
The onerror attribute has the following browser support for each element:
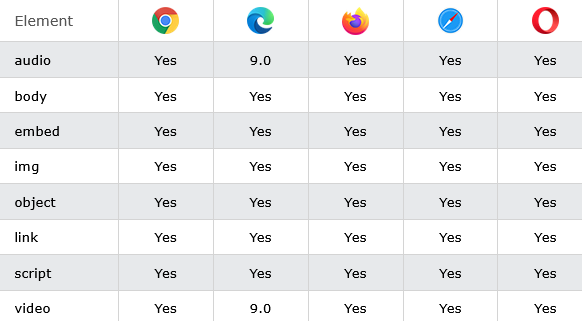
How to Run "myFunction" if an error occurs during loading Video
Video Example.
index.html
Example:
HTML
<audio onerror="myFunction()">
How to Run "myFunction" if an error occures during loading audio
Audio Example
index.html
Example:
HTML
<video onerror="myFunction()">
# Tips-87) What is HTML onfocus Attribute
Definition and Usage
The onfocus attribute fires the moment that the element gets focus.
Onfocus is most often used with <input>, <select>, and <a>.
Tip: The onfocus attribute is the opposite of the onblur attribute.
Applies to
The onfocus attribute is part of the Event Attributes, and can be used on any HTML elements.
| Elements | Event |
|---|---|
| All HTML elements | onfocus |
Browser Support

How to Execute a JavaScript when an input field gets focus
Input Example. A function is triggered when one of the input fields get focus. The function changes the background-color of the input field.
index.html
Example:
HTML
First name: <input type="text" id="fname" onfocus="myFunction(this.id)"><br>
Last name: <input type="text" id="lname" onfocus="myFunction(this.id)">

<script>
function myFunction(x) {
  document.getElementById(x).style.background = "yellow";
}
</script>
Output should be:

# Tips-88) What is HTML onhashchange Attribute
Definition and Usage
The onhashchange attribute fires when there has been changes to the anchor part (begins with a '#' symbol) of the current URL.
An example of what an anchor part actually is: Assume that the current URL is
http://www.example.com/test.htm#part2 - The anchor part of this URL would be #part2.
To invoke this event, you can:
- Change the anchor part by setting the location.hash or location.href property of the Location Object
- Navigate to the current page with a different bookmark (Use the "back" or "forward" buttons)
- Click on a link to a bookmark anchor
Applies to
The onhashchange attribute is part of the Event Attributes, and can be used on the following element:
| Elements | Event |
|---|---|
| <body> | onhashchange |
Browser Support
The numbers in the table specify the first browser version that fully supports the event attribute.

How to Execute a JavaScript when the anchor part has been changed - HTML onhashchange
Click the button to change the anchor part of the current URL to #part5
index.html
Example:
HTML
<!DOCTYPE html>
<html>
<body onhashchange="myFunction()">

<p>Click the button to change the anchor part of the current URL to #part5</p>

<button onclick="changePart()">Try it</button>

<p id="demo"></p>

<script>
// Using the location.hash property to change the anchor part
function changePart() {
  location.hash = "part5";
  let x = "The anchor part is now: " + location.hash;
  document.getElementById("demo").innerHTML = x;
}

// Alert some text if there has been changes to the anchor part
function myFunction() {
  alert("The anchor part has changed!");
}
</script>

</body>
</html>
# Tips-89) What is HTML oninput Attribute
Definition and Usage
The oninput attribute fires when an element gets user input.
The oninput attribute fires when the value of an <input> or <textarea> element is changed.
Tip: This event is similar to the onchange event. The difference is that the oninput event occurs immediately after the value of an element has changed, while onchange occurs when the element loses focus. The other difference is that the onchange event also works on <select> elements.
Applies to
The oninput attribute is part of the Event Attributes, and can be used on any HTML elements.
| Elements | Event |
|---|---|
| All HTML elements | oninput |
Browser Support

How to Execute a JavaScript when a user writes something in an <input> field - HTML oninput Attribute
Write something in the text field to trigger a function.
index.html
Example:
HTML
<!DOCTYPE html>
<html>
<body>

<p>Write something in the text field to trigger a function.</p>

<input type="text" id="myInput" oninput="myFunction()">

<p id="demo"></p>

<script>
function myFunction() {
  let x = document.getElementById("myInput").value;
  document.getElementById("demo").innerHTML = "You wrote: " + x;
}
</script>

</body>
</html>
Output should be:

# Tips-90) What is HTML oninvalid Attribute
Definition and Usage
The oninvalid event occurs when a submittable <input> element is invalid.
For example, the input field is invalid if the required attribute is set and the field is empty (the required attribute specifies that the input field must be filled out before submitting the form).
Applies to
The oninvalid attribute is part of the Event Attributes, and can be used on any HTML elements.
| Elements | Event |
|---|---|
| All HTML elements | oninvalid |
Browser Support
The numbers in the table specify the first browser version that fully supports the event attribute.

How to add HTML oninvalid Attribute
Input Example. If you click submit, without filling out the text field, an alert message will occur. Note: The oninvalid event is not supported in Safari.
index.html
Example:
HTML
<!DOCTYPE html>
<html>
<body>

<form action="/action_page.php" method="get">
  Name: <input type="text" oninvalid="alert('You must fill out the form!');" name="fname" required>
  <input type="submit" value="Submit">
</form>

<p>If you click submit, without filling out the text field, an alert message will occur.</p>

<p><strong>Note:</strong> The oninvalid event is not supported in Safari.</p>

</body>
</html>
Output should be:

# Tips-91) What is HTML onkeydown Attribute
Definition and Usage
The onkeydown attribute fires when the user is pressing a key (on the keyboard).
Tip: The order of events related to the onkeydown event:
- onkeydown
- onkeypress
- onkeyup
Applies to
The onkeydown attribute is part of the Event Attributes, and can be used on any HTML elements.
| Elements | Event |
|---|---|
| All HTML elements | onkeydown |
Browser Support

How to Execute a JavaScript when a user is pressing a key - HTML onkeydown
Input Example. A function is triggered when the user is pressing a key in the input field.
index.html
Example:
HTML
<!DOCTYPE html>
<html>
<body>

<p>A function is triggered when the user is pressing a key in the input field.</p>

<input type="text" onkeydown="myFunction()">

<script>
function myFunction() {
  alert("You pressed a key inside the input field");
}
</script>

</body>
</html>
Output should be:

# Tips-92) What is HTML onkeypress Attribute
Definition and Usage
The onkeypress attribute fires when the user presses a key (on the keyboard).
Tip: The order of events related to the onkeypress event:
- onkeydown
- onkeypress
- onkeyup
Note: The onkeypress event is not fired for all keys (e.g. ALT, CTRL, SHIFT, ESC) in all browsers. To detect only whether the user has pressed a key, use onkeydown instead, because it works for all keys.
Applies to
The onkeypress attribute is part of the Event Attributes, and can be used on any HTML elements.
| Elements | Event |
|---|---|
| All HTML elements | onkeypress |
Browser Support

How to Execute a JavaScript when a user presses a key
A function is triggered when the user is pressing a key in the input field.
index.html
Example:
HTML
<!DOCTYPE html>
<html>
<body>

<p>A function is triggered when the user is pressing a key in the input field.</p>

<input type="text" onkeypress="myFunction()">

<script>
function myFunction() {
  alert("You pressed a key inside the input field");
}
</script>

</body>
</html>
Output should be:

# Tips-93) What is HTML onkeyup Attribute
Definition and Usage
The onkeyup attribute fires when the user releases a key (on the keyboard).
Tip: The order of events related to the onkeyup event:
- onkeydown
- onkeypress
- onkeyup
Applies to
The onkeyup attribute is part of the Event Attributes, and can be used on any HTML elements.
| Elements | Event |
|---|---|
| All HTML elements | onkeyup |
Browser Support

How to Execute a JavaScript when a user releases a key - HTML onkeyup Attribute
A function is triggered when the user releases a key in the input field. The function transforms the character to upper case.
index.html
Example:
HTML
<!DOCTYPE html>
<html>
<body>

<p>A function is triggered when the user releases a key in the input field. The function transforms the character to upper case.</p>
Enter your name: <input type="text" id="fname" onkeyup="myFunction()">

<script>
function myFunction() {
  let x = document.getElementById("fname");
  x.value = x.value.toUpperCase();
}
</script>

</body>
</html>
Output should be:

# Tips-94) What is HTML onload Attribute
Definition and Usage
The onload attribute fires when an object has been loaded.
onload is most often used within the <body> element to execute a script once a web page has completely loaded all content (including images, script files, CSS files, etc.). However, it can be used on other elements as well (see "Supported HTML tags" below).
For input elements, the onload attribute is only supported when <input type="image">
The onload attribute can be used to check the visitor's browser type and browser version, and load the proper version of the web page based on the information.
Applies to
The onload attribute is part of the Event Attributes, and can be used on the following elements:
| Elements |
|---|
| <body> |
| <iframe> |
| <img> |
| <input> |
| <link> |
| <script> |
| <style> |
Browser Support
The onload attribute has the following browser support for each element:

How to Execute a JavaScript immediately after a page has been loaded - HTML onload Attribute
Body Example.
index.html
Example:
HTML
<!DOCTYPE html>
<html>
<head>
<script>
function myFunction() {
  alert("Page is loaded");
}
</script>
</head>

<body onload="myFunction()">
<h1>Hello World!</h1>
</body>

</html>
Output should be:

How to Using onload on an <img> element. Alert "Image is loaded" immediately after an image has been loaded - HTML onload Attribute
Img Example.
index.html
Example:
HTML
<!DOCTYPE html>
<html>
<body>

<img src="https://horje.com/avatar.png" onload="loadImage()" width="100" height="132">

<script>
function loadImage() {
  alert("Image is loaded");
}
</script>

</body>
</html>
Output should be:

How to Using onload on an <input type="image"> element. Alert "Image is loaded" immediately after an image has been loaded - HTML onload Attribute
Input Example.
index.html
Example:
HTML
<!DOCTYPE html>
<html>
<body>

<input type="image" onload="loadImage()"  src="https://horje.com/uploads/category/2024-08-31-06-56-41-php_script.png" alt="Submit" width="48" height="48">

<script>
function loadImage() {
  alert("Image is loaded");
}
</script>

</body>
</html>
Output should be:
 element. Alert "Image is loaded" immediately after an image has been loaded - HTML onload Attribute">
 # Tips-95) What is HTML onloadeddata Attribute
Definition and Usage
The loadeddata event occurs when data for the current frame is loaded, but not enough data to play next frame of the specified audio/video.
During the loading process of an audio/video, the following events occur, in this order:
- onloadstart
- ondurationchange
- onloadedmetadata
- loadeddata
- onprogress
- oncanplay
- oncanplaythrough
Applies to
The onloadeddata attribute is part of the Event Attributes, and can be used on the following elements:
| Elements | Event |
|---|---|
| loadeddata | |
| loadeddata |
Browser Support
The onloadeddata attribute has the following browser support for each element:

How to Run "myFunction" when the loadeddata event occurs - HTML onloadeddata Attribute
Audio Example. Play the audio file. This example demonstrates how to use the "onloadeddata" attribute on an AUDIO element.
index.html
Example:
HTML
<!DOCTYPE html>
<html>
<body>

<audio id="myAudio" controls onloadeddata="myFunction()">
  <source src="https://file-examples.com/wp-content/storage/2017/11/file_example_MP3_700KB.mp3" type="audio/ogg">
  <source src="https://file-examples.com/wp-content/storage/2017/11/file_example_MP3_700KB.mp3" type="audio/mpeg">
  Your browser does not support the audio element.
</audio>

<p>Play the audio file:</p>

<script>
function myFunction() {
  alert("Data is loaded");
}
</script>

<p>This example demonstrates how to use the "onloadeddata" attribute on an AUDIO element.</p>

</body>
</html>
Output should be:

How to Run "myFunction" when the loadeddata event occurs - HTML onloadeddata Attribute
Video Example. Play the video. This example demonstrates how to use the "onloadeddata" attribute on a VIDEO element.
index.html
Example:
HTML
<!DOCTYPE html>
<html>
<body>

<video id="myVideo" width="320" height="176" controls onloadeddata="myFunction()">
  <source src="https://www.sample-videos.com/video321/mp4/240/big_buck_bunny_240p_2mb.mp4" type="video/mp4">
  <source src="https://www.sample-videos.com/video321/mp4/240/big_buck_bunny_240p_2mb.mp4" type="video/ogg">
  Your browser does not support HTML5 video.
</video>

<p>Play the video:</p>

<script>
function myFunction() {
  alert("Data is loaded");
}
</script>

<p>This example demonstrates how to use the "onloadeddata" attribute on a VIDEO element.</p>

<p>Video courtesy of <a href="https://www.bigbuckbunny.org/" target="_blank">Big Buck Bunny</a>.</p>

</body>
</html>
Output should be:

# Tips-96) What is HTML onloadedmetadata Attribute
Definition and Usage
The loadedmetadata event occurs when meta data for the specified audio/video has been loaded.
Meta data for audio/video consists of: duration, dimensions (video only) and text tracks.
During the loading process of an audio/video, the following events occur, in this order:
- loadstart
- durationchange
- loadedmetadata
- loadeddata
- progress
- canplay
- canplaythrough
Applies to
The onloadedmetadata attribute is part of the Event Attributes, and can be used on the following elements:
| Elements | Event |
|---|---|
| <audio> | loadedmetadata |
| <video> | loadedmetadata |
Browser Support
The onloadedmetadata attribute has the following browser support for each element:

How to Run "myFunction" when the Audio loadedmetadata event occurs - HTML onloadedmetadata Attribute
Audio Example. Play the audio file. This example demonstrates how to use the "onloadedmetadata" attribute on an AUDIO element.
index.html
Example:
HTML
<!DOCTYPE html>
<html>
<body>

<audio id="myAudio" controls onloadedmetadata="myFunction()">
  <source src="https://file-examples.com/wp-content/storage/2017/11/file_example_MP3_700KB.mp3" type="audio/ogg">
  <source src="https://file-examples.com/wp-content/storage/2017/11/file_example_MP3_700KB.mp3" type="audio/mpeg">
  Your browser does not support the audio element.
</audio>

<p>Play the audio file:</p>

<script>
function myFunction() {
  alert("Meta data is loaded");
}
</script>

<p>This example demonstrates how to use the "onloadedmetadata" attribute on an AUDIO element.</p>

</body>
</html>
Output should be:

Run "myFunction" when the video loadedmetadata event occurs - HTML onloadedmetadata Attribute
Video Example. Play the video. This example demonstrates how to use the "onloadedmetadata" attribute on a VIDEO element.
index.html
Example:
HTML
<!DOCTYPE html>
<html>
<body>

<video id="myVideo" width="320" height="176" controls onloadedmetadata="myFunction()">
  <source src="https://www.sample-videos.com/video321/mp4/240/big_buck_bunny_240p_2mb.mp4" type="video/mp4">
  <source src="https://www.sample-videos.com/video321/mp4/240/big_buck_bunny_240p_2mb.mp4" type="video/ogg">
  Your browser does not support HTML5 video.
</video>

<p>Play the video:</p>

<script>
function myFunction() {
  alert("Meta data is loaded");
}
</script>

<p>This example demonstrates how to use the "onloadedmetadata" attribute on a VIDEO element.</p>

<p>Video courtesy of <a href="https://www.bigbuckbunny.org/" target="_blank">Big Buck Bunny</a>.</p>

</body>
</html>
Output should be:

# Tips-97) What is HTML onloadstart Attribute
Definition and Usage
The onloadstart event occurs when the browser starts looking for the specified audio/video. This is when the loading process starts.
During the loading process of an audio/video, the following events occur, in this order:
- loadstart
- durationchange
- loadedmetadata
- loadeddata
- progress
- canplay
- canplaythrough
Applies to
The onloadstart attribute is part of the Event Attributes, and can be used on the following elements:
| Elements | Event |
|---|---|
| <audio> | loadstart |
| <video> | loadstart |
Browser Support
The onloadstart attribute has the following browser support for each element:

How to Run "myFunction" when the Audio data starts to load - HTML onloadstart Attribute
Play the audio file. This example demonstrates how to use the "onloadstart" attribute on an AUDIO element.
index.html
Example:
HTML
<!DOCTYPE html>
<html>
<body>

<audio id="myAudio" controls onloadstart="myFunction()">
  <source src="https://file-examples.com/wp-content/storage/2017/11/file_example_MP3_5MG.mp3" type="audio/ogg">
  <source src="https://file-examples.com/wp-content/storage/2017/11/file_example_MP3_5MG.mp3" type="audio/mpeg">
  Your browser does not support the audio element.
</audio>

<p>Play the audio file:</p>

<script>
function myFunction() {
  alert("The media file has started loading");
}
</script>

<p>This example demonstrates how to use the "onloadstart" attribute on an AUDIO element.</p>

</body>
</html>
Output should be:

How to Run "myFunction" when the Video data starts to load - HTML onloadstart Attribute
Play the video. This example demonstrates how to use the "onloadstart" attribute on a VIDEO element.
index.html
Example:
HTML
<!DOCTYPE html>
<html>
<body>

<video id="myVideo" width="320" height="176" controls onloadstart="myFunction()">
  <source src="https://www.sample-videos.com/video321/mp4/240/big_buck_bunny_240p_2mb.mp4" type="video/mp4">
  <source src="https://www.sample-videos.com/video321/mp4/240/big_buck_bunny_240p_2mb.mp4" type="video/ogg">
  Your browser does not support HTML5 video.
</video>

<p>Play the video:</p>

<script>
function myFunction() {
  alert("The media file has started loading");
}
</script>

<p>This example demonstrates how to use the "onloadstart" attribute on a VIDEO element.</p>

<p>Video courtesy of <a href="https://www.bigbuckbunny.org/" target="_blank">Big Buck Bunny</a>.</p>

</body>
</html>
Output should be:

# Tips-98) What is HTML onmousedown Attribute
Definition and Usage
The onmousedown attribute fires when a mouse button is pressed down on the element.
Tip: The order of events related to the onmousedown event (for the left/middle mouse button):
- onmousedown
- onmouseup
- onclick
The order of events related to the onmousedown event (for the right mouse button):
- onmousedown
- onmouseup
- oncontextmenu
Applies to
The onmousedown attribute is part of the Event Attributes, and can be used on any HTML elements.
| Elements | Event |
|---|---|
| All HTML elements | onmousedown |
Browser Support

How to Execute a JavaScript when pressing a mouse button over a paragraph - HTML onmousedown Attribute
Click the text! The mouseDown() function is triggered when the mouse button is pressed down over this paragraph. The function sets the color of the text to red. The mouseUp() function is triggered when the mouse button is released. The mouseUp() function sets the color of the text to green.
index.html
Example:
HTML
<!DOCTYPE html>
<html>
<body>

<p id="p1" onmousedown="mouseDown()" onmouseup="mouseUp()">
Click the text! The mouseDown() function is triggered when the mouse button is pressed down over this paragraph. The function sets the color of the text to red. The mouseUp() function is triggered when the mouse button is released. The mouseUp() function sets the color of the text to green.
</p>

<script>
function mouseDown() {
  document.getElementById("p1").style.color = "red";
}

function mouseUp() {
  document.getElementById("p1").style.color = "green";
}
</script>

</body>
</html>
Output should be:

# Tips-99) What is HTML onmousemove Attribute
Definition and Usage
The onmousemove attribute fires when the pointer is moving while it is over an element.
Applies to
The onmousemove attribute is part of the Event Attributes, and can be used on any HTML elements.
| Elements | Event |
|---|---|
| All HTML elements | onmousemove |
Browser Support

How to Execute a JavaScript when moving the mouse pointer over an image - HTML onmousemove Attribute
The function bigImg() is triggered when the user mouse pointer is moved over the image. This function enlarges the image. The function normalImg() is triggered when the mouse pointer is moved out of the image. That function sets the height and width of the image back to normal.
index.html
Example:
HTML
<!DOCTYPE html>
<html>
<body>

<img onmousemove="bigImg(this)" onmouseout="normalImg(this)" border="0" src="smiley.gif" alt="Smiley" width="32" height="32">

<p>The function bigImg() is triggered when the user mouse pointer is moved over the image. This function enlarges the image.</p>
<p>The function normalImg() is triggered when the mouse pointer is moved out of the image. That function sets the height and width of the image back to normal.</p>

<script>
function bigImg(x) {
  x.style.height = "64px";
  x.style.width = "64px";
}

function normalImg(x) {
  x.style.height = "32px";
  x.style.width = "32px";
}
</script>

</body>
</html>
Output should be:

# Tips-100) What is HTML onmouseout Attribute
Definition and Usage
The onmouseout attribute fires when the mouse pointer moves out of an element.
Tip: The onmouseout attribute is often used together with the onmouseover attribute.
Applies to
The onmouseout attribute is part of the Event Attributes, and can be used on any HTML elements.
| Elements | Event |
|---|---|
| All HTML elements | onmouseout |
Browser Support

How to Execute a JavaScript when moving the mouse pointer out of an image - HTML onmouseout Attribute
Img Example. The function bigImg() is triggered when the user mouse over the image. This function enlarges the image. The function normalImg() is triggered when the mouse pointer is moved out of the image. That function sets the height and width of the image back to normal.
index.html
Example:
HTML
<!DOCTYPE html>
<html>
<body>

<img onmouseover="bigImg(this)" onmouseout="normalImg(this)" border="0" src="smiley.gif" alt="Smiley" width="32" height="32">

<p>The function bigImg() is triggered when the user mouse over the image. This function enlarges the image.</p>
<p>The function normalImg() is triggered when the mouse pointer is moved out of the image. That function sets the height and width of the image back to normal.</p>

<script>
function bigImg(x) {
  x.style.height = "64px";
  x.style.width = "64px";
}

function normalImg(x) {
  x.style.height = "32px";
  x.style.width = "32px";
}
</script>

</body>
</html>
Output should be:
# Tips-101) What is HTML onmouseover Attribute
Definition and Usage
The onmouseover attribute fires when the mouse pointer moves over an element.
Tip: The onmouseover attribute is often used together with the onmouseout attribute.
Applies to
The onmouseover attribute is part of the Event Attributes, and can be used on any HTML elements.
| Elements | Event |
|---|---|
| All HTML elements | onmouseover |
Browser Support

How to Execute a JavaScript when moving the mouse pointer over an image - HTML onmouseover Attribute
Img Example. The function bigImg() is triggered when the user mouse over the image. This function enlarges the image. The function normalImg() is triggered when the mouse pointer is moved out of the image. That function sets the height and width of the image back to normal.
index.html
Example:
HTML
<!DOCTYPE html>
<html>
<body>

<img onmouseover="bigImg(this)" onmouseout="normalImg(this)" border="0" src="https://horje.com/avatar.png" alt="Smiley" width="32" height="32">

<p>The function bigImg() is triggered when the user mouse over the image. This function enlarges the image.</p>
<p>The function normalImg() is triggered when the mouse pointer is moved out of the image. That function sets the height and width of the image back to normal.</p>

<script>
function bigImg(x) {
  x.style.height = "64px";
  x.style.width = "64px";
}

function normalImg(x) {
  x.style.height = "32px";
  x.style.width = "32px";
}
</script>

</body>
</html>
Output should be:
# Tips-102) What is HTML onmouseup Attribute
Definition and Usage
The onmouseup attribute fires when a mouse button is released over the element.
Tip: The order of events related to the onmouseup event (for the left/middle mouse button):
- onmousedown
- onmouseup
- onclick
The order of events related to the onmouseup event (for the right mouse button):
- onmousedown
- onmouseup
- oncontextmenu
Applies to
The onmouseup attribute is part of the Event Attributes, and can be used on any HTML elements.
| Elements | Event |
|---|---|
| All HTML elements | onmouseup |
Browser Support

How to Execute a JavaScript when releasing a mouse button over a paragraph - HTML onmouseup Attribute
P Example. Click the text! The mouseDown() function is triggered when the mouse button is pressed down over this paragraph. The function sets the color of the text to red. The mouseUp() function is triggered when the mouse button is released. The mouseUp() function sets the color of the text to green.
index.html
Example:
HTML
<!DOCTYPE html>
<html>
<body>

<p id="p1" onmousedown="mouseDown()" onmouseup="mouseUp()">
Click the text! The mouseDown() function is triggered when the mouse button is pressed down over this paragraph. The function sets the color of the text to red. The mouseUp() function is triggered when the mouse button is released. The mouseUp() function sets the color of the text to green.
</p>

<script>
function mouseDown() {
  document.getElementById("p1").style.color = "red";
}

function mouseUp() {
  document.getElementById("p1").style.color = "green";
}
</script>

</body>
</html>
Output should be:

# Tips-103) What is HTML onmousewheel Attribute
Definition and Usage
The onmousewheel attribute fires when the mouse wheel is rolled up or down over an element.
Deprecated. The onmousewheel attribute is deprecated, you should use the onwheel attribute instead.
Applies to
The onmousewheel attribute is part of the Event Attributes, and can be used on any HTML elements.
| Elements | Event |
|---|---|
| All HTML elements | onmousewheel |
Browser Support

How to Execute a JavaScript when the user rolls the mouse wheel over a <div> element - HTML onmousewheel Attribute
Img Example. A function is triggered when you roll the mouse wheel over div. The function sets the font-size of div to 35 pixels.
index.html
Example:
HTML
<!DOCTYPE html>
<html>
<head>
<style>
#myDIV {
  border: 1px solid black;
}
</style>
</head>
<body>

<div id="myDIV" onmousewheel="myFunction()">This example demonstrates how to assign an "onmousewheel" event to a DIV element. Roll the mouse wheel over me - either up or down!</div>

<p>A function is triggered when you roll the mouse wheel over div. The function sets the font-size of div to 35 pixels.</p>

<script>
function myFunction() {
  document.getElementById("myDIV").style.fontSize = "35px";
}
</script>

</body>
</html>
Output should be:
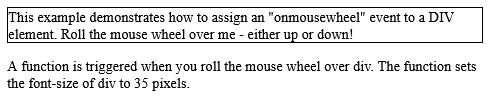
# Tips-104) What is HTML onoffline Attribute
Definition and Usage
The onoffline attribute fires when the browser starts to work offline.
Tip: The onoffline attribute is the opposite of the ononline attribute.
Applies to
The onoffline attribute is part of the Event Attributes, and can be used on the following element:
| Elements | Event |
|---|---|
| <body> | onoffline |
How to Execute a JavaScript when the browser starts to work offline - HTML onoffline Attribute
Body Example. Try to disconnect from the internet to toggle between working online and offline.
index.html
Example:
HTML
<!DOCTYPE html>
<html>
<body ononline="onFunction()" onoffline="offFunction()">

<p>Try to disconnect from the internet to toggle between working online and offline.</p>

<script>
function onFunction() {
  alert ("Your browser is working online.");
}

function offFunction() {
  alert ("Your browser is working offline.");
}
</script>

</body>
</html>
Output should be:

# Tips-105) What is HTML ononline Attribute
Definition and Usage
The ononline attribute fires when the browser starts to work online.
Tip: The ononline attribute is the opposite of the onoffline attribute.
Applies to
The ononline attribute is part of the Event Attributes, and can be used on the following element:
| Elements | Event |
|---|---|
| <body> | ononline |
Browser Support
The numbers in the table specify the first browser version that fully supports the event attribute.
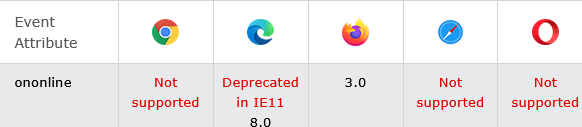
How to Execute a JavaScript when the browser starts to work online - HTML ononline Attribute
Body Example. Try to disconnect from the internet to toggle between working online and offline.
index.html
Example:
HTML
<!DOCTYPE html>
<html>
<body ononline="onFunction()" onoffline="offFunction()">

<p>Try to disconnect from the internet to toggle between working online and offline.</p>

<script>
function onFunction() {
  alert ("Your browser is working online.");
}

function offFunction() {
  alert ("Your browser is working offline.");
}
</script>

</body>
</html>
Output should be:

# Tips-106) What is HTML onpageshow Attribute
Definition and Usage
The onpageshow event occurs when a user navigates to a webpage.
The onpageshow event is similar to the onload event, except that it occurs after the onload event when the page first loads. Also, the onpageshow event occurs every time the page is loaded, whereas the onload event does not occur when the page is loaded from the cache.
Applies to
The onpageshow attribute is part of the Event Attributes, and can be used on the following element:
| Elements | Event |
|---|---|
| <body> | onpageshow |
Browser Support
The numbers in the table specify the first browser version that fully supports the event attribute.

How to Execute a JavaScript when a user navigates to a webpage - HTML onpageshow Attribute
It Executes a JavaScript when a user navigates to a webpage.
index.html
Example:
HTML
<!DOCTYPE html>
<html>
<body onpageshow="myFunction()">

<h1>Hello World!</h1>

<script>
function myFunction() {
  alert("Welcome!");
}
</script>

</body>
</html>
Output should be:
# Tips-107) What is HTML onpaste Attribute
Definition and Usage
The onpaste attribute fires when the user pastes some content in an element.
Note: Although the onpaste attribute is supported by all HTML elements, it is not actually possible to paste some content in, for example, a <p> element, UNLESS the element has set contenteditable to "true" (See "More Examples" below).
Tip: The onpaste attribute is mostly used on <input> elements with type="text".
Tip: There are three ways to paste some content in an element:
- Press CTRL + V
- Select "Paste" from the Edit menu in your browser
- Right click to display the context menu and select the "Paste" command
Applies to
The onpaste attribute is part of the Event Attributes, and can be used on any HTML elements.
| Elements | Event |
|---|---|
| All HTML elements | onpaste |
Browser Support

HTML onpaste Attribute
Input Example. Try to paste something in here.
index.html
Example:
HTML
<!DOCTYPE html>
<html>
<body>

<input type="text" onpaste="myFunction()" value="Try to paste something in here" size="40">

<p id="demo"></p>

<script>
function myFunction() {
  document.getElementById("demo").innerHTML = "You pasted text!";
}
</script>

</body>
</html>
Output should be:

How to Execute a JavaScript when pasting some text in a <p> element (Note that contenteditable is set to "true") - HTML onpaste Attribute
P Example. Try to paste something inside this paragraph.
index.html
Example:
HTML
<!DOCTYPE html>
<html>
<body>

<p contenteditable="true" onpaste="myFunction()">Try to paste something inside this paragraph.</p>

<script>
function myFunction() {
  alert("You pasted text!");
}
</script>

</body>
</html>
Output should be:

# Tips-108) What is HTML onpause Attribute
Definition and Usage
The onpause attribute defines a script to be run when the audio/video is paused either by the user or programmatically.
Tip: The onplay attribute is used to define a script to run when the audio/video has been started or is no longer paused.
Applies to
The onpause attribute is part of the Event Attributes, and can be used on the following elements:
| Elements | Event |
|---|---|
| <audio> | pause |
| <video> | pause |
Browser Support
The onpause attribute has the following browser support for each element:

How to Run "myFunction" if the audio is paused - HTML onpause Attribute
Audio Example. This example demonstrates how to use the "onpause" attribute on an AUDIO element.
index.html
Example:
HTML
<!DOCTYPE html>
<html>
<body>

<p>Play and pause the audio file.</p>

<audio id="myAudio" controls onpause="myFunction()">
  <source src="https://file-examples.com/wp-content/storage/2017/11/file_example_MP3_700KB.mp3" type="audio/ogg">
  <source src="https://file-examples.com/wp-content/storage/2017/11/file_example_MP3_700KB.mp3" type="audio/mpeg">
  Your browser does not support the audio element.
</audio>

<script>
function myFunction() {
  alert("The audio file has been paused");
}
</script>

<p>This example demonstrates how to use the "onpause" attribute on an AUDIO element.</p>

</body>
</html>
Output should be:
How to Run "myFunction" if the video is paused - HTML onpause Attribute
Video Example. This example demonstrates how to use the "onpause" attribute on a VIDEO element.
index.html
Example:
HTML
<!DOCTYPE html>
<html>
<body>

<p>Play and pause the video.</p>

<video id="myVideo" width="320" height="176" controls onpause="myFunction()">
  <source src="https://www.sample-videos.com/video321/mp4/240/big_buck_bunny_240p_2mb.mp4" type="video/mp4">
  <source src="https://www.sample-videos.com/video321/mp4/240/big_buck_bunny_240p_2mb.mp4" type="video/ogg">
  Your browser does not support HTML5 video.
</video>

<script>
function myFunction() {
  alert("The video has been paused");
}
</script>

<p>This example demonstrates how to use the "onpause" attribute on a VIDEO element.</p>

<p>Video courtesy of <a href="https://www.bigbuckbunny.org/" target="_blank">Big Buck Bunny</a>.</p>

</body>
</html>
Output should be:
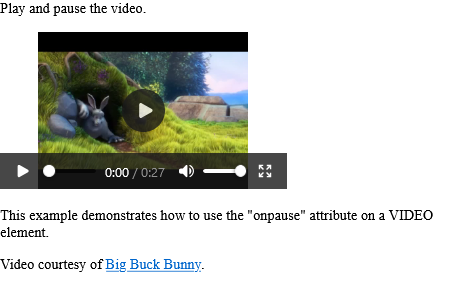
# Tips-109) What is HTML onplay Attribute
Definition and Usage
The onplay attribute defines a script to be run when the audio/video has been started or is no longer paused.
Tip: The onpause attribute is used to define a script when the audio/video has been paused.
Applies to
The onplay attribute is part of the Event Attributes, and can be used on the following elements:
| Elements | Event |
|---|---|
| <audio> | play |
| <video> | play |
Browser Support
The onplay attribute has the following browser support for each element:

How to Run "myFunction" when the audio file is being played - HTML onplay Attribute
Audio Example. This example demonstrates how to use the "onplay" attribute on an AUDIO element.
index.html
Example:
HTML
<!DOCTYPE html>
<html>
<body>

<p>Play the audio file.</p>

<audio id="myAudio" controls onplay="myFunction()">
  <source src="https://file-examples.com/wp-content/storage/2017/11/file_example_MP3_1MG.mp3" type="audio/ogg">
  <source src="https://file-examples.com/wp-content/storage/2017/11/file_example_MP3_1MG.mp3" type="audio/mpeg">
  Your browser does not support the audio element.
</audio>

<script>
function myFunction() {
  alert("The audio file is playing");
}
</script>

<p>This example demonstrates how to use the "onplay" attribute on an AUDIO element.</p>

</body>
</html>
Output should be:
How to Run "myFunction" when the video is being played - HTML onplay Attribute
Video Example. This example demonstrates how to use the "onplay" attribute on a VIDEO element.
index.html
Example:
HTML
<!DOCTYPE html>
<html>
<body>

<p>Play the video.</p>

<video id="myVideo" width="320" height="176" controls onplay="myFunction()">
  <source src="https://www.sample-videos.com/video321/mp4/240/big_buck_bunny_240p_20mb.mp4" type="video/mp4">
  <source src="https://www.sample-videos.com/video321/mp4/240/big_buck_bunny_240p_20mb.mp4" type="video/ogg">
  Your browser does not support HTML5 video.
</video>

<script>
function myFunction() {
  alert("The video is playing");
}
</script>

<p>This example demonstrates how to use the "onplay" attribute on a VIDEO element.</p>

<p>Video courtesy of <a href="https://www.bigbuckbunny.org/" target="_blank">Big Buck Bunny</a>.</p>

</body>
</html>
Output should be:
# Tips-110) What is HTML onplaying Attribute
Definition and Usage
The onplay attribute defines a script to be run when the audio/video has been started or is no longer paused.
Tip: The onpause attribute is used to define a script when the audio/video has been paused.
Applies to
The onplay attribute is part of the Event Attributes, and can be used on the following elements:
| Elements | Event |
|---|---|
| <audio> | play |
| <video> | play |
Browser Support
The onplay attribute has the following browser support for each element:
How to Run "myFunction" when the audio file is being played - HTML onplaying Attribute
Audio Example. This example demonstrates how to use the "onplaying" attribute on an AUDIO element.
index.html
Example:
HTML
<!DOCTYPE html>
<html>
<body>

<p>Play the audio file.</p>

<audio id="myAudio" controls onplaying="myFunction()">
  <source src="https://file-examples.com/wp-content/storage/2017/11/file_example_MP3_700KB.mp3" type="audio/ogg">
  <source src="https://file-examples.com/wp-content/storage/2017/11/file_example_MP3_700KB.mp3" type="audio/mpeg">
  Your browser does not support the audio element.
</audio>

<script>
function myFunction() {
  alert("The audio file has started playing");
}
</script>

<p>This example demonstrates how to use the "onplaying" attribute on an AUDIO element.</p>

</body>
</html>
Output should be:

How to Run "myFunction" when the video is being played - HTML onplaying Attribute
Video Example. This example demonstrates how to use the "onplaying" attribute on a VIDEO element.
index.html
Example:
HTML
<!DOCTYPE html>
<html>
<body>

<p>Play the video.</p>

<video id="myVideo" width="320" height="176" controls onplaying="myFunction()">
  <source src="https://www.sample-videos.com/video321/mp4/240/big_buck_bunny_240p_2mb.mp4" type="video/mp4">
  <source src="https://www.sample-videos.com/video321/mp4/240/big_buck_bunny_240p_2mb.mp4" type="video/ogg">
  Your browser does not support HTML5 video.
</video>

<script>
function myFunction() {
  alert("The video has started playing");
}
</script>

<p>This example demonstrates how to use the "onplaying" attribute on a VIDEO element.</p>

<p>Video courtesy of <a href="https://www.bigbuckbunny.org/" target="_blank">Big Buck Bunny</a>.</p>

</body>
</html>
Output should be:
# Tips-111) What is HTML onprogress Attribute
Definition and Usage
The onprogress attribute defines a script to be run when the browser is downloading the specified audio/video.
During the loading process of an audio/video, the following events occur, in this order:
- onloadstart
- ondurationchange
- onloadedmetadata
- onloadeddata
- onprogress
- oncanplay
- oncanplaythrough
Applies to
The onprogress attribute is part of the Event Attributes, and can be used on the following elements:
| Elements | Event |
|---|---|
| <audio> | progress |
| <video> | progress |
Browser Support
The onprogress attribute has the following browser support for each element:

How to Run "myFunction" when the audio file is being downloaded - HTML onprogress Attribute
Audio Example. This example demonstrates how to use the "onprogress" attribute on an AUDIO element.
index.html
Example:
HTML
<!DOCTYPE html>
<html>
<body>

<audio id="myAudio" controls onprogress="myFunction()">
  <source src="https://file-examples.com/wp-content/storage/2017/11/file_example_MP3_700KB.mp3" type="audio/ogg">
  <source src="https://file-examples.com/wp-content/storage/2017/11/file_example_MP3_700KB.mp3" type="audio/mpeg">
  Your browser does not support the audio element.
</audio>

<script>
function myFunction() {
  alert("The audio file has started downloading");
}
</script>

<p>This example demonstrates how to use the "onprogress" attribute on an AUDIO element.</p>

</body>
</html>
Output should be:

How to Run "myFunction" when the video is being downloaded - HTML onprogress Attribute
Video Example. This example demonstrates how to use the "onprogress" attribute on a VIDEO element.
index.html
Example:
HTML
<!DOCTYPE html>
<html>
<body>

<video id="myVideo" width="320" height="176" controls onprogress="myFunction()">
  <source src="https://www.sample-videos.com/video321/mp4/240/big_buck_bunny_240p_20mb.mp4" type="video/mp4">
  <source src="https://www.sample-videos.com/video321/mp4/240/big_buck_bunny_240p_20mb.mp4" type="video/ogg">
  Your browser does not support HTML5 video.
</video>

<script>
function myFunction() {
  alert("The video has started downloading");
}
</script>

<p>This example demonstrates how to use the "onprogress" attribute on a VIDEO element.</p>

<p>Video courtesy of <a href="https://www.bigbuckbunny.org/" target="_blank">Big Buck Bunny</a>.</p>

</body>
</html>
Output should be:

# Tips-112) What is HTML onratechange Attribute
Definition and Usage
The onratechange attribute defines a script to be run when the playing speed of the audio/video is changed (like when a user switches to a slow motion or fast forward mode).
Applies to
The onratechange attribute is part of the Event Attributes, and can be used on the following elements:
| Elements | Event |
|---|---|
| <audio> | ratechange |
| <video> | ratechange |
Browser Support
The onratechange attribute has the following browser support for each element:

How to Run "myFunction" when the audio changes the rate - HTML onratechange Attribute
Audio Example. The audio's speed. This example demonstrates how to use the "onratechange" attribute on an AUDIO element.
index.html
Example:
HTML
<!DOCTYPE html>
<html>
<body>

<audio id="myAudio" controls onratechange="myFunction()">
  <source src="https://file-examples.com/wp-content/storage/2017/11/file_example_MP3_700KB.mp3" type="audio/ogg">
  <source src="https://file-examples.com/wp-content/storage/2017/11/file_example_MP3_700KB.mp3" type="audio/mpeg">
  Your browser does not support the audio element.
</audio>
<p id="demo">Change the speed of the audio</p>
<input type="range" min="0.5" max="3" step="0.1" value="1"oninput="changeRate(this)">

<script>
function myFunction() {
  document.getElementById("demo").innerHTML = "The audio's speed is " + document.getElementById("myAudio").playbackRate;
}

function changeRate(obj) {
  document.getElementById("myAudio").playbackRate = obj.value;
}
</script>

<p>This example demonstrates how to use the "onratechange" attribute on an AUDIO element.</p>

</body>
</html>
Output should be:
How to Run "myFunction" when the video changes the rate - HTML onratechange Attribute
Video Example. The video's speed. This example demonstrates how to use the "onratechange" attribute on a VIDEO element.
index.html
Example:
HTML
<!DOCTYPE html>
<html>
<body>

<video id="myVideo" width="320" height="176" controls onratechange="myFunction()">
  <source src="https://www.sample-videos.com/video321/mp4/240/big_buck_bunny_240p_30mb.mp4" type="video/mp4">
  <source src="https://www.sample-videos.com/video321/mp4/240/big_buck_bunny_240p_30mb.mp4" type="video/ogg">
  Your browser does not support HTML5 video.
</video>
<p id="demo">Change the speed of the video</p>
<input type="range" min="0.1" max="3" step="0.1" value="1"oninput="changeRate(this)">

<script>
function myFunction() {
  document.getElementById("demo").innerHTML = "The video's speed is " + document.getElementById("myVideo").playbackRate;
}

function changeRate(obj) {
  document.getElementById("myVideo").playbackRate = obj.value;
}
</script>

<p>This example demonstrates how to use the "onratechange" attribute on a VIDEO element.</p>

<p>Video courtesy of <a href="https://www.bigbuckbunny.org/" target="_blank">Big Buck Bunny</a>.</p>

</body>
</html>
Output should be:
# Tips-113) What is HTML onreset Attribute
Definition and Usage
The onreset attribute fires when a form is reset.
Applies to
The onreset attribute is part of the Event Attributes, and can be used on the following element:
| Elements | Event |
|---|---|
| <form> | onreset |
Browser Support

How to Execute a JavaScript when the Reset button in a form is clicked - HTML onreset Attribute
When you reset the form, a function is triggered which alerts some text.
index.html
Example:
HTML
<!DOCTYPE html>
<html>
<body>

<p>When you reset the form, a function is triggered which alerts some text.</p>

<form onreset="myFunction()">
  Enter name: <input type="text">
  <input type="reset">
</form>

<script>
function myFunction() {
  alert("The form was reset");
}
</script>

</body>
</html>
Output should be:

# Tips-114) What is HTML onresize Attribute
Definition and Usage
The onresize attribute fires when the browser window is resized.
Applies to
The onresize attribute is part of the Event Attributes, and can be used on the following element:
| Elements | Event |
|---|---|
| <body> | onresize |
Browser Support

How to Execute a JavaScript when the browser window is resized - HTML onresize Attribute
Try to resize the browser window.
index.html
Example:
HTML
<!DOCTYPE html>
<html>

<body onresize="myFunction()">

<p>Try to resize the browser window.</p>

<script>
function myFunction() {
  alert("You have changed the size of the browser window!");
}
</script>

</body>
</html>
Output should be:

# Tips-115) What is HTML onscroll Attribute
Definition and Usage
The onscroll attribute fires when an element's scrollbar is being scrolled.
Tip: use the CSS overflow style property to create a scrollbar for an element.
Applies to
The onscroll attribute is part of the Event Attributes, and can be used on any HTML elements.
| Elements | Event |
|---|---|
| All HTML elements | onscroll |
Browser Support

How to Execute a JavaScript when a <div> element is being scrolled - HTML onscroll Attribute
Div Example. A function is triggered when you scroll in div. The function sets the color of the text in div to red.
index.html
Example:
HTML
<!DOCTYPE html>
<html>
<head>
<style>
#myDIV {
  border: 1px solid black;
  width: 200px;
  height: 100px;
  overflow: scroll;
}
</style>
</head>
<body>

<p>Try the scrollbar in div.</p>

<div id="myDIV" onscroll="myFunction()">In my younger and more vulnerable years my father gave me some advice that I've been turning over in my mind ever since.
<br><br>
'Whenever you feel like criticizing anyone,' he told me, just remember that all the people in this world haven't had the advantages that you've had.'</div>

<script>
function myFunction() {
  document.getElementById("myDIV").style.color = "red";
}
</script>

<p>A function is triggered when you scroll in div. The function sets the color of the text in div to red.</p>

</body>
</html>
Output should be:

# Tips-116) What is HTML onsearch Attribute
Definition and Usage
The onsearch attribute fires when a user presses the "ENTER" key or clicks the "x" button in an <input> element with type="search".
Applies to
The onsearch attribute is part of the Event Attributes, and can be used on the following element:
| Elements | Event |
|---|---|
| <input type="search"> | onsearch |
Browser Support
The numbers in the table specify the first browser version that fully supports the event attribute.

How to Execute a JavaScript when submitting a search - HTML onsearch Attribute
Note: The onsearch event is not supported in Internet Explorer, Firefox or Opera 12 and earlier versions.
index.html
Example:
HTML
<!DOCTYPE html>
<html>
<body>

<p>Write something in the search field and press "ENTER".</p>

<input type="search" id="myInput" onsearch="myFunction()">

<p><strong>Note:</strong> The onsearch event is not supported in Internet Explorer, Firefox or Opera 12 and earlier versions.</p>

<p id="demo"></p>

<script>
function myFunction() {
   let x = document.getElementById("myInput");
   document.getElementById("demo").innerHTML = "You are searching for: " + x.value;
}
</script>

</body>
</html>
Output should be:
# Tips-117) What is HTML onseeked Attribute
Definition and Usage
The onseeked attribute defines a script to run when the user is finished moving/skipping to a new position in the audio/video.
Tip: Use the currentTime property of the Audio/Video Object to get the current playback position.
Applies to
The onseeked attribute is part of the Event Attributes, and can be used on the following elements:
| Elements | Event |
|---|---|
| <audio> | seeked |
| <video> | seeked |
Browser Support
The onseeked attribute has the following browser support for each element:

How to Run "myFunction" when the audio changes the position - HTML onseeked Attribute
Audio Example. This example demonstrates how to use the "onseeked" attribute on an AUDIO element.
index.html
Example:
HTML
<!DOCTYPE html>
<html>
<body>

<p id="demo">Move to a new position in the audio:</p>

<audio id="myAudio" controls onseeked="myFunction()">
  <source src="https://file-examples.com/wp-content/storage/2017/11/file_example_MP3_5MG.mp3" type="audio/ogg">
  <source src="https://file-examples.com/wp-content/storage/2017/11/file_example_MP3_5MG.mp3" type="audio/mpeg">
  Your browser does not support the audio element.
</audio>

<script>
function myFunction() {
  document.getElementById("demo").innerHTML = "You moved to position " + document.getElementById("myAudio").currentTime;
}
</script>

<p>This example demonstrates how to use the "onseeked" attribute on an AUDIO element.</p>

</body>
</html>
Output should be:
How to Run "myFunction" when the video changes the position - HTML onseeked Attribute
Video Example. This example demonstrates how to use the "onseeked" attribute on a VIDEO element.
index.html
Example:
HTML
<!DOCTYPE html>
<html>
<body>

<p id="demo">Move to a new position in the video:</p>

<video id="myVideo" width="320" height="176" controls onseeked="myFunction()">
  <source src="https://www.sample-videos.com/video321/mp4/240/big_buck_bunny_240p_30mb.mp4" type="video/mp4">
  <source src="https://www.sample-videos.com/video321/mp4/240/big_buck_bunny_240p_30mb.mp4" type="video/ogg">
  Your browser does not support HTML5 video.
</video>

<script>
function myFunction() {
  document.getElementById("demo").innerHTML = "You moved to position " + document.getElementById("myVideo").currentTime;
}
</script>

<p>This example demonstrates how to use the "onseeked" attribute on a VIDEO element.</p>

<p>Video courtesy of <a href="https://www.bigbuckbunny.org/" target="_blank">Big Buck Bunny</a>.</p>

</body>
</html>
Output should be:

# Tips-118) What is HTML onseeking Attribute
Definition and Usage
The onseeking attribute defines a script to run when the user starts moving/skipping to a new position in the audio/video.
Tip: Use the currentTime property of the Audio/Video Object to get the current playback position.
Applies to
The onseeking attribute is part of the Event Attributes, and can be used on the following elements:
| Elements | Event |
|---|---|
| <audio> | seeking |
| <video> | seeking |
Browser Support
The onseeking attribute has the following browser support for each element:

How to Run "myFunction" when the user starts changing the position of the audio - HTML onseeking Attribute
Audio Example. This example demonstrates how to use the "onseeking" attribute on an AUDIO element.
index.html
Example:
HTML
<!DOCTYPE html>
<html>
<body>

<p id="demo">Move to a new position in the audio:</p>

<audio id="myAudio" controls onseeking="myFunction()">
  <source src="https://file-examples.com/wp-content/storage/2017/11/file_example_MP3_1MG.mp3" type="audio/ogg">
  <source src="https://file-examples.com/wp-content/storage/2017/11/file_example_MP3_1MG.mp3" type="audio/mpeg">
  Your browser does not support the audio element.
</audio>

<script>
function myFunction() {
  document.getElementById("demo").innerHTML = "You moved to position " + document.getElementById("myAudio").currentTime;
}
</script>

<p>This example demonstrates how to use the "onseeking" attribute on an AUDIO element.</p>

</body>
</html>
Output should be:
How to Run "myFunction" when the user starts changing the position of the video - HTML onseeking Attribute
Video Example. This example demonstrates how to use the "onseeking" attribute on a VIDEO element.
index.html
Example:
HTML
<!DOCTYPE html>
<html>
<body>

<p id="demo">Move to a new position in the video:</p>

<video id="myVideo" width="320" height="176" controls onseeking="myFunction()">
  <source src="https://www.sample-videos.com/video321/mp4/240/big_buck_bunny_240p_20mb.mp4" type="video/mp4">
  <source src="https://www.sample-videos.com/video321/mp4/240/big_buck_bunny_240p_20mb.mp4" type="video/ogg">
  Your browser does not support HTML5 video.
</video>

<script>
function myFunction() {
  document.getElementById("demo").innerHTML = "You moved to position " + document.getElementById("myVideo").currentTime;
}
</script>

<p>This example demonstrates how to use the "onseeking" attribute on a VIDEO element.</p>

<p>Video courtesy of <a href="https://www.bigbuckbunny.org/" target="_blank">Big Buck Bunny</a>.</p>

</body>
</html>
Output should be:
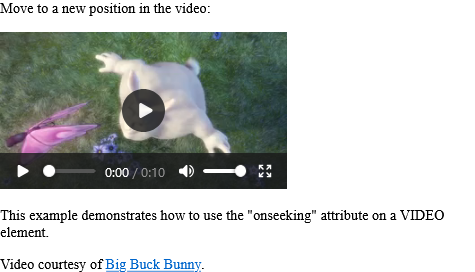
# Tips-119) What is HTML onstalled Attribute
Definition and Usage
The onstalled attribute defines a script to run when the browser is trying to get media data, but data is not available.
Tip: Related events that occurs when there is some kind of disturbance to the media loading process, are:
- onabort
- onemptied
- onerror
- onsuspend
Applies to
The onstalled attribute is part of the Event Attributes, and can be used on the following elements:
| Elements | Event |
|---|---|
| <audio> | stalled |
| <video> | stalled |
Browser Support
The onstalled attribute has the following browser support for each element:

How to use HTML onstalled Attribute
In this example, we will apply onstalled attribute on the video tag.
index.html
Example:
HTML
<!DOCTYPE html>
<html>

<head>
    <title>
        HTML onstalled Attribute
    </title>
</head>

<body>
    <center>
        <h1 style="color:green">Horje</h1>
        <h2>HTML onstalled Attribute</h2>

        <video controls id="videoID">
            <source src="https://www.sample-videos.com/video321/mp4/240/big_buck_bunny_240p_20mb.mp4"
                    type="video/mp4">
        </video>
    </center>
    <script>
        document.getElementById(
            "videoID").addEventListener("stalled", GFGfun);

        function GFGfun() {
            alert(
            "Data of this media not available");
        }
    </script>

</body>

</html>
Output should be:
# Tips-120) What is HTML onsubmit Attribute
Definition and Usage
The onsubmit attribute fires when a form is submitted.
Applies to
The onsubmit attribute is part of the Event Attributes, and can be used on the following element:
| Elements | Event |
|---|---|
| <form> | onsubmit |
Browser Support

How to Execute a JavaScript when a form is submitted - HTML onsubmit Attribute
When you submit the form, a function is triggered which alerts some text.
index.html
Example:
HTML
<!DOCTYPE html>
<html>
<body>

<p>When you submit the form, a function is triggered which alerts some text.</p>

<form action="/action_page.php" onsubmit="myFunction()">
  Enter name: <input type="text" name="fname">
  <input type="submit" value="Submit">
</form>

<script>
function myFunction() {
  alert("The form was submitted");
}
</script>

</body>
</html>
Output should be:

# Tips-121) What is HTML onsuspend Attribute
Definition and Usage
The onsuspend attribute defines a script to run when the browser is intentionally not getting media data.
This event occurs when the loading of the media is suspended (prevented from continuing). This can happen when the download has completed, or because it has been paused for some reason.
Tip: Related events that occurs when there is some kind of disturbance to the media loading process, are:
- onabort
- onemptied
- onerror
- onstalled
Applies to
The onsuspend attribute is part of the Event Attributes, and can be used on the following elements:
| Elements | Event |
|---|---|
| <audio> | suspend |
| <video> | suspend |
Browser Support
The onsuspend attribute has the following browser support for each element:

How to use HTML onsuspend Attribute
This attribute contains single value script which works when onsuspend event attribute call.
index.html
Example:
HTML
<!DOCTYPE html>
<html>

<head>
    <title>
        HTML onsuspend Attribute
    </title>
</head>

<body>
    <center>
        <h1 style="color:green">Horje</h1>
        <h2>HTML onsuspend Attribute</h2>


        <audio controls id-"audioID">
            <source src="https://file-examples.com/wp-content/storage/2017/11/file_example_MP3_700KB.mp3" type="audio/mpeg">
        </audio>
    </center>
    <script>
        document.getElementById(
            "audioID").addEventListener("suspend", GFGfun);

        function GFGfun() {
            alert(
                "Media loading suspended");
        }
    </script>

</body>

</html>
Output should be:

# Tips-122) What is HTML ontimeupdate Attribute
Definition and Usage
The ontimeupdate attribute defines a script to run when the playing position of an audio/video has changed.
This event is invoked by:
- Playing the audio/video
- Moving the playback position (like when the user fast forwards to a different point in the audio/video)
Tip: This timeupdate event is often used together with the currentTime property of the Audio/Video Object, which returns the current position of the audio/video playback, in seconds.
Applies to
The ontimeupdate attribute is part of the Event Attributes, and can be used on the following elements:
| Elements | Event |
|---|---|
| <audio> | timeupdate |
| <video> | timeupdate |
Browser Support
The ontimeupdate attribute has the following browser support for each element:

How to Run "myFunction" when the position of the audio changes - HTML ontimeupdate Attribute
Audio Example. This example demonstrates how to use the "ontimeupdate" attribute on an AUDIO element.
index.html
Example:
HTML
<!DOCTYPE html>
<html>
<body>

<p id="demo">Move to a new position in the audio:</p>

<audio id="myAudio" controls ontimeupdate="myFunction()">
  <source src="https://file-examples.com/wp-content/storage/2017/11/file_example_MP3_700KB.mp3" type="audio/ogg">
  <source src="https://file-examples.com/wp-content/storage/2017/11/file_example_MP3_700KB.mp3" type="audio/mpeg">
  Your browser does not support the audio element.
</audio>

<script>
function myFunction() {
  document.getElementById("demo").innerHTML = "You moved to position " + document.getElementById("myAudio").currentTime;
}
</script>

<p>This example demonstrates how to use the "ontimeupdate" attribute on an AUDIO element.</p>

</body>
</html>
Output should be:
How to Run "myFunction" when the position of the video changes - HTML ontimeupdate Attribute
Video Example. This example demonstrates how to use the "ontimeupdate" attribute on a VIDEO element. Move to a new position in the video.
index.html
Example:
HTML
<!DOCTYPE html>
<html>
<body>

<p id="demo">Move to a new position in the video:</p>

<video id="myVideo" width="320" height="176" controls ontimeupdate="myFunction()">
  <source src="https://www.sample-videos.com/video321/mp4/240/big_buck_bunny_240p_2mb.mp4" type="video/mp4">
  <source src="https://www.sample-videos.com/video321/mp4/240/big_buck_bunny_240p_2mb.mp4" type="video/ogg">
  Your browser does not support HTML5 video.
</video>

<script>
function myFunction() {
  document.getElementById("demo").innerHTML = "You moved to position " + document.getElementById("myVideo").currentTime;
}
</script>

<p>This example demonstrates how to use the "ontimeupdate" attribute on a VIDEO element.</p>

<p>Video courtesy of <a href="https://www.bigbuckbunny.org/" target="_blank">Big Buck Bunny</a>.</p>

</body>
</html>
Output should be:

# Tips-123) What is HTML ontoggle Attribute
Definition and Usage
The ontoggle attribute fires when the user opens or closes a <details> element.
The <details> element specifies additional details that the user can view or hide on demand.
Applies to
The ontoggle attribute is part of the Event Attributes, and can be used on the following element:
| Elements | Event |
|---|---|
| <details> | ontoggle |
Browser Support
The numbers in the table specify the first browser version that fully supports the event attribute.

How to Execute a JavaScript when a <details> element is opened or closed - HTML ontoggle Attribute
Click on Arrow to Open the details System HTML Code.
index.html
Example:
HTML
<!DOCTYPE html>
<html>
<body>

<p>Open the details.</p>

<details ontoggle="myFunction()">
<summary>Copyright 1999-2014.</summary>
<p> - by Refsnes Data. All Rights Reserved.</p>
<p>All content and graphics on this web site are the property of the company Refsnes Data.</p>
</details>

<script>
function myFunction() {
  alert("The ontoggle event occured");
}
</script>

</body>
</html>
Output should be:
# Tips-124) What is HTML onunload Attribute
Definition and Usage
The onunload attribute fires once a page has unloaded (or the browser window has been closed).
onunload occurs when the user navigates away from the page (by clicking on a link, submitting a form, closing the browser window, etc.)
Note: If you reload a page, you will also trigger the onunload event (and the onload event).
Applies to
The onunload attribute is part of the Event Attributes, and can be used on the following element:
| Elements | Event |
|---|---|
| <body> | onunload |
Browser Support

How to Execute a JavaScript when a user unloads the document - HTML onunload Attribute
Click on F5 button to reload the page.
index.html
Example:
HTML
<!DOCTYPE html>
<html>
<body onunload="myFunction()">

<h1>Welcome to my Home Page</h1>

<p>Close this window or press F5 to reload the page.</p>
<p><strong>Note:</strong> Due to different browser settings, this event may not always work as expected.</p>

<script>
function myFunction() {
  alert("Thank you for visiting W3Schools!");
}
</script>

</body>
</html>
Output should be:

# Tips-125) What is HTML onvolumechange Attribute
Definition and Usage
The onvolumechange attribute defines a script to run each time the volume of a video/audio has been changed.
This event is invoked by:
- Increasing or decreasing the volume
- Muting or unmuting the media player
Tip: Use the volume property of the Audio/Video Object to set or return the audio volume of an audio/video.
Applies to
The onvolumechange attribute is part of the Event Attributes, and can be used on the following elements:
| Elements | Event |
|---|---|
| <audio> | volumechange |
| <video> | volumechange |
Browser Support
The onvolumechange attribute has the following browser support for each element:

How to Run "myFunction" when the volume of the audio changes - HTML onvolumechange Attribute
Audio Example. Change the volume of the audio. This example demonstrates how to use the "onvolumenchange" attribute on an AUDIO element.
index.html
Example:
HTML
<!DOCTYPE html>
<html>
<body>

<p id="demo">Change the volume of the audio:</p>

<audio id="myAudio" controls onvolumechange="myFunction()">
  <source src="https://file-examples.com/wp-content/storage/2017/11/file_example_MP3_2MG.mp3" type="audio/ogg">
  <source src="https://file-examples.com/wp-content/storage/2017/11/file_example_MP3_2MG.mp3" type="audio/mpeg">
  Your browser does not support the audio element.
</audio>

<script>
function myFunction() {
  document.getElementById("demo").innerHTML = "You changed the volume";
}
</script>

<p>This example demonstrates how to use the "onvolumenchange" attribute on an AUDIO element.</p>

</body>
</html>
Output should be:
How to Run "myFunction" when the volume of the video changes - HTML onvolumechange Attribute
Video Example. Change the volume of the video. This example demonstrates how to use the "onvolumechange" attribute on a VIDEO element.
index.html
Example:
HTML
<!DOCTYPE html>
<html>
<body>

<p id="demo">Change the volume of the video:</p>

<video id="myVideo" width="320" height="176" controls onvolumechange="myFunction()">
  <source src="https://www.sample-videos.com/video321/mp4/240/big_buck_bunny_240p_30mb.mp4" type="video/mp4">
  <source src="https://www.sample-videos.com/video321/mp4/240/big_buck_bunny_240p_30mb.mp4" type="video/ogg">
  Your browser does not support HTML5 video.
</video>

<script>
function myFunction() {
  document.getElementById("demo").innerHTML = "You changed the volume";
}
</script>

<p>This example demonstrates how to use the "onvolumechange" attribute on a VIDEO element.</p>

<p>Video courtesy of <a href="https://www.bigbuckbunny.org/" target="_blank">Big Buck Bunny</a>.</p>

</body>
</html>
Output should be:

# Tips-126) What is HTML onwaiting Attribute
Definition and Usage
The onwaiting attribute defines a script to run when the video stops because it needs to buffer the next frame.
This event can also be used on <audio> elements, but it is mostly used for videos.
Applies to
The onwaiting attribute is part of the Event Attributes, and can be used on the following elements:
| Elements | Event |
|---|---|
| <audio> | waiting |
| <video> | waiting |
Browser Support
The onwaiting attribute has the following browser support for each element:

How to set up HTML onwaiting Attribute
A example of video.
index.html
Example:
HTML
<!DOCTYPE html>
<html>

<head>
	<title>HTML DOM onwaiting Attribute</title>
</head>

<body>
	<center>
		<h1 style="color:green">Horje</h1>
		<h2>HTML onwaiting Attribute</h2>

		<video controls id="videoID">
			<source src="https://www.sample-videos.com/video321/mp4/240/big_buck_bunny_240p_30mb.mp4" type="video/mp4">
		</video>

	</center>
	<script>
		document.getElementById(
		"videoID").addEventListener("waiting", GFGfun);

		function GFGfun() {
			alert(" start Buffering");
		}
	</script>

</body>

</html>
Output should be:
# Tips-127) What is HTML onwheel Attribute
Definition and Usage
The onwheel attribute fires when the wheel of a pointing device is rolled up or down over an element.
The onwheel attribute also fires when the user scrolls or zooms on an element by using a touchpad (like the "mouse" of a laptop).
Applies to
The onwheel attribute is part of the Event Attributes, and can be used on any HTML elements.
| Elements | Event |
|---|---|
| All HTML elements | onwheel |
Browser Support
The numbers in the table specify the first browser version that fully supports the event attribute.

How to Execute a JavaScript when the user rolls the mouse wheel over a <div> element - HTML onwheel Attribute
A Example of Div Example. A function is triggered when you roll the mouse wheel over div. The function sets the font-size of div to 35 pixels. Note: The onwheel event is not supported in Internet Explorer or Safari.
index.html
Example:
HTML
<!DOCTYPE html>
<html>
<head>
<style>
#myDIV {
border: 1px solid black;
}
</style>
</head>
<body>
<div id="myDIV" onwheel="myFunction()">This example demonstrates how to assign an "onwheel" event event to a DIV element. Roll the mouse wheel over me - either up or down!</div>
<p>A function is triggered when you roll the mouse wheel over div. The function sets the font-size of div to 35 pixels.</p>
<p><strong>Note:</strong> The onwheel event is not supported in Internet Explorer or Safari.</p>
<script>
function myFunction() {
document.getElementById("myDIV").style.fontSize = "35px";
}
</script>
</body>
</html>
Output should be:
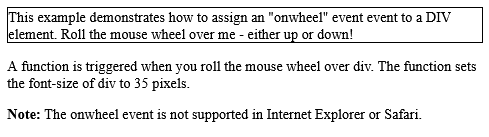
# Tips-128) What is HTML open Attribute
Definition and Usage
The open attribute is a boolean attribute.
When present, it specifies that the details should be visible (open) by default.
Applies to
The open attribute can be used on the following element:
| Element | Attribute |
|---|---|
| <details> | open |
Browser Support
The numbers in the table specify the first browser version that fully supports the attribute.

How to use An open/visible <details> element - HTML open Attribute
This example demonstrates a details element that is open by default.
index.html
Example:
HTML
<!DOCTYPE html>
<html>
<body>
<h1>The details open attribute</h1>
<details open>
<summary>Epcot Center</summary>
<p>Epcot is a theme park at Walt Disney World Resort featuring exciting attractions, international pavilions, award-winning fireworks and seasonal special events.</p>
</details>
<p>This example demonstrates a details element that is open by default.</p>
</body>
</html>
Output should be:
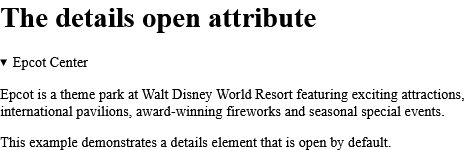
# Tips-129) What is HTML optimum Attribute
Definition and Usage
The optimum attribute specifies the range where the gauge's value is considered to be an optimal value.
Applies to
The optimum attribute can be used on the following element:
| Element | Attribute |
|---|---|
| optimum |
Browser Support
The numbers in the table specify the first browser version that fully supports the attribute.

How to run A gauge with an optimal value of 0.5: - HTML optimum Attribute
The meter optimum attribute.
index.html
Example:
HTML
<meter id="yinyang" value="0.3" high="0.9" low="0.1" optimum="0.5"></meter>
Output should be:

# Tips-130) What is HTML pattern Attribute
Definition and Usage
The pattern attribute specifies a regular expression that the <input> element's value is checked against.
Note: The pattern attribute works with the following input types: text, date, search, url, tel, email, and password.
Tip: Use the global title attribute to describe the pattern to help the user.
Tip: Learn more about regular expressions in our JavaScript tutorial.
Applies to
The pattern attribute can be used on the following element:
| Element | Attribute |
|---|---|
| <input> | pattern |
Browser Support
The numbers in the table specify the first browser version that fully supports the attribute.

How to run An HTML form with an input field that can contain only three letters (no numbers or special characters) - HTML pattern Attribute
Input Example. The input pattern attribute. Note: The pattern attribute of the input tag is not supported in Safari 10 (or earlier).
index.html
Example:
HTML
<!DOCTYPE html>
<html>
<body>
<h1>The input pattern attribute</h1>
<form action="/action_page.php">
<label for="country_code">Country code:</label>
<input type="text" id="country_code" name="country_code" pattern="[A-Za-z]{3}" title="Three letter country code"><br><br>
<input type="submit">
</form>
<p><strong>Note:</strong> The pattern attribute of the input tag is not supported in Safari 10 (or earlier).</p>
</body>
</html>
Output should be:
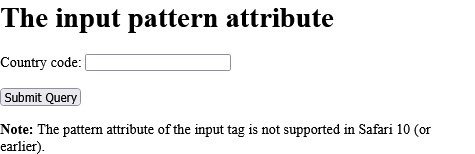
How to run An <input> element with type="password" that must contain 6 or more characters - HTML pattern Attribute
Password Example. The input pattern attribute. A form with a password field that must contain 8 or more characters.
index.html
Example:
HTML
<!DOCTYPE html>
<html>
<body>
<h1>The input pattern attribute</h1>
<p>A form with a password field that must contain 8 or more characters:</p>
<form action="/action_page.php">
<label for="pwd">Password:</label>
<input type="password" id="pwd" name="pwd" pattern=".{8,}" title="Eight or more characters">
<input type="submit">
</form>
</body>
</html>
Output should be:

How to run An <input> element with type="password" that must contain 8 or more characters that are of at least one number, and one uppercase and lowercase letter - HTML pattern Attribute
Password Example. The input pattern attribute. A form with a password field that must contain 8 or more characters that are of at least one number, and one uppercase and lowercase letter.
index.html
Example:
HTML
<!DOCTYPE html>
<html>
<body>
<h1>The input pattern attribute</h1>
<p>A form with a password field that must contain 8 or more characters that are of at least one number, and one uppercase and lowercase letter:</p>
<form action="/action_page.php">
<label for="pwd">Password:</label>
<input type="password" id="pwd" name="pwd" pattern="(?=.*\d)(?=.*[a-z])(?=.*[A-Z]).{8,}" title="Must contain at least one number and one uppercase and lowercase letter, and at least 8 or more characters">
<input type="submit">
</form>
</body>
</html>
Output should be:

# Tips-131) What is HTML placeholder Attribute
Definition and Usage
The placeholder attribute specifies a short hint that describes the expected value of an input field or a textarea.
The short hint is displayed in the field before the user enters a value.
Applies to
The placeholder attribute can be used on the following elements:
| Elements | Attribute |
|---|---|
| <input> | placeholder |
| <textarea> | placeholder |
Browser Support
The placeholder attribute has the following browser support for each element:

How to add Two input fields with a placeholder text - HTML placeholder Attribute
Input Example. The input placeholder attribute.
index.html
Example:
HTML
<!DOCTYPE html>
<html>
<body>
<h1>The input placeholder attribute</h1>
<form action="/action_page.php">
<label for="phone">Enter a phone number:</label><br><br>
<input type="tel" id="phone" name="phone" placeholder="123-45-678" pattern="[0-9]{3}-[0-9]{2}-[0-9]{3}"><br><br>
<small>Format: 123-45-678</small><br><br>
<input type="submit">
</form>
</body>
</html>
Output should be:

How to add A text area with a placeholder text - HTML placeholder Attribute
Textarea Example. The textarea placeholder attribute.
index.html
Example:
HTML
<!DOCTYPE html>
<html>
<body>
<h1>The textarea placeholder attribute</h1>
Who are you?
<textarea rows="4" cols="50" placeholder="Describe yourself here..."></textarea>
</body>
</html>
Output should be:

# Tips-132) What is HTML popover Attribute
Definition and Usage
The popover attribute defines an element as a popover element, meaning that when it is invoked, it will be placed on top of the content, not interfere with the position of other HTML elements.
A popover element will be invisible until it is invoked by another element. The other element must have a popovertarget attribute where the value refers to the popover element's id.
The popover element will be placed on top of all other content, and by clicking the popovertarget element, the popover element will toggle between showing and hiding:
The popover element can be a single HTML element, or an entire section of HTML elements. See examples below.
Applies to
The popover attribute is a Global Attribute, and can be used on any HTML element, but the element must be editable.
| Element | Attribute |
|---|---|
| All HTML elements | popover |
Browser Support

How to Add a <h1> element with a popover attribute, and a button to show/hide it - HTML popover Attribute
Click the button and it will toggle between showing and hiding the popover element.
index.html
Example:
HTML
<!DOCTYPE html>
<html>
<body>
<h1>The popover Attribute</h1>
<h1 popover id="myheader">Hello</h1>
<button popovertarget="myheader">Click me!</button>
<p>Click the button and it will toggle between showing and hiding the popover element.</p>
</body>
</html>
Output should be:
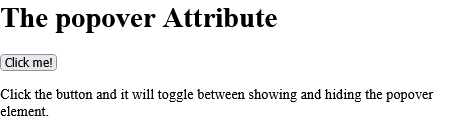
How to Use a DIV element as a popover element - HTML popover Attribute
You can style popover elements with CSS. Click the button to show the popover element.
index.html
Example:
HTML
<!DOCTYPE html>
<html>
<body>
<style>
#mydiv {
text-align:center;
padding:40px;
background-color:lightblue;
font-family:"Segoe UI", Tahoma, Geneva, Verdana, sans-serif;
}
</style>
<h1>The popover Attribute</h1>
<div popover id="mydiv">
<h2>Popover</h2>
<hr>
<p>A popover is an element that is placed on top of everything else.</p>
<p>It can be used when you want to tell something important.</p>
<button popovertarget="mydiv" popovertargetaction="hide">Close</button>
</div>
<button popovertarget="mydiv">Click me!</button>
<p>You can style popover elements with CSS.</p>
<p>Click the button to show the popover element.</p>
</body>
</html>
Output should be:
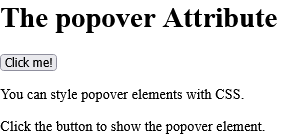
# Tips-133) What is HTML popovertarget Attribute
Definition and Usage
With the popovertarget attribute you can refer to the popover element with the specified id, and toggle between showing and hiding it:
The popovertarget only works when type="button".
Applies to
The popovertarget attribute can be used on the following elements:
| Elements | Attribute |
|---|---|
| <input> | popovertarget |
| <button> | popovertarget |
Browser Support

How to Refer to a popover element with the popovertarget attribute to show/hide the specified popover element - HTML popovertarget Attribute
The input popovertarget Attribute. Click the button and it will toggle between showing and hiding the popover element.
index.html
Example:
HTML
<!DOCTYPE html>
<html>
<body>
<h1>The input popovertarget Attribute</h1>
<h1 popover id="myheader">Hello</h1>
<input type="button" popovertarget="myheader" value="Click me!">
<p>Click the button and it will toggle between showing and hiding the popover element.</p>
</body>
</html>
Output should be:
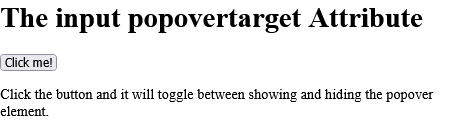
# Tips-134) What is HTML popovertargetaction Attribute
Definition and Usage
The popovertargetaction attribute allows you to define what happens when you click the button.
You can choose between the values "show", "hide", and "toggle".
The popovertargetaction only works when type="button".
If the popovertargetaction attribute is not specified, the default "toggle" value will be used.
Applies to
The popovertargetaction attribute can be used on the following elements:
| Elements | Attribute |
|---|---|
| <input> | popovertargetaction |
| <button> | popovertargetaction |
Browser Support

When the input button is clicked, the popover element will show - HTML popovertargetaction Attribute
The input popovertargetaction Attribute. Click the button and it will show the popover element.
index.html
Example:
HTML
<!DOCTYPE html>
<html>
<body>
<h1>The input popovertargetaction Attribute</h1>
<h1 popover id="myheader">Hello</h1>
<input type="button" popovertarget="myheader" popovertargetaction="show" value="Show popover">
<p>Click the button and it will show the popover element.</p>
</body>
</html>
Output should be:
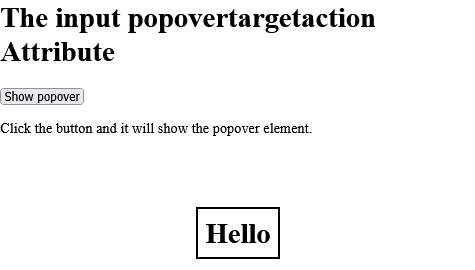
# Tips-135) What is HTML poster Attribute
Definition and Usage
The poster attribute specifies an image to be shown while the video is downloading, or until the user hits the play button. If this is not included, the first frame of the video will be used instead.
Applies to
The poster attribute can be used on the following element:
| Elements | Attribute |
|---|---|
| <video> | poster |
Browser Support
The poster attribute has the following browser support.

How to add A video player with a poster image - HTML poster Attribute
See the Example.
index.html
Example:
HTML
<!DOCTYPE html>
<html>
<body>
<h1>The video poster attribute</h1>
<video width="320" height="240" poster="https://horje.com/avatar.png" controls>
<source src="https://www.sample-videos.com/video321/mp4/240/big_buck_bunny_240p_30mb.mp4" type="video/mp4">
<source src="https://www.sample-videos.com/video321/mp4/240/big_buck_bunny_240p_30mb.mp4" type="video/ogg">
Your browser does not support the video tag.
</video>
</body>
</html>
Output should be:
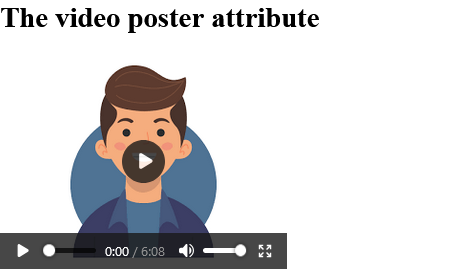
# Tips-136) What is HTML preload Attribute
Definition and Usage
The preload attribute specifies if and how the author thinks that the media file should be loaded when the page loads.
The preload attribute allows the author to provide a hint to the browser about what he/she thinks will lead to the best user experience. This attribute may be ignored in some instances.
Note: The preload attribute is ignored if autoplay is present.
Applies to
The preload attribute can be used on the following elements:
| Elements | Attribute |
|---|---|
| <audio> | preload |
| <video> | preload |
Browser Support
The preload attribute has the following browser support for each element.
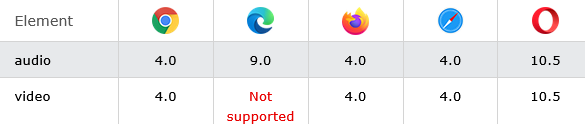
How to add Author thinks that the video should NOT be loaded when the page loads - HTML preload Attribute
Video Example. The video preload attribute.
index.html
Example:
HTML
<!DOCTYPE html>
<html>
<body>
<h1>The video preload attribute</h1>
<video width="320" height="240" controls preload="none">
<source src="https://www.sample-videos.com/video321/mp4/240/big_buck_bunny_240p_30mb.mp4" type="video/mp4">
<source src="https://www.sample-videos.com/video321/mp4/240/big_buck_bunny_240p_30mb.mp4" type="video/ogg">
Your browser does not support the video tag.
</video>
</body>
</html>
Output should be:
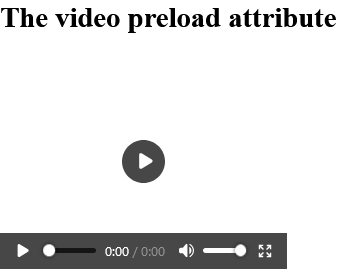
How to add Author thinks that the sound should NOT be loaded when the page loads - HTML preload Attribute
Audio Example. The audio preload attribute. Click on the play button to play a sound.
index.html
Example:
HTML
<!DOCTYPE html>
<html>
<body>
<h1>The audio preload attribute</h1>
<p>Click on the play button to play a sound:</p>
<audio controls preload="none">
<source src="https://file-examples.com/wp-content/storage/2017/11/file_example_MP3_700KB.mp3" type="audio/ogg">
<source src="https://file-examples.com/wp-content/storage/2017/11/file_example_MP3_700KB.mp3" type="audio/mpeg">
Your browser does not support the audio element.
</audio>
</body>
</html>
Output should be:
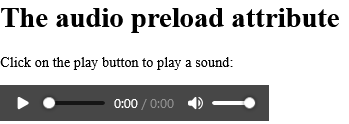
# Tips-137) What is HTML readonly Attribute
Definition and Usage
The readonly attribute is a boolean attribute.
When present, it specifies that an input field or textarea is read-only.
A read-only field cannot be modified (however, a user can tab to it, highlight it, and copy the text from it).
The readonly attribute can be set to keep a user from changing the value until some other conditions have been met (like selecting a checkbox, etc.). Then, a JavaScript can remove the readonly value, and make the input field editable.
Applies to
The readonly attribute can be used on the following elements:
| Elements | Attribute |
|---|---|
| <input> | readonly |
| <textarea> | readonly |
Browser Support
The readonly attribute has the following browser support for each element.

How to add An HTML form with a read-only input field - HTML readonly Attribute
Input Example. The input readonly attribute.
index.html
Example:
HTML
<!DOCTYPE html>
<html>
<body>
<h1>The input readonly attribute</h1>
<form action="/action_page.php">
<label for="fname">First name:</label>
<input type="text" id="fname" name="fname"><br><br>
<label for="country">Country:</label>
<input type="text" id="country" name="country" value="Norway" readonly><br><br>
<input type="submit" value="Submit">
</form>
</body>
</html>
Output should be:
How to add A read-only text area - HTML readonly Attribute
Textarea Example. The textarea readonly attribute.
index.html
Example:
HTML
<!DOCTYPE html>
<html>
<body>
<h1>The textarea readonly attribute</h1>
<textarea rows="4" cols="50" readonly>
At Horje.com you will learn how to make a website. We offer free tutorials in all web development technologies.
</textarea>
</body>
</html>
Output should be:
# Tips-138) What is HTML rel Attribute
Definition and Usage
The rel attribute specifies the relationship between the current document and the linked document/resource.
Applies to
The rel attribute can be used on the following elements:
| Elements | Attribute |
|---|---|
| <a> | rel |
| <area> | rel |
| <link> | rel |
| <form> | rel |
Browser Support
The rel attribute has the following browser support for each element:
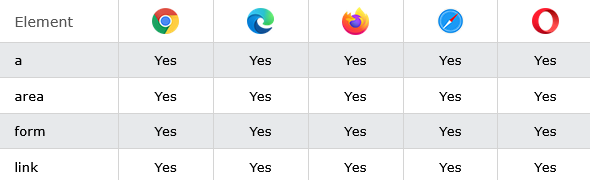
How to add A link with a rel attribute - HTML rel Attribute
Rel attribute has been added with a HTML Link.
index.html
Example:
HTML
<!DOCTYPE html>
<html>
<body>
<h1>The a rel attribute</h1>
<p><a rel="nofollow" href="https://horje.com/">Horje.com</a></p>
</body>
</html>
Output should be:
How to add An image map, with a clickable area - HTML rel Attribute
Area Example. The area rel attribute. Click on the sun to watch it closer.
index.html
Example:
HTML
<!DOCTYPE html>
<html>
<body>
<h1>The area rel attribute</h1>
<p>Click on the sun to watch it closer:</p>
<img src="https://horje.com/avatar.png" width="145" height="126" alt="Planets" usemap="#planetmap">
<map name="planetmap">
<area shape="rect" coords="0,0,82,126" alt="Sun" href="sun.htm" rel="alternate">
</map>
</body>
</html>
Output should be:
How to add An external stylesheet - HTML rel Attribute
Link Example.
index.html
Example:
HTML
<!DOCTYPE html>
<html>
<head>
<link rel="stylesheet" href="styles.css">
</head>
<body>
<h1>Hello World!</h1>
<h2>I am formatted with a linked style sheet.</h2>
<p>Me too!</p>
</body>
</html>
Output should be:

# Tips-139) What is HTML required Attribute
Definition and Usage
The required attribute is a boolean attribute.
When present, it specifies that the element must be filled out before submitting the form.
Applies to
The required attribute can be used on the following elements:
| Elements | Attribute |
|---|---|
| <input> | required |
| <select> | required |
| <textarea> | required |
Browser Support
The required attribute has the following browser support for each element:
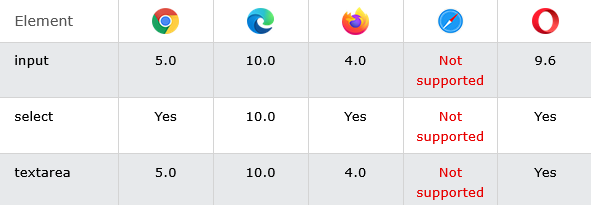
How to add An HTML form with a required input field - HTML required Attribute
Input Example. Here the input will require any text.
index.html
Example:
HTML
<!DOCTYPE html>
<html>
<body>
<h1>The input required attribute</h1>
<form action="/action_page.php">
<label for="username">Username:</label>
<input type="text" id="username" name="username" required>
<input type="submit">
</form>
</body>
</html>
Output should be:

How to add An HTML form with a required drop-down list - HTML required Attribute
The required attribute specifies that the user is required to select a value before submitting the form.
index.html
Example:
HTML
<form action="/action_page.php">
<label for="cars">Choose a car:</label>
<select name="cars" id="cars" required>
<option value="">None</option>
<option value="volvo">Volvo</option>
<option value="saab">Saab</option>
<option value="mercedes">Mercedes</option>
<option value="audi">Audi</option>
</select>
<br><br>
<input type="submit" value="Submit">
</form>
Output should be:
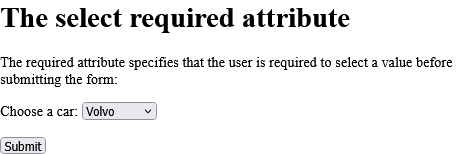
How to add A form with a required text area - HTML required Attribute
The textarea required attribute.
index.html
Example:
HTML
<form action="/action_page.php">
<textarea rows="4" cols="50" name="comment" required>
</textarea>
<input type="submit">
</form>
Output should be:
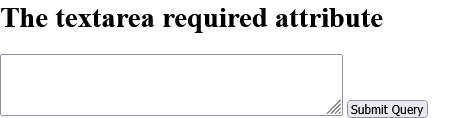
# Tips-140) What is HTML reversed Attribute
Definition and Usage
The reversed attribute is a boolean attribute.
When present, it specifies that the list order should be descending (9,8,7...), instead of ascending (1, 2, 3...).
Applies to
The reversed attribute can be used on the following element:
| Element | Attribute |
|---|---|
| <ol> | reversed |
Browser Support
The numbers in the table specify the first browser version that fully supports the attribute.

How to add Descending list order - HTML reversed Attribute
Note: The reversed attribute of the ol tag is not supported in Edge prior version 79.
index.html
Example:
HTML
<ol reversed>
<li>Coffee</li>
<li>Tea</li>
<li>Milk</li>
</ol>
Output should be:
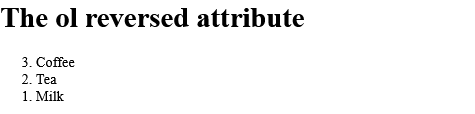
# Tips-141) What is HTML rows Attribute
Definition and Usage
The rows attribute specifies the visible height of a text area, in lines.
Note: The size of a textarea can also be specified by the CSS height and width properties.
Applies to
The rows attribute can be used on the following element:
| Element | Attribute |
|---|---|
| <textarea> | rows |
Browser Support

How to add A text area with a specified height and width - HTML rows Attribute
This textarea has 4 visible rows. You can change that by changing the value of the "rows" attribute.
index.html
Example:
HTML
<!DOCTYPE html>
<html>
<body>
<h1>The textarea rows and cols attributes</h1>
<textarea rows="4" cols="50">
At Horje.com you will learn how to make a website. We offer free tutorials in all web development technologies.
</textarea>
<p>This textarea has 4 visible rows.</p>
<p>You can change that by changing the value of the "rows" attribute.</p>
</body>
</html>
Output should be:
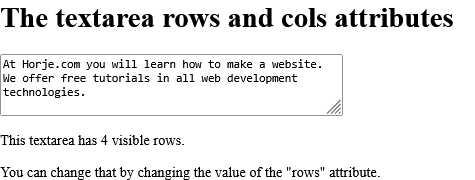
# Tips-142) What is HTML rowspan Attribute
Definition and Usage
The rowspan attribute specifies the number of rows a cell should span.
Applies to
The rowspan attribute can be used on the following elements:
| Elements | Attribute |
|---|---|
| <td> | rowspan |
| <th> | rowspan |
Browser Support
The rowspan attribute has the following browser support for each element:

How to add An HTML table with a table cell that spans two rows - HTML rowspan Attribute
Td Example. The td rowspan attribute.
index.html
Example:
HTML
<!DOCTYPE html>
<html>
<head>
<style>
table, th, td {
border: 1px solid black;
}
</style>
</head>
<body>
<h1>The td rowspan attribute</h1>
<table>
<tr>
<th>Month</th>
<th>Savings</th>
<th>Savings for holiday!</th>
</tr>
<tr>
<td>January</td>
<td>$100</td>
<td rowspan="2">$50</td>
</tr>
<tr>
<td>February</td>
<td>$80</td>
</tr>
</table>
</body>
</html>
Output should be:

How to add An HTML table with a header cell that spans three rows - HTML rowspan Attribute
The th rowspan attribute.
index.html
Example:
HTML
<!DOCTYPE html>
<html>
<head>
<style>
table, th, td {
border: 1px solid black;
}
</style>
</head>
<body>
<h1>The th rowspan attribute</h1>
<table>
<tr>
<th>Month</th>
<th>Savings</th>
<th rowspan="3">Savings for holiday!</th>
</tr>
<tr>
<td>January</td>
<td>$100</td>
</tr>
<tr>
<td>February</td>
<td>$80</td>
</tr>
</table>
</body>
</html
Output should be:
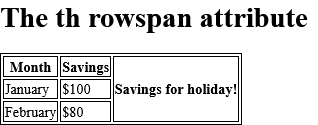
# Tips-143) What is HTML sandbox Attribute
Definition and Usage
The sandbox attribute enables an extra set of restrictions for the content in an iframe.
When the sandbox attribute is present, and it will:
- treat the content as being from a unique origin
- block form submission
- block script execution
- disable APIs
- prevent links from targeting other browsing contexts
- prevent content from using plugins (through <embed>, <object>, <applet>, or other)
- prevent the content to navigate its top-level browsing context
- block automatically triggered features (such as automatically playing a video or automatically focusing a form control)
The value of the sandbox attribute can either be just sandbox (then all restrictions are applied), or a space-separated list of pre-defined values that will REMOVE the particular restrictions.
Browser Support
The numbers in the table specify the first browser version that fully supports the attribute.

How to add An <iframe> with extra restrictions - HTML sandbox Attribute
The "Get date and time" button will run a script in the inline frame. Since the sandbox attribute is set, the content of the inline frame is not allowed to run scripts. You can add "allow-scripts" to the sandbox attribute, to allow the JavaScript to run.
index.html
Example:
HTML
<!DOCTYPE html>
<html>
<body>
<h1>The iframe sandbox attribute</h1>
<iframe src="demo_iframe_sandbox.htm" sandbox>
<p>Your browser does not support iframes.</p>
</iframe>
<p>The "Get date and time" button will run a script in the inline frame.</p>
<p>Since the sandbox attribute is set, the content of the inline frame is not allowed to run scripts.</p>
<p>You can add "allow-scripts" to the sandbox attribute, to allow the JavaScript to run.</p>
</body>
</html>
Output should be:
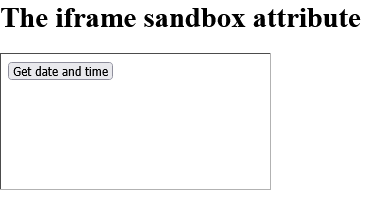
# Tips-144) What is HTML scope Attribute
Definition and Usage
The scope attribute specifies whether a header cell is a header for a column, row, or group of columns or rows.
The scope attribute has no visual effect in ordinary web browsers, but can be used by screen readers.
Applies to
The scope attribute can be used on the following element:
| Element | Attribute |
|---|---|
| <th> | scope |
Browser Support

How to Specify that the two header cells are headers for columns - HTML scope Attribute
The th scope attribute.
index.html
Example:
HTML
<!DOCTYPE html>
<html>
<head>
<style>
table, th, td {
border: 1px solid black;
}
</style>
</head>
<body>
<h1>The th scope attribute</h1>
<table>
<tr>
<th></th>
<th scope="col">Month</th>
<th scope="col">Savings</th>
</tr>
<tr>
<td>1</td>
<td>January</td>
<td>$100</td>
</tr>
<tr>
<td>2</td>
<td>February</td>
<td>$80</td>
</tr>
</table>
</body>
</html>
Output should be:

# Tips-145) What is HTML selected Attribute
Definition and Usage
The selected attribute is a boolean attribute.
When present, it specifies that an option should be pre-selected when the page loads.
The pre-selected option will be displayed first in the drop-down list.
Tip: The selected attribute can also be set after the page loads, with a JavaScript.
Applies to
The selected attribute can be used on the following element:
| Element | Attribute |
|---|---|
| <option> | selected |
Browser Support

How to add A drop-down list with a pre-selected option - HTML selected Attribute
The option selected attribute.
index.html
Example:
HTML
<!DOCTYPE html>
<html>
<body>
<h1>The option selected attribute</h1>
<label for="cars">Choose a car:</label>
<select id="cars">
<option value="volvo">Volvo</option>
<option value="saab">Saab</option>
<option value="vw">VW</option>
<option value="audi" selected>Audi</option>
</select>
</body>
</html>
Output should be:

# Tips-146) What is HTML shape Attribute
Definition and Usage
The shape attribute specifies the shape of an area.
The shape attribute is used together with the coords attribute to specify the size, shape, and placement of an area.
Applies to
The shape attribute can be used on the following element:
| Element | Attribute |
|---|---|
| <area> | shape |
Browser Support

How to run An image map, with clickable areas - HTML shape Attribute
Click on the computer, the phone, or the cup of coffee to go to a new page and read more about the topic:
index.html
Example:
HTML
<!DOCTYPE html>
<html>
<body>
<h1>The map and area elements</h1>
<p>Click on the computer, the phone, or the cup of coffee to go to a new page and read more about the topic:</p>
<img src="https://horje.com/avatar.png" alt="Workplace" usemap="#workmap" width="400" height="379">
<map name="workmap">
<area shape="rect" coords="34,44,270,350" alt="Computer" href="computer.htm">
<area shape="rect" coords="290,172,333,250" alt="Phone" href="phone.htm">
<area shape="circle" coords="337,300,44" alt="Cup of coffee" href="coffee.htm">
</map>
</body>
</html>
Output should be:
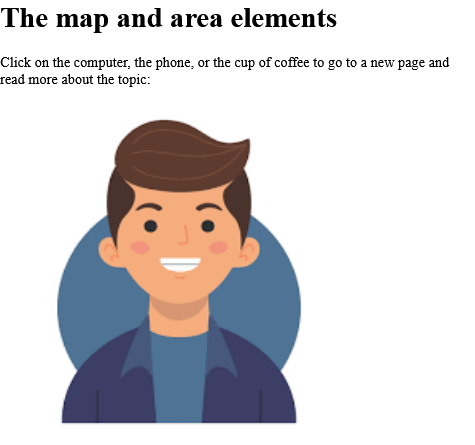
# Tips-147) What is HTML size Attribute
Definition and Usage
For input elements, the size attribute specifies the visible width, in characters, of an <input> element.
For select elements, the size attribute specifies the number of visible options in a drop-down list.
Applies to
The size attribute can be used on the following elements:
| Elements | Attribute |
|---|---|
| <input> | size |
| <select> | size |
Browser Support
The size attribute has the following browser support for each element:

How to add An HTML form with two input fields with a width of 35 and 4 characters - HTML size Attribute
Input Example. The input size attribute.
index.html
Example:
HTML
<!DOCTYPE html>
<html>
<body>
<h1>The input size attribute</h1>
<form action="/action_page.php">
<label for="fname">First name:</label>
<input type="text" id="fname" name="fname" size="50"><br><br>
<label for="pin">PIN:</label>
<input type="text" id="pin" name="pin" maxlength="4" size="4"><br><br>
<input type="submit" value="Submit">
</form>
</body>
</html>
Output should be:
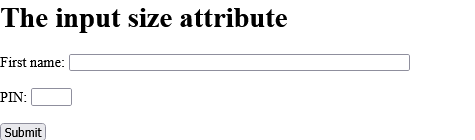
How to add A drop-down list with three visible options - HTML size Attribute
Select Example. The size attribute specifies the number of visible options in a drop-down list.
index.html
Example:
HTML
<!DOCTYPE html>
<html>
<body>
<h1>The select size attribute</h1>
<p>The size attribute specifies the number of visible options in a drop-down list:</p>
<form action="/action_page.php">
<label for="cars">Choose a car:</label>
<select id="cars" name="cars" size="3">
<option value="volvo">Volvo</option>
<option value="saab">Saab</option>
<option value="opel">Opel</option>
<option value="audi">Audi</option>
</select>
<br><br>
<input type="submit" value="Submit">
</form>
</body>
</html>
Output should be:
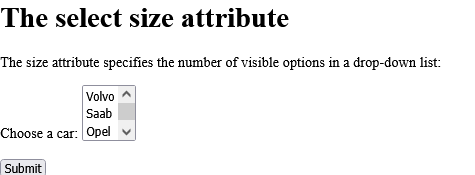
# Tips-148) What is HTML sizes Attribute
Definition and Usage
The sizes attribute specifies the sizes of icons for visual media.
This attribute is only used if rel="icon".
Applies to
The sizes attribute can be used on the following element:
| Element | Attribute |
|---|---|
| <link> | sizes |
Browser Support

How to add Icon with specified size - HTML sizes Attribute
Note: The sizes attribute is not currently supported in any of the major browsers.
index.html
Example:
HTML
<!DOCTYPE html>
<html>
<head>
<link rel="icon" href="https://horje.com/avatar.png" type="image/png" sizes="16x16">
</head>
<body>
<h2>Hello world!</h2>
<p>Open this page in a <a href="https://horje.com" target="_blank">new window</a> to see the favicon.</p>
<p><b>Note:</b> The sizes attribute is not currently supported in any of the major browsers.</p>
</body>
</html>
Output should be:

# Tips-149) What is HTML span Attribute
Definition and Usage
The span attribute defines the number of columns a <col> or <colgroup> element should span.
Applies to
The span attribute can be used on the following elements:
| Elements | Attribute |
|---|---|
| <col> | span |
| <colgroup> | span |
Browser Support
The span attribute has the following browser support for each element:

How to add the first two columns should have a background color of red - HTML span Attribute
Col Example. The col element.
index.html
Example:
HTML
<!DOCTYPE html>
<html>
<head>
<style>
table, th, td {
border: 1px solid black;
}
</style>
</head>
<body>
<h1>The col element</h1>
<table>
<colgroup>
<col span="2" style="background-color:red">
<col style="background-color:yellow">
</colgroup>
<tr>
<th>ISBN</th>
<th>Title</th>
<th>Price</th>
</tr>
<tr>
<td>3476896</td>
<td>My first HTML</td>
<td>$53</td>
</tr>
<tr>
<td>5869207</td>
<td>My first CSS</td>
<td>$49</td>
</tr>
</table>
</body>
</html>
Output should be:

How to Set the background color of the first two columns using the <colgroup> span attribute - HTML span Attribute
Colgroup Example. The colgroup span attribute.
index.html
Example:
HTML
<!DOCTYPE html>
<html>
<head>
<style>
table, th, td {
border: 1px solid black;
}
</style>
</head>
<body>
<h1>The colgroup span attribute</h1>
<table>
<colgroup span="2" style="background:red"></colgroup>
<tr>
<th>ISBN</th>
<th>Title</th>
<th>Price</th>
</tr>
<tr>
<td>3476896</td>
<td>My first HTML</td>
<td>$53</td>
</tr>
<tr>
<td>5869207</td>
<td>My first CSS</td>
<td>$49</td>
</tr>
</table>
</body>
</html>
Output should be:

# Tips-150) What is HTML spellcheck Attribute
Definition and Usage
The spellcheck attribute specifies whether the element is to have its spelling and grammar checked or not.
The following can be spellchecked:
- Text values in input elements (not password)
- Text in <textarea> elements
- Text in editable elements
Applies to
The spellcheck attribute is part of the Global Attributes, and can be used on any HTML element.
| Element | Attribute |
|---|---|
| All HTML elements | spellcheck |
Browser Support
The numbers in the table specify the first browser version that fully supports the attribute.

How to add An editable paragraph with spellcheck - HTML spellcheck Attribute
This is a praggagraph. It is editable. Try to change the text.
index.html
Example:
HTML
<p contenteditable="true" spellcheck="true">This is a paragraph.</p>
Output should be:

# Tips-151) What is HTML src Attribute
Definition and Usage
The src attribute specifies the location (URL) of the external resource.
Applies to
The src attribute can be used on the following elements:
| Elements | Attribute |
|---|---|
| <audio> | src |
| <embed> | src |
| <iframe> | src |
| <img> | src |
| <input> | src |
| <script> | src |
| <source> | src |
| <track> | src |
| <video> | src |
Browser Support
The src attribute has the following browser support for each element:

How to add An audio player - HTML src Attribute
Audio Example. The audio src attribute Click on the play button to play a sound: Your browser does not support the audio element. Note: The .ogg fileformat is not supported in IE or Safari.
index.html
Example:
HTML
<!DOCTYPE html>
<html>
<body>
<h1>The audio src attribute</h1>
<p>Click on the play button to play a sound:</p>
<audio src="https://file-examples.com/wp-content/storage/2017/11/file_example_MP3_700KB.mp3" controls>
Your browser does not support the audio element.
</audio>
<p><b>Note:</b> The .ogg fileformat is not supported in IE or Safari.</p>
</body>
</html>
Output should be:

How to add An embedded flash animation - HTML src Attribute
Embed Example.
index.html
Example:
HTML
<!DOCTYPE html>
<html>
<body>
<h1>The embed src attribute</h1>
<embed src="https://horje.com/avatar.png">
</body>
</html>
Output should be:

How to add An <iframe> in its simplest use - HTML src Attribute
Iframe Example.
index.html
Example:
HTML
<!DOCTYPE html>
<html>
<body>
<h1>The iframe src attribute</h1>
<iframe src="https://horje.com">
<p>Your browser does not support iframes.</p>
</iframe>
</body>
</html>
Output should be:

How to add An image is marked up as follows - HTML src Attribute
Img Example.
index.html
Example:
HTML
<!DOCTYPE html>
<html>
<body>
<h1>The img element</h1>
<img src="https://horje.com/avatar.png" alt="Girl in a jacket" width="500" height="600">
</body>
</html>
Output should be:

How to add An HTML form with an image that represents the submit button - HTML src Attribute
Input Example. Click on the image, and the input will be sent to a page on the server called "/action_page.php".
index.html
Example:
HTML
<!DOCTYPE html>
<html>
<body>
<h1>The input src attribute</h1>
<p>Click on the image, and the input will be sent to a page on the server called "/action_page.php".</p>
<form action="/action_page.php">
<label for="fname">First name:</label>
<input type="text" id="fname" name="fname"><br><br>
<input type="image" src="https://horje.com/avatar.png" alt="Submit" width="48" height="48">
</form>
<p><b>Note:</b> The image input type sends the X and Y coordinates of the click that activated the image button as default.</p>
</body>
</html>
Output should be:

How to Point to an external JavaScript file - HTML src Attribute
Script Example. This text comes from an external script.
index.html
Example:
HTML
<!DOCTYPE html>
<html>
<body>
<h1>The script src attribute</h1>
<script src="demo_script_src.js">
</script>
</body>
</html>
Output should be:

How to add An audio player with two source files. The browser should choose which file (if any) it has support for - HTML src Attribute
Source Example. The source element. Click on the play button to play a sound:
index.html
Example:
HTML
<!DOCTYPE html>
<html>
<body>
<h1>The source element</h1>
<p>Click on the play button to play a sound:</p>
<audio controls>
<source src="https://file-examples.com/wp-content/storage/2017/11/file_example_MP3_700KB.mp3" type="audio/ogg">
<source src="https://file-examples.com/wp-content/storage/2017/11/file_example_MP3_700KB.mp3" type="audio/mpeg">
Your browser does not support the audio element.
</audio>
</body>
</html>
Output should be:

How to add A video with two subtitle tracks - HTML src Attribute
See the Example.
index.html
Example:
HTML
<video width="320" height="240" controls>
<source src="https://www.sample-videos.com/video321/mp4/360/big_buck_bunny_360p_10mb.mp4" type="video/mp4">
<source src="https://www.sample-videos.com/video321/mp4/360/big_buck_bunny_360p_10mb.mp4" type="video/ogg">
<track src="subtitles_en.vtt" kind="subtitles" srclang="en" label="English">
<track src="subtitles_no.vtt" kind="subtitles" srclang="no" label="Norwegian">
</video>
Output should be:

How to add Video Example - HTML src Attribute
Video Example. Note: The .ogg fileformat is not supported in old IE and Safari.
index.html
Example:
HTML
<!DOCTYPE html>
<html>
<body>
<h1>The video src attribute</h1>
<video width="320" height="240" controls src="https://www.sample-videos.com/video321/mp4/240/big_buck_bunny_240p_30mb.mp4">
Your browser does not support the video tag.
</video>
<p><b>Note:</b> The .ogg fileformat is not supported in old IE and Safari.</p>
</body>
</html>
Output should be:

# Tips-152) What is HTML srcdoc Attribute
Definition and Usage
The srcdoc attribute specifies the HTML content of the page to show in the inline frame.
Tip: This attribute is expected to be used together with the sandbox and seamless attributes.
If a browser supports the srcdoc attribute, it will override the content specified in the src attribute (if present).
If a browser does NOT support the srcdoc attribute, it will show the file specified in the src attribute instead (if present).
Applies to
The srcdoc attribute can be used on the following element:
| Element | Attribute |
|---|---|
| <iframe> | srcdoc |
Browser Support
The numbers in the table specify the first browser version that fully supports the attribute.

How to add An <iframe> with a srcdoc attribute -
The iframe srcdoc attribute.
index.html
Example:
HTML
<!DOCTYPE html>
<html>
<body>
<h1>The iframe srcdoc attribute</h1>
<iframe srcdoc="<p>Hello world!</p>" src="https://horje.com">
<p>Your browser does not support iframes.</p>
</iframe>
</body>
</html>
Output should be:
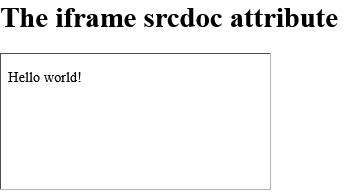
# Tips-153) What is HTML srclang Attribute
Definition and Usage
The srclang attribute specifies the language of the track text data.
This attribute is required if kind="subtitles".
Tip: To view all available language codes, go to our Language code reference.
Applies to
The srclang attribute can be used on the following element:
| Element | Attribute |
|---|---|
| <track> | srclang |
Browser Support
The numbers in the table specify the first browser version that fully supports the attribute.

How to add A video with two subtitle tracks - HTML srclang Attribute
See the Example.
index.html
Example:
HTML
<video width="320" height="240" controls>
<source src="forrest_gump.mp4" type="video/mp4">
<source src="forrest_gump.ogg" type="video/ogg">
<track src="subtitles_en.vtt" kind="subtitles" srclang="en" label="English">
<track src="subtitles_no.vtt" kind="subtitles" srclang="no" label="Norwegian">
</video>
# Tips-154) What is HTML <source> srcset Attribute
Definition and Usage
The srcset attribute specifies the URL of the image to use in different situations.
This attribute is required when <source> is used in <picture>.
Browser Support
The numbers in the table specify the first browser version that fully supports the attribute.

Syntax
<source srcset="URL">
Attribute Values
| Value | Description |
|---|---|
| URL | Specifies the URL of the image.
Possible values:
|
How to add HTML <source> srcset Attribute
A <picture> element with two source files, and a fallback image.
index.html
Example:
HTML
<!DOCTYPE html>
<html>
<head>
<meta name="viewport" content="width=device-width, initial-scale=1.0">
</head>
<body>
<h1>The picture element</h1>
<p>Resize the browser window to load different images.</p>
<picture>
<source media="(min-width:650px)" srcset="https://horje.com/avatar.png">
<source media="(min-width:465px)" srcset="https://horje.com/avatar.png">
<img src="https://horje.com/avatar.png" alt="Flowers" style="width:auto;">
</picture>
</body>
</html>
Output should be:
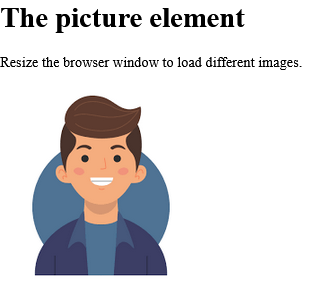
# Tips-155) What is HTML start Attribute
Definition and Usage
The start attribute specifies the start value of the first list item in an ordered list.
Applies to
The start attribute can be used on the following element:
| Element | Attribute |
|---|---|
| <ol> | start |
Browser Support

How to add An ordered list starting at "50" - HTML start Attribute
The ol start attribute.
index.html
Example:
HTML
<ol start="50">
<li>Coffee</li>
<li>Tea</li>
<li>Milk</li>
</ol>
Output should be:
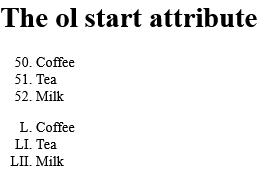
# Tips-156) What is HTML step Attribute
Definition and Usage
The step attribute specifies the legal number intervals for an <input> element.
Example: if step="3", legal numbers could be -3, 0, 3, 6, etc.
Tip: The step attribute can be used together with the max and min attributes to create a range of legal values.
Note: The step attribute works with the following input types: number, range, date, datetime, datetime-local, month, time and week.
Applies to
The step attribute can be used on the following element:
| Element | Attribute |
|---|---|
| <input> | step |
Browser Support
The numbers in the table specify the first browser version that fully supports the attribute.

How to add An HTML form with an input field with a specified legal number intervals - HTML step Attribute
The input step attribute.
index.html
Example:
HTML
<!DOCTYPE html>
<html>
<body>
<h1>The input step attribute</h1>
<form action="/action_page.php">
<label for="points">Points:</label>
<input type="number" id="points" name="points" step="3">
<input type="submit">
</form>
</body>
</html>
Output should be:
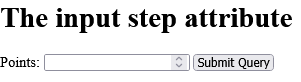
# Tips-157) What is HTML style Attribute
Definition and Usage
The style attribute specifies an inline style for an element.
The style attribute will override any style set globally, e.g. styles specified in the <style> tag or in an external style sheet.
Applies to
The style attribute is part of the Global Attributes, and can be used on any HTML element.
| Element | Attribute |
|---|---|
| All HTML elements | style |
Browser Support

How to Use of the style attribute in an HTML document - HTML style Attribute
Style of This is a header and This is a paragraph.
index.html
Example:
HTML
<!DOCTYPE html>
<html>
<body>
<h1 style="color:blue;text-align:center;">This is a header</h1>
<p style="color:green;">This is a paragraph.</p>
</body>
</html>
Output should be:

# Tips-158) What is HTML tabindex Attribute
Definition and Usage
The tabindex attribute specifies the tab order of an element (when the "tab" button is used for navigating).
Applies to
The tabindex attribute is part of the Global Attributes, and can be used on any HTML element.
| Element | Attribute |
|---|---|
| All HTML elements | tabindex |
Browser Support

How to use Elements with a specified tab order - HTML tabindex Attribute
Note: Try navigating the elements by using the "Tab" button on your keyboard.
index.html
Example:
HTML
<!DOCTYPE html>
<html>
<body>
<div tabindex="1">Horje</div><br>
<div tabindex="3">Google</div><br>
<div tabindex="2">Microsoft</div>
<script>
// At start, set focus on the first div
document.getElementsByTagName('div')[0].focus();
</script>
<p tabindex="4"><b>Note:</b> Try navigating the elements by using the "Tab" button on your keyboard.</p>
</body>
</html>
Output should be:

# Tips-159) What is HTML target Attribute
Definition and Usage
For <a> and <area> elements, the target attribute specifies where to open the linked document.
For <base> elements, the target attribute specifies the default target for all hyperlinks and forms in the page.
For <form> elements, the target attribute specifies a name or a keyword that indicates where to display the response that is received after submitting the form.
Applies to
The target attribute can be used on the following elements:
| Elements | Attribute |
|---|---|
| <a> | target |
| <area> | target |
| <base> | target |
| <form> | target |
Browser Support
The target attribute has the following browser support for each element:
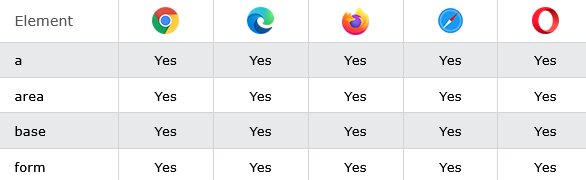
How to use The target attribute specifies where to open the linked document - HTML target Attribute
A Example. The a target attribute. Open link in a new window or tab.
index.html
Example:
HTML
<!DOCTYPE html>
<html>
<body>
<h1>The a target attribute</h1>
<p>Open link in a new window or tab: <a href="https://horje.com" target="_blank">Visit Horje!</a></p>
</body>
</html>
Output should be:
How to add An image map, with clickable areas, and a target attribute - HTML target Attribute
Area Example. The area target attribute. Click on the sun or on one of the planets to watch it closer.
index.html
Example:
HTML
<!DOCTYPE html>
<html>
<body>
<h1>The area target attribute</h1>
<p>Click on the sun or on one of the planets to watch it closer:</p>
<img src="https://horje.com/avatar.png" width="145" height="126" alt="Planets" usemap="#planetmap">
<map name="planetmap">
<area shape="rect" coords="0,0,82,126" alt="Sun" href="sun.htm" target="_blank">
<area shape="circle" coords="90,58,3" alt="Mercury" href="mercur.htm">
<area shape="circle" coords="124,58,8" alt="Venus" href="venus.htm">
</map>
</body>
</html>
Output should be:

How to Specify a default target for all hyperlinks and forms on a page - HTML target Attribute
Base Example. Notice that the link opens in a new window, even if it has no target="_blank" attribute. This is because the target attribute of the base element is set to "_blank".
index.html
Example:
HTML
<!DOCTYPE html>
<html>
<head>
<base target="_blank">
</head>
<body>
<h1>The base target attribute</h1>
<p><a href="https://horje.com">Horje</a> - Notice that the link opens in a new window, even if it has no target="_blank" attribute. This is because the target attribute of the base element is set to "_blank".</p>
</body>
</html>
Output should be:
How to Display the response received in a new window or tab - HTML target Attribute
Form Example. The form target attribute.
index.html
Example:
HTML
<form action="/action_page.php" method="get" target="_blank">
<label for="fname">First name:</label>
<input type="text" id="fname" name="fname"><br><br>
<label for="lname">Last name:</label>
<input type="text" id="lname" name="lname"><br><br>
<input type="submit" value="Submit">
</form>
Output should be:
# Tips-160) What is HTML title Attribute
Definition and Usage
The title attribute specifies extra information about an element.
The information is most often shown as a tooltip text when the mouse moves over the element.
Applies to
The title attribute is part of the Global Attributes, and can be used on any HTML element.
| Element | Attribute |
|---|---|
| All HTML elements | title |
Browser Support

How to Use of the title attribute in an HTML document - HTML title Attribute
See the Example.
index.html
Example:
HTML
<!DOCTYPE html>
<html>
<body>
<p><abbr title="World Health Organization">WHO</abbr> was founded in 2011.</p>
<p title="Free Web tutorials">Horje.com</p>
</body>
</html>
Output should be:
# Tips-161) What is HTML translate Attribute
Definition and Usage
The translate attribute specifies whether the content of an element should be translated or not.
Test: Use the Google translate box (at the top of the page) to change to another language, and look what happens to the word "ice cream" below:
Here we use translate="no": ice cream.
Here we use class="notranslate": ice cream.
Tip: Use class="notranslate" instead.
Applies to
The translate attribute is part of the Global Attributes, and can be used on any HTML element.
| Element | Attribute |
|---|---|
| All HTML elements | translate |
Browser Support
![]()
How to Specify that some elements should not be translated - HTML translate Attribute
See the Example.
index.html
Example:
HTML
<p translate="no">Don't translate this!</p>
<p>This can be translated to any language.</p>
# Tips-162) What is HTML type Attribute
Definition and Usage
For <button> elements, the type attribute specifies the type of button.
For <input> elements, the type attribute specifies the type of <input> element to display.
For <embed>, <link>, <object>, <script>, <source>, and <style> elements, the type attribute specifies the Internet media type (formerly known as MIME type).
Applies to
The type attribute can be used on the following elements:
| Elements | Attribute |
|---|---|
| <a> | type |
| <button> | type |
| <embed> | type |
| <input> | type |
| <link> | type |
| <menu> | type |
| <object> | type |
| <script> | type |
| <source> | type |
| <style> | type |
Browser Support
The type attribute has the following browser support for each element:
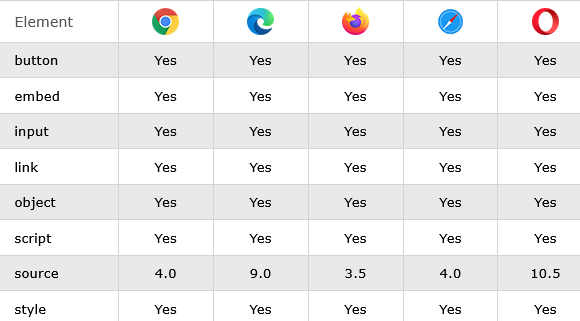
How to add Two button elements that act as one submit button and one reset button (in a form) - HTML type Attribute
Button Example. The button type attribute.
index.html
Example:
HTML
<!DOCTYPE html>
<html>
<body>
<h1>The button type attribute</h1>
<form action="/action_page.php" method="get">
<label for="fname">First name:</label>
<input type="text" id="fname" name="fname"><br><br>
<label for="lname">Last name:</label>
<input type="text" id="lname" name="lname"><br><br>
<button type="submit" value="Submit">Submit</button>
<button type="reset" value="Reset">Reset</button>
</form>
</body>
</html>
Output should be:
How to add An embedded flash animation with a specified media type - HTML type Attribute
Embed Example.
index.html
Example:
HTML
<embed type="image/jpg" src="https://horje.com/avatar.png">
Output should be:
How to add An HTML form with two different input types; text and submit - HTML type Attribute
Input Example.
index.html
Example:
HTML
<form action="/action_page.php">
<label for="username">Username: </label>
<input type="text" id="username" name="username"><br>
<input type="submit" value="Submit">
</form>
Output should be:
How to add In the following example, the type attribute indicates that the linked document is an external style sheet -
Link Example.
index.html
Example:
HTML
<head>
<link rel="stylesheet" type="text/css" href="theme.css">
</head>
Output should be:

How to add An <object> element with a specified media type - HTML type Attribute
The object type attribute.
index.html
Example:
HTML
<!DOCTYPE html>
<html>
<body>
<h1>The object type attribute</h1>
<object data="https://horje.com/avatar.png" type="image/jpg" width="500" height="300">
</object>
</body>
</html>
Output should be:
How to add A script with the type attribute specified - HTML type Attribute
The script type attribute.
index.html
Example:
HTML
<!DOCTYPE html>
<html>
<body>
<h1>The script type attribute</h1>
<p id="demo"></p>
<script type="text/javascript">
document.getElementById("demo").innerHTML = "Hello JavaScript!";
</script>
</body>
</html>
Output should be:

How to Use of the type attribute - HTML type Attribute
Source Example.
index.html
Example:
HTML
<!DOCTYPE html>
<html>
<body>
<h1>The source type attribute</h1>
<audio controls>
<source src="https://file-examples.com/wp-content/storage/2017/11/file_example_MP3_5MG.mp3" type="audio/ogg">
<source src="https://file-examples.com/wp-content/storage/2017/11/file_example_MP3_5MG.mp3" type="audio/mpeg">
Your browser does not support the audio element.
</audio>
</body>
</html>
Output should be:
How to Use the type attribute to specify the media type of the <style> tag - HTML type Attribute
Style of This is a heading This is a paragraph.
index.html
Example:
HTML
<!DOCTYPE html>
<html>
<head>
<style>
h1 {color:red;}
p {color:blue;}
</style>
</head>
<body>
<h1>This is a heading</h1>
<p>This is a paragraph.</p>
</body>
</html>
Output should be:

# Tips-163) What is HTML usemap Attribute
Definition and Usage
The usemap attribute specifies an image (or an object) as an image map (an image map is an image with clickable areas).
The usemap attribute is associated with a <map> element's name or id attribute, and creates a relationship between the <img> and the <map>.
Note: The usemap attribute cannot be used if the <img> element is a descendant of an <a> or <button> element.
Applies to
The usemap attribute can be used on the following elements:
| Elements | Attribute |
|---|---|
| <img> | usemap |
| <object> | usemap |
Browser Support
The usemap attribute has the following browser support for each element:

How to add An image map, with clickable areas - HTML usemap Attribute
Click on the banner, the phone, or the cup of coffee to go to a new page and read more about the topic.
index.html
Example:
HTML
<img src="planets.gif" width="145" height="126" alt="Planets" usemap="#planetmap">
<map name="planetmap">
<area shape="rect" coords="0,0,82,126" href="sun.htm" alt="Sun">
<area shape="circle" coords="90,58,3" href="mercur.htm" alt="Mercury">
<area shape="circle" coords="124,58,8" href="venus.htm" alt="Venus">
</map>
Output should be:

How to add An <object> element using an image map - HTML usemap Attribute
Note: The usemap attribute of the object element is not supported in Chrome, Edge, Safari, and Opera.
index.html
Example:
HTML
<!DOCTYPE html>
<html>
<body>
<h1>The object usemap attribute</h1>
<object data="https://horje.com/avatar.png" width="145" height="126" usemap="#planetmap"></object>
<map name="planetmap">
<area shape="rect" coords="0,0,82,126" alt="Sun" href="sun.htm">
<area shape="circle" coords="90,58,3" alt="Mercury" href="mercur.htm">
<area shape="circle" coords="124,58,8" alt="Venus" href="venus.htm">
</map>
<p><b>Note:</b> The usemap attribute of the object element is not supported in Chrome,
Edge, Safari, and Opera.</p>
</body>
</html>
Output should be:
# Tips-164) What is HTML value Attribute
Definition and Usage
For <button>, <input> and <option> elements, the value attribute specifies the initial value of the element.
For <li> elements, the value attribute sets the value of the list item (for ordered lists). The next list items will increment from that value.
For <meter> elements, the value attribute specifies the current value of the gauge.
For <progress> elements, the value attribute specifies how much of the task has been completed.
For <param> elements, the value attribute specifies the value of the parameter.
Applies to
The value attribute can be used on the following elements:
| Elements | Attribute |
|---|---|
| <button> | value |
| <input> | value |
| <meter> | value |
| <li> | value |
| <option> | value |
| <progress> | value |
| <param> | value |
Browser Support
The value attribute has the following browser support for each element:

How to add Two buttons with equal names, that submit different values when clicked - HTML value Attribute
<button> Example.
index.html
Example:
HTML
<!DOCTYPE html>
<html>
<body>
<h1>The button value attribute</h1>
<form action="/action_page.php" method="get">
Choose your favorite subject:
<button name="subject" type="submit" value="fav_HTML">HTML</button>
<button name="subject" type="submit" value="fav_CSS">CSS</button>
</form>
</body>
</html>
Output should be:
How to add An HTML form with initial (default) values - HTML value Attribute
<input> Example.
index.html
Example:
HTML
<!DOCTYPE html>
<html>
<body>
<h1>The input value attribute</h1>
<form action="/action_page.php">
<label for="fname">First name:</label>
<input type="text" id="fname" name="fname" value="John"><br><br>
<label for="lname">Last name:</label>
<input type="text" id="lname" name="lname" value="Doe"><br><br>
<input type="submit" value="Submit">
</form>
</body>
</html>
Output should be:
How to add Use of the value attribute in an ordered list - HTML value Attribute
<li> Example.
index.html
Example:
HTML
<ol>
<li value="100">Coffee</li>
<li>Tea</li>
<li>Milk</li>
<li>Water</li>
<li>Juice</li>
<li>Beer</li>
</ol>
Output should be:
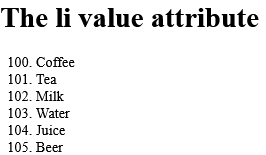
How to add A gauge with a current value, min, max, high, and low segments - HTML value Attribute
<meter> Example.
index.html
Example:
HTML
<meter min="0" low="40" high="90" max="100" value="95"></meter>
Output should be:
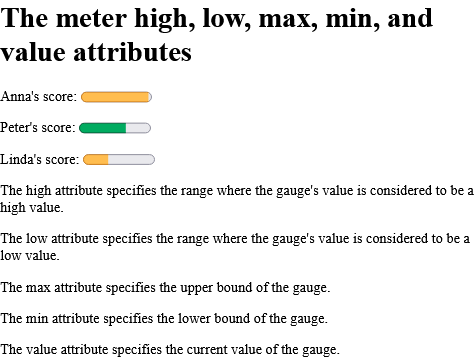
How to add A drop-down list inside an HTML form - HTML value Attribute
<option> Example.
index.html
Example:
HTML
<form action="/action_page.php">
<select name="cars">
<option value="volvo">Volvo XC90</option>
<option value="saab">Saab 95</option>
<option value="mercedes">Mercedes SLK</option>
<option value="audi">Audi TT</option>
</select>
<input type="submit" value="Submit">
</form>
Output should be:
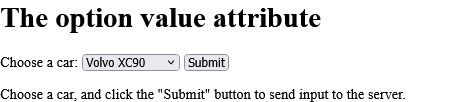
How to add Downloading in progress - HTML value Attribute
<progress> Example.
index.html
Example:
HTML
<progress value="22" max="100"></progress>
Output should be:

How to Set the "autoplay" parameter to "true", so the sound will start playing as soon as the page loads - HTML value Attribute
<param> Example.
index.html
Example:
HTML
<object data="horse.wav">
<param name="autoplay" value="true">
</object>
Output should be:
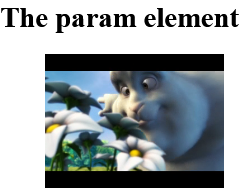
# Tips-165) What is HTML width Attribute
Definition and Usage
The width attribute specifies the width of the element, in pixels.
Note: For input elements, the width attribute is used only with <input type="image">.
Applies to
The width attribute can be used on the following elements:
| Elements | Attribute |
|---|---|
| <canvas> | width |
| <embed> | width |
| <iframe> | width |
| <img> | width |
| <input> | width |
| <object> | width |
| <video> | width |
Browser Support
The width attribute has the following browser support for each element:
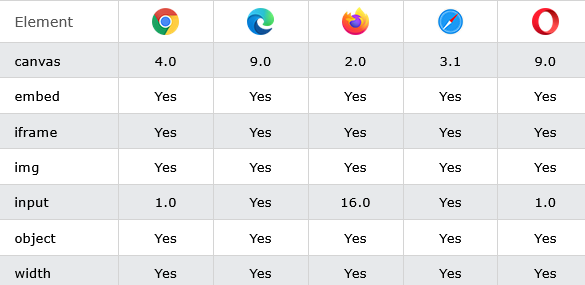
How to add A <canvas> element with a height and width of 200 pixels - HTML width Attribute
Canvas Example.
index.html
Example:
HTML
<canvas id="myCanvas" width="200" height="200" style="border:1px solid">
Output should be:
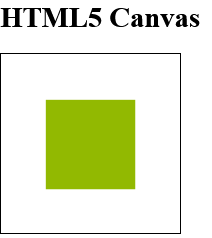
How to add A flash animation with a height and width of 200 pixels - HTML width Attribute
Embed Example.
index.html
Example:
HTML
<embed src="helloworld.swf" width="200" height="200">
Output should be:
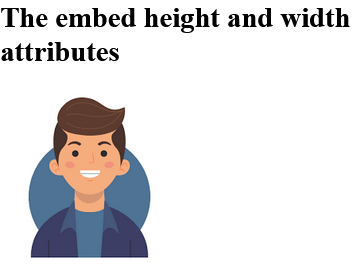
How to add An <iframe> with a specified height and width of 200 pixels - HTML width Attribute
Iframe Example
index.html
Example:
HTML
<iframe src="https://horje.com" width="200" height="200">
<p>Your browser does not support iframes.</p>
</iframe>
Output should be:

How to add An image with a height and a width of 42 pixels - HTML width Attribute
Img Example.
index.html
Example:
HTML
<img src="https://horje.com/avatar.png" alt="Girl in a jacket" width="500" height="600">
Output should be:
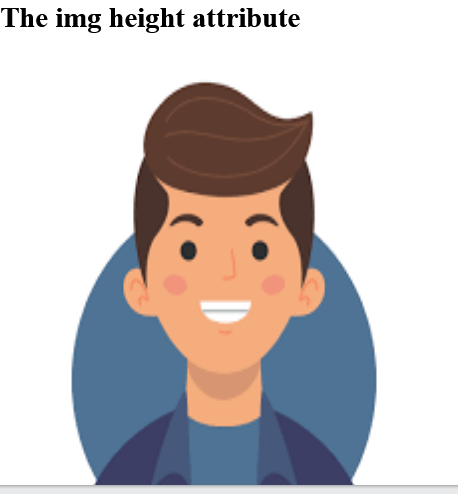
How to add Define an image as the submit button, with height and width attributes - HTML width Attribute
Input Example. Note: The input type="image" sends the X and Y coordinates of the click that activated the image button.
index.html
Example:
HTML
<form action="/action_page.php">
First name: <input type="text" name="fname"><br>
Last name: <input type="text" name="lname"><br>
<input type="image" src="img_submit.gif" alt="Submit" width="48" height="48">
</form>
Output should be:
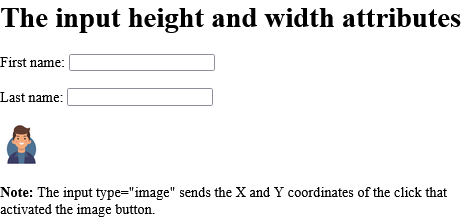
How to add A flash animation with a height and width of 400 pixels - HTML width Attribute
Object Example.
index.html
Example:
HTML
<!DOCTYPE html>
<html>
<body>
<h1>The object element</h1>
<object data="https://horje.com/avatar.png" width="300" height="200"></object>
</body>
</html>
Output should be:

How to add A video player with a specified width and height - HTML width Attribute
Video Example.
index.html
Example:
HTML
<!DOCTYPE html>
<html>
<body>
<h1>The video width and height attributes</h1>
<video width="320" height="240" controls>
<source src="https://www.sample-videos.com/video321/mp4/240/big_buck_bunny_240p_20mb.mp4" type="video/mp4">
<source src="https://www.sample-videos.com/video321/mp4/240/big_buck_bunny_240p_20mb.mp4" type="video/ogg">
Your browser does not support the video tag.
</video>
</body>
</html>
Output should be:
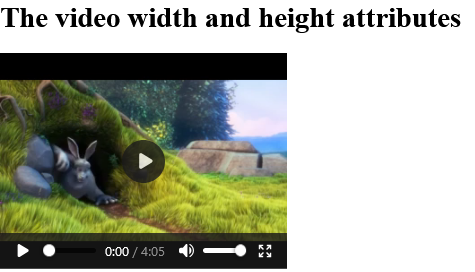
# Tips-166) What is HTML wrap Attribute
Definition and Usage
The wrap attribute specifies how the text in a text area is to be wrapped when submitted in a form.
Applies to
The wrap attribute can be used on the following element:
| Element | Attribute |
|---|---|
| <textarea> | wrap |
Browser Support

How to add The text in a text area with wrap="hard" will contain newlines (if any) when submitted in a form - HTML wrap Attribute
The textarea wrap attribute.
index.html
Example:
HTML
<!DOCTYPE html>
<html>
<body>
<h1>The textarea wrap attribute</h1>
<form action="/action_page.php">
<textarea rows="2" cols="20" name="usrtxt" wrap="hard">
At Horje you will find free Web-building tutorials.
</textarea>
<input type="submit">
</form>
</body>
</html>
Output should be: