Tips (Total 5)
# Tips-1) What is HTML id Attribute
The HTML id attribute is used to specify a unique id for an HTML element.
You cannot have more than one element with the same id in an HTML document.
Full Example of HTML id Attribute
index.html
Example:
HTML
<!DOCTYPE html>
<html>
<head>
<style>
#myHeader {
  background-color: lightblue;
  color: black;
  padding: 40px;
  text-align: center;
}
</style>
</head>
<body>

<h2>The id Attribute</h2>
<p>Use CSS to style an element with the id "myHeader":</p>

<h1 id="myHeader">My Header</h1>

</body>
</html>
Output should be:

# Tips-2) How to Use HTML id Attribute
The id attribute specifies a unique id for an HTML element. The value of the id attribute must be unique within the HTML document.
The id attribute is used to point to a specific style declaration in a style sheet. It is also used by JavaScript to access and manipulate the element with the specific id.
The syntax for id is: write a hash character (#), followed by an id name. Then, define the CSS properties within curly braces {}.
Full Example of Using HTML id Attribute
In the following example we have an <h1> element that points to the id name "myHeader". This <h1> element will be styled according to the #myHeader style definition in the head section:
index.html
Example:
HTML
<!DOCTYPE html>
<html>
<head>
<style>
#myHeader {
  background-color: lightblue;
  color: black;
  padding: 40px;
  text-align: center;
}
</style>
</head>
<body>

<h2>The id Attribute</h2>
<p>Use CSS to style an element with the id "myHeader":</p>

<h1 id="myHeader">My Header</h1>

</body>
</html>
Output should be:

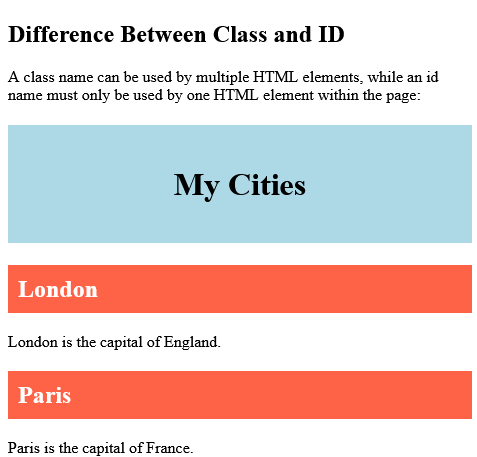
# Tips-3) What are the Difference Between HTML Class and ID
A class name can be used by multiple HTML elements, while an id name must only be used by one HTML element within the page:
Difference Between HTML Class and ID
Follow the code. We make Difference Between HTML Class and ID
index.html
Example:
HTML
<!DOCTYPE html>
<html>
<head>
<style>
/* Style the element with the id "myHeader" */
#myHeader {
  background-color: lightblue;
  color: black;
  padding: 40px;
  text-align: center;
}

/* Style all elements with the class name "city" */
.city {
  background-color: tomato;
  color: white;
  padding: 10px;
}
</style>
</head>
<body>

<h2>Difference Between Class and ID</h2>
<p>A class name can be used by multiple HTML elements, while an id name must only be used by one HTML element within the page:</p>

<!-- An element with a unique id -->
<h1 id="myHeader">My Cities</h1>

<!-- Multiple elements with same class -->
<h2 class="city">London</h2>
<p>London is the capital of England.</p>

<h2 class="city">Paris</h2>
<p>Paris is the capital of France.</p>

<h2 class="city">Tokyo</h2>
<p>Tokyo is the capital of Japan.</p>

</body>
</html>
Output should be:
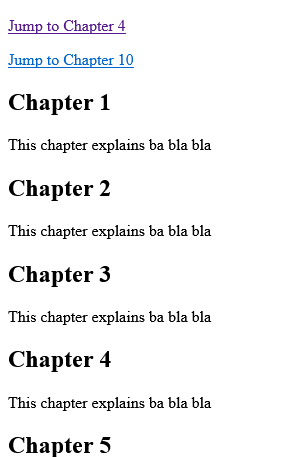
# Tips-4) How to create HTML Bookmarks with ID and Links (Jump to Specific Text)
HTML bookmarks are used to allow readers to jump to specific parts of a webpage.
Bookmarks can be useful if your page is very long.
To use a bookmark, you must first create it, and then add a link to it.
Then, when the link is clicked, the page will scroll to the location with the bookmark.
Basic Example of HTML Bookmarks with ID and Links
First, create a bookmark with the id attribute:
<h2 id="C4">Chapter 4</h2>
Full Example of HTML Bookmarks with ID and Links
Then, add a link to the bookmark ("Jump to Chapter 4"), from within the same page:
index.html
Example:
HTML
<!DOCTYPE html>
<html>
<body>

<p><a href="#C4">Jump to Chapter 4</a></p>
<p><a href="#C10">Jump to Chapter 10</a></p>

<h2>Chapter 1</h2>
<p>This chapter explains ba bla bla</p>

<h2>Chapter 2</h2>
<p>This chapter explains ba bla bla</p>

<h2>Chapter 3</h2>
<p>This chapter explains ba bla bla</p>

<h2 id="C4">Chapter 4</h2>
<p>This chapter explains ba bla bla</p>

<h2>Chapter 5</h2>
<p>This chapter explains ba bla bla</p>

<h2>Chapter 6</h2>
<p>This chapter explains ba bla bla</p>

<h2>Chapter 7</h2>
<p>This chapter explains ba bla bla</p>

<h2>Chapter 8</h2>
<p>This chapter explains ba bla bla</p>

<h2>Chapter 9</h2>
<p>This chapter explains ba bla bla</p>

<h2 id="C10">Chapter 10</h2>
<p>This chapter explains ba bla bla</p>

<h2>Chapter 11</h2>
<p>This chapter explains ba bla bla</p>

<h2>Chapter 12</h2>
<p>This chapter explains ba bla bla</p>

<h2>Chapter 13</h2>
<p>This chapter explains ba bla bla</p>

<h2>Chapter 14</h2>
<p>This chapter explains ba bla bla</p>

<h2>Chapter 15</h2>
<p>This chapter explains ba bla bla</p>

<h2>Chapter 16</h2>
<p>This chapter explains ba bla bla</p>

<h2>Chapter 17</h2>
<p>This chapter explains ba bla bla</p>

<h2>Chapter 18</h2>
<p>This chapter explains ba bla bla</p>

<h2>Chapter 19</h2>
<p>This chapter explains ba bla bla</p>

<h2>Chapter 20</h2>
<p>This chapter explains ba bla bla</p>

<h2>Chapter 21</h2>
<p>This chapter explains ba bla bla</p>

<h2>Chapter 22</h2>
<p>This chapter explains ba bla bla</p>

<h2>Chapter 23</h2>
<p>This chapter explains ba bla bla</p>

</body>
</html>
Output should be:
Or, add a link to the bookmark ("Jump to Chapter 4"), from another page:
<a href="html_demo.html#C4">Jump to Chapter 4</a>
# Tips-5) How to use The id Attribute in JavaScript
The id attribute can also be used by JavaScript to perform some tasks for that specific element.
JavaScript can access an element with a specific id with the getElementById() method:
Full Example of The id Attribute in JavaScript
Use the id attribute to manipulate text with JavaScript:
index.html
Example:
HTML
<!DOCTYPE html>
<html>
<body>

<h2>Using The id Attribute in JavaScript</h2>
<p>JavaScript can access an element with a specified id by using the getElementById() method:</p>

<h1 id="myHeader">Hello World!</h1>
<button onclick="displayResult()">Change text</button>

<script>
function displayResult() {
  document.getElementById("myHeader").innerHTML = "Have a nice day!";
}
</script>

</body>
</html>
Output should be:
